MEGA PUFF COTTAGECORE DECOR DRESS: Using Vintage Simplicity 5916 to Create a Designer Style Dress!

For my 37th birthday, in April 2020, I wanted to sew myself a dress pattern that was released the year I was born: 1983. I dug through my pattern collection and once I saw it, I knew Simplicity 5916 would do the trick! You can see that dress here. While Covid restrictions meant I couldn’t wear that dress to a party, or even to meet up with a few close friends, I wore it around the apartment, I wore it on my parent’s farm when we went to visit them, I hung it on the wall next to my bed so I could look at it first thing in the morning. It cheered me up, it still cheers me up.

That dress also fits me really well, and the envelope came with some dramatic sleeve and collar options. I have borrowed those sleeves and the bodice for numerous garments in the past year! So I knew I would eventually need to sew the dress again. I recently scored this Liberty Tana lawn for £10/meter (that’s about $14USD and you get a few extra inches!) at a fabric outlet in Glasgow, and it sparked my creativity.
Before you get too jealous, let me mention that the invisible zipper cost £4, where I am used to paying less than $1 (thankful for my stash…..and I’ll be stocking up next time I find a deal!).

A close up of this Liberty print, which grows on me the more I look at it. This is my invisible zipper seam. I am so pleased with the pattern matching and the waistline seam matching up.
I’ve been seeing more and more high end designers use Liberty lawn for their gorgeous, expensive dresses in recent years: The Vampire’s Wife and Horror Vacui both come to mind, and were definite influences on this project. The use of Liberty fabric is curious to me because on the one hand, I get it: it is a dream to sew and to wear; in terms of quality cotton, there is nothing quite like it. On the other hand, in my career as a textile designer for the fashion industry, my job has always been to create unique, proprietary prints for brands, ensuring no one else can make a dress using the same print/fabric. So in spite of the typically steep price, Liberty is a bit of a democratizing material in this instance.

In my previous version of this pattern, I did make a few basic fitting adjustments to the bodice. Some were standard for me: lowering bust darts. Some not: shortening the bodice, where I usually lengthen it. But then I kept going!

My sleeve pattern, after slashing & spreading.
Out of the envelope, the sleeves are quite puffy, but I wanted drama. I did a straightforward slash & spread to the sleeve, adding 5" to width, 2" to height of sleeve cap, and 2.75" to sleeve length. I created an elastic casing instead of a cuff at hem, and used the additional sleeve length to create a little self ruffle when I created the elastic casing.
I also made a 1” narrow shoulder adjustment, which is fairly standard for me. Without a narrow shoulder adjustment, I don’t enjoy wearing big sleeves, it creates a silhouette that makes me feel like I’m wearing someone else’s clothes. I’ll be keeping the adjustment on all future versions of this pattern.

Here is the sleeve cuff - I love how Tana lawn is so light & thin that it doesn’t get too bulky, even with this much gathering.
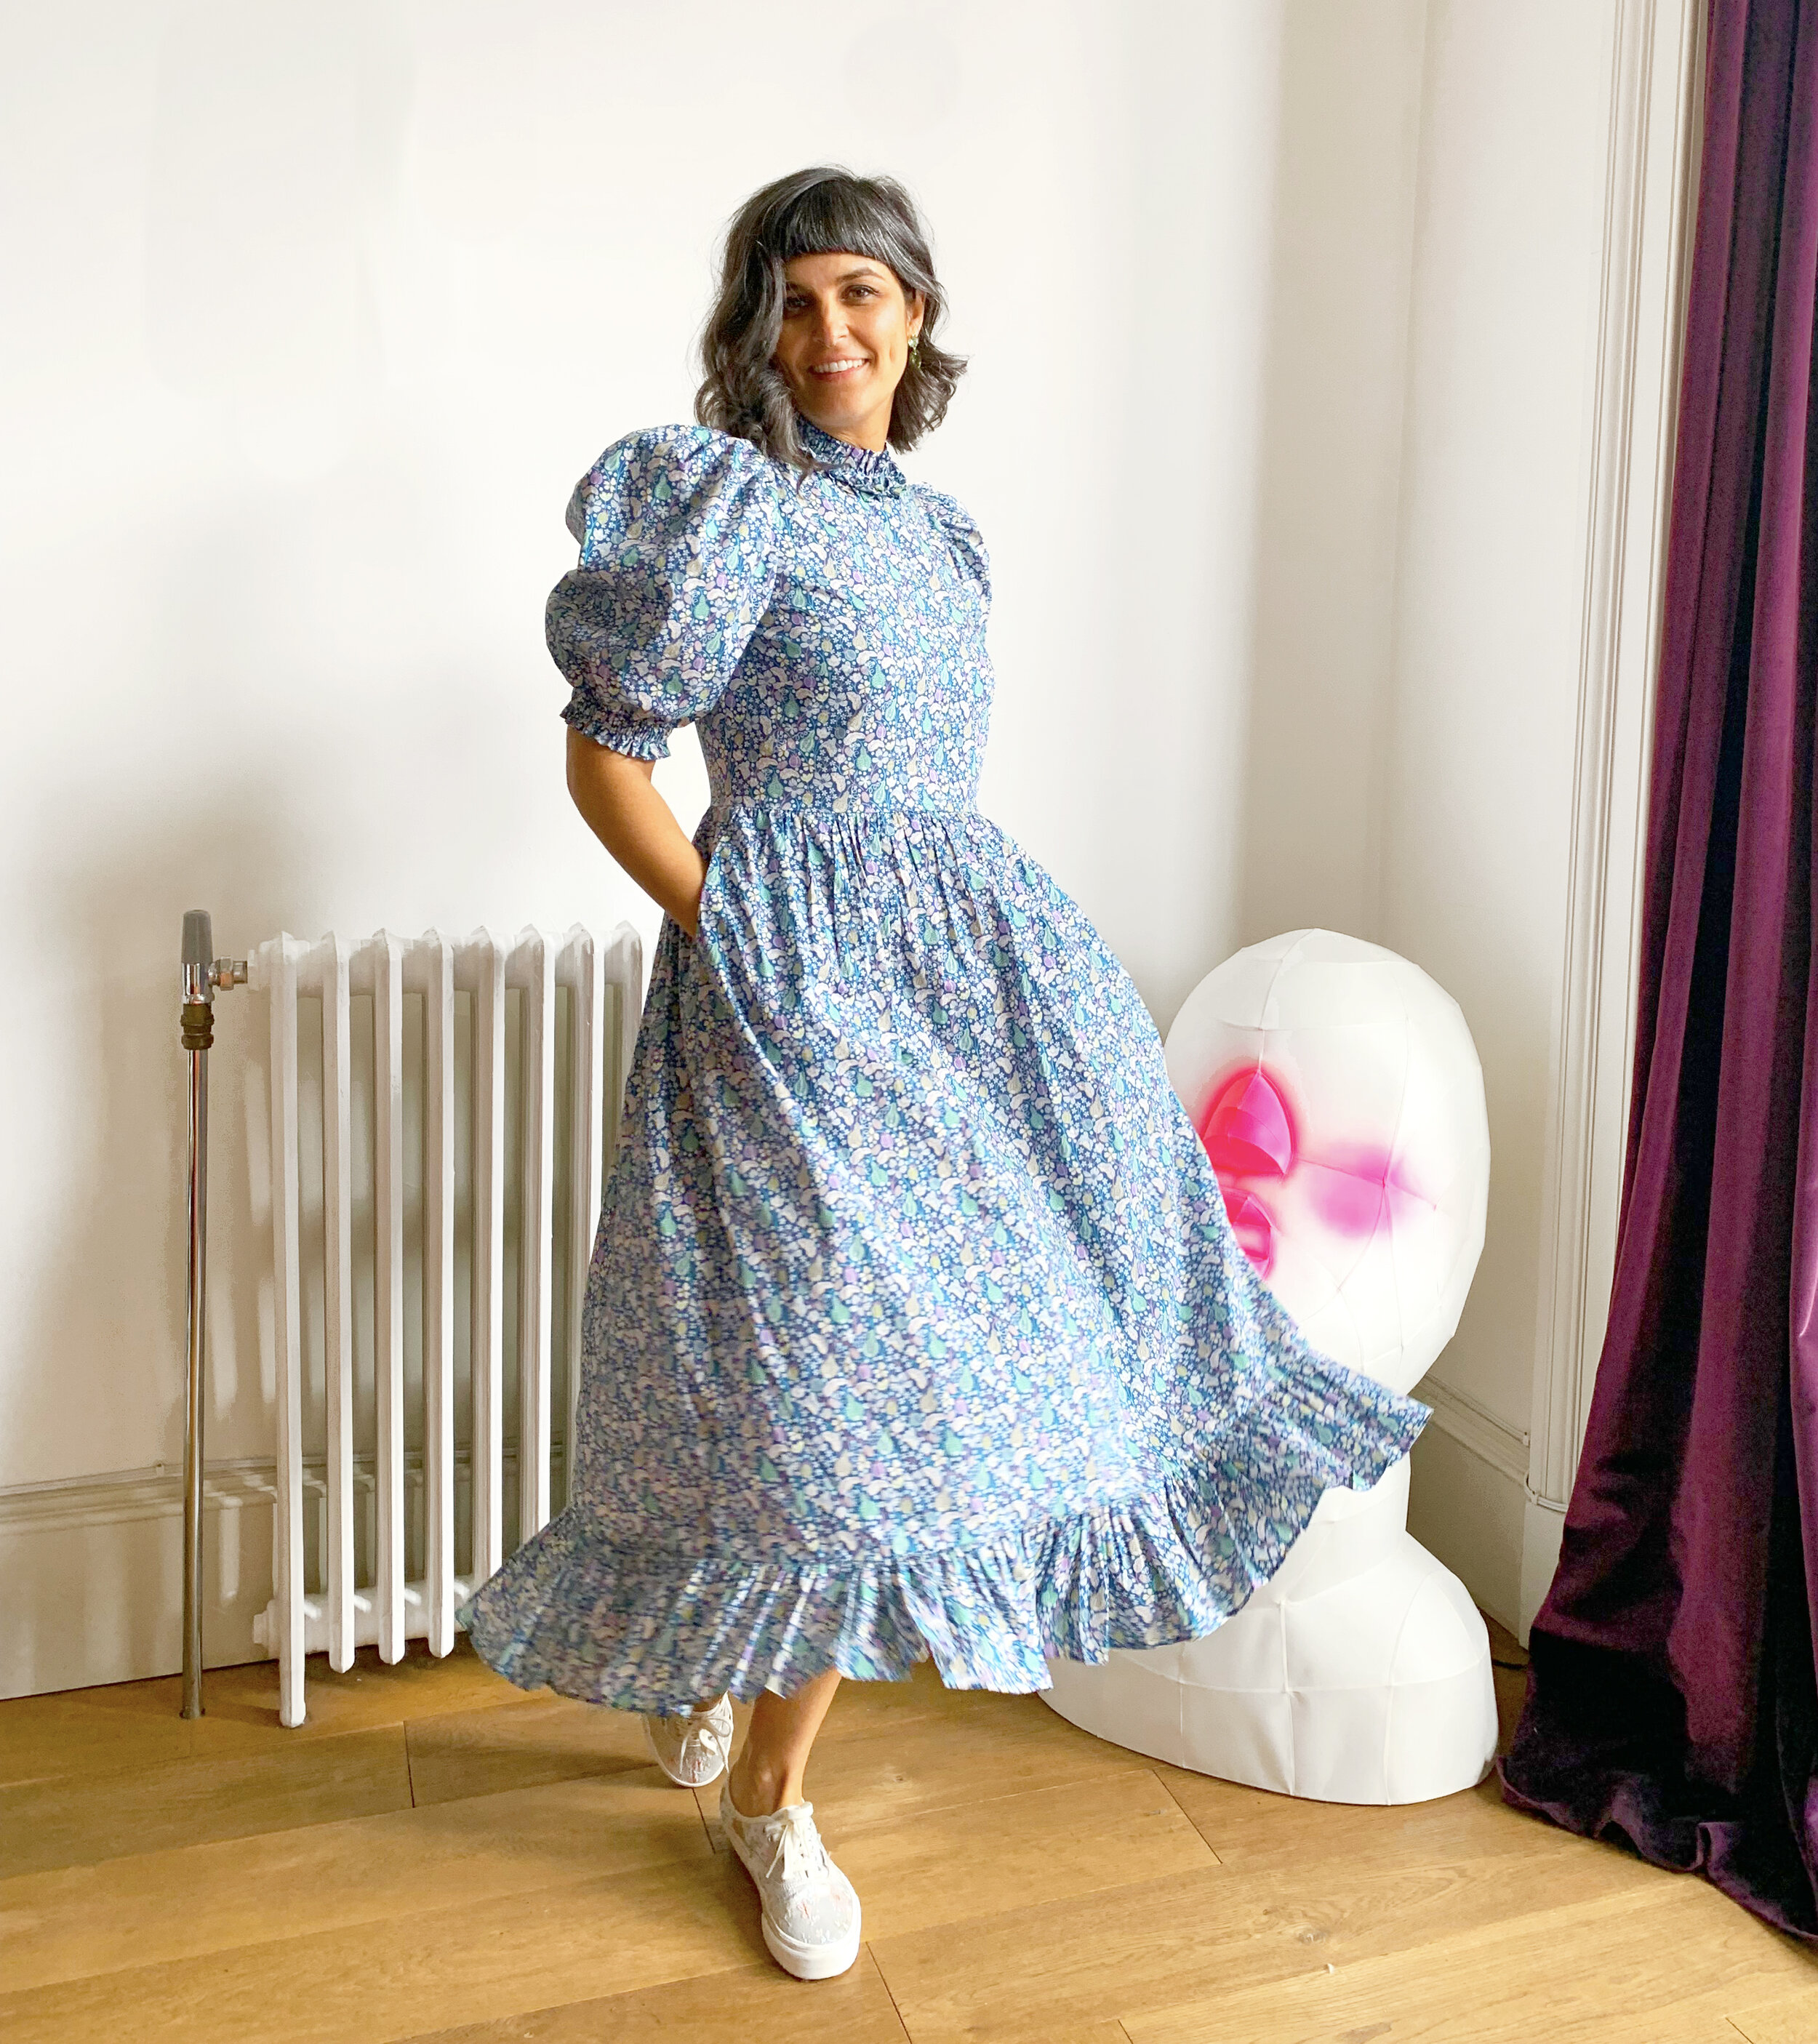
I added a lot of fullness to the skirt. The pattern pieces are just rectangles, but I don't like how that adds bulk at the waistline. So I made the skirt pieces more narrow at the waist, gently curving to be wider at the hip, and then very gently curving out to the hem. This pattern comes with pockets, but I have a favorite pocket pattern, so I used mine instead. I also added a 5" ruffle at the hem, because I’ve never met a dress that couldn’t benefit from just one more ruffle.
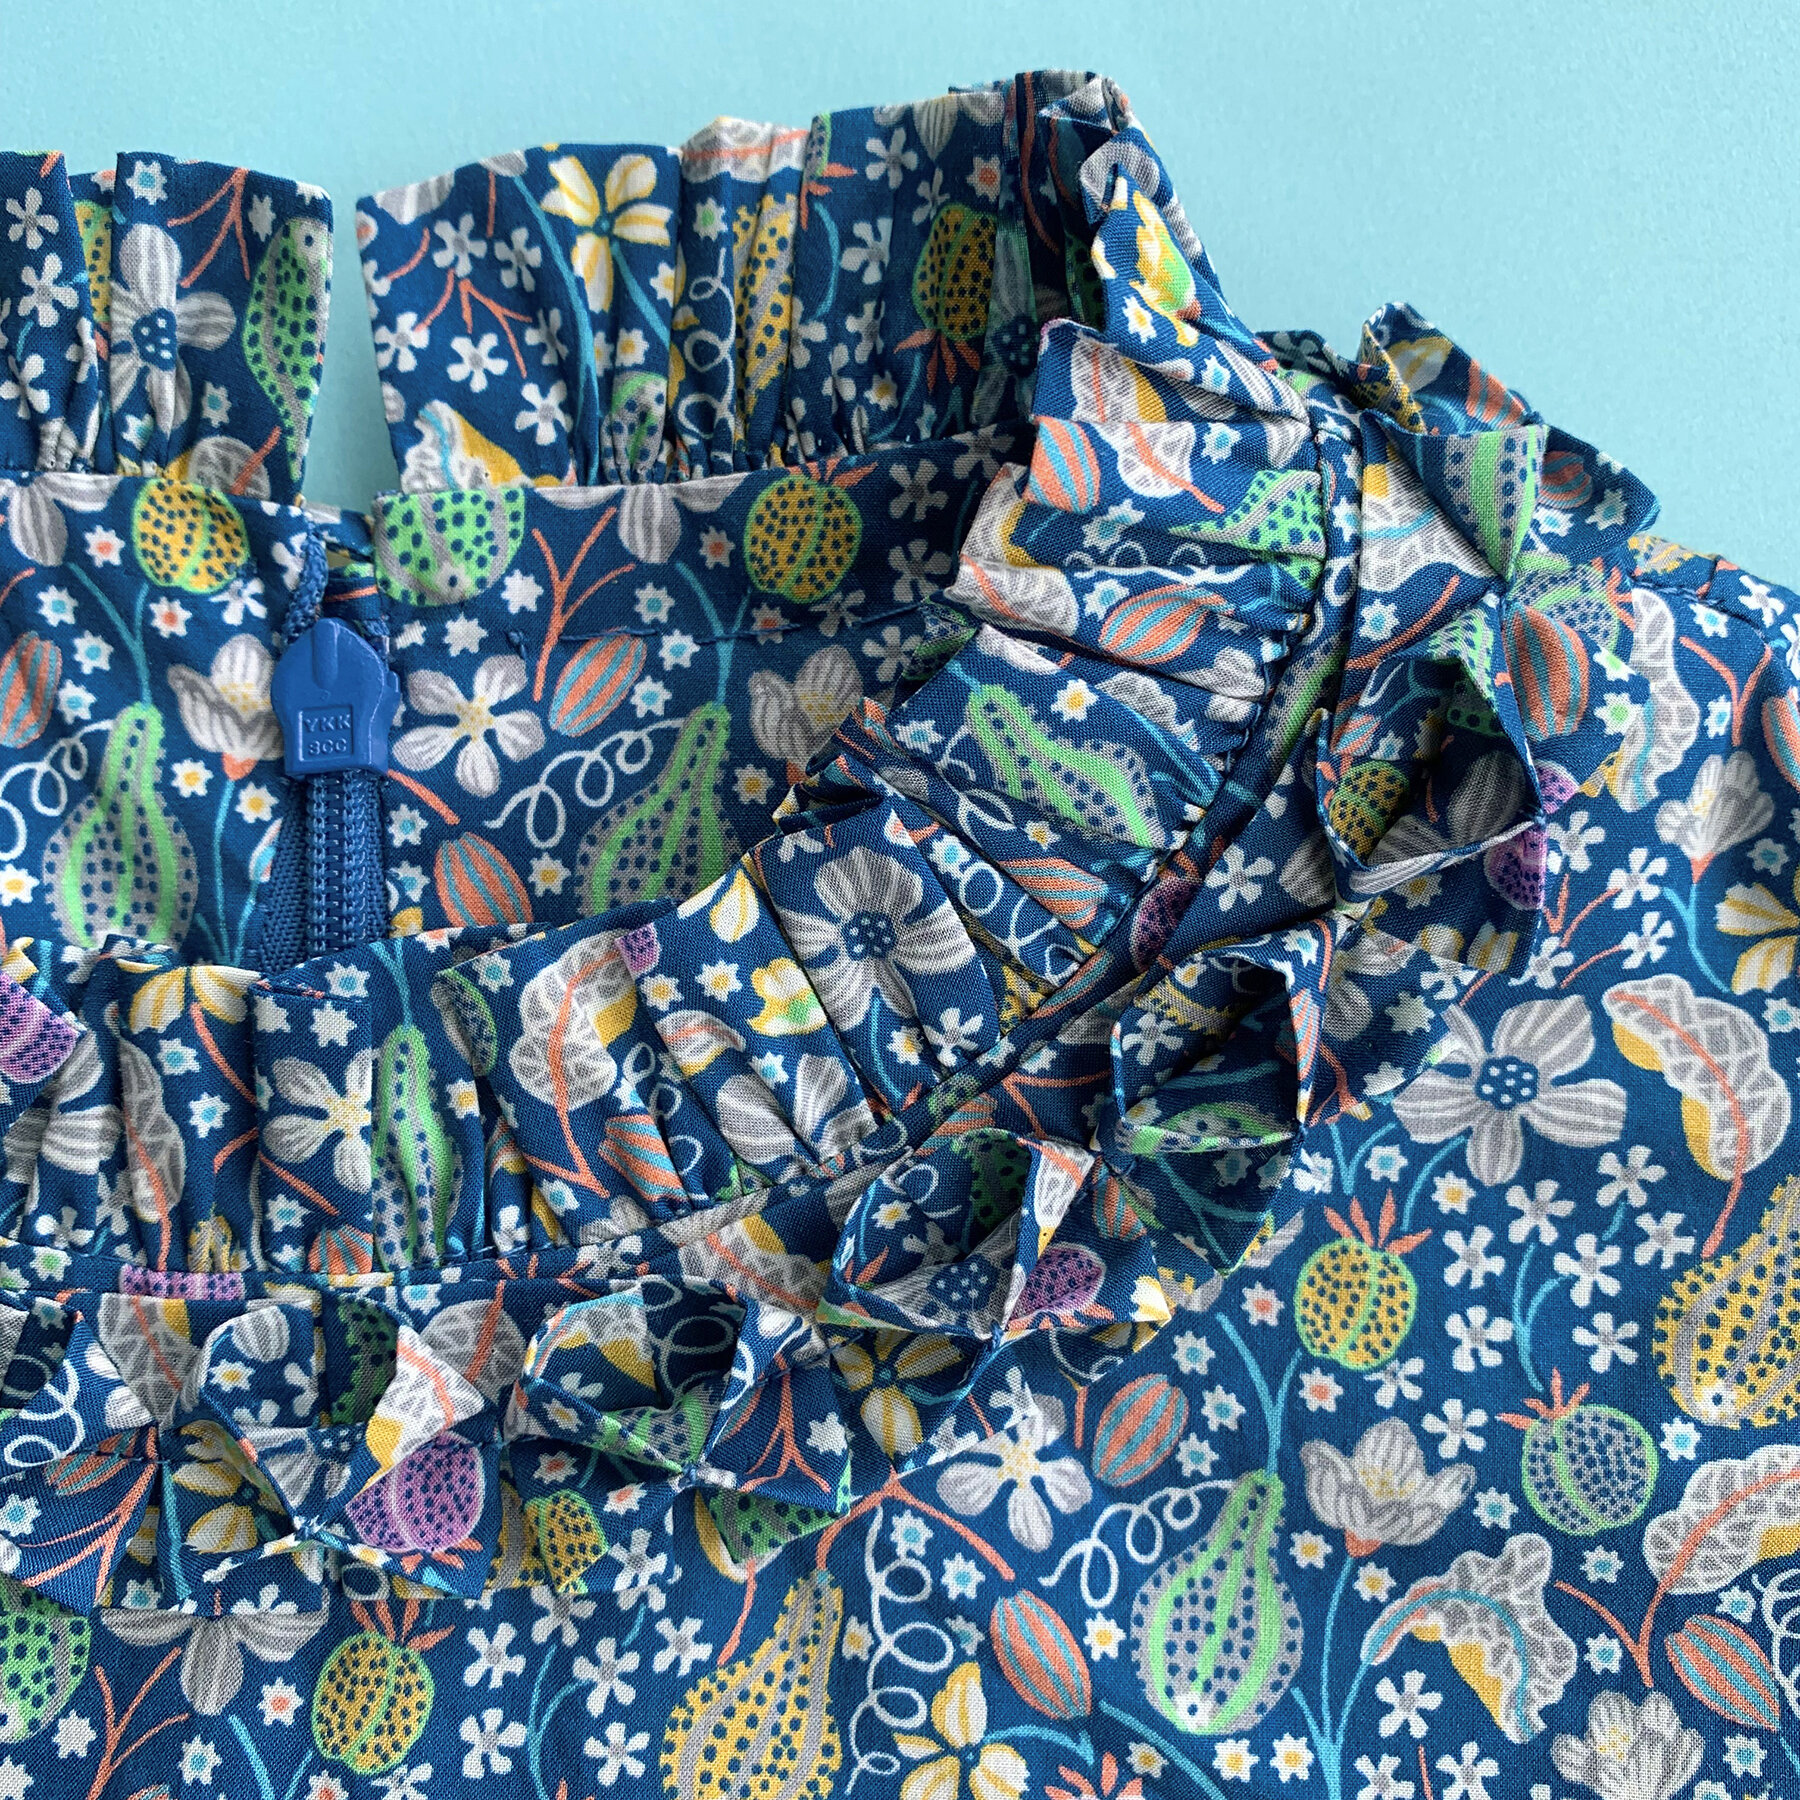
The collar ruffle and decorative box pleat trim.
The collar is my favorite part of this dress! I skipped a collar, and just added the ruffle. It is sandwiched between the bodice and neckline facings for clean finish. Then I added a little rouleaux loop at back neck & a small shell button. I was so happy with it! But I kept looking at my inspiration images, and knew it needed more.
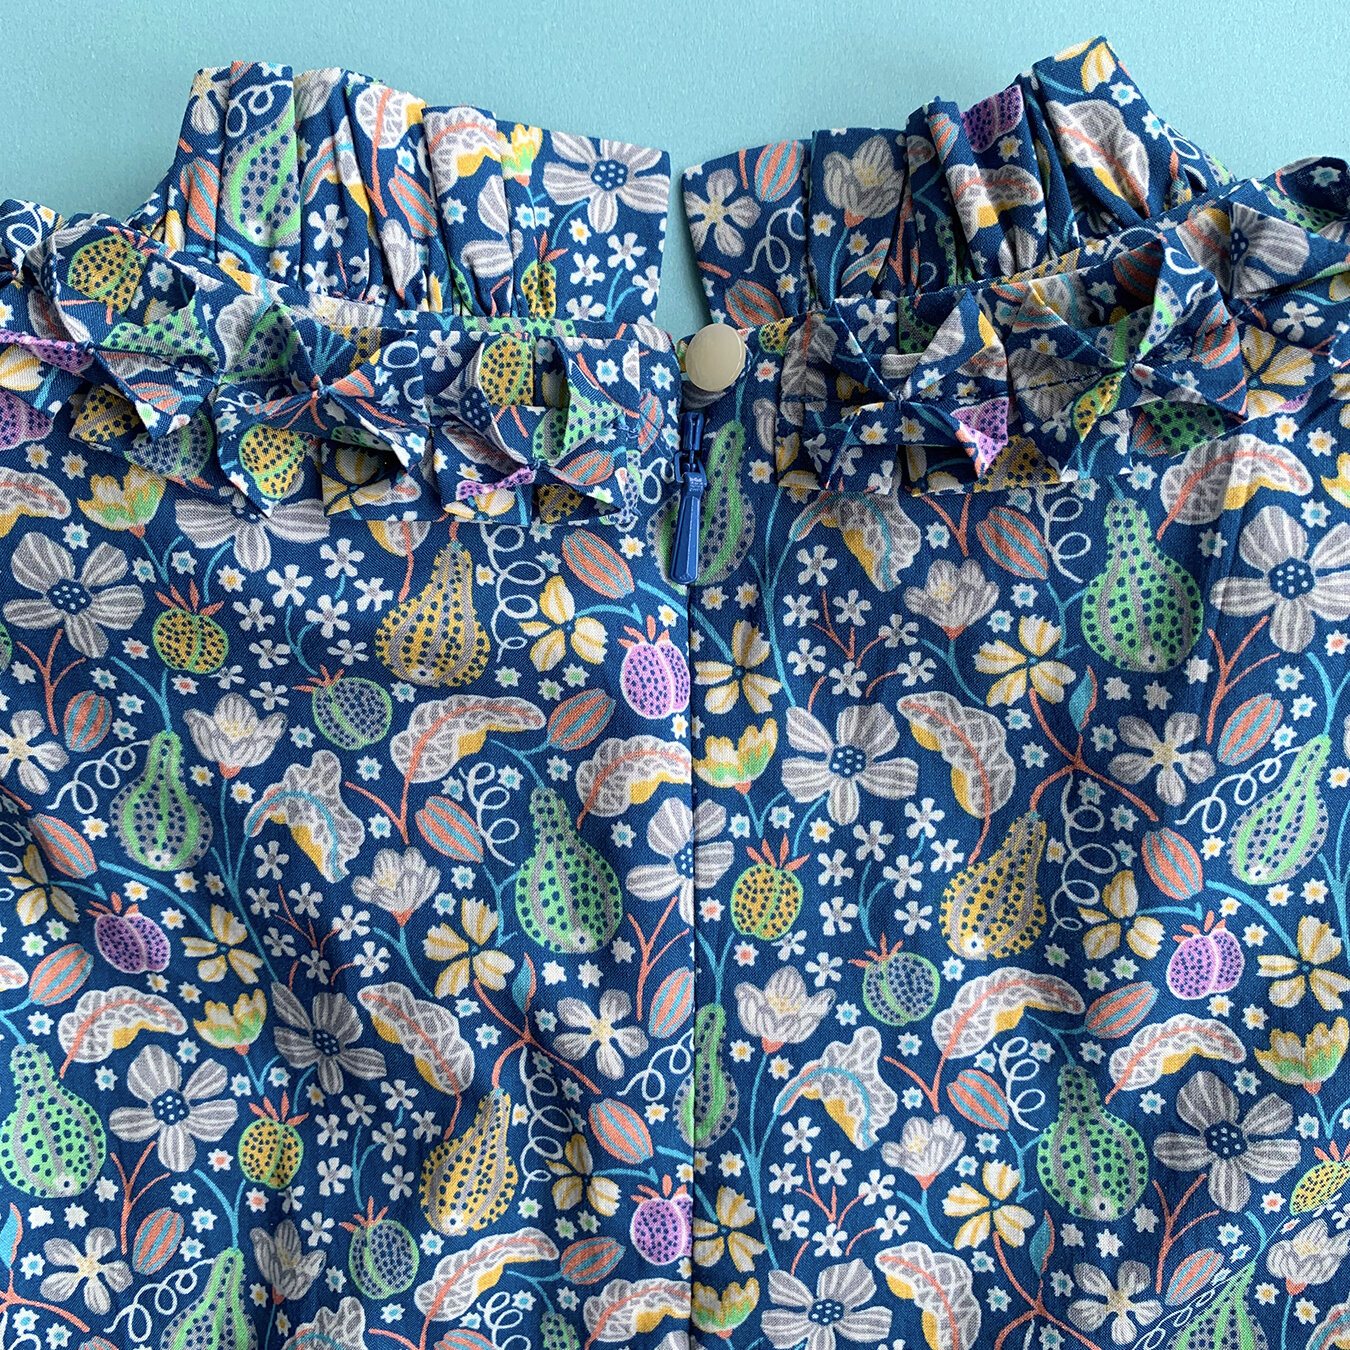
I turned to my sewing library and pulled out Fabric Manipulation: 150 Creative Sewing Techniques by Ruth Singer, which I have reviewed here. After a quick flip, it was settled: I’d be sewing a decorative box pleated trim following instructions from the book. It went much more quickly than I anticipated. While making this kind of trim is pretty fiddly, once you have a card stock jig and find your rhythm, it all speeds up. I should note, I enjoy hand sewing, an unavoidable part of making this trim.

I’ve sewn this dress with the intention of wearing it for the first time to Jason’s birthday dinner next week. I hate my own birthday - it makes me miserable. But I love Jason’s birthday! What fun to celebrate someone you love! I sewed my orange nightgown dress to wear to his birthday dinner in 2019! We had dinner in Brooklyn with his sister, Keiko, and we had the best time. I think of it whenever I wear that dress. Hopefully I’ll infuse this dress with joy, too. XO, Martha