MY "SPANISH DRESS" - McCALL'S 7925 PATTERN REVIEW

I usually wear solid colors, but you know how sometimes you can’t resist a print? The garment or base fabric doesn’t matter, because you need that print? In my day job as a textile designer for fashion companies, I am always chasing that emotional reaction. The number one way a print finds its way into my stash, is by catching my eye and making me think “I wish I designed that!”. And then I ask myself what I love about it. In this case, these colors clash in the most delicious way! I purchased this fabric at Ribes y Casals in Madrid last fall - a truly wonderful fabric store chain that I visited in a few cities in Spain. The buttons are from Pacific Trimming in NYC.
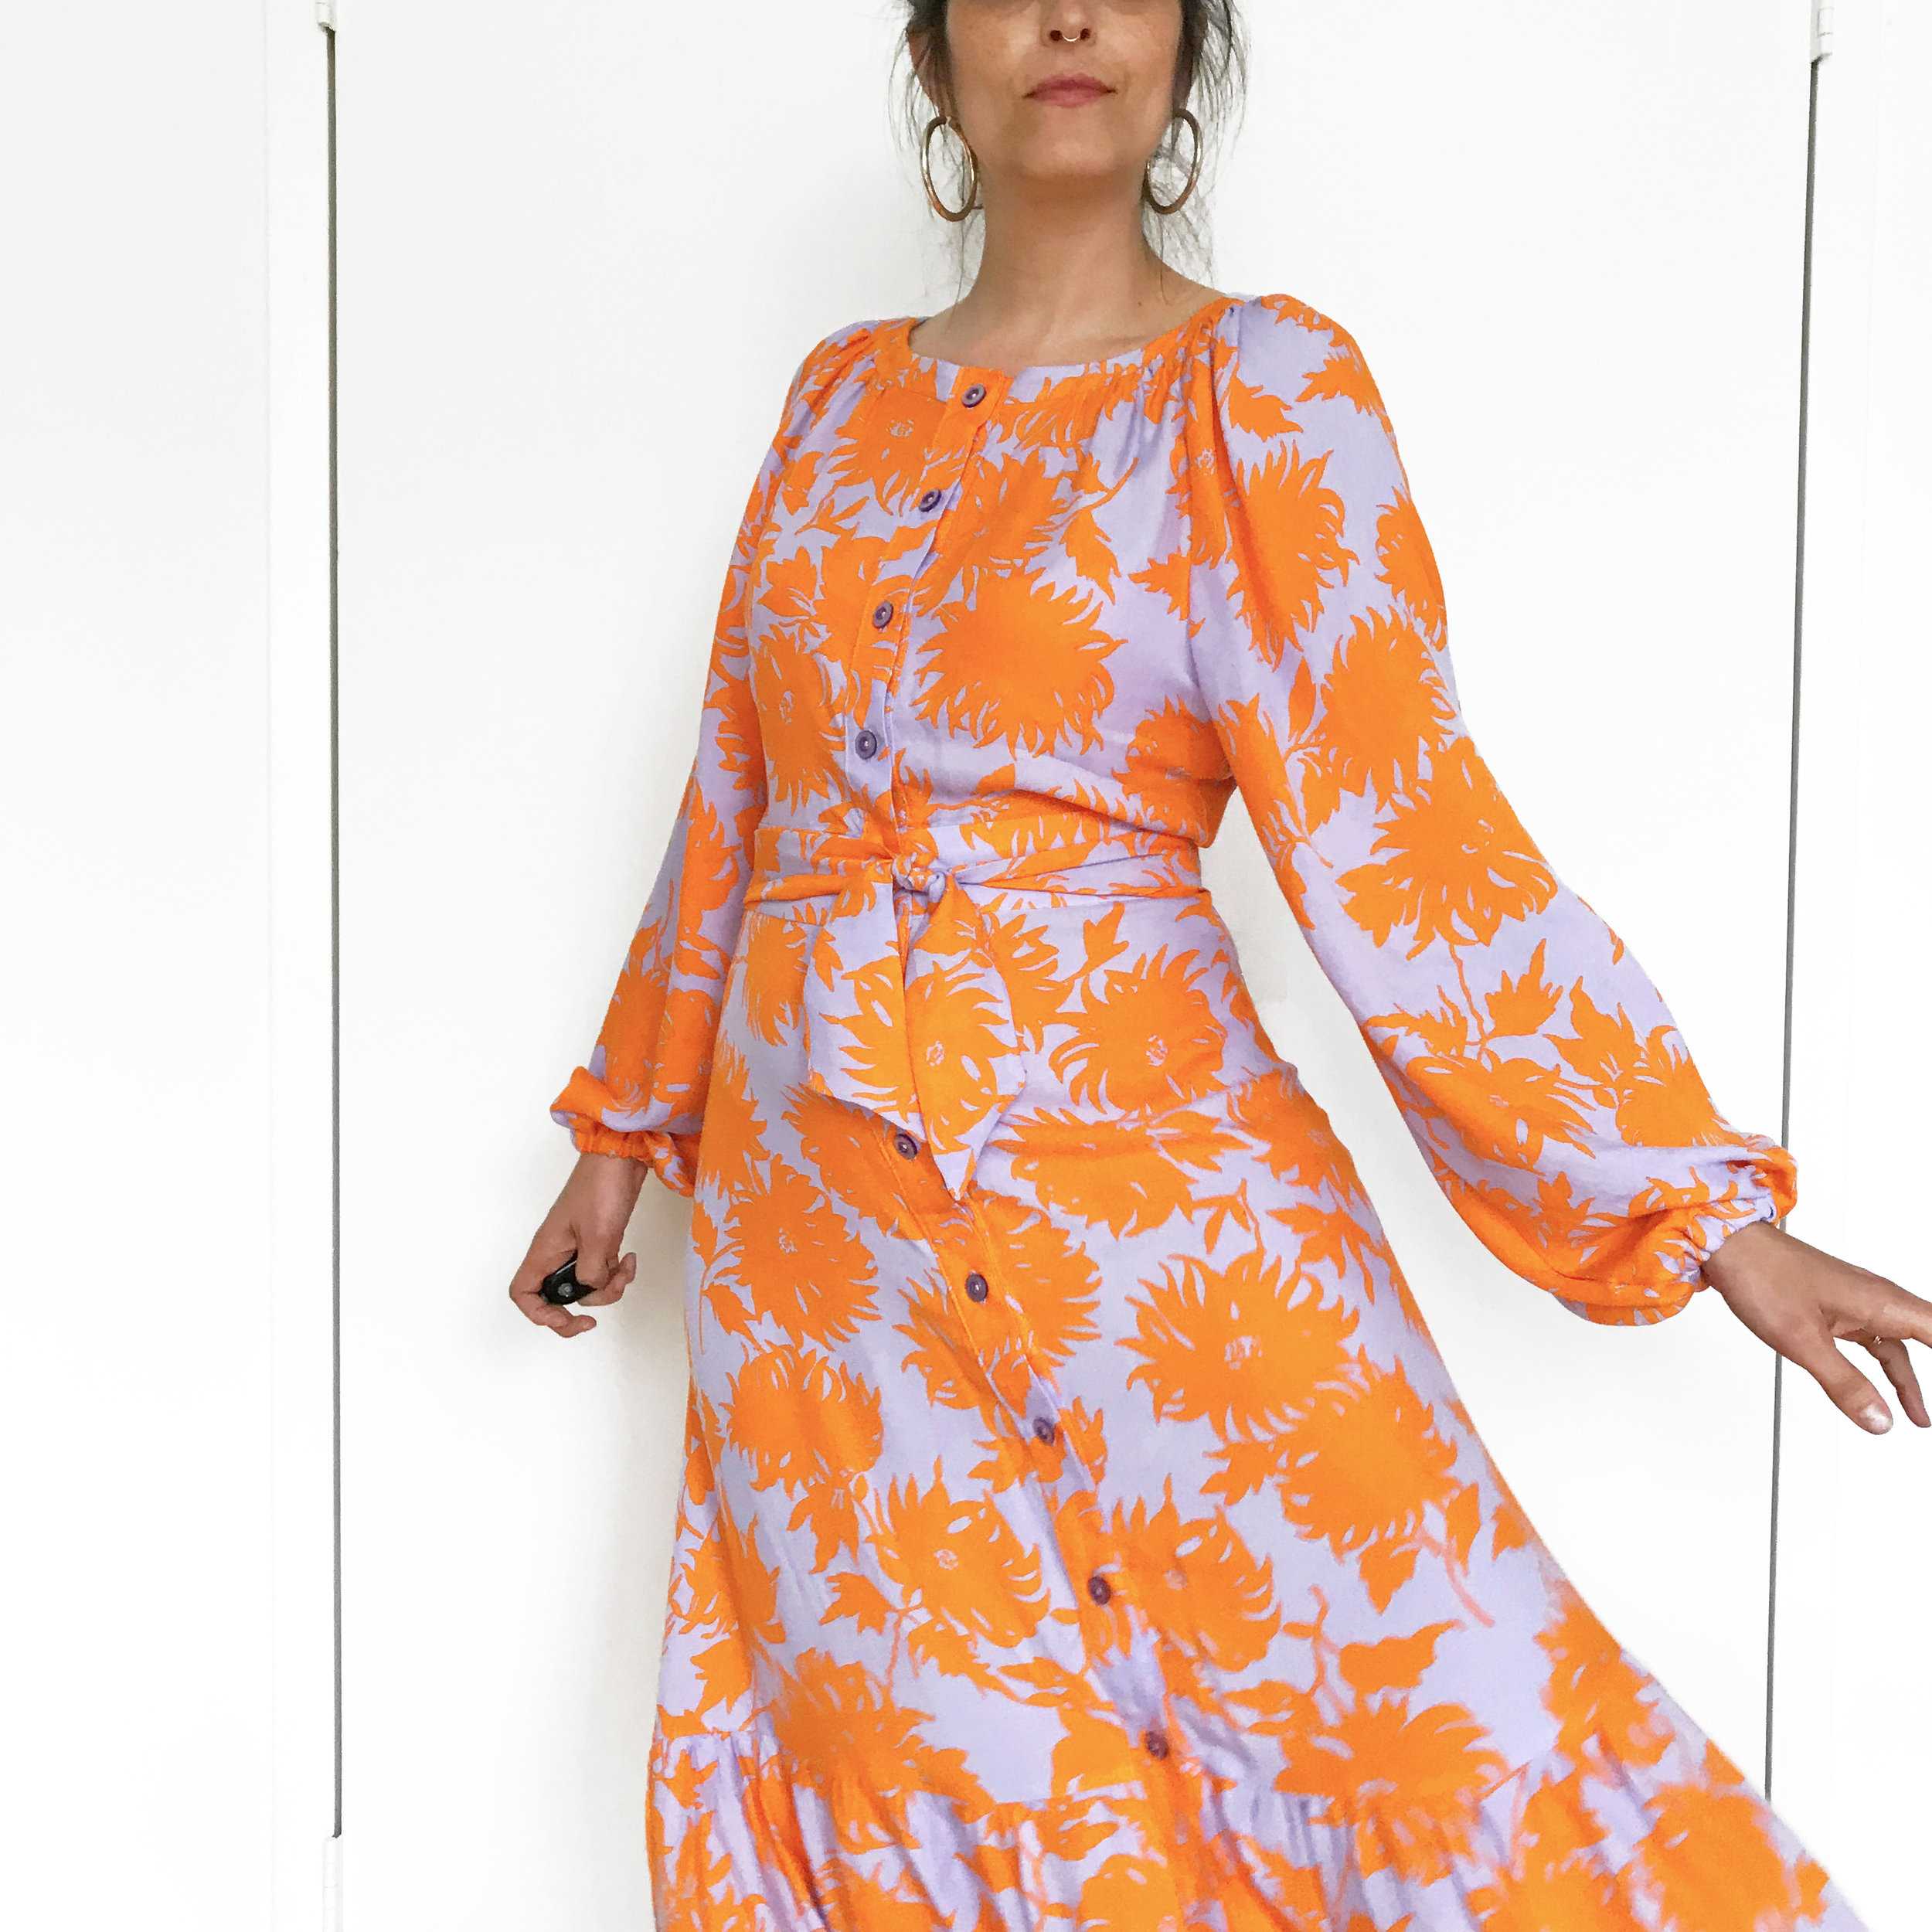
I don’t know why, but I don’t like to touch 100% rayon. Regardless, I snatched up 3 meters of this viscose twill as soon as I laid eyes on it. At Ribes y Casals, fabric rolls are laid out on tables, where you can see and touch all of them - it’s an impressive way to view fabric and I just couldn’t resist. I think rayon challis is a comparable weight fabric, and I will caution you, after sewing this dress, I think it is too light/wobbly for this pattern. I think a light weight linen, linen/rayon blend, soft cotton, or even some silks would be ideal for this pattern. You need something with drape, but also a bit of stability to make the neckline have enough integrity.

I’ve been staring at this fabric on my stash shelf for months, wondering when I would use it. When this pattern arrived in the mail, it clicked. I’m not one for flamenco, but the ruffle seems like a nice acknowledgement of where this fabric came from. Fabric is one of my favorite travel souvenirs, and I recommend it! It always evokes nice memories for me, because I am very happy when fabric shopping. Aren’t you?

My full pattern review is below, but my main callouts are: consider using a lightweight interfacing on your shell and facing pieces (instead of only interfacing the facing pieces), and brace yourself for buttonholes. I made eleven buttonholes, and magically only had to rip out 1.5 and restart my machine once. That’s good, right? lol. Otherwise, this goes together really quickly, and looks more complicated than it is.

So that’s it! I have already ordered fabric to make a solid black version, with some special buttons. Without further ado, here is my pattern review, complete with all my modifications and alterations. If you have any questions, leave me a comment! XO, Martha
Pattern Description:
"Button-front dresses are fitted through the bust with a neck band, inset midriff, and sleeve and skirt variations. B: Elasticized sleeves, purchased piping. D: Elasticized sleeves, tie ends encased in side seams."
Pattern Sizing:
I found this ran a little small - not enough for me to size up from my usual size, but I did sew the bodice side seams with 1/2” seam allowances.
Were the instructions easy to follow?
Yes. This is a straightforward construction. The illustrations/written directions for attaching the neckline are a bit unclear, but looking at the pattern pieces, I understood how they were meant to go together. The neckline pattern pieces have a lot of markings: circles, dots, triangles, and squares. Mark all of them, and you won't have trouble.
Pattern alterations or any design changes you made:
• Lengthened bodice 1" - my usual adjustment, I am 5'8".
• Lengthened skirt 3", and graded from size 12 waist to 14 hip. Next time, I will slash & spread instead of grading between sizes, or use a TNT skirt pattern instead.
• I wasn't paying attention when I cut the sash, and I only had enough fabric to do it the way I did. I cut it crossgrain, on the fold, and did not attach it to the main dress. It is long enough to make a little tie, but not a bow, which works for me.
• After doing the neckband in this wiggly fabric, I decided to do the following: instead of interfacing the facing and not interfacing the outside neckband (per pattern), next time I will use a lighter weight interfacing on *both* pieces. That is what I did for the middrift pieces and it helped me achieve a much cleaner finish.
• I did some edgestitching along the button band (photo shows only on one edge, but I did both sides so it is symettrical).