RED WOOL DREAM COAT - STEP UP SEWING
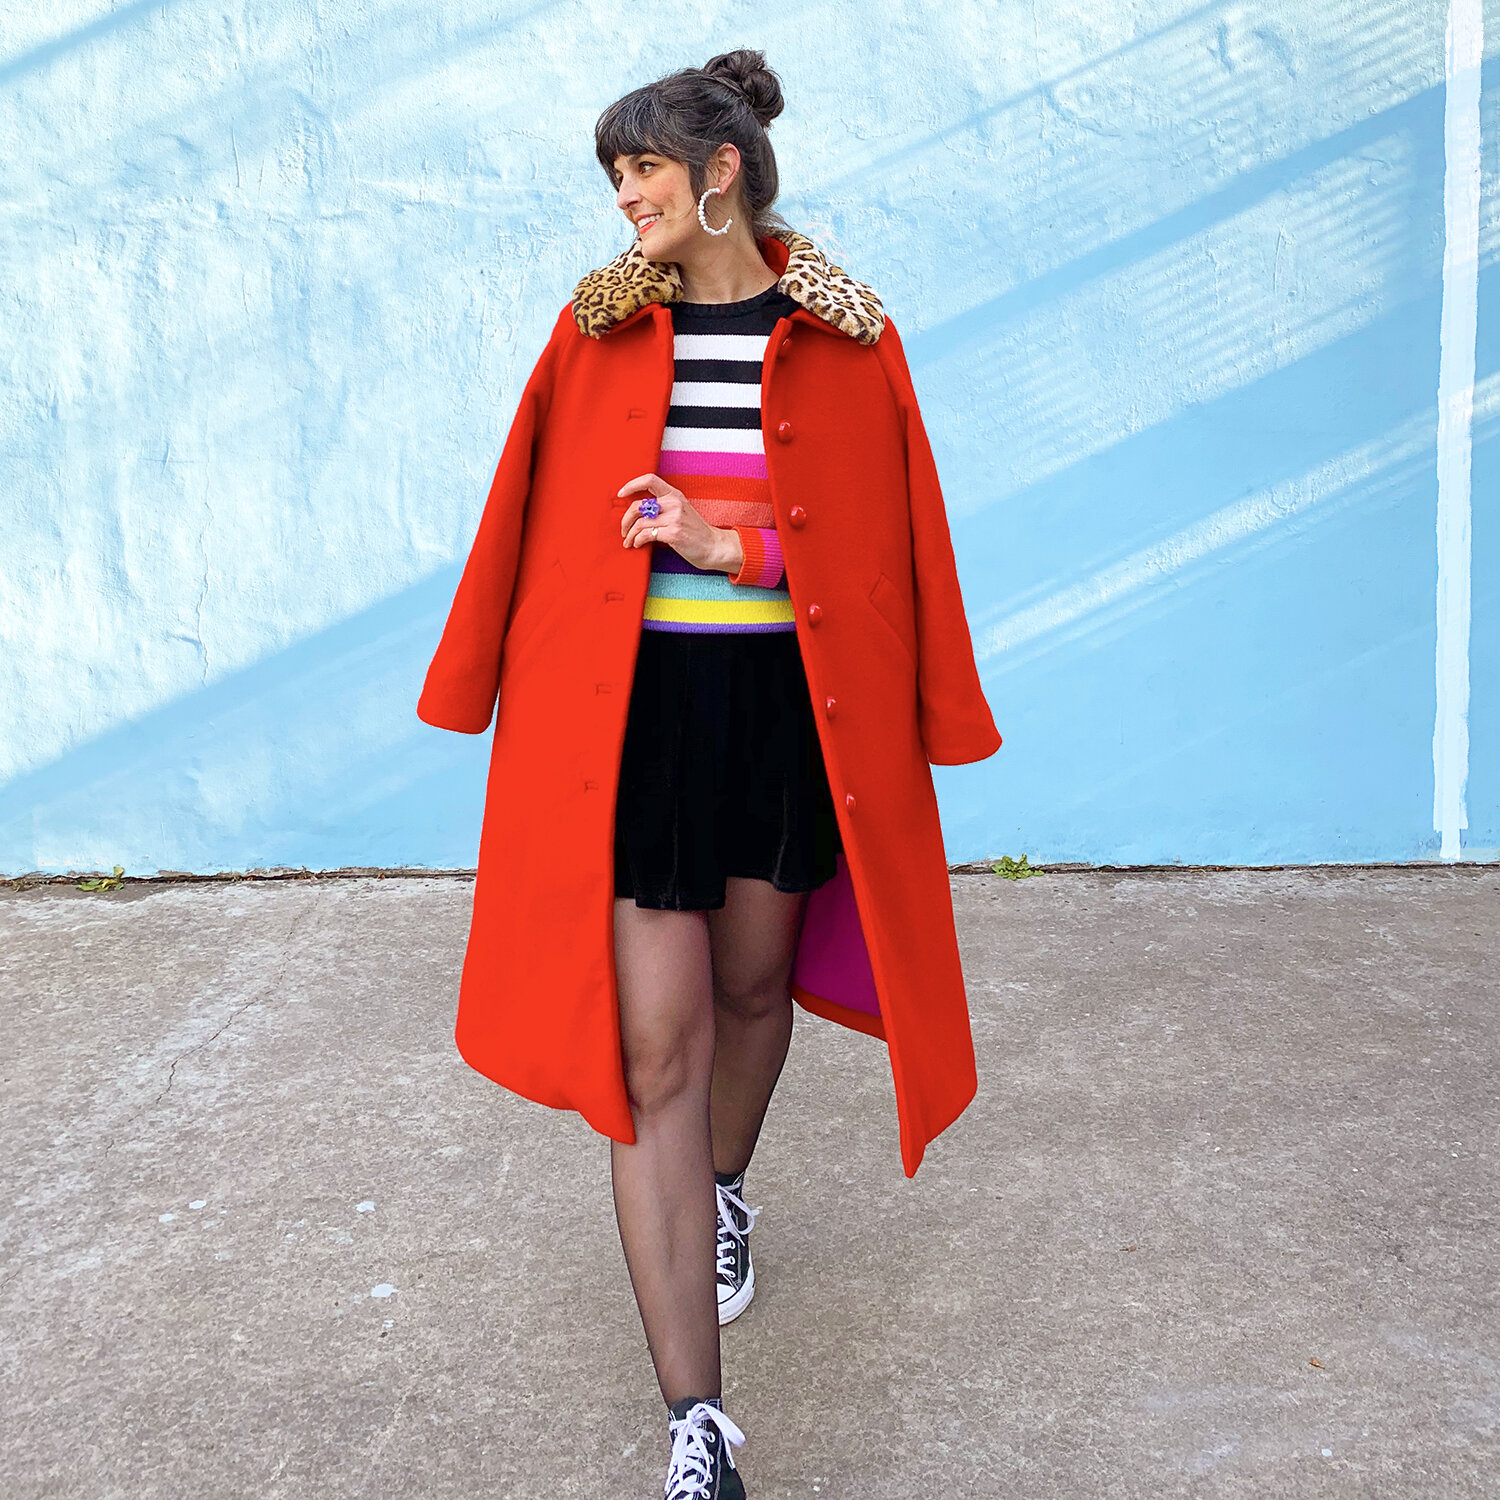
Earrings: Zara. Faux fur collar: Monki. Sweater: Gap. Skirt: Topshop (but ancient). Shoes: Converse.
After a few weeks of plotting, planning, hand basting, and dutifully mocking up bound buttonholes and welt pockets…..it’s done. The red coat of my dreams is here! As you may remember, my 2019 New Year’s Resolution was to sew all my own clothes. It feels fitting that the last project of the year (unless I squeak something in after Christmas, but I’m not counting on it) was also my most involved, featuring some of my best craftsmanship. I really took my time with all the details. It feels good to look back at my sewing from a year ago and know my skills and patience have progressed. I never cared much about resolutions, until I started thinking of them as year long creative projects with a few set goals along the way; I now enjoy using them as a way to encourage my own creative growth. It’s time to start planning for 2020!
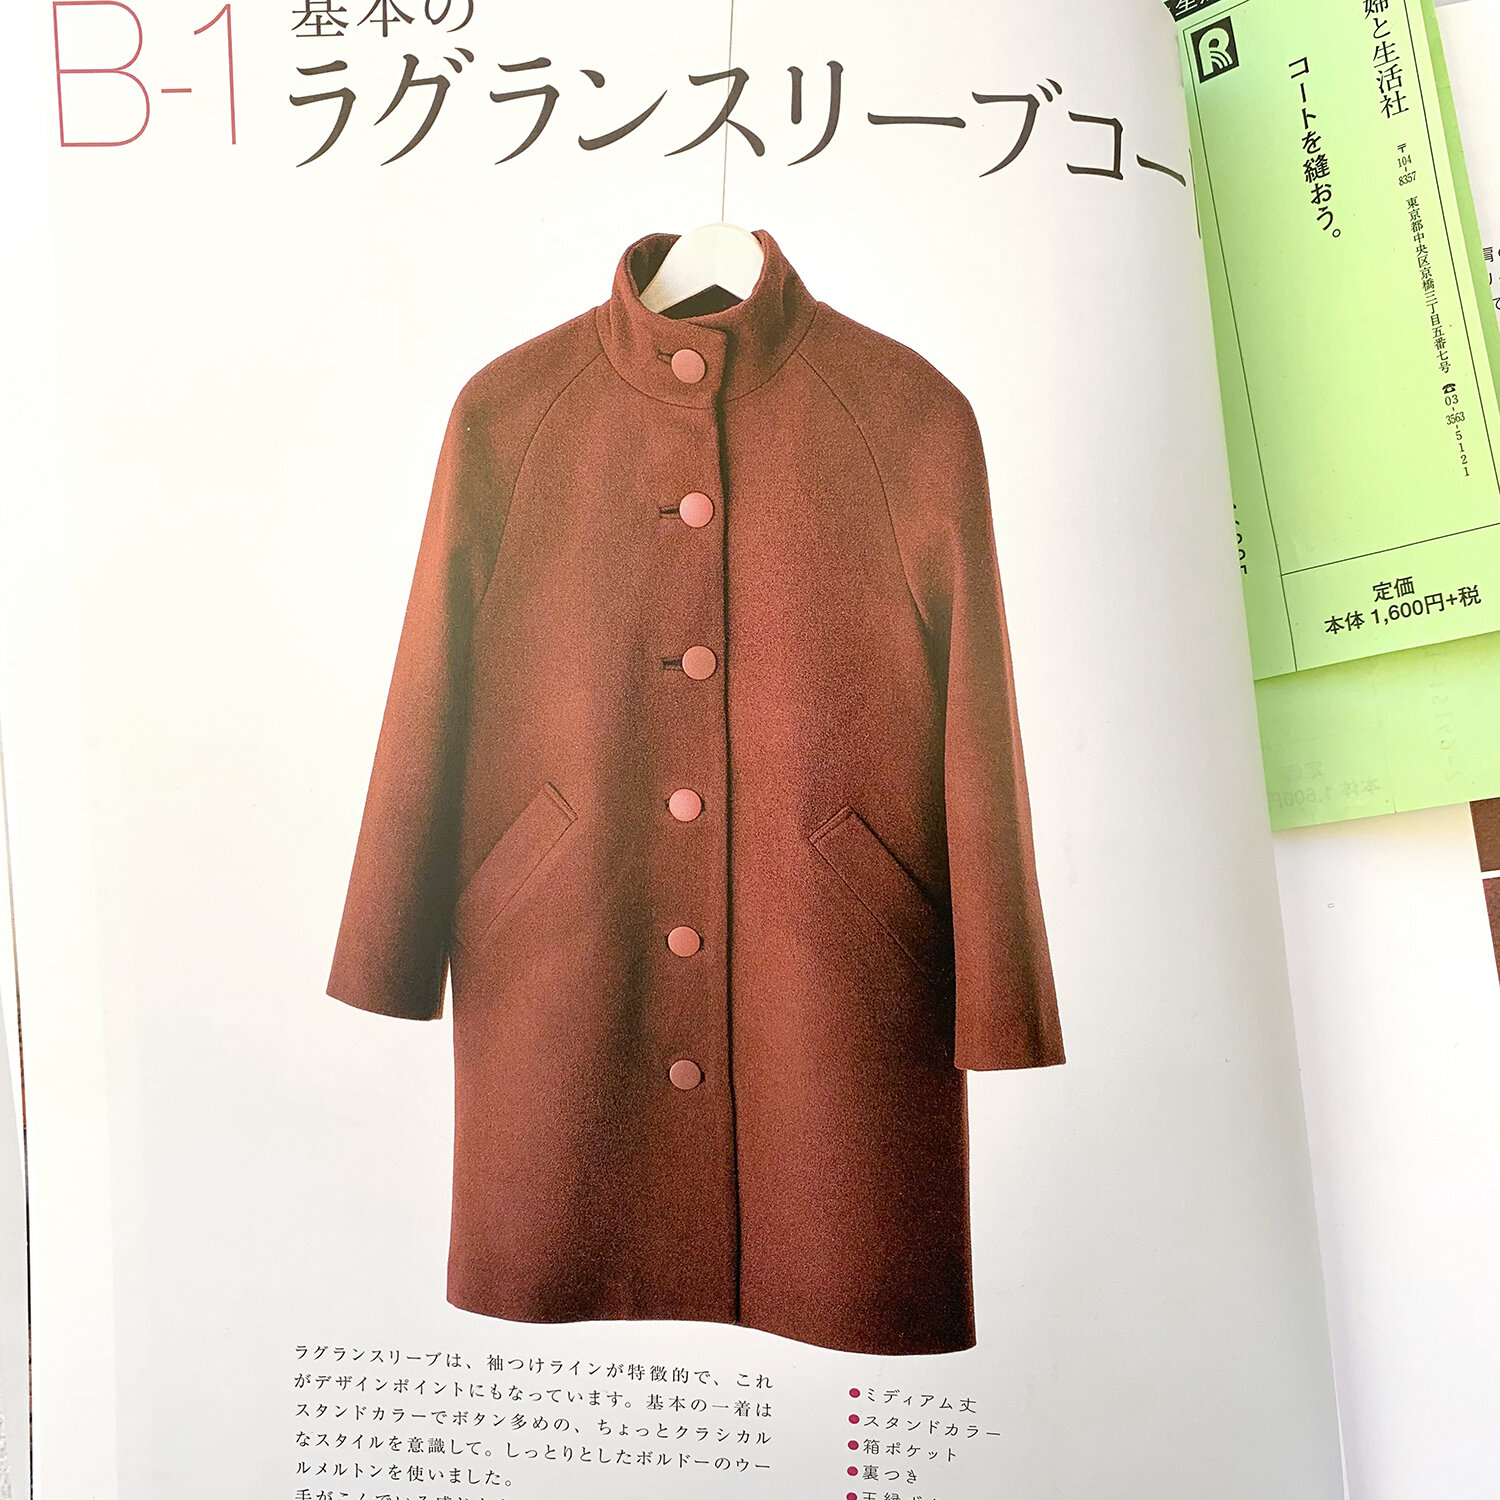
When I flipped to this page, I knew I’d found the one! Coat B-1. I used the round collar shape from coat B-2, which uses the same basic pattern block.
But first, this coat! I used pattern B-1 from the Japanese sewing book Step Up Sewing, which I reviewed previously, here. If you’re interested in the book, I have a few tips in that post that might help. Sewing from Japanese pattern books is totally managable if you don’t read the language (I don’t), but take your time with the book, and “read” every page before beginning your project. There are so many illustrations and photographs, that I was able to absorb what to do, without words.
I usually start my projects with the fabric, and that was the case here. I ordered this red pepper colored brushed wool on clearance from Fabric Mart, with the intention of using a different pattern, which I had already spent a bunch of time prepping. When the fabric arrived, it was beautiful, but not at all what I expected: much looser and a more visibly open weave than I had imagined. Slightly irritated, I damped the wool, let it sit for a bit, and popped it in the dryer to felt ever so slightly. And then I bit the bullet and ordered red cotton flannel during a Black Friday sale, which washed and dryed on hot, and then used to underline the wool. In the end, I love the combo, and it is very warm! Somewhere in there, I decided I couldn’t use this fabric for the original pattern, and let my mind wander to different patterns, and it all clicked into place!

I had always assumed that Japanese patterns wouldn’t fit me, but they have more wearing and style ease built in than many western patterns. I am 5’8” and usually cut size 12 in Big 4 patterns. I cut size LL (the largest size offered), and the alterations I made to the pattern are very similar to what I would do with a Big 4 size 12. Probably my biggest modifications were for height.
I did run into one glitch with this pattern: the sleeve lining piece. The sleeve lining piece, is bigger that the sleeve piece. After seeing some photos from the book and pattern sheet, Jason’s mom confirmed that the sleeve lining piece had seam allowance included (but why? the only other pieces with seam allowance were the pockets). After removing the allowance, the shape of the piece still didn’t make sense. Maybe it is for the reversible version of this coat? I drafted my own sleeve lining, which wasn’t a big deal because you have to draft your own pattern pieces for the other lining and interfacing pieces in this pattern (clear measurements are included for the interfacing pieces). I made the lining pattern piece the same as the sleeve, removed where the facing goes, and then added seam allowance. Worked great.

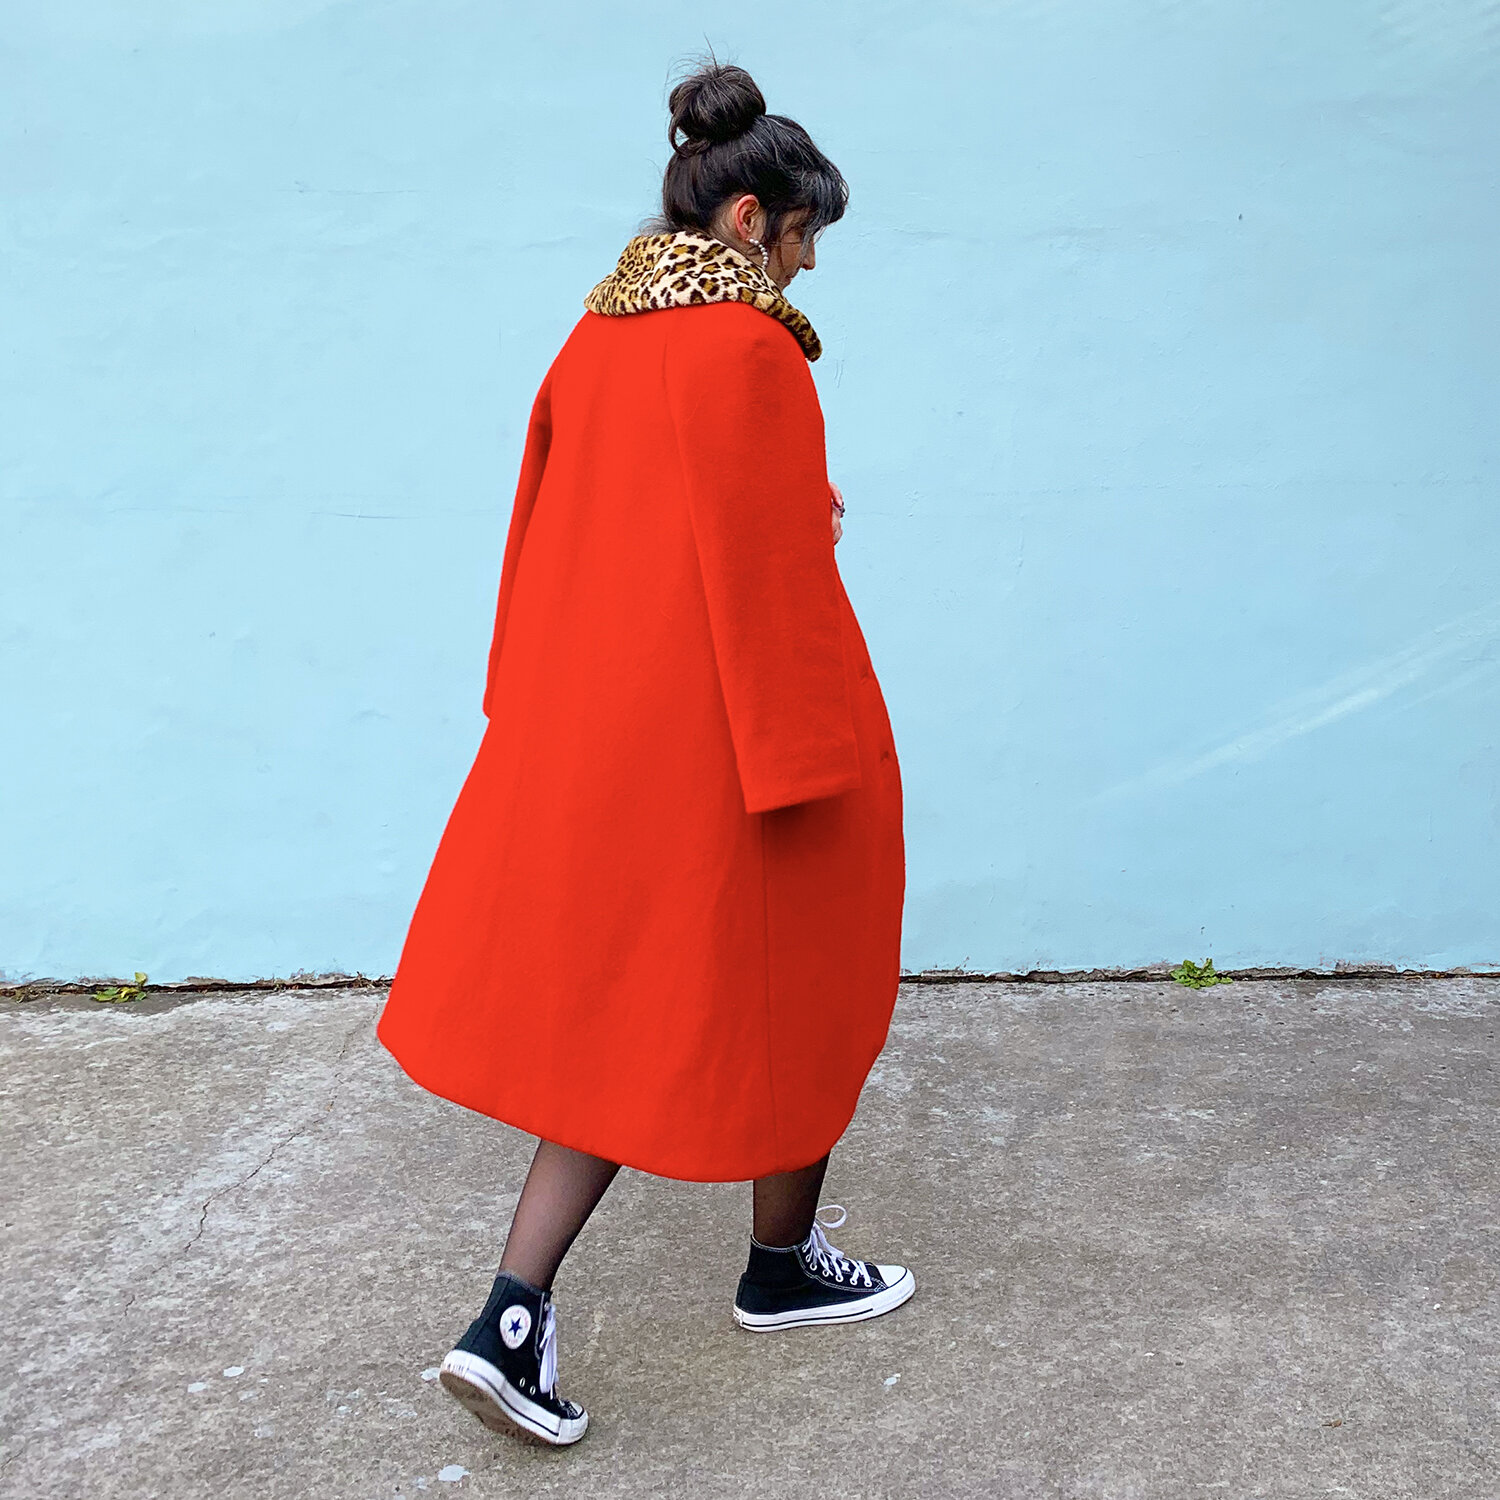
The pattern sheets that come with the book are relatively small, especially for coats. So the instructions tell you which pieces to lengthen to get the look of the photos. For this coat, you are meant to lengthen the body and facing pieces at the hem by 10cm, or about 4”. I lengthened 7”. I usually lengthen 1” through the bodice, but because of the easy swingy shape, I just lowered the pocket placement 1”. And for my wide hips, I slashed & spread the back piece to add 2” to the hip circumference. I think I could have gotten away without that alteration, but it’s always nice to have ease.
For the sleeve, I lengthened 3/8”, and widened the sleeve, started with 0 at the armpit, to +1” at the cuff. If I make the coat again, I may just leave the sleeve as drafted. But I can wear my thin Patagonia down puffer jacket under this very comfortably, with plenty of space to bend my elbows. When it gets down to single digits, that’s really important!

Something I love about sewing coats is that there are many opportunites for personalization and stretching your skills. The bound buttonholes were in the pattern, and I really liked the technique used (I’ll post a step-by-step after the holidays). In addition to those buttonholes, here you can see my favorite details: I hand understitched the collar, added ribbon & chain to create a loop for hanging the coat, added my custom label, and added a 2” pleat to the center back lining for wearing ease.
I went on a day long hunt for buttons for this coat. I LOVE button shopping in Midtown. There are so many options, and you never know what is going to catch your eye! I found these on my last stop of the day (I already picked up another option, which quickly paled in comparison). They’re from M&J and cost $3.98 each, the most I have ever spent on a button! Worth it. Because they were expensive I sewed on the buttons with 4 ply thread, and used little red plastic anchor buttons. I found those at a trim shop in my neighborhood in Brooklyn.
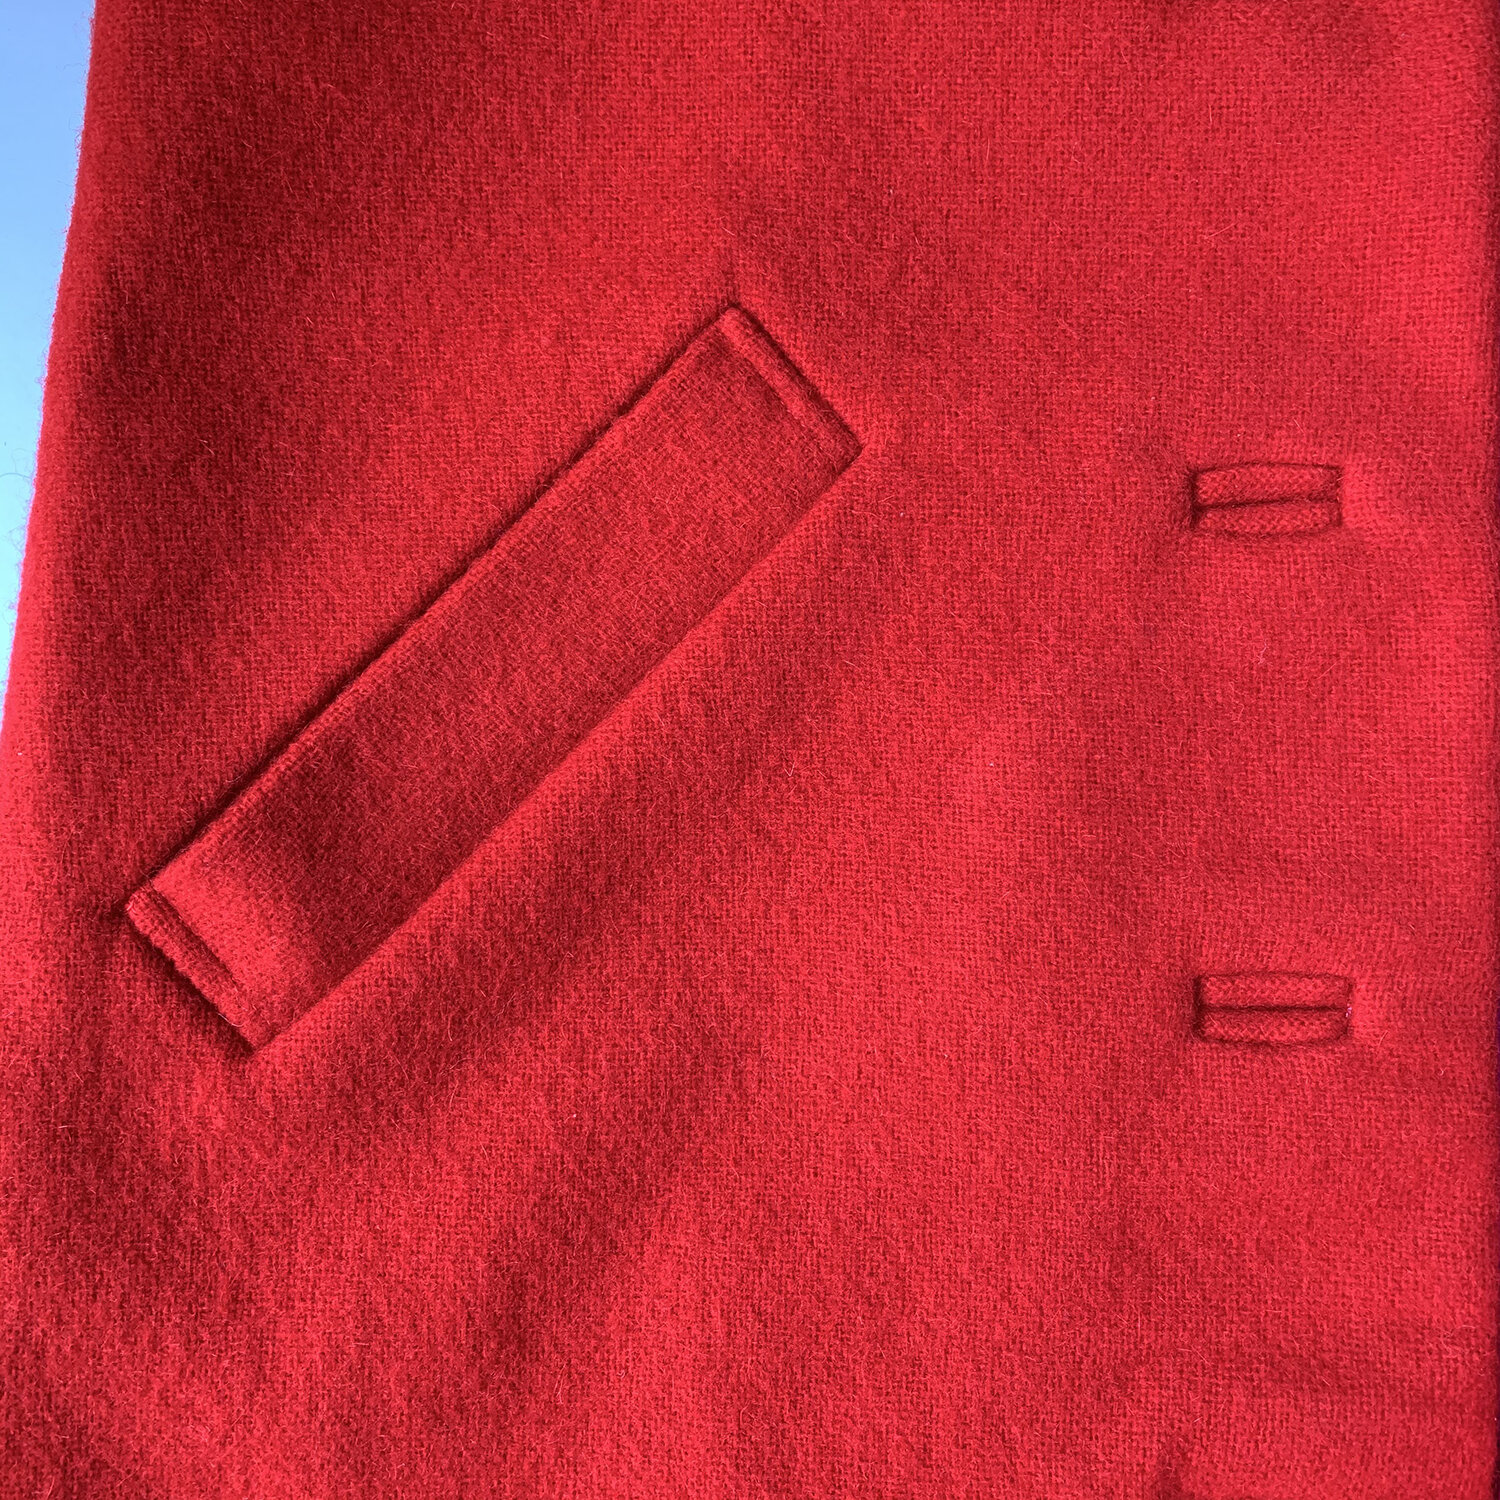
I am really pleased with the welt pockets - I actually can’t remember the last time I made one….it has been years. These went in easily and I love the shape of the pocket bag. I enlarged the pockets overall, so I can shove my mitten clad paws in there while clutching my phone. I widened the welt and pocket 1”, and added 1” depth to the pocket bag. I will borrow these pockets for future coats, they’re perfect.

I can’t resist a good color combo! Fuschia heavy poly satin lining from Mood Fabrics.
Sewing this was time consuming, but an absolute pleasure. Not sure if my closet can handle it, but I look forward to making more coats! I will definitely trace off another pattern block from Step Up Sewing, and I can see myself making another version from the B block, too. The other variations for this pattern are: funnel neck, no collar, unlined with Hong Kong seam finishing, and fully reversible with a belt. I have everything traced off, so next time it will be a bit speedier.
Oh, and the leopard faux fur collar! It is ready-to-wear, purchased at Monki in London a few years ago. I have a pretty big collection of little fur collars, and I always imagined wearing this coat with one - that’s why I chose this round collar option. But now I need to sew up my own collars! I’m looking forward to finding different faux furs for this purpose.

I wore this out in yesterday’s suprise snow squall, and I have to say, it is extremely warm, and this poly satin lining is fairly windproof (I used it in my polka dot coat, too). It is 18ºF as I type this. Yikes. This coat will certainly be on heavy rotation this winter! Hope you’re staying warm & cozy! XO, Martha