MY QUILTED DREAM COAT: Part 2, Pattern Placement, Quilting, and Binding
This is my second post about sewing my quilted coat. My first installment in this series covers my fabric and patchwork design choices, and how I got started to making this garment. You can read it here.
Once I had my fat stack of nine patch quilt blocks ready to go, it was time to think more critically about some essential design elements:
Pattern selection
Patchwork placement on the finished jacket
Quilting design (the patchwork part of a quilt is called piecing or patchwork; quilting is the stitching that goes through the “sandwich” of patchwork, batting, and backing).
Seam finishing & bindings
PATTERN SELECTION:
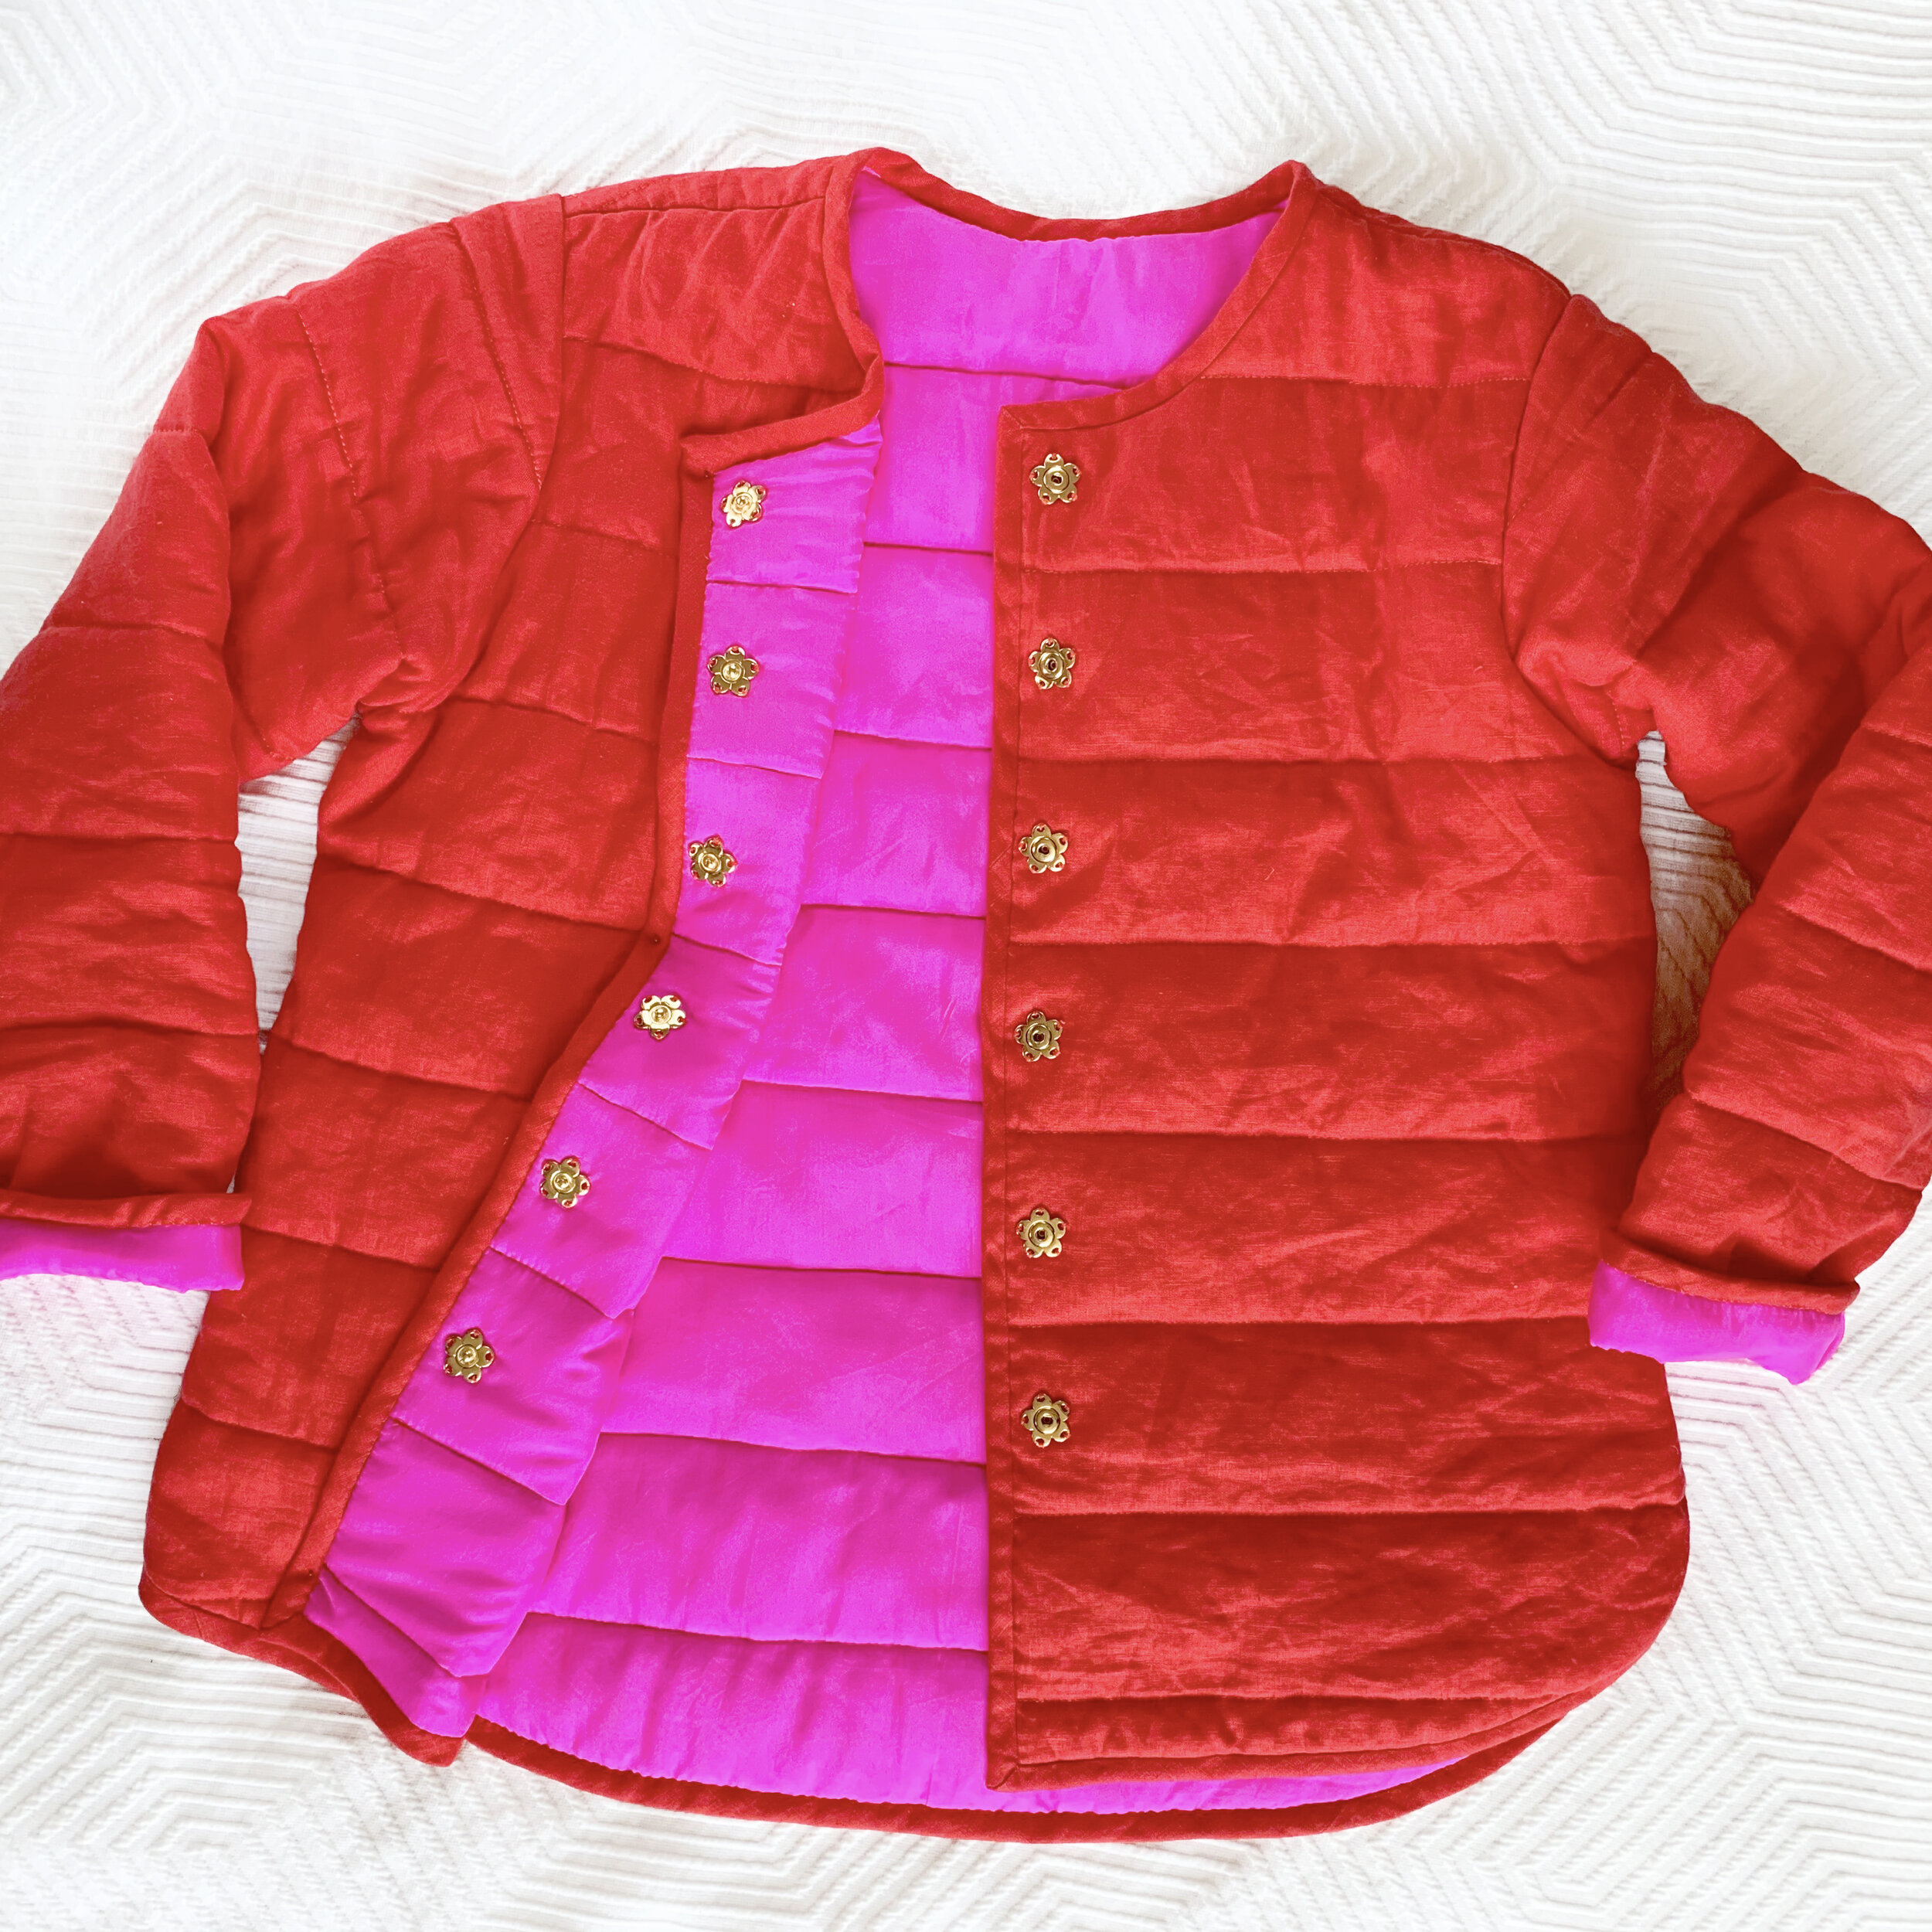
Let’s talk about my pattern choice. I wanted a collar, but I also wanted a simple pattern that would lend itself to quilted fabric, which can become bulky very quickly. I have already sewn the Grainline Studio Tamarack Jacket a couple times - here is my red linen and hot pink silk version. I chose to base this quilted jacket off the Tamarack pattern almost entirely because the sleeve is easy to insert with bulky quilted fabric, and because I knew the fit already (FYI: I sized down from my measurements on the envelope, after pin-fitting my first version. You may wish to muslin before committing to a size.) It is a very simple pattern, which is ideal for a quilted project.
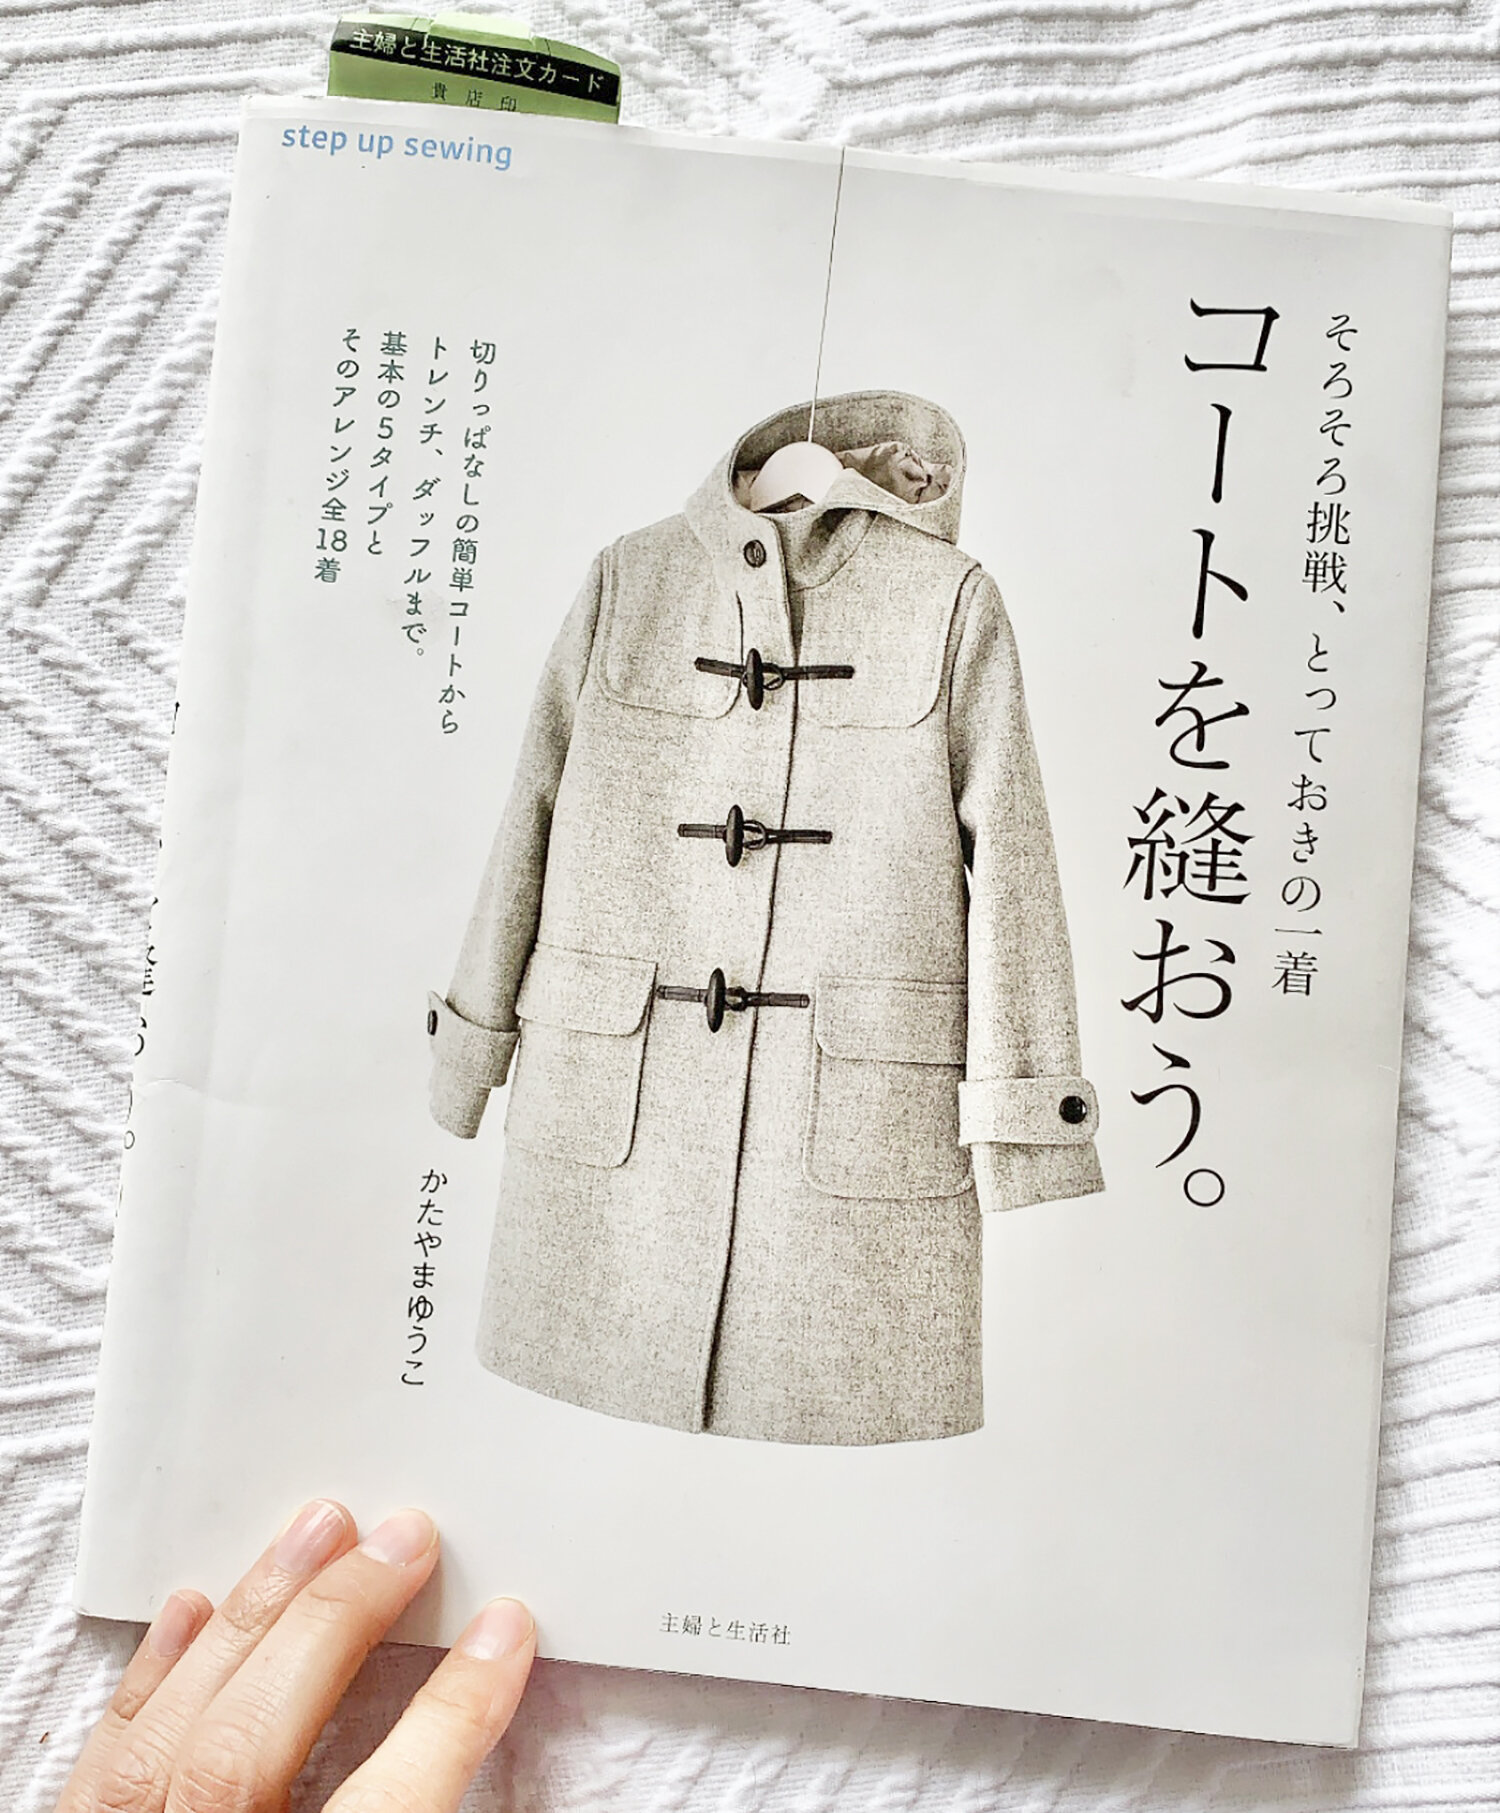
Ok, so the Tamarack covers most of my needs, but it lacks a collar! Reminder - I made this during Stay at Home orders in NYC, so I wasn’t buying anything new. Luckily I own a lot of patterns. Step Up Sewing is my personal favorite coat pattern book. I used it to make my favorite winter coat. (lol do I only make Dream Coats? Hold that thought, more on dreams later…) I found a collar in the book that fit my vision (the collar from coat D-2), and traced off pattern pieces not just for the collar, but for the neckline and shoulder of that pattern.
I don’t have photos of this because when making the jacket, I didn’t consider writing a blog post, but you could duplicate this process with any 2 patterns you own. I laid the patterns on top of each other, and gently grafted them together. You can fudge things here and there with a French curve, and check your work by walking the seam lines to make sure pieces fit together. Basically, I wanted the collar and neckline grafted on to the Tamarack. Magically, this required minimal adjustment (both patterns are relatively simple).
Additionally, I lengthened the body of the jacket, and straightened the hem. I lengthened the arms by 1”, and I wish I had added 1.5-2” more than that (my arms are not extra long, but I need more length from this pattern)! I did not make a muslin, because I didn’t want to and I’d sewn this pattern before…but again, I encourage you to do so.

PATCHWORK PLACEMENT:
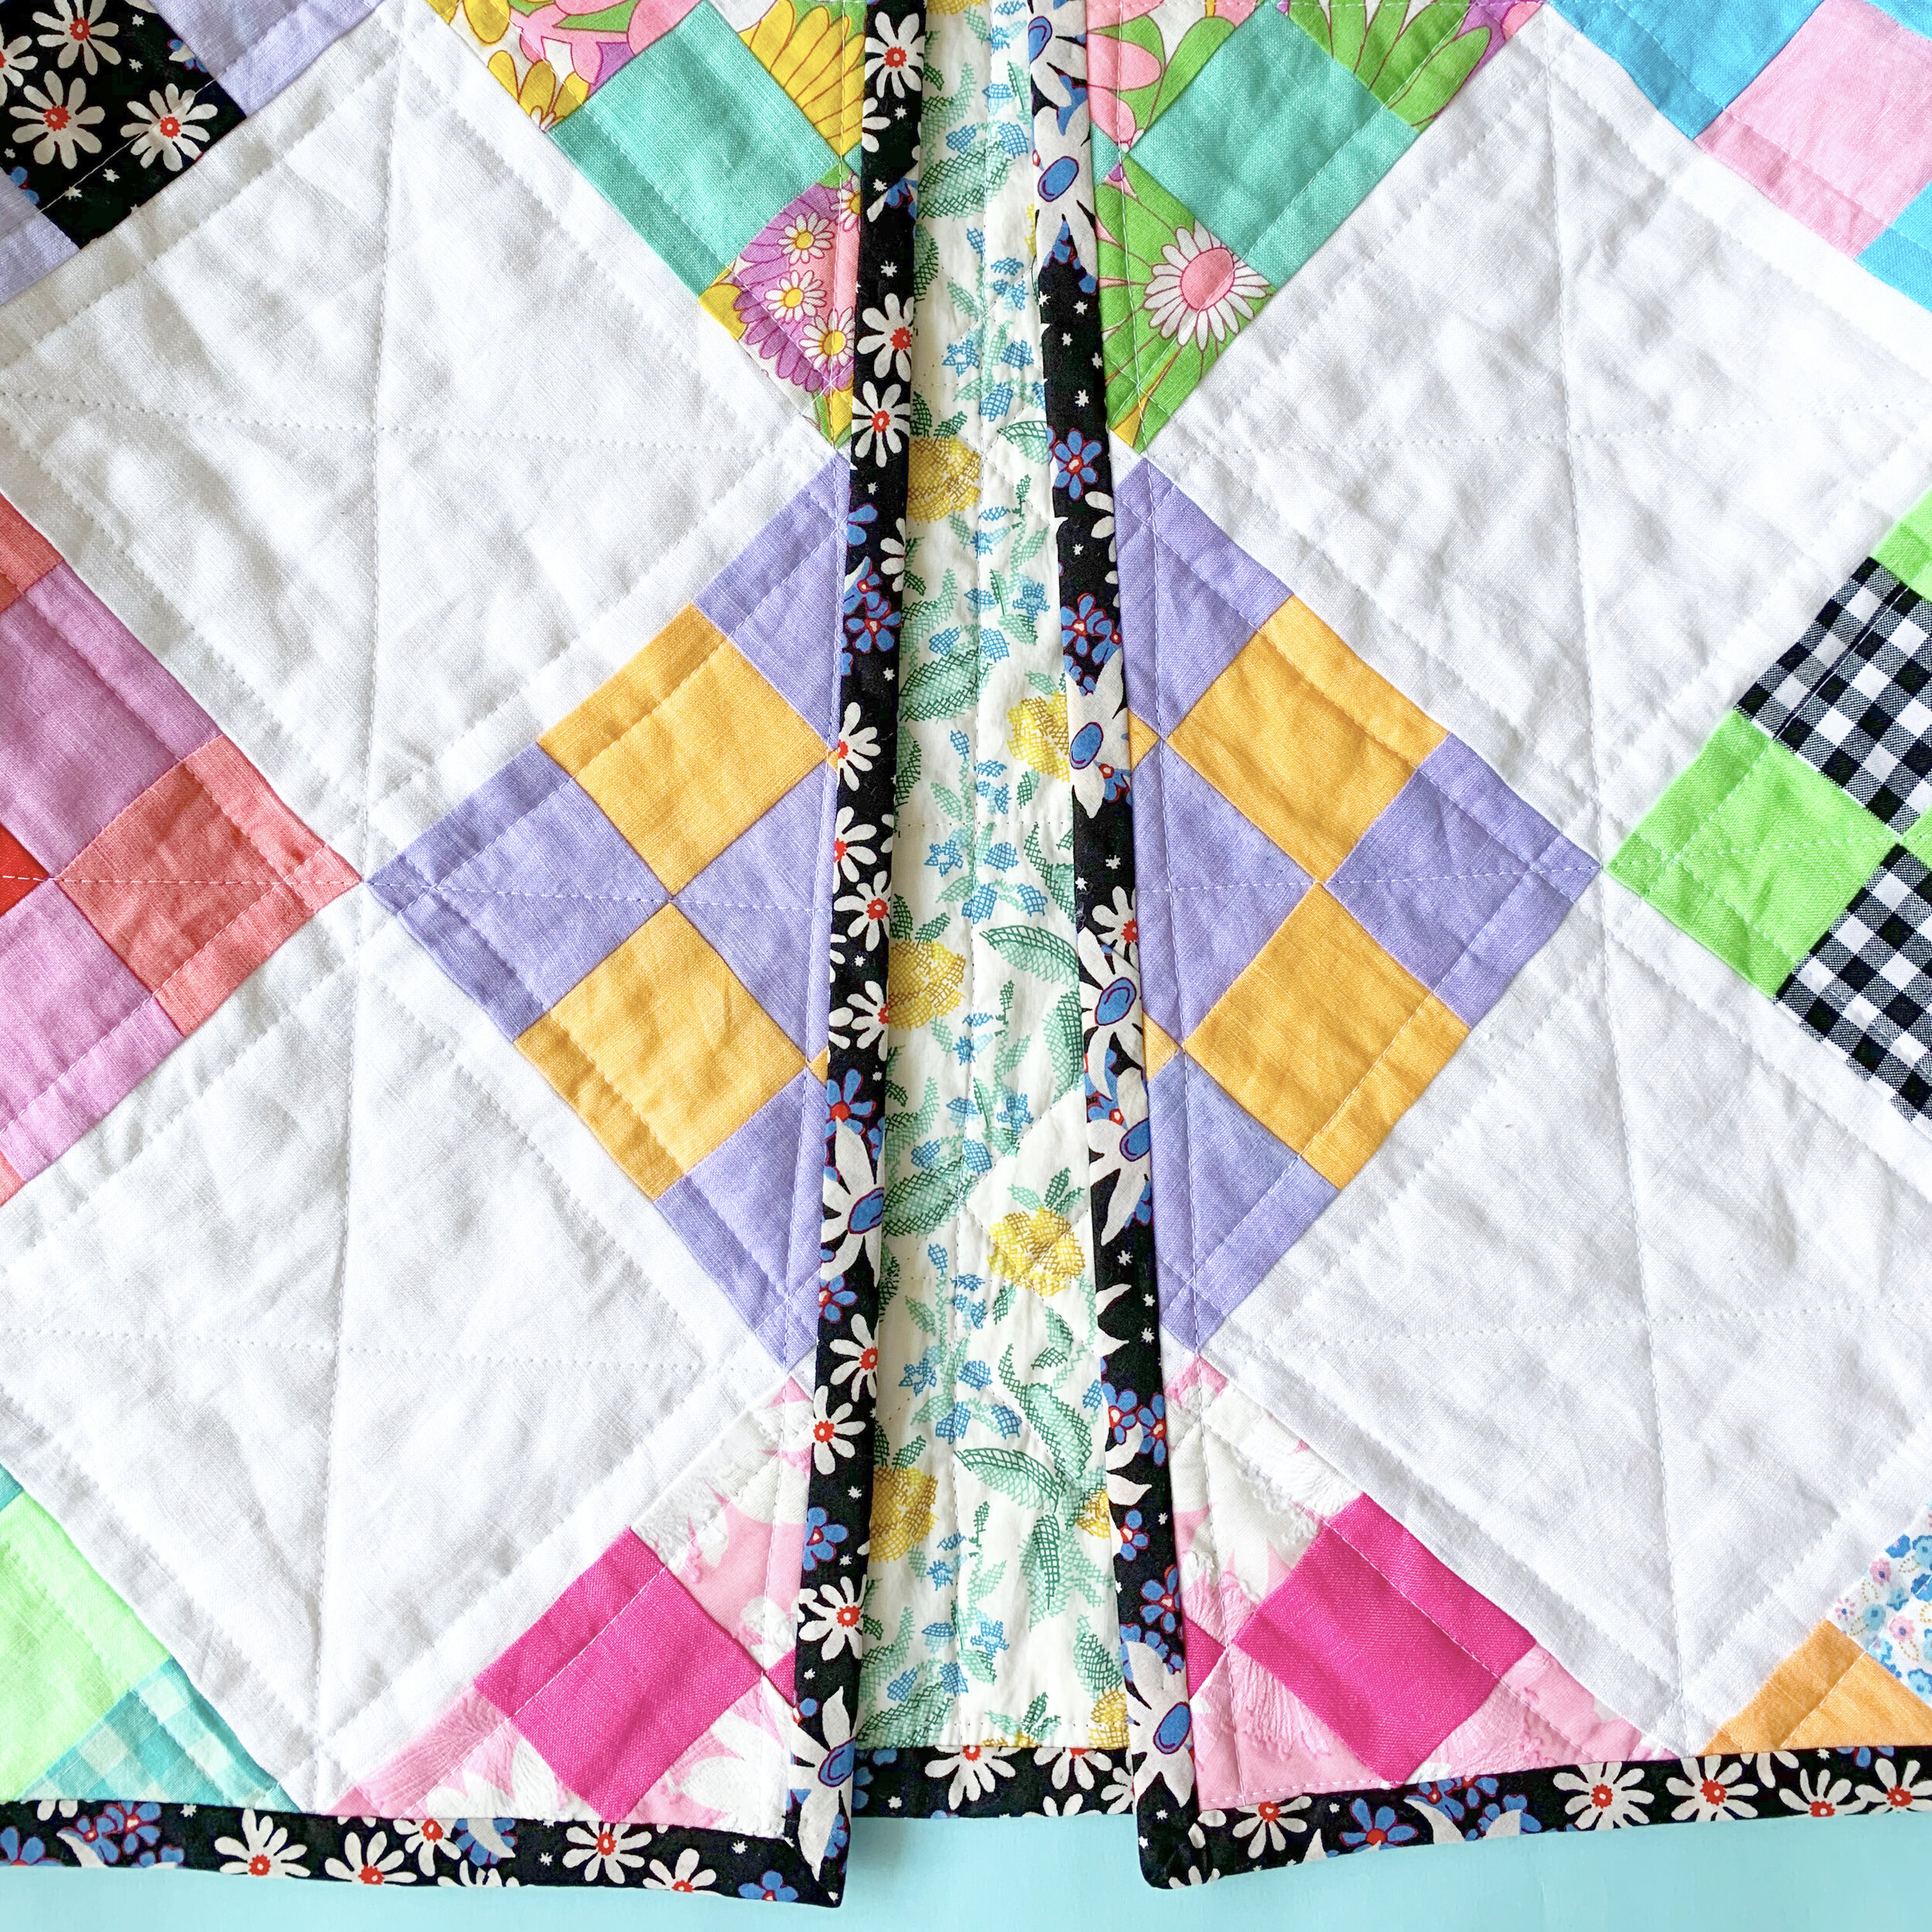
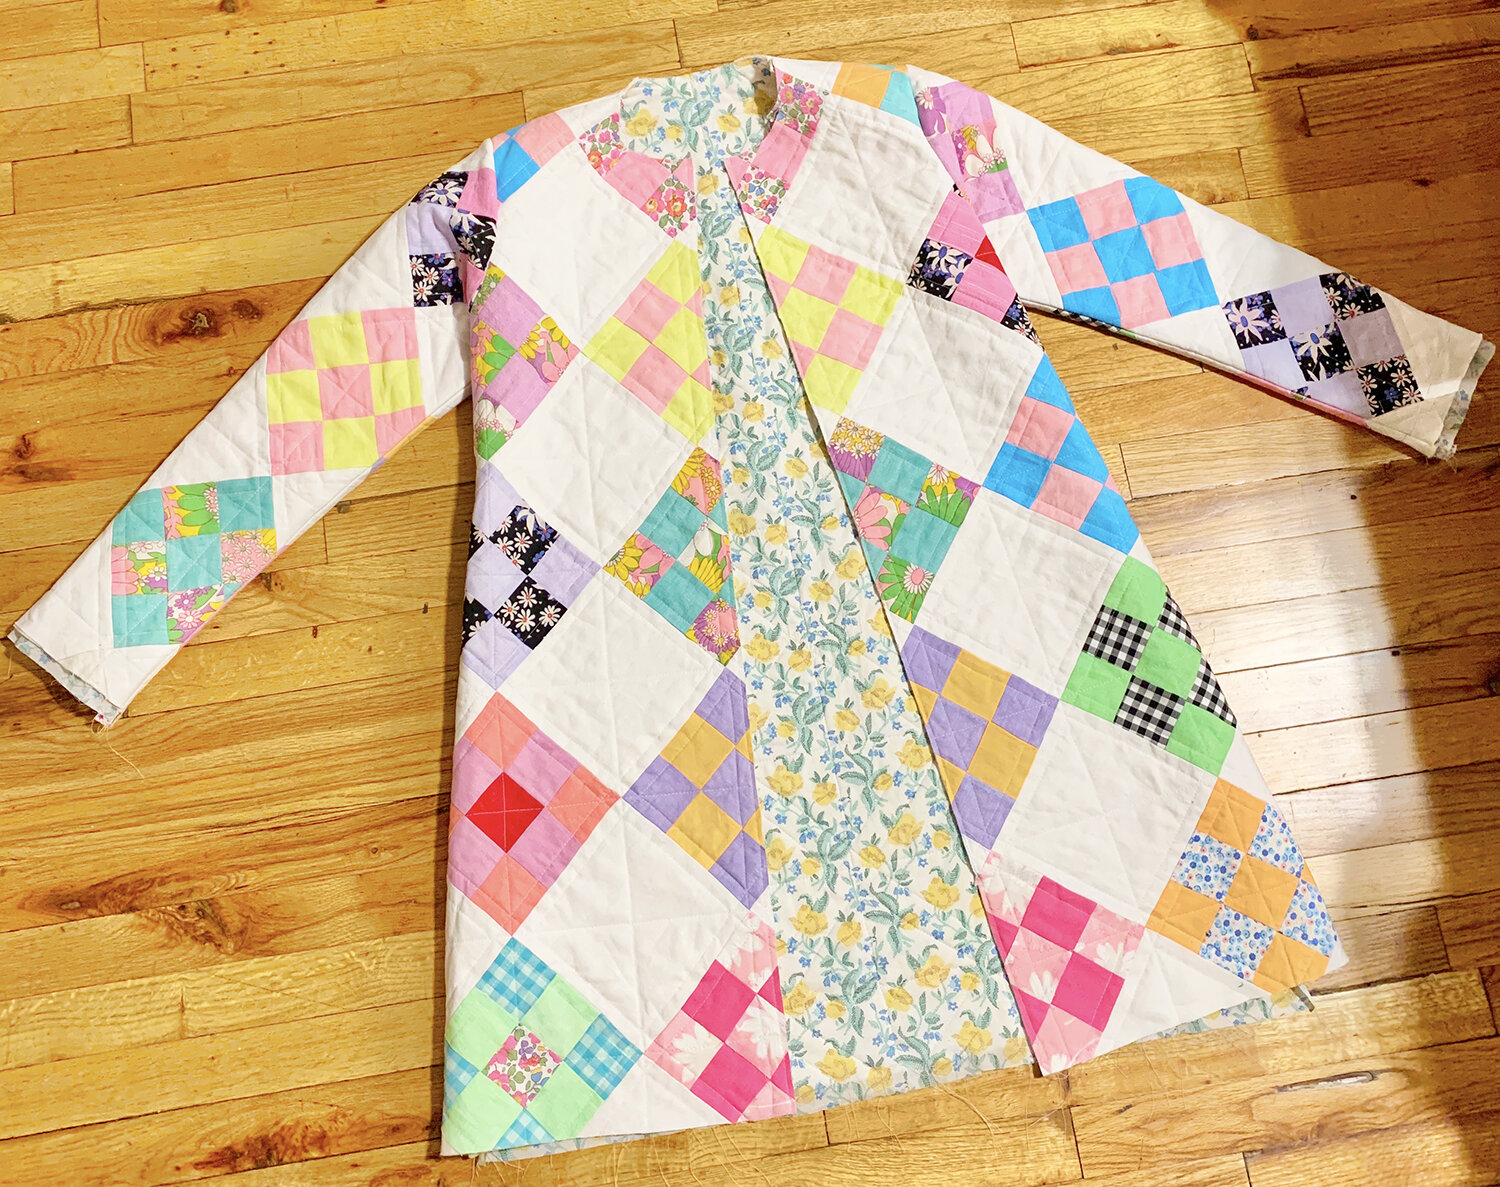
Before I sewed all my patchwork together, I laid all the individual squares on the floor with my pattern pieces and decided on the arrangement. Here you can see the front pieces, with matching patchwork at center front. Once I was happy with placement, I sewed them together with solid white squares, and put the pattern on top to check my work once again. Every time you piece squares together, it all gets smaller due to the seam allowance uptake, so be sure to double and triple check at the end of each step.

To make placement easier, I traced off full pattern pieces - not half pieces to cut on fold - and I traced 2 sleeves, 2 fronts, etc. I marked pieces with grainlines and important markings like Center Back running the entire length of the pattern piece. Then I could look through my tissue at the patchwork and make sure everything was just so. I use medical tracing paper for my pattern tissue.
Here you can see the Lining (Liberty Tana lawn), bias binding used for Hong Kong seams (also Liberty Tana lawn, left over from a dress I made earlier in quarantine), and the bias binding used on all edges that show on the outside of the garment (Anna Sui deadstock cotton lawn).
QUILTING DESIGN:
Apparently I didn’t document the actual quilting portion of this project. But I know I used Quilter’s Dream Select batting left over from when I sewed my Quilted & Reversible Wiksten Haori, and my lining is a Liberty Tana lawn that I purchased as a remnant on super sale. To be honest, I don’t love the lining print. If it hadn’t been lockdown, I would have selected something else. But it is cute, high quality, and the colors match the rest of the jacket, so I can’t complain.

I created a quilt sandwich: pieced top, batting, then lining, and safety pinned everything together. Leave yourself a couple inches of extra fabric on all sides of your pattern piece for quilting uptake. I quilted straight lines through the “diamonds” both vertically and horizontally. I marked this with white Clover Chaco Liner - barely visible on the white fabric, but you can see it. Then, I stitched 3/8” from the diagonal lines, on both sides of the seam. For those rows, I used the width of my walking foot as a guide - I kept the foot lined up with the patchwork seam line.
Personally, I wouldn’t bother with quilting without a walking foot. I know that is a dramatic statement! but I don’t love quilting, and it makes it SO much easier, with beautiful results: no bunching, everything stays perfectly flat.
Once I finished quilting all of my pieces, I laid them on the floor again, and put the pattern pieces on top again. When you add quilting stitches, things shrink up a little bit, which is why you leave excess that you can trim off later. Now is the time to trim down those pieces to match the pattern.
Next, I Hong Kong finished all the long seams with bias cut Liberty Tana lawn (pink starry print) before sewing any of the pieces together. It’s easier to do this with the flat pattern pieces, especially with quilted pieces, which can get unwieldy! (Sorry, no photo of the flat pieces with finished seams, but you can see the seam finishing below.)
SEAM FINISHING & BINDINGS:
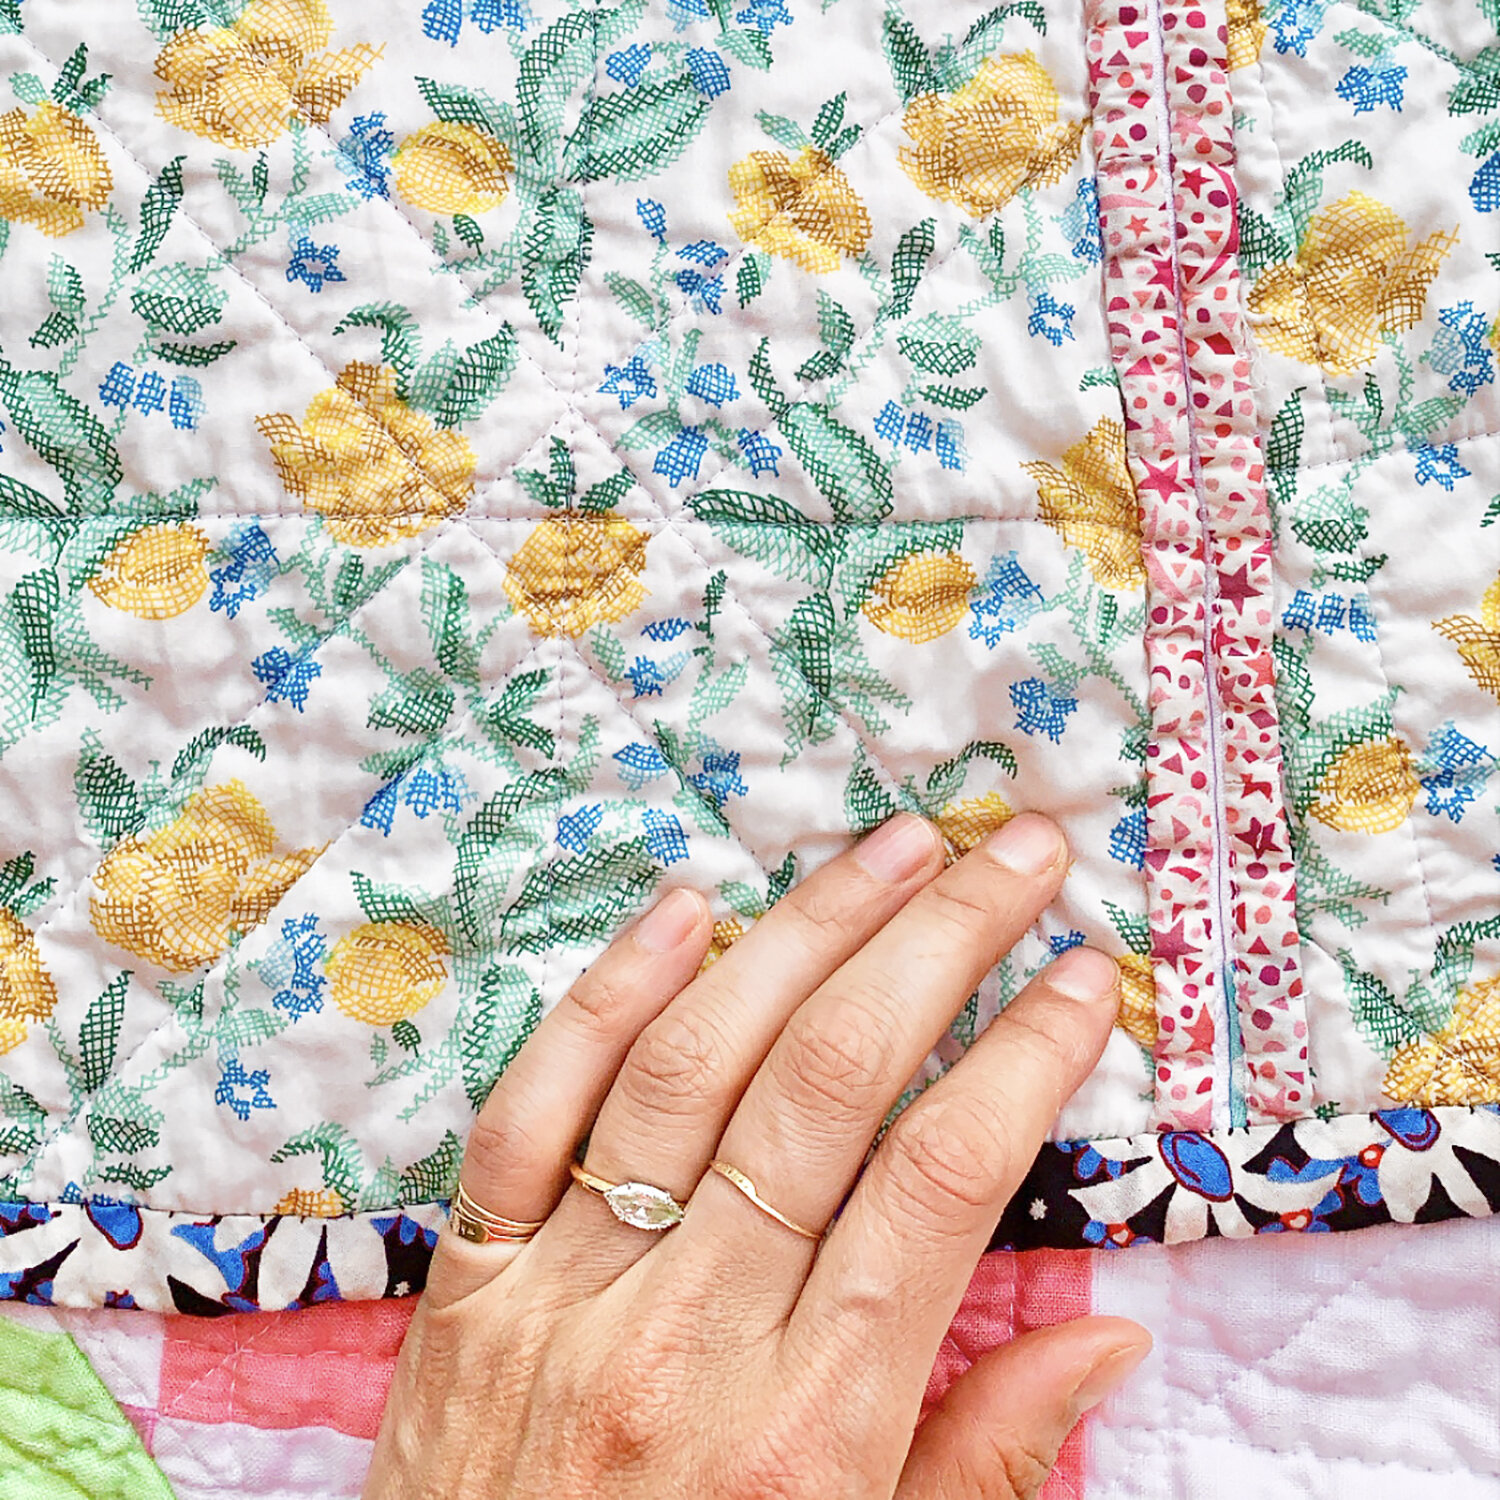
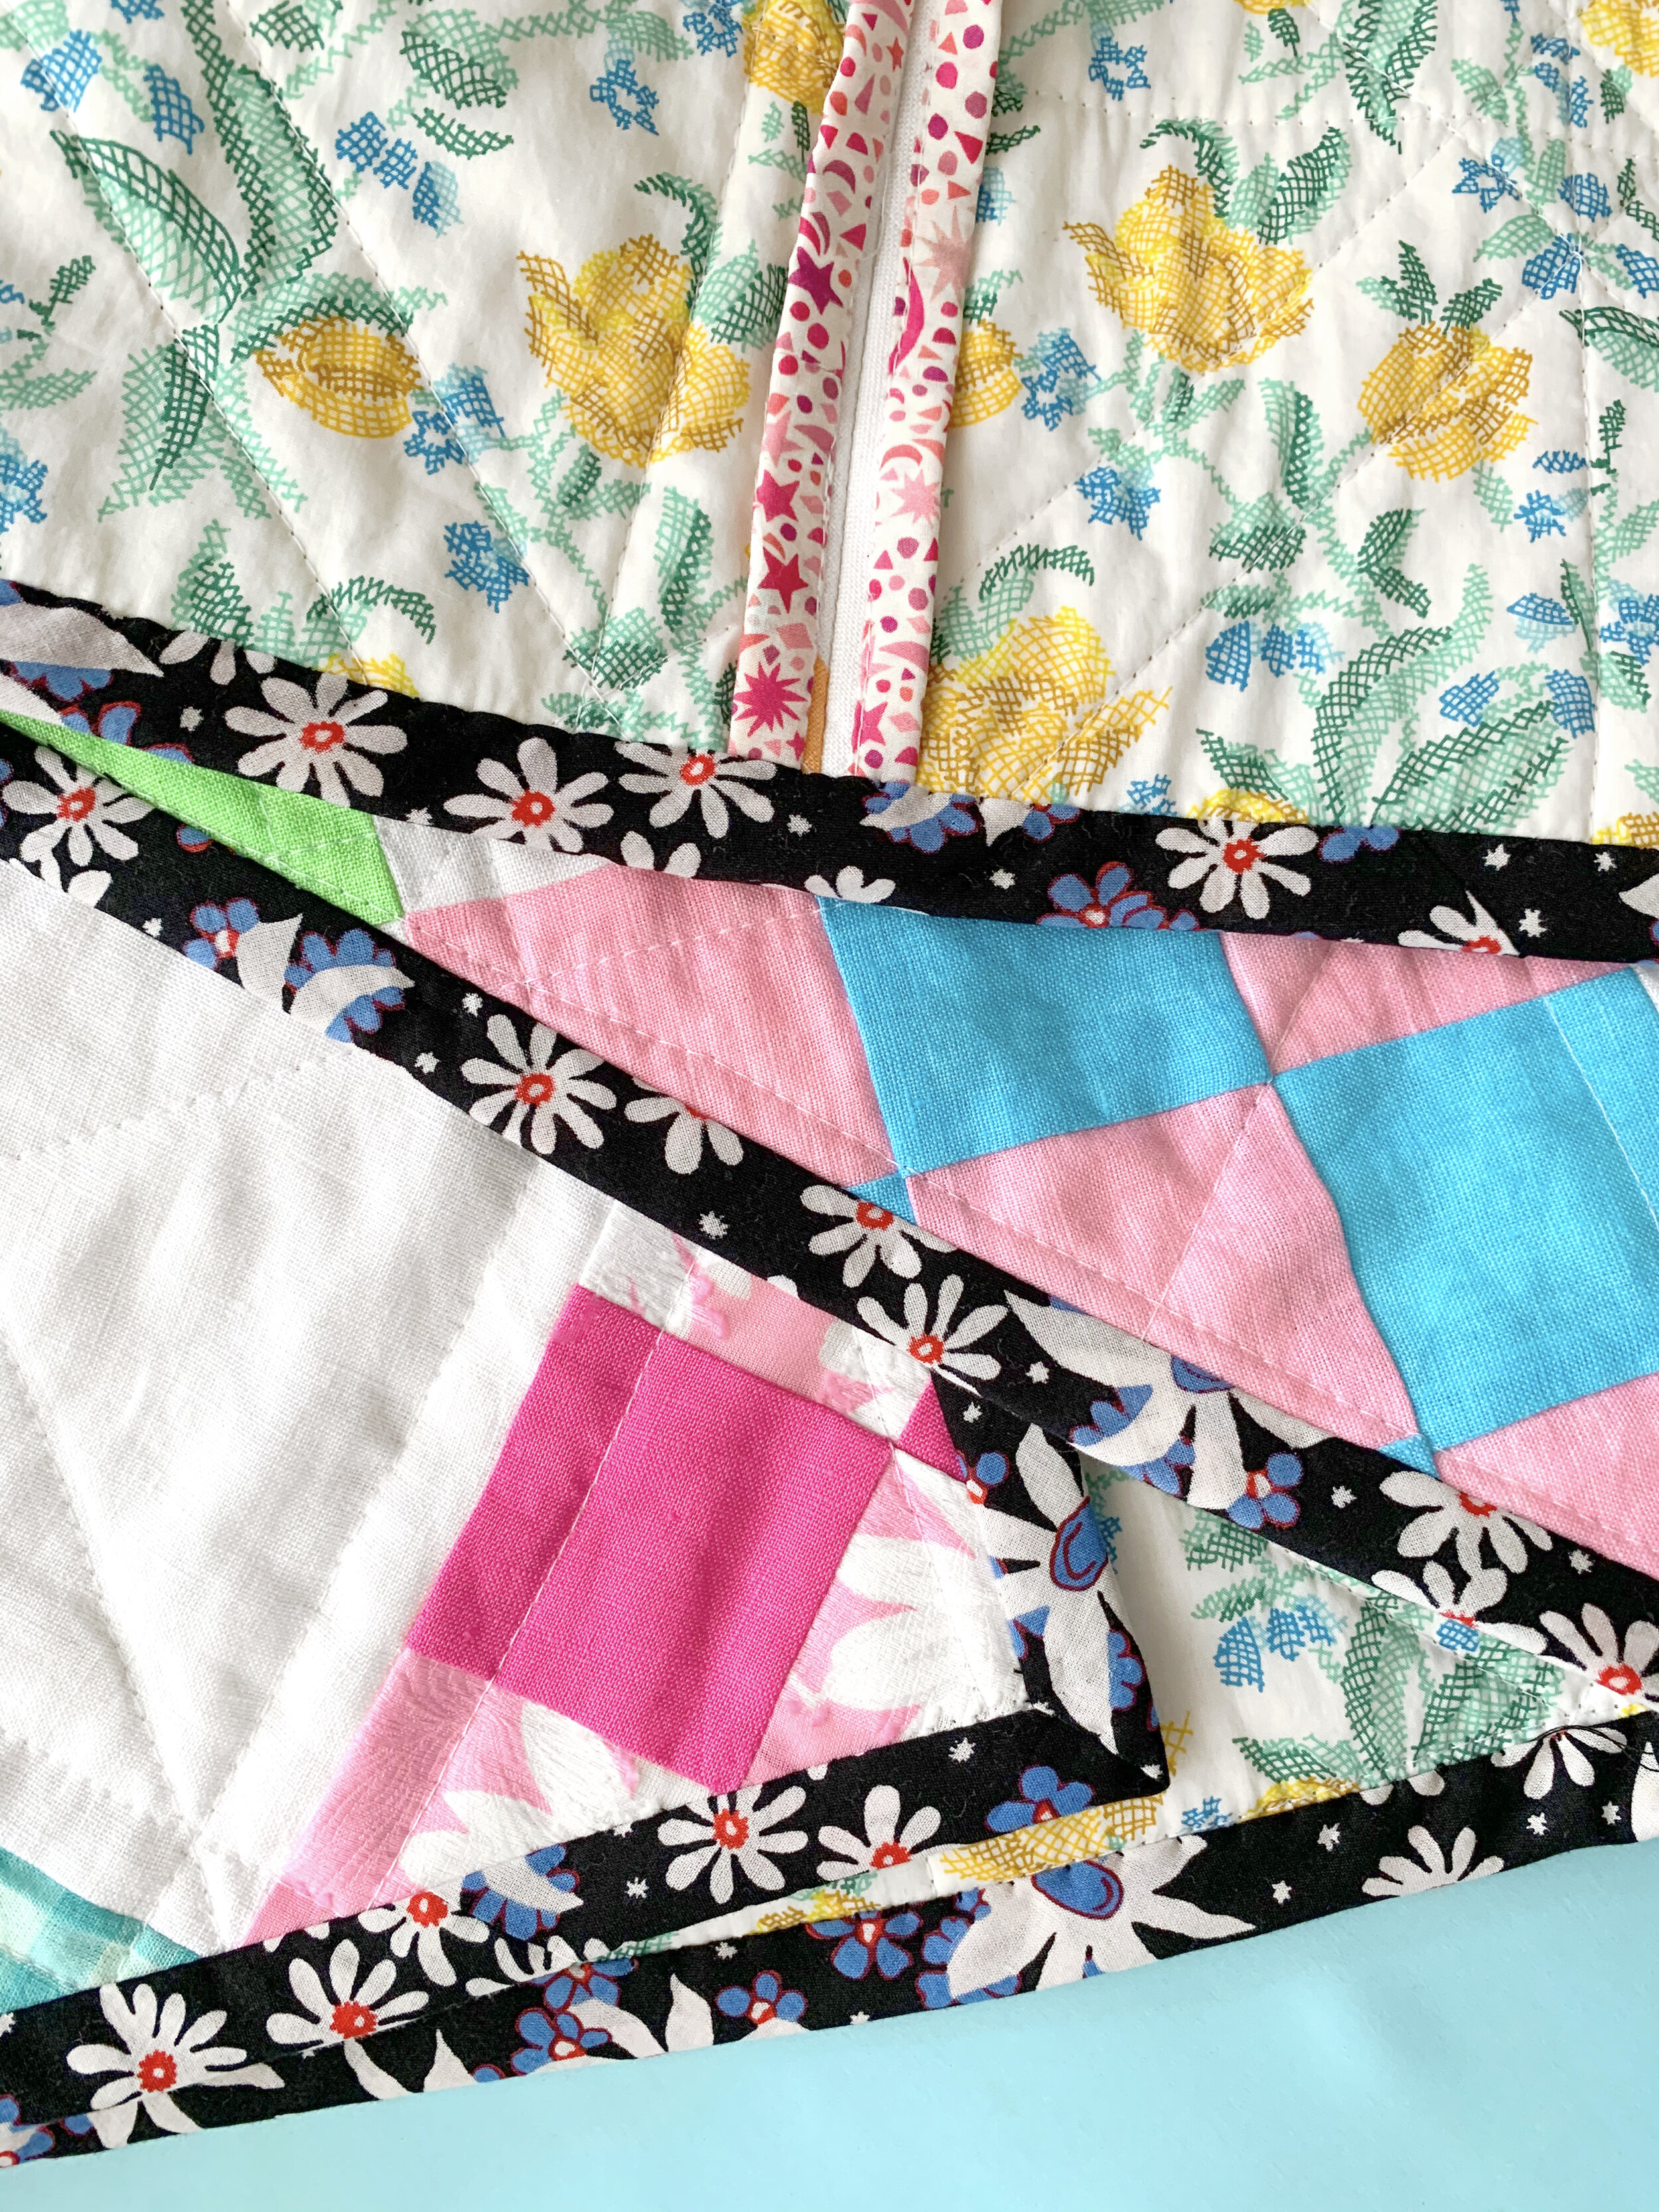
I used Hong Kong seam finishing for all interior straigt seams: side seams & sleeves. The armhole is bound with a wider piece of bias binding, with all seam allowance inside one binding. This is the pink starry print - I used scraps from a Liberty Tana lawn nightgown dress I sewed a few months prior to making this coat.
I had a different print picked out for the bias bindings that show on the exterior of the garment. I was going to use a pink floral. But I was playing around with scraps, just seeing what looked good, and once I saw this black Anna Sui cotton lawn, there was no going back. It makes the whole thing pop! It makes it easier for me to wear this jacket with black jeans or tights. I love it so much. These scraps keep on giving!
If you look closely at my binding photos, you can see that with the pink, interior Hong Kong binding, I machine stitched everything (stitch in the ditch). For the black floral bias binding, I attached the bindings to the right side of the garment by machine, and hand slip stitched them on the interior. This creates a clean finish, allowed me to shape sharply mitered corners, and while you can of course do these things entirely by machine, I prefer to do them by hand.
Also, it’s worth noting that Hong Kong finishing is different than fully bias binding an edge - I’ll save that for a separate post, so you might want to google in the meantime. And if you need a tutorial on how to make your own bias binding, here is mine!

To reduce bulk as much as possible, I invisibly, and loosely sewed down the Hong Kong finished seam allowances, ensuring they will always lay flat, even after the garment has been laundered.

Are you thinking, “Wow, what an all-consuming project!”? If so, thank you for understanding. It took 5 weeks of obsessive planning and sewing. Today I will leave you with a text message I sent to my friend Tessa, in the midst of sewing this quilted coat. Do you ever dream about sewing? Please tell me I’m not alone.
If you have found this series or this post helpful, and especially if you are going to make your own version of my quilted jacket design, please consider making a “tip” to my Kofi account. Any amount is appreciated, but please consider what you would pay if this had been a pattern offered for sale, or a class you could take online. Thank you so much, I am so thankful for your support.
The next installment of this saga will be up tomorrow! TTYL! XO, Martha