STAY HOME & SEW A SOFT SHIRRED DRESS - McCALL'S M7946

Once again, my “sewing plans” have turned into a loose suggestion of what I will sew next. Just a few days ago, I paired this fabric with another pattern, and this pattern with another fabric. But you know, sometimes, you pull everything out and swirl it all around, and you realize you had all the right ingredients, but they needed a slight remix. So here we are!
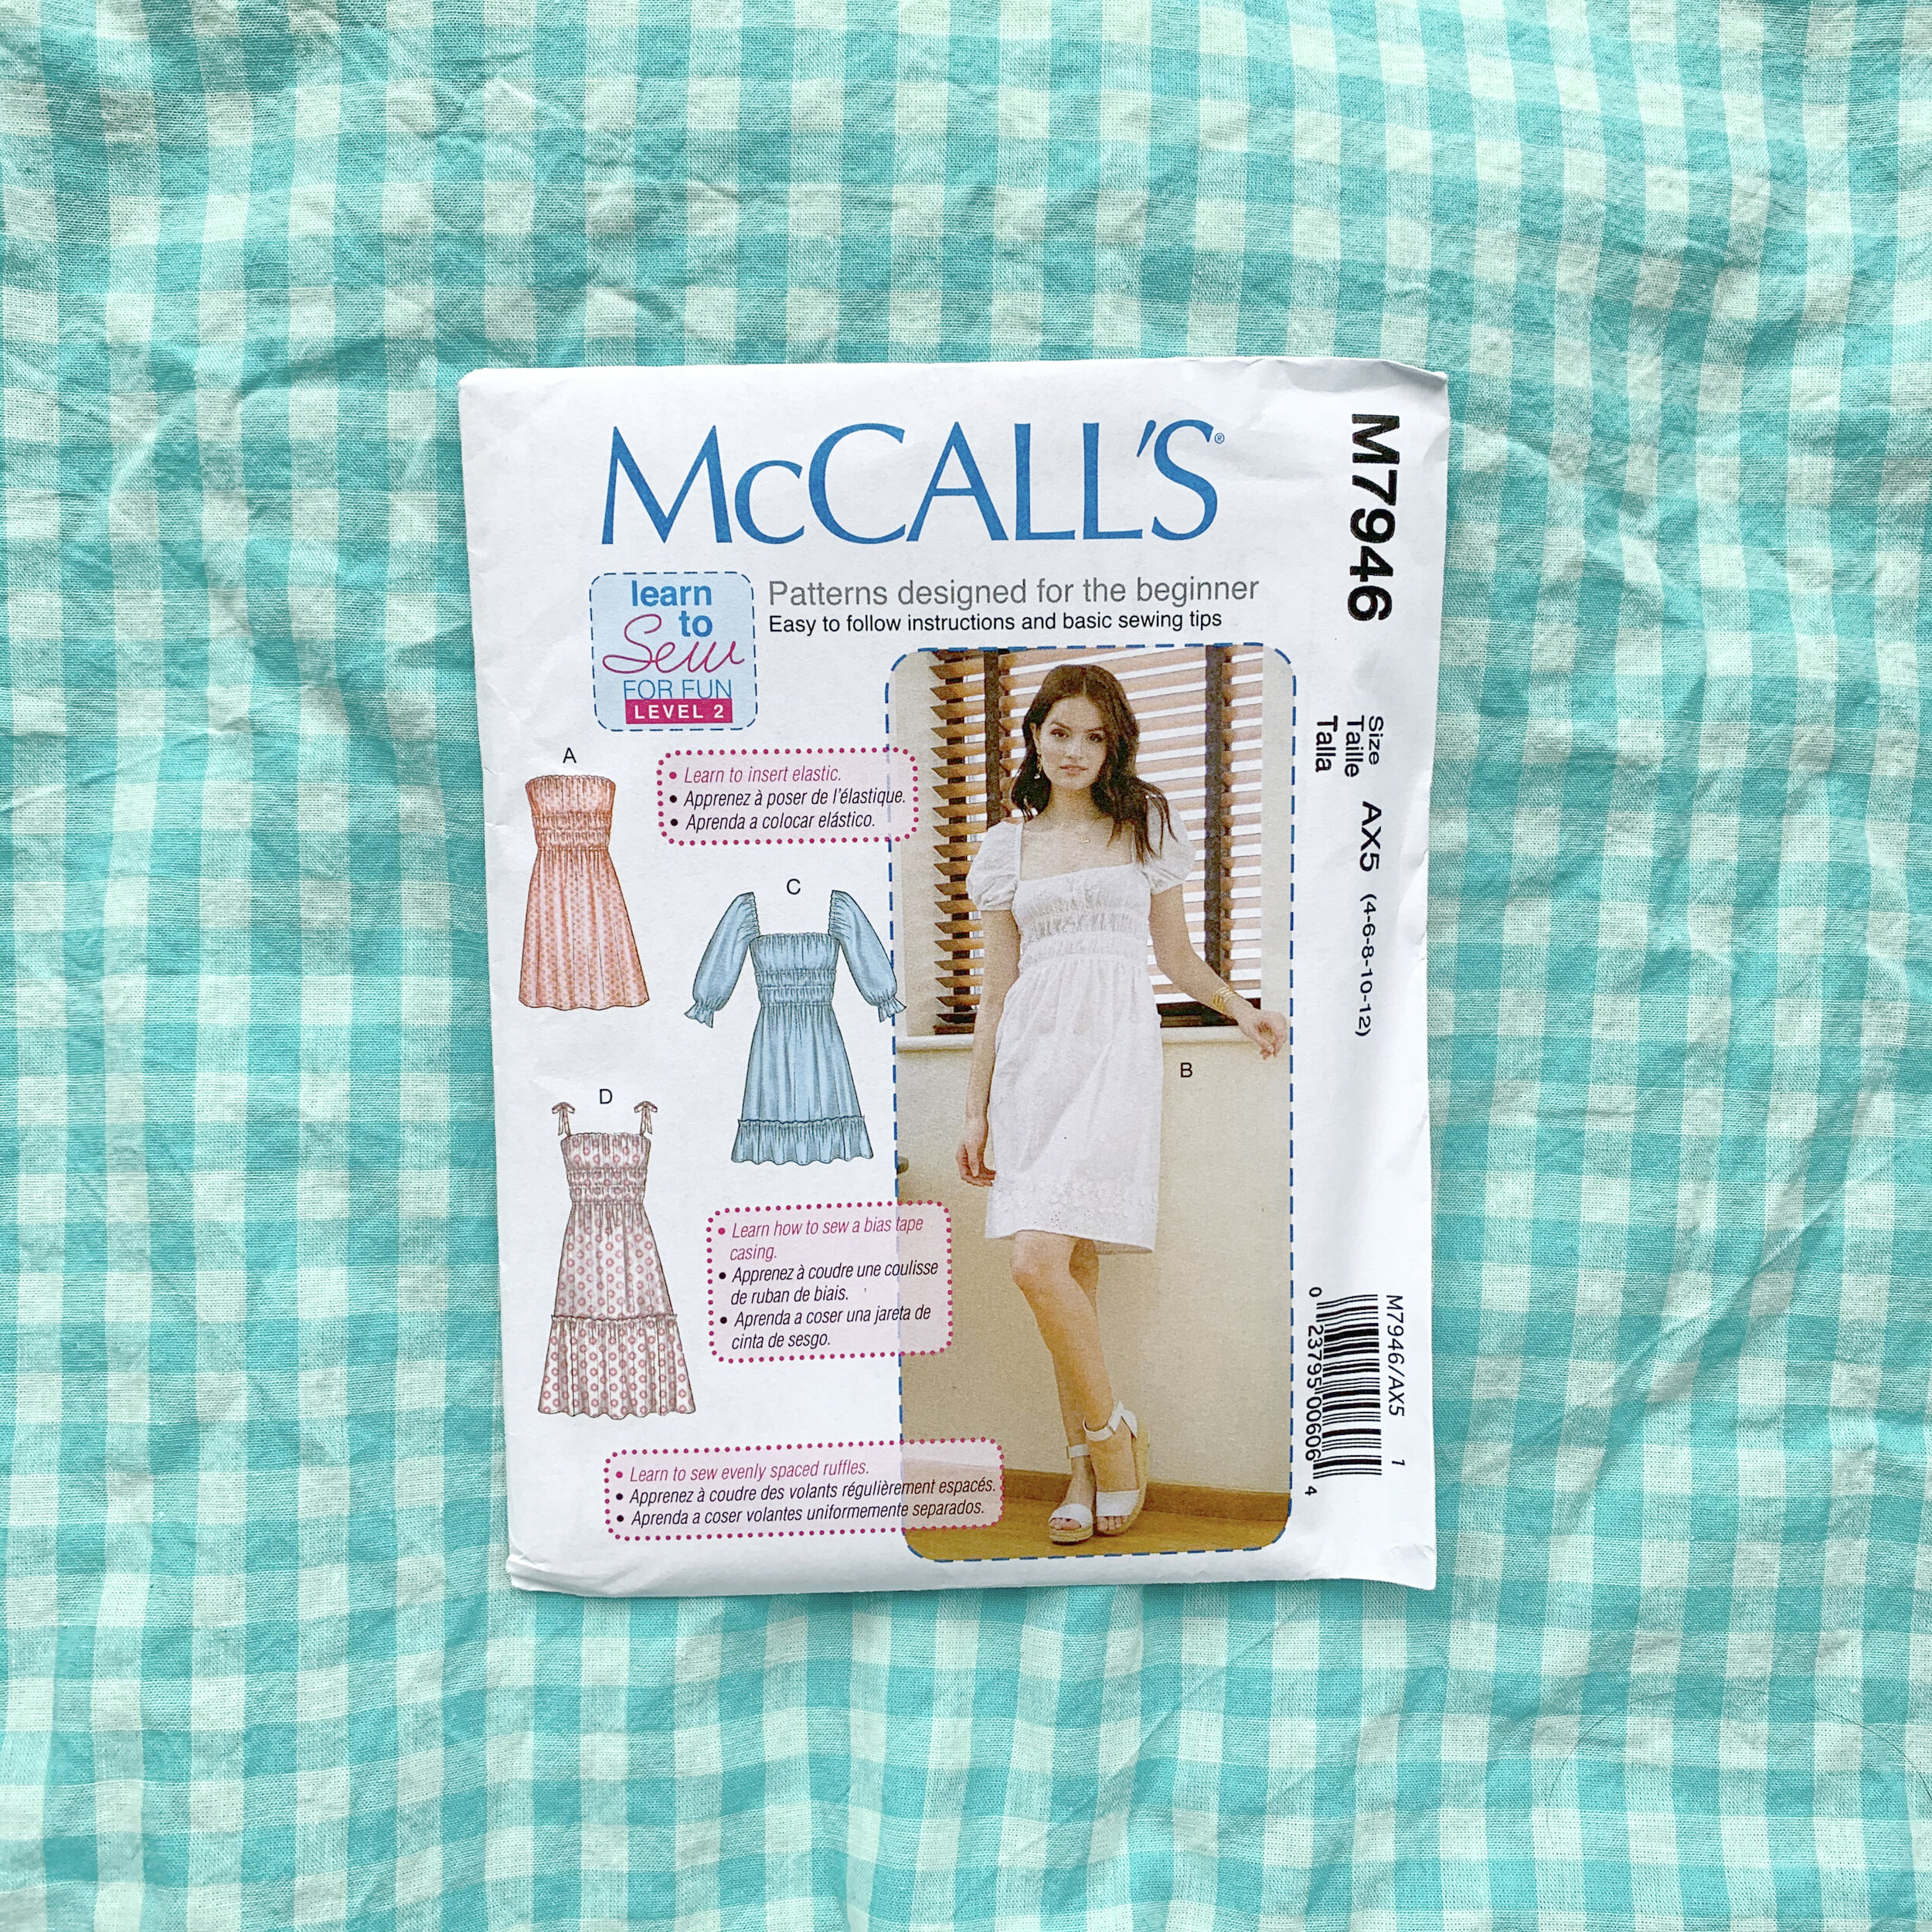
The pattern I used to sew this dress is McCall’s M7946, a “Learn to Sew for Fun” pattern. I am a self taught home sewer, and I Learned to Sew, for Fun, using almost exclusively McCall’s patterns. That’s just the brand my mom bought me growing up (she doesn’t sew, so I can’t explain her preference), and my loyalty has stayed strong. This pattern is suitable for a confident beginner, or perhaps a beginner with access to someone they can ask a few questions as they work. It is rated Level 2, so I have to imagine Level 1 patterns are great for someone who has never sewn before. I liked how much explanation was provided in the instructions. If you want to learn to sew, read everything, even the keys and cutting layouts; all the information is there!

I bought this fabric at Nur Jahan fabrics on Fulton Street in Brooklyn a couple years ago. I think it cost $1.99/yard. I bought the pink fabric and a zipper at the shop for less than $10, walked home, and sewed a dress. That dress is so well worn: practically threadbare, pit stained, rumpled, quite honestly only suitable for wear around the house. I love it so much. That affection was immediately apparent, so I walked back to Nur Jahan a couple days later to buy more of the fabric, but the pink had sold out! I bought 3 yards of the blue anyway, even though blue is my least favorite color (its about 58” wide). You know what? After a couple years on my shelf, the color has not grown on me, but the fabric promises to be a beloved dress if I’ll just give it a chance. It didn’t lie!
Let’s talk about this pattern. Something I avoid is pattern pieces that are just rectangles, because my body is not a block. If you have an hourglass figure, a rectangle will do you no favors. That being said, the amount of gathering created by shirring, or even with the technique used in the pattern (bias binding elastic casings), a rectangle can be forgiven. Still, I decided a minor alteration to the main dress pattern pieces. Below the waist seam, I gently graded out 1” at both side seams to give a bit more volume at the hip. I also lengthened the skirt about 5”, and added an 8” ruffle.
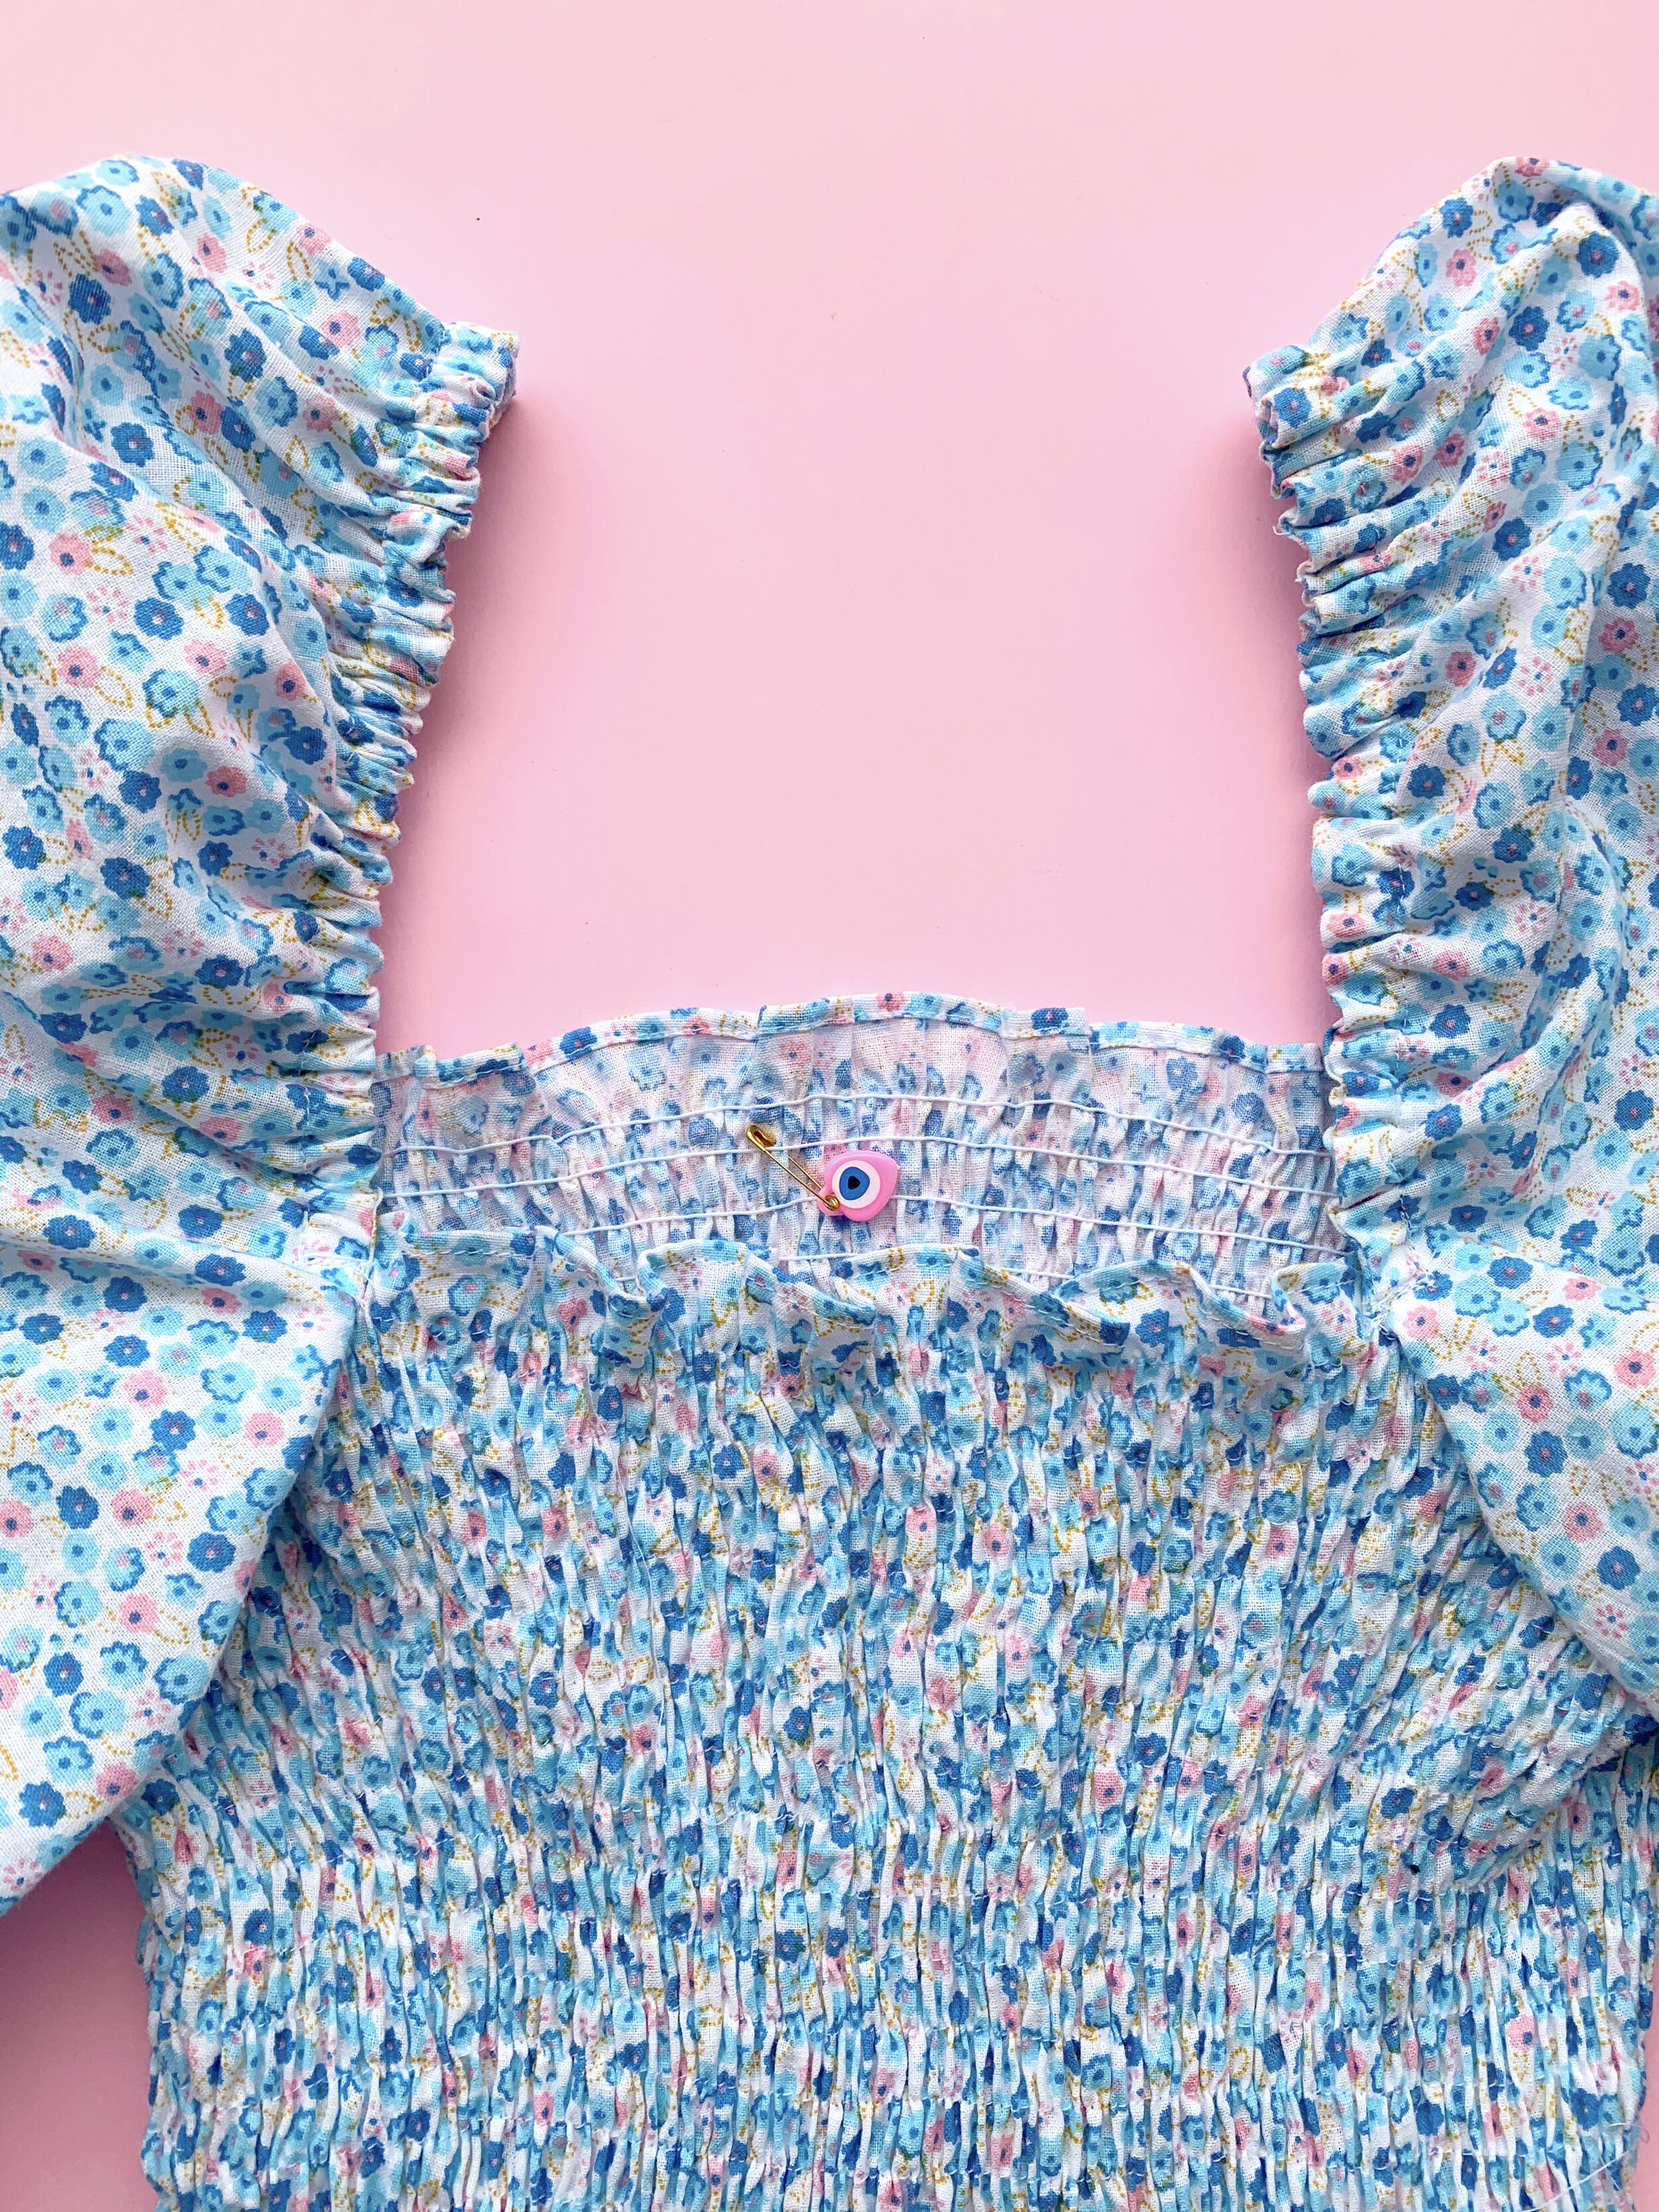
I really like that the top edge of the bodice is curved upwards at center front! The front bodice top edge goes up higher than in the back. This allows for fabric to go over the bust, and keep both the top edge of the dress and the waistline level.
A detail of my shirring. The lumpy line is the side seam.
My biggest change to this pattern is obviously that I shirred the bodice, instead of sewing the bias casings and inserting elastic. The result is the same - fabric is gathered to create nipped in areas that release to create volume - so you don’t need to make any fitting alterations to accomodate the different technique.
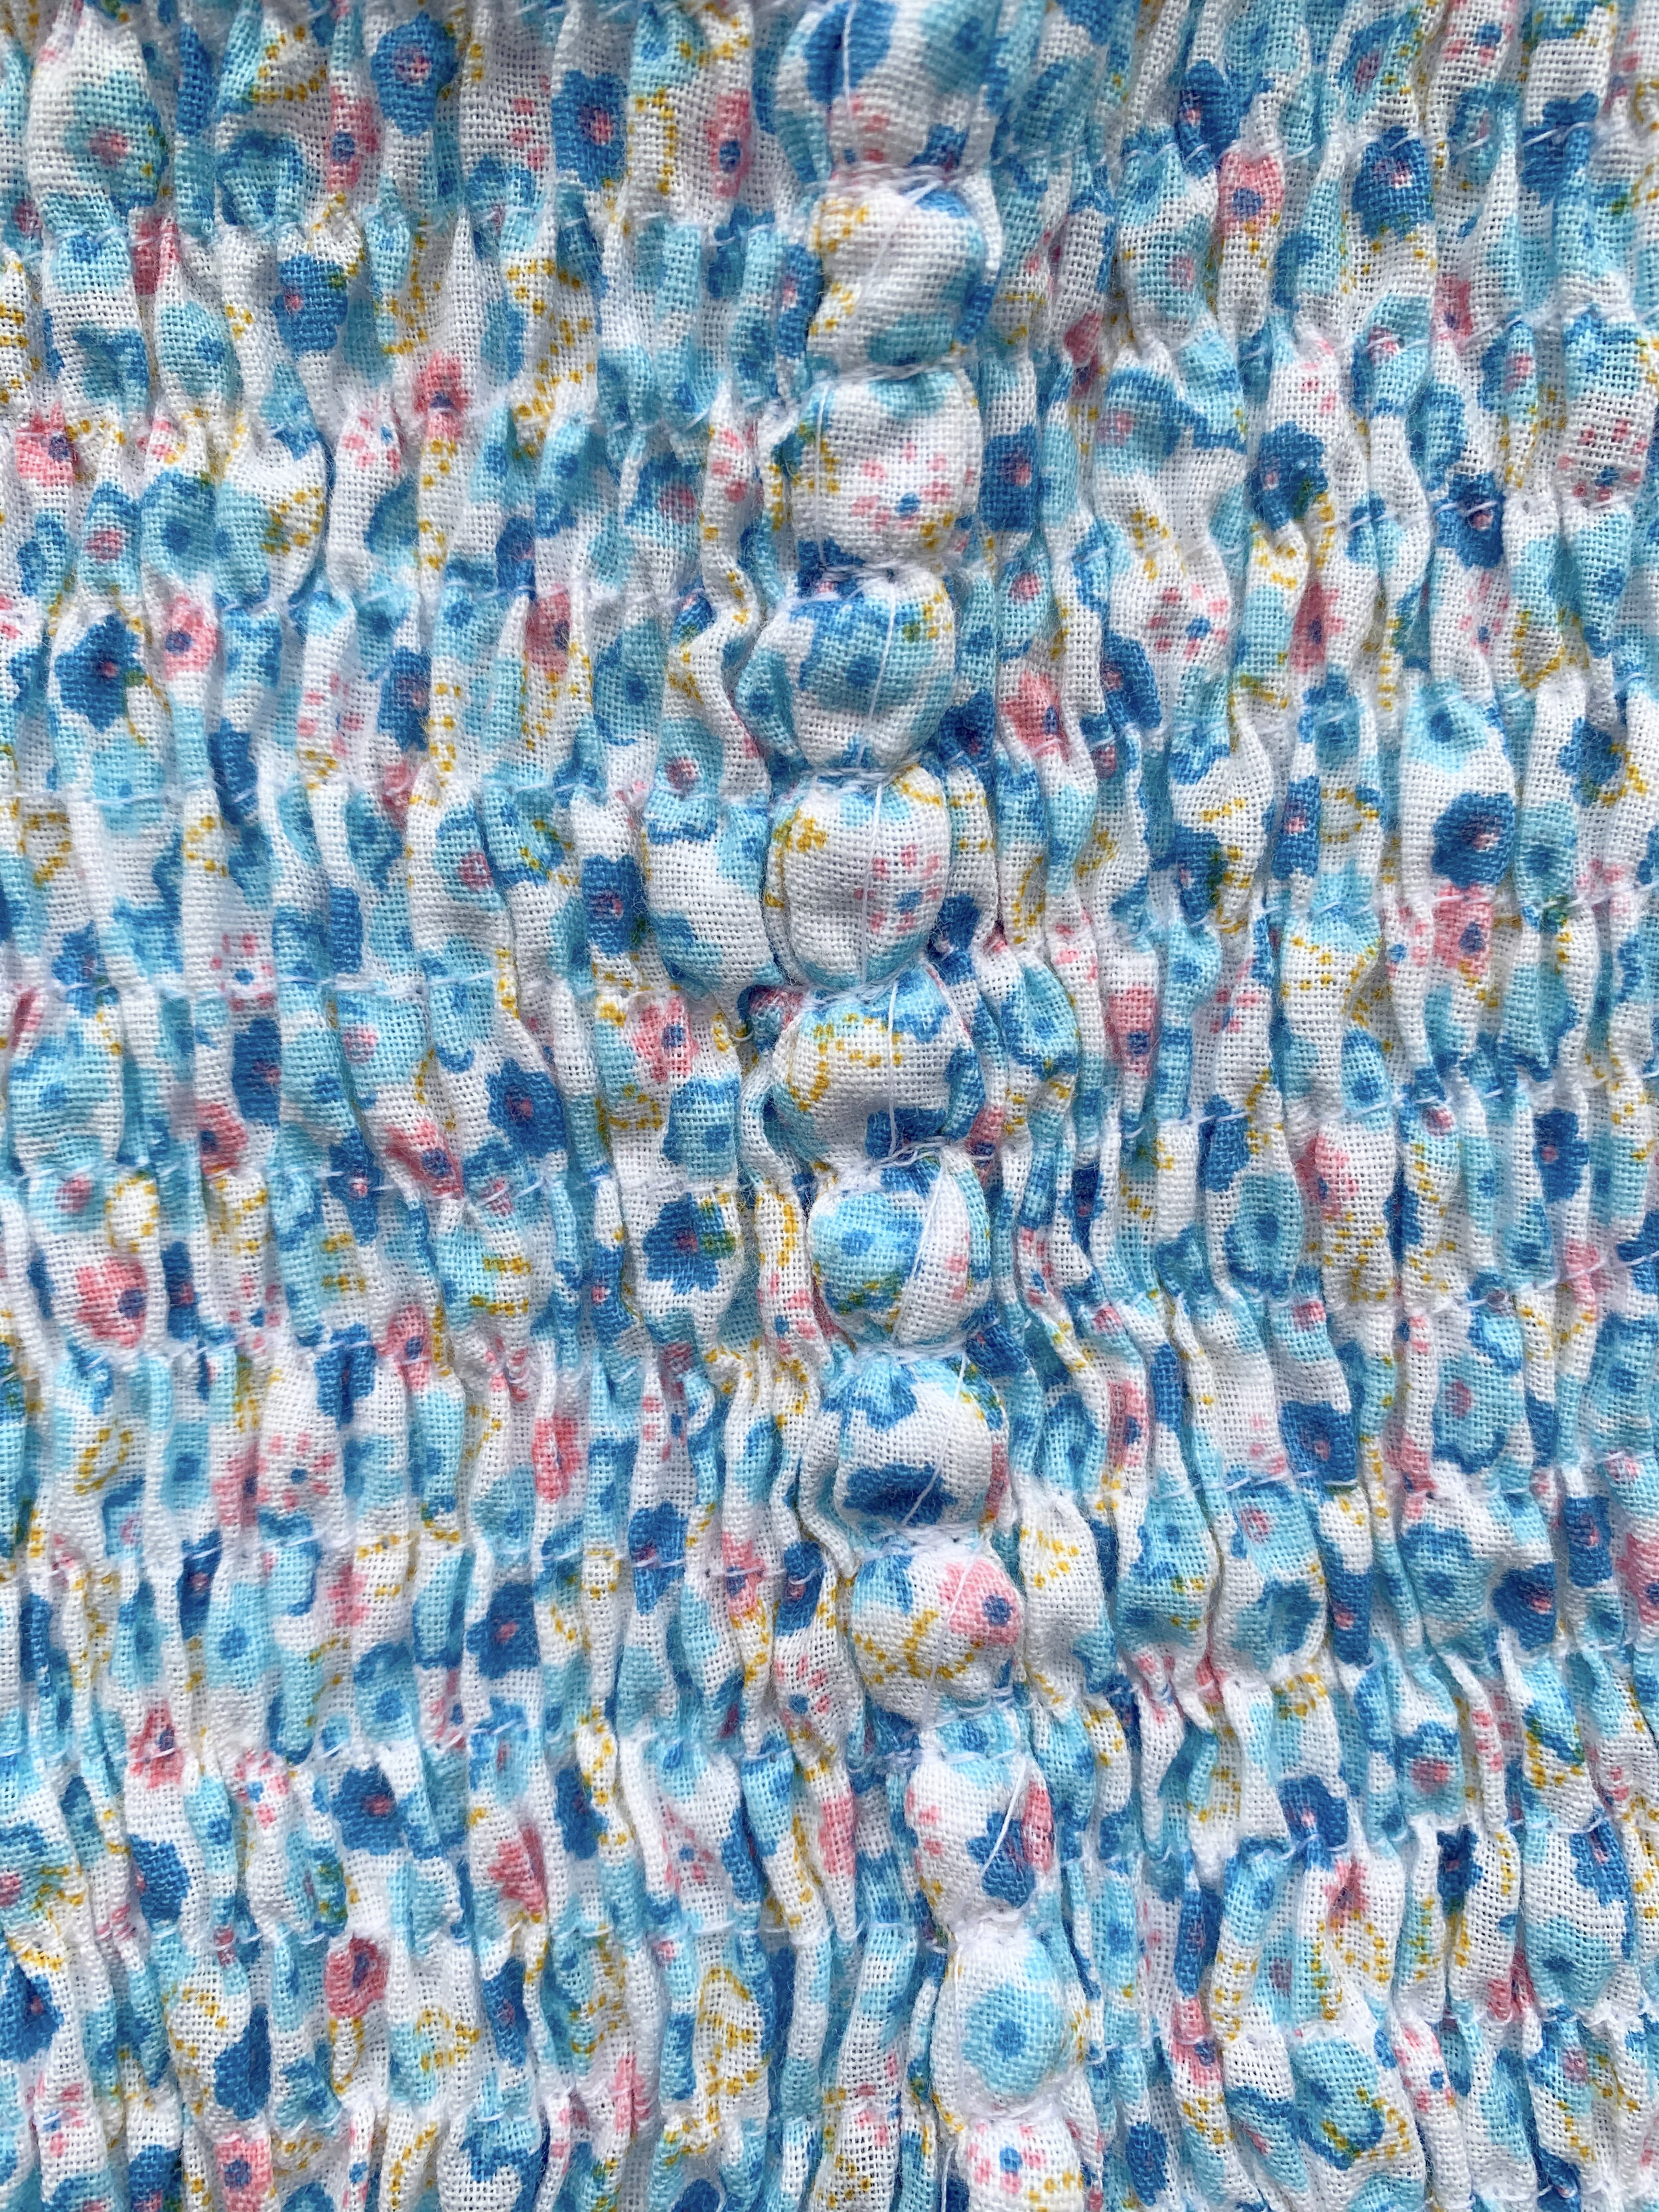
I assembled the bodice - which was just sewing the side seams and finishing them inside with a 3 thread narrow overlock on my serger. I then finished the top edge with my rolled hem foot, to create a tiny baby hem there. I shirred in concentric circles, beginning at the top edge of the dress, 3/4” away from the top edge. This allows the edge to form a 3/4” ruffle once there is shirring. As I mentioned before, the top edge of the dress is higher at the front than the back, to accomodate the curve of your bust. This means that as you sew around the circumference of the dress, you follow that curve. I shirred as many rows as was required to hit my natural waist when I tried on the dress. When you wear the dress, the shirring will all be level at the waist.

I used Gutterman elastic thread that I found in my stash. I used 2 full spools with nothing left to spare!
Shirring is not complicated, but it is tedious. Patience is important here because you are going to sew many rows and it’s kinda boring. It had been a few years since I had last tried shirring, and I found this blog post on the Bernina website, written by Erica Bunker, to be an ideal refresher. No matter what, plan on making a few test swatches before diving in to your project. Practice makes perfect!
Here’s what worked for me: I wound my bobbins by hand, and did not stretch the elastic at all. If you google around, you will see that some people stretch the elastic slightly. I did not stretch it at all, but this may depend on your machine. It is important not to over-wind your bobbin. The elastic thread is spongy, and if you wind a full bobbin, it’s just going to jam. Wind it about 75% full. Guess what? You’re gonna get to wind it a few times, there’s no point in trying to avoid the inevitable. Your top thread should be your regular thread that matches your fabric. The shirring takes place with fabric face up.
You will need longer stitches so that when the elastic is stretched, the regular thread can stretch around your body without popping and breaking and undoing all your hard work! I used a stitch length of 4 (I sew on a Bernina). After sewing my first row of shirred stitches, I sewed all of the following rows with my Reverse Pattern Foot (Bernina foot #1, it’s what I would consider a “regular” zig zag foot), lining up the edge of the foot with the previous row of stitching. I moved my needle into the far left position. This makes your rows 3/8” apart. You can play around with more or less dense rows of stitching and decide what look you love. I back stitched at the beginning and end of every row; this way, if one row breaks, the rest of my work stays in tact.

When you have completed your shirring, give your garment a steam with lots of puffs of steam. Hold the iron just above the surface of the fabric, and blast it with steam. This will cause the elastic threads to shrink and contract just a bit, and the dress will have a better fit as a result.
For the sleeve, I used the pattern pieces for View C. To echo the design detail of shirring, I also shirred 3 rows along the edge of the sleeve in place of the elastic casing called for in the pattern. For the part of the sleeve that goes over the shoulder, I followed the pattern and used (homemade, self fabric bias binding). I followed the guide of elastic included in the pattern, but ultimately needed to shorten my elastic by about 3.5”. This depends on so many factors - your body shape, the elastic used, etc. - but check the fit before proceeding to much further in your construction, because it was quite long.

Inside the armscye - this is basically inside the dress, where the bodice and sleeve meet in the armpit.
Because I deviated from the pattern, and didn’t do a single moment of advanced planning, I had to figure out a couple of things on the fly. Once I had attached the sleeve, I wasn’t sure what to do with the resulting raw seam allowance. The top edge of the bodice was already hemmed. So I double folded that 5/8” seam allowance down, using the seam allowance to encase it's own raw edge, and edge stitched it in place. It looks great! You can see it near my thumb in the above photo.

This is where the sleeve attaches to the bodice.
There is one part of the pattern where there is room for improvement on the page: where the sleeve connects to the bodice. This is really only going to make sense if you are looking at the pattern pieces. On the sleeve, there is a sharp 90º turn that is reinforced with one row of stay stitching. The abrupt change is to accomodate how the fabric is shaped once part of it connects to the bodice, and the other part takes a turn to go over the shoulder. I would add a scrap of interfacing here next time before stay stitching and clipping, as the stay stitching is under a lot of pressure to hold it all together. Once this area is clipped to the stay stitching is fairly weak.
I personally don’t know the right words to use to explain this, so maybe that’s why the pattern doesn’t explain it well either. But basically, you can flippety-flop all the fabric around, and fold the seam allowance of your bias binding over the end of your elastic (the elastic that goes over your shoulder), and everything will be neatly hidden. You then just need to add some top stitching to hold this neatly in place, and it will strengthen the area, too. You can see the top stitching if you look closely at my photo, it’s in the shape of an “L”.
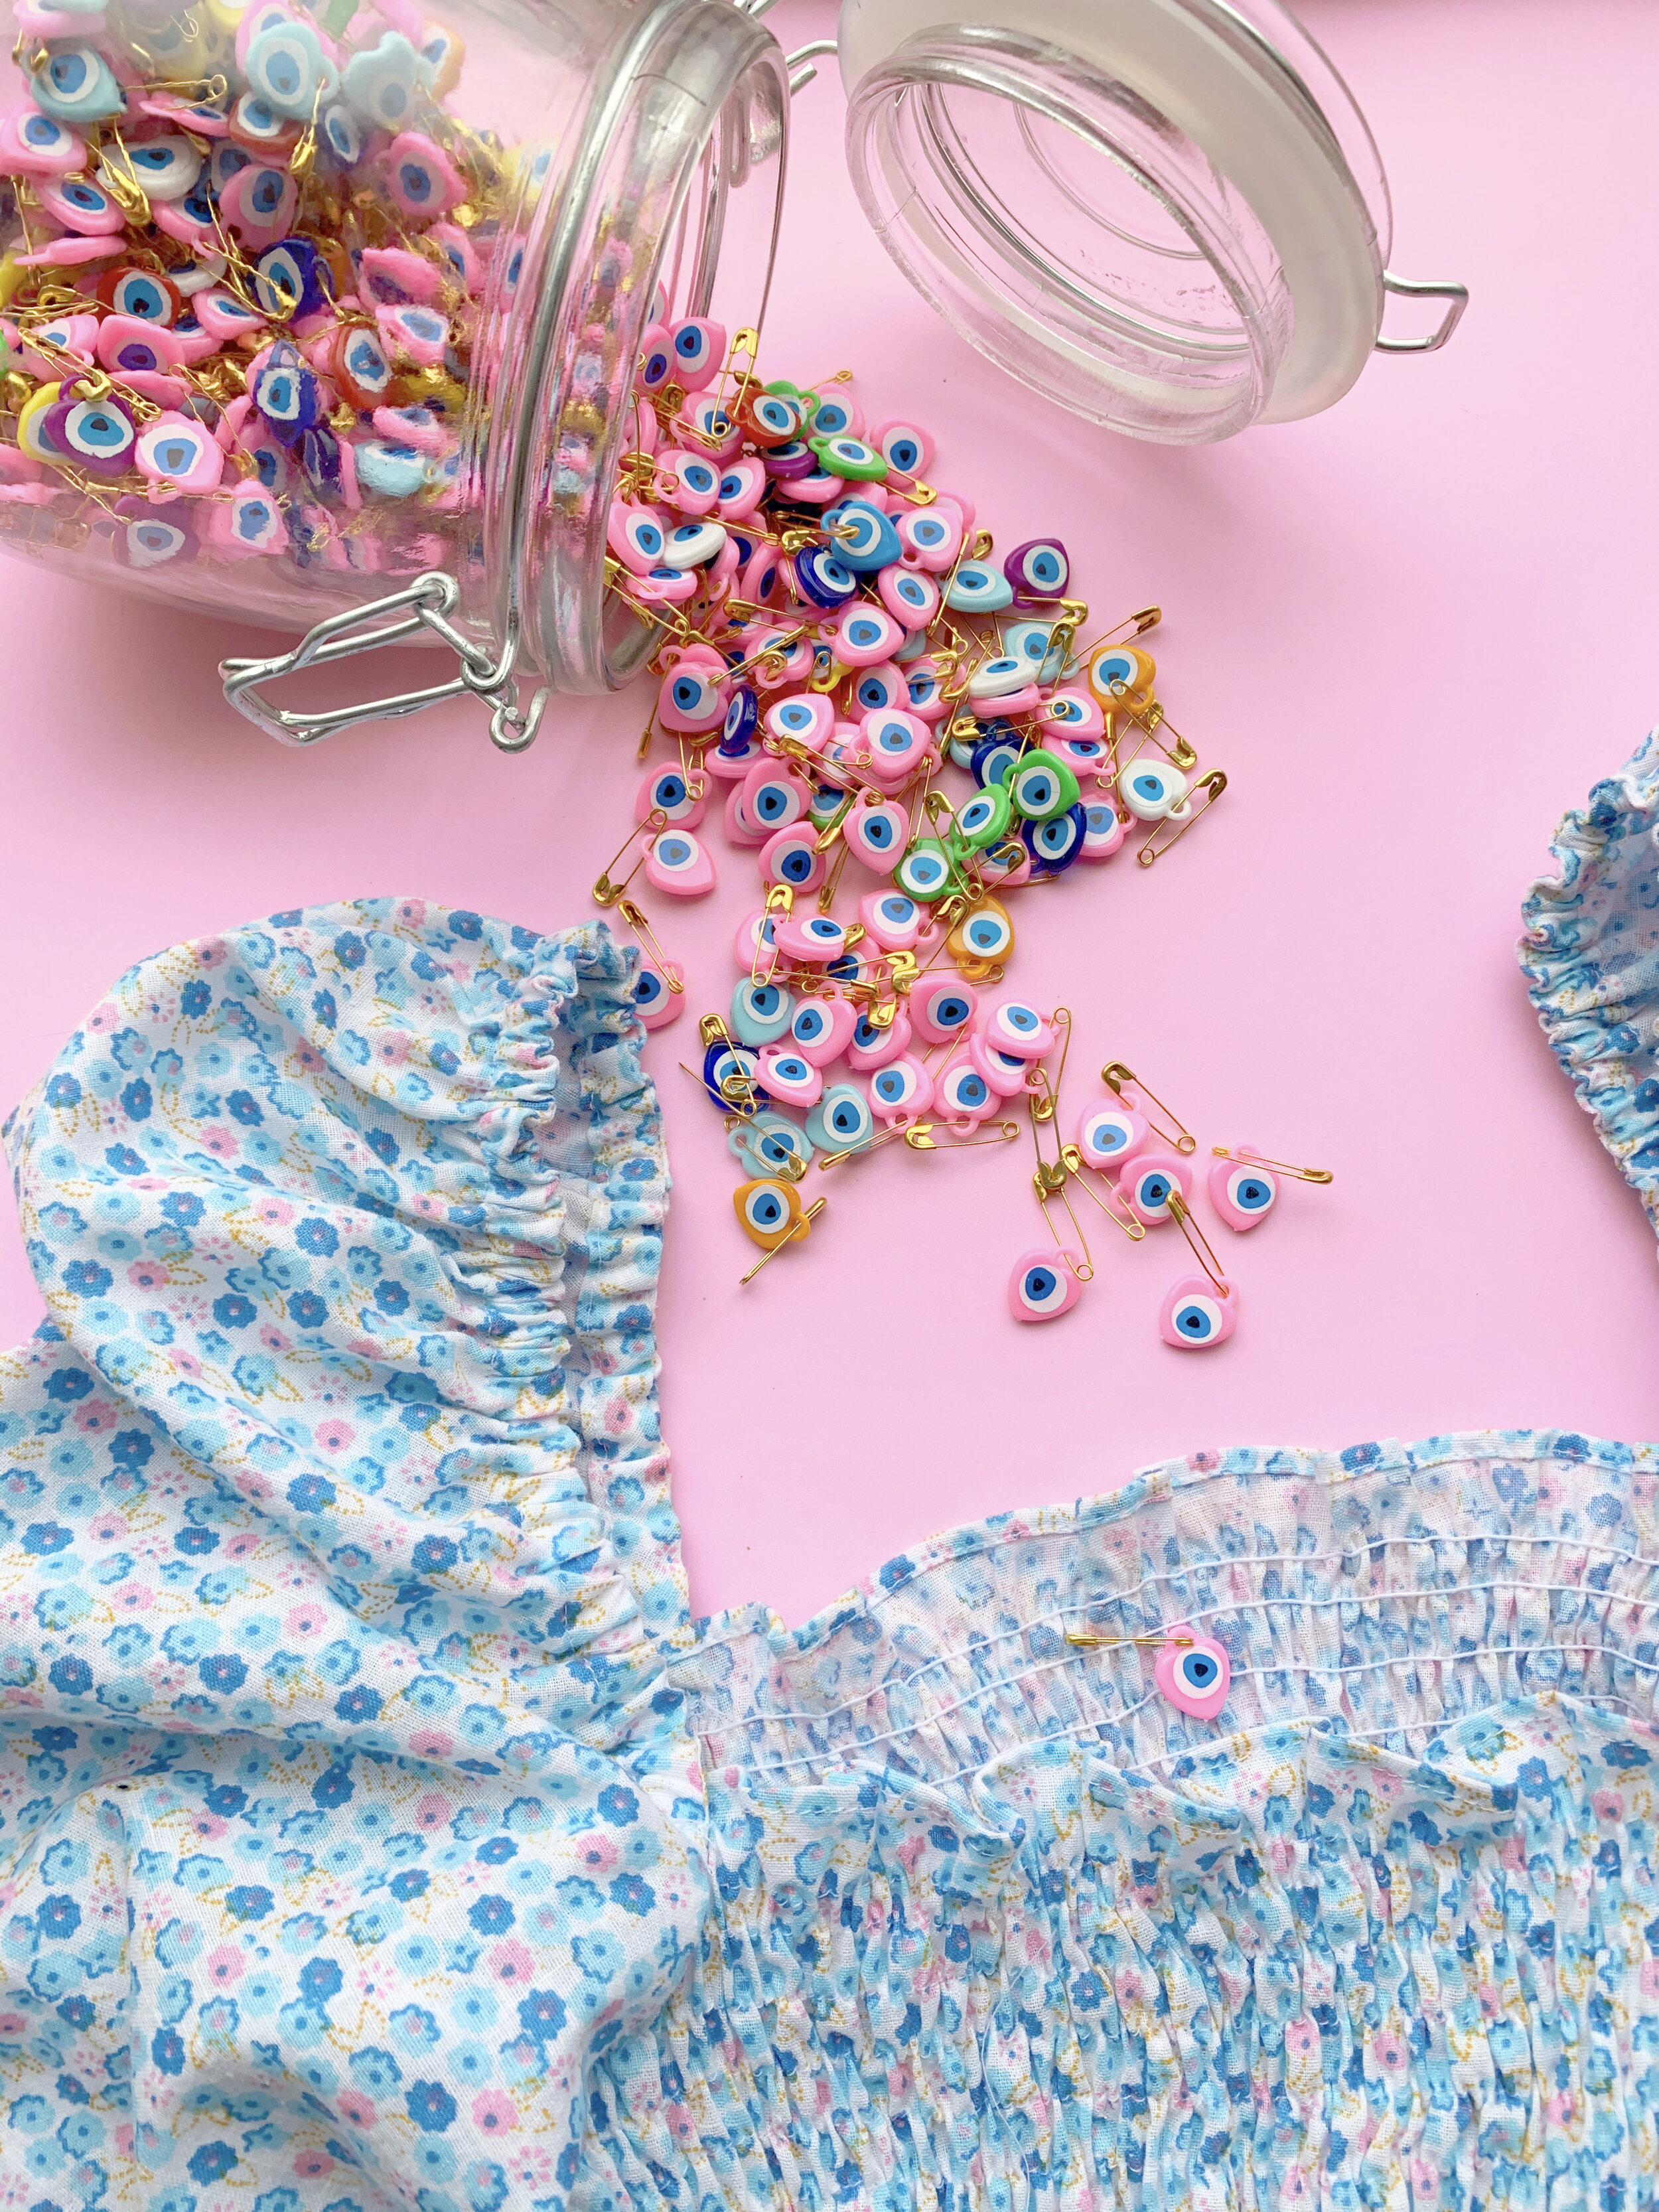
When I finished the dress, I realized it was difficult to tell the front and back apart, and they are different. Much as I love adding my tags to things, it doesn’t make sense on something so stretchy and form fitting. So I rooted around and found this big jar of tiny evil eyes I bought in Istanbul, Turkey, almost exactly 3 years ago. These little plastic ones are for children’s clothes, isn’t that cute? Anyway, I selected a pink one, and pinned it in the back of my dress, so I won’t be walking around backwards.

It has taken me a long time to explain a simple dress! Don’t be put off, I sewed this in a few quick hours. It’s a perfect dress: easy & wearable, dressy enough for a party, casual enough to throw on without much thought, you don’t need a bra (but can wear one if you like), the length is super easy to change, the elastic is forgiving if you eat a big meal or doze off on the couch, it can be made sleeveless or halter or short sleeved or whatever! I think it’s worth having this pattern in your collection! Let me know if you try it! XO, Martha