OVERALLS! Practical with a Touch of Gold: Kwik Sew 3897 aka K3897

Happy as can be in these!
I love overalls. As a Dress Girl, I dislike pants, but I’ll wear them. A necessary evil. Somehow, jumpsuits and overalls have always been OK: the practicality of trousers, the all-in-one security of a dress.
I have a beloved pair of vintage (dingy, rust stained) white painter’s overalls from Sears Roebuck. I bought them at 10 Foot Single by Stella Dallas, a sprawling vintage clothing store in Williamsburg, Brooklyn. It must have been about 2011 or 2012 - I was working at DKNY and it was a time when my personal style was evolving. I’d wear the overalls cuffed to be short, with a tiny crop top and a pair of Rachel Comey wooden platforms, a pair of shoes that almost broke my ankles many times over. I digress!

Look how similar! Proof that this pattern is a classic.
I still enjoy wearing the white overalls, but I have decided they can’t really go out in the world anymore. There are stains on the butt and they remained rumpled no matter what. So I purchased this fabric….probably over a year ago, with the plan to make a replacement pair of overalls. The fabric is Kaufman Ventana Twill - widely available in the USA. It’s a great fabric for Hard Pants. Yes, it’s twill, but I think it’s safe to call it bull denim, as well. It comes in many colors, and I have a couple pairs of Lander Pants sewn up in it. It’s sturdy but not too stiff.

K3897 aka Kwik Sew 3897 once again proving that you should ignore the envelope cover and look at the line drawings instead. Tbh, this photo is inoffensive, I can see how the overalls fit. But the pose and styling are…. a little goofy.
My initial plan was to rub off a pattern from the Sears overalls, but then I kept dragging my feet. I pulled out all my overalls patterns, had a look at the tissues, and decided making my own pattern would be unnecessary. Overalls have what I’d call a “general” fit - they’re not tailored, you just need to get them on your body so you can start painting the ceiling or whatever. That said, my body is not a general fit! If it were, I wouldn’t have to sew all my own pants (a task I don’t particularly enjoy). I was surprised at how similar K3897 was to my Sears overalls. The differences were things like a slightly slimmer leg - things I was planning on changing anyway. Perfect!

I knew I’d need a zipper on my bib pocket. Otherwise, I am dropping my phone every time I bend over!
My fabric has a clear Carhartt reference to it, though the Ventana twill is a more cinnamon color than the classic Carhartt canvas. I did a quick google on Carhartt overalls to get some bib pocket ideas. The Kwik Sew pattern is drafted with one big, plain pocket. That’s fine, but if you wear overalls, you know: anything you put in there will fall out when you bend over! (and somehow it is a shock Every. Single. Time.)
I made this pocket before beginning any other sewing for the project. It felt like the most important component! Adding the zipper was simple, I just cut my pocket taller than the pattern piece, and inserted the zipper. I shortened a zipper from stash to be the right size - take into account that you won’t want any metal in the path of your topstitching. Then I re-cut the pocket down to the exact size of the pattern piece. I cut another pocket, but shorter, to layer on top. For the dividers, be sure to add those lines of stitching before attaching the pocket to the bib! That way the zipper pocket stays full size.

Comfortable for sitting, bending over, squatting, reaching overhead!
Now that the pocket is sorted, let’s get down to discussing this pattern. Pattern includes sizes XS-XL in one envelope. Having made some Kwik Sew overalls in the past, I suspected excess ease. Let’s also remember that concept of a “general” fit - it’s at play here. Per the size chart, I am M on top, L on bottom. Per the finished measurements printed on the tissue, L would be fine, but XL would actually be safer for my low hip measurement. So you know what I did? I measured the tissue and compared those measurements with my body measurements, and with the Sears overalls. Which is what I think you should do (if you don’t own vintage Sears overalls, just skip that part).
And then I cut size M. Now, if this were a jumpsuit, I’d probably grade things a little: make the waist more fitted, maybe let out the hip at the outseam a little. However, due to the way this is constructed, you need that outseam to be straight in order to cleanly form the overlapping button plackets that allow you to get in and out of the overalls. So I left it alone and got on with sewing.
Kwik Sew is known for excellent instructions, and this pattern is no exception. Any level sewer who is good at following instructions could execute this pattern. The written directions and illustrations are clear as can be, and the tissue has good markings on it. I love that the pattern accounts for seam finishing, and provides different options if you do or don’t have a serger.

Ooh baby, look at all that topstitching.
I switched thread weights between construction and top stitching, but used a jeans needle for everything, mostly because I didn't have a topstitch needle on hand. My machine hates topstitch thread, so I had a lot of trouble with my bobbin tension (thread nests, loose stitches) but I figured it out and it ended up ok. I kept some scraps nearby and tested things frequently. It was annoying to switch threads so often, so I tried to group the steps in ways to minimize changing thread.

I’m very pleasantly surprised at the fit! Especially because you can’t try them on until late in the process.
And now for the boring part: my fitting changes (they’re minimal).
I lengthened the legs 2.5” and made a 1” hem. I have learned the hard way to overestimate how much length I need to add to pant legs, regardless of pattern company! I am 5’8”, but I don’t have super long legs.
I cut the back pockets at size XL (who wants a smaller pocket??) and added 1” height to them. The finished pocket is now about 1/2” taller than my iPhone.

It’s not that I wanted to line the bib in Liberty, it’s that I didn’t have any other fabric that would work. JK I wanted to.
The pattern does not have you trim the seam allowance after attaching the bib to the legs (it tells you to trim almost every other seam), but I found it was crucial to do so, or I wouldn't have been able to make the buttonhole at the waist. The area would have been too uneven/bulky.
Speaking of bulk, I lined the bib in a scrap of Liberty lawn. If I had used self fabric as per pattern, it would have been impossible to do some of the top stitching (on my machine/with this fabric anyway), because at the corners where the bib meets the pants and the pocket bags…. I think it would be 7 (!!!) layers of fabric to stitch through. My old Bernina does not appreciate things like that. Even as I sewed it, I hammered thick areas first to help flatten them.


For the buttonholes, I used my automatic buttonhole foot to make corded buttonholes - basically, there is a thread inside the satin stitch on the long sides of the buttonhole. This adds strength and dimension to the buttonhole. I don’t know why I don’t do those more often! I like how it looks. I used my regular thread for the buttonhole, and my top stitch thread for the cord inside.

You could finish these edges earlier in the process, but it’s actually less bulky to finish all the edges together.
Something to look out for is the one place on this pattern where I ended up with an unfinished cut edge: at the base of the plackets. I went back and looked at the instructions, and I still don’t see where it is telling me to finish those edges. It’s easy to fix though - I zig zagged all layers together, and they are held in place with a bar tack, or in my case, a rivet.
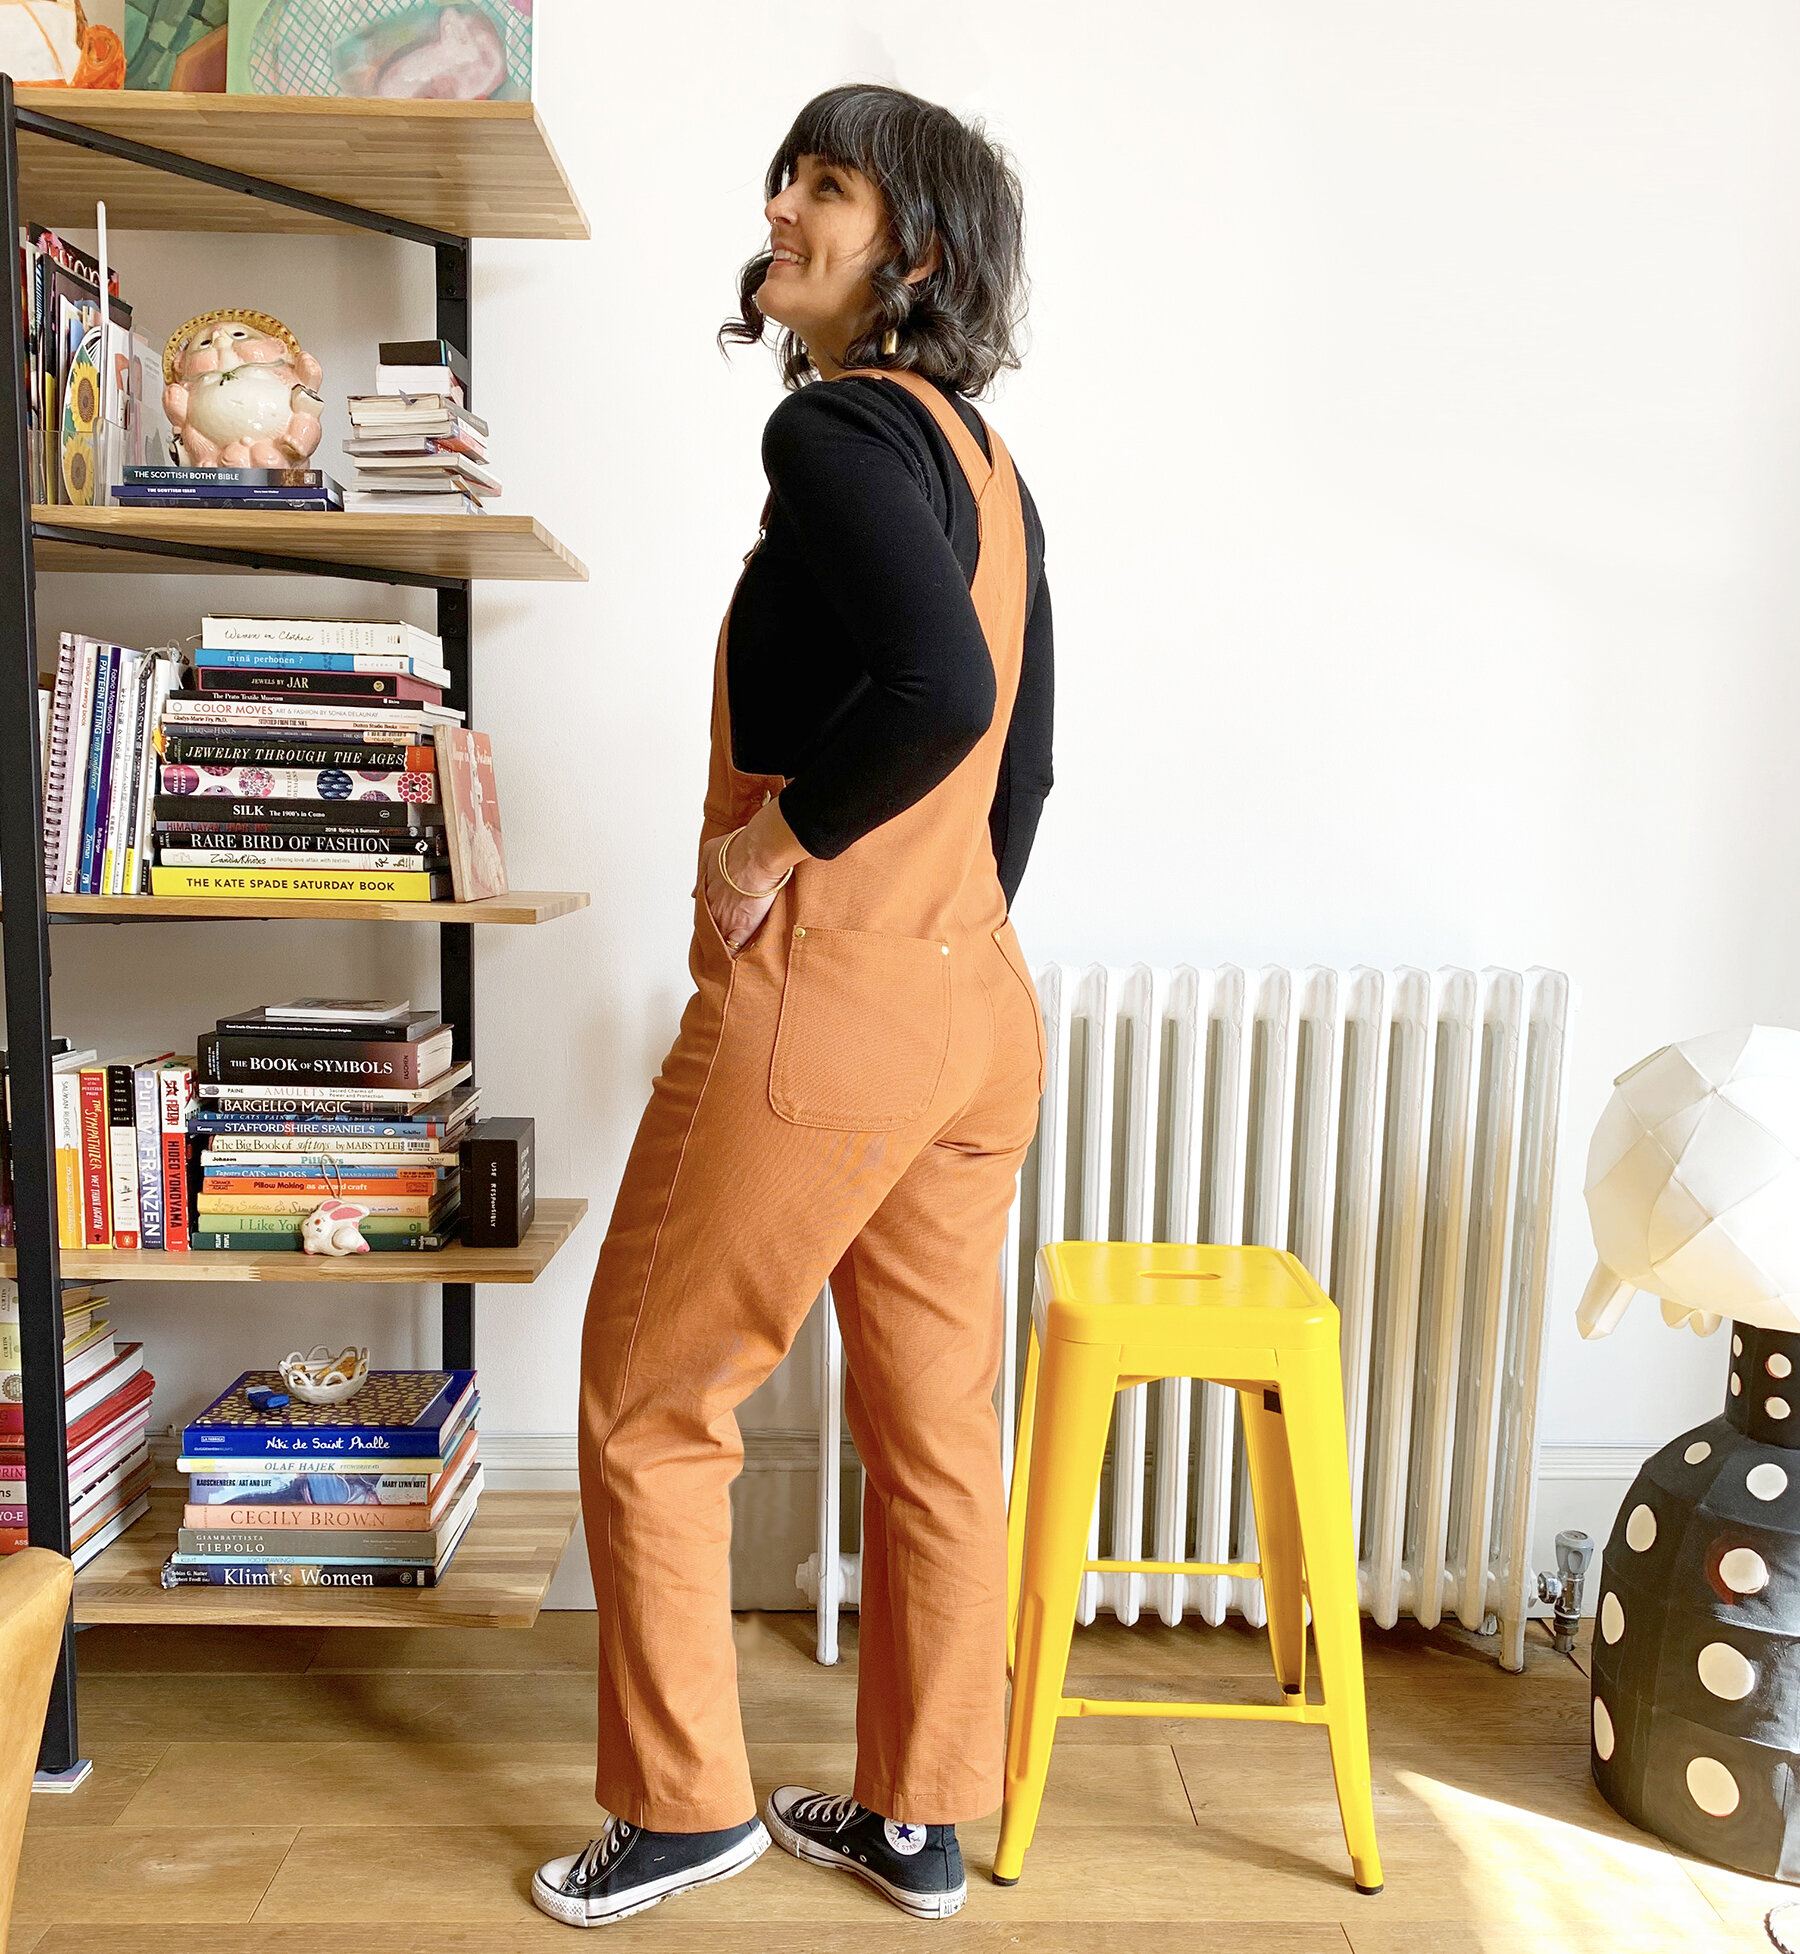
My greatest fear, always, is things not fitting over my hips and butt. They fit! Phew.
Due to the order of construction (which I think is the best way to assemble these), you cannot try on the garment until it is too late to make any serious adjustments (obviously avoidable with a muslin). If I made these again, I'd tweak the crotch curve and adjust the back leg to eliminate wrinkles. There are some of those pesky back-of-thigh wrinkles, but honestly, I think having excess fabric there allows for a lot of movement. That ease could be shifted around to create less wrinkles, but you do need ease in non-stretch overalls.

What can I say, I love shiny things.
Wow. I almost forgot to talk about hardware! Hardware! Let’s discuss!
This pattern is simple to construct, like I said before, I think sewers at a variety of experience levels could make this garment. Out of the envelope, the greatest challenge is all the topstitching - which just takes practice, and figuring out the best foot for you and your machine. I wanted to take it a step further, and give myself a hardware challenge.
All hardware is from my stash! Because I planned to make these a while back, I purchased notions in New York, buying things here and there, knowing I’d need them eventually. I know I got my shiny rivets from SIL Thread - they are Japanese and were a breeze to install, but you do need a die to cut out the small hole for them (an awl won’t cut it) and the matching setting tool. I was liberal with my placement of these, because I love how they look. But they are all at stress points, where you commonly see rivets on classic denim garments.
I hate hammering jean tack buttons - the metal on metal of it is SO loud, in an almost painful way. So I spaced that over two days. But it was fast and easy. In the end, all the shiny gold matches my jewelry, and brings a touch of bling and femininity to a utilitarian garment. I think the hardware really makes it!

I wanted to say these came out as I expected/wanted, but that’s not true. They came out better. I am so happy with these and know I’ll wear them a ton! They’ll be fun with floral blouses, tshirts, and idk I might even try a crop top and platform shoes again, who knows!? I 100% recommend the pattern, and I can see myself sewing it again…. I mean, I still need new white overalls… Let me know if you sew some! XO, Martha