ORANGE WOOL PINAFORE - VINTAGE VERY EASY VOGUE 8849

Vintage Very Easy Vogue 8849 all sewn up.
Last spring, I snagged this cut of super bright orange wool from Fabric Mart Fabrics. I had been watching it for a while, and waited for a day when wool was on sale. My patience paid off because the price dipped low, and then I scored the “Lucky You!” sticker they put at the end of bolt. I ordered 2.5 yards, but was sent more like 3.75.
My intention was to sew myself a chore jacket to wear around our property during hunting season. To be clear, I don’t hunt, but it’s a reality of living in rural America - you’re safer if you can easily be seen. And that’s what this fabric was originally used for; I found the unlined men’s jackets on a few websites.

A perfect fit!
Anyway! I sewed the jacket. It’s done except for some hand sewing and buttonholes, which I plan to have done professionally in Manhattan. So I decided to have some fun with the rest of my fabric!
THE PATTERN:
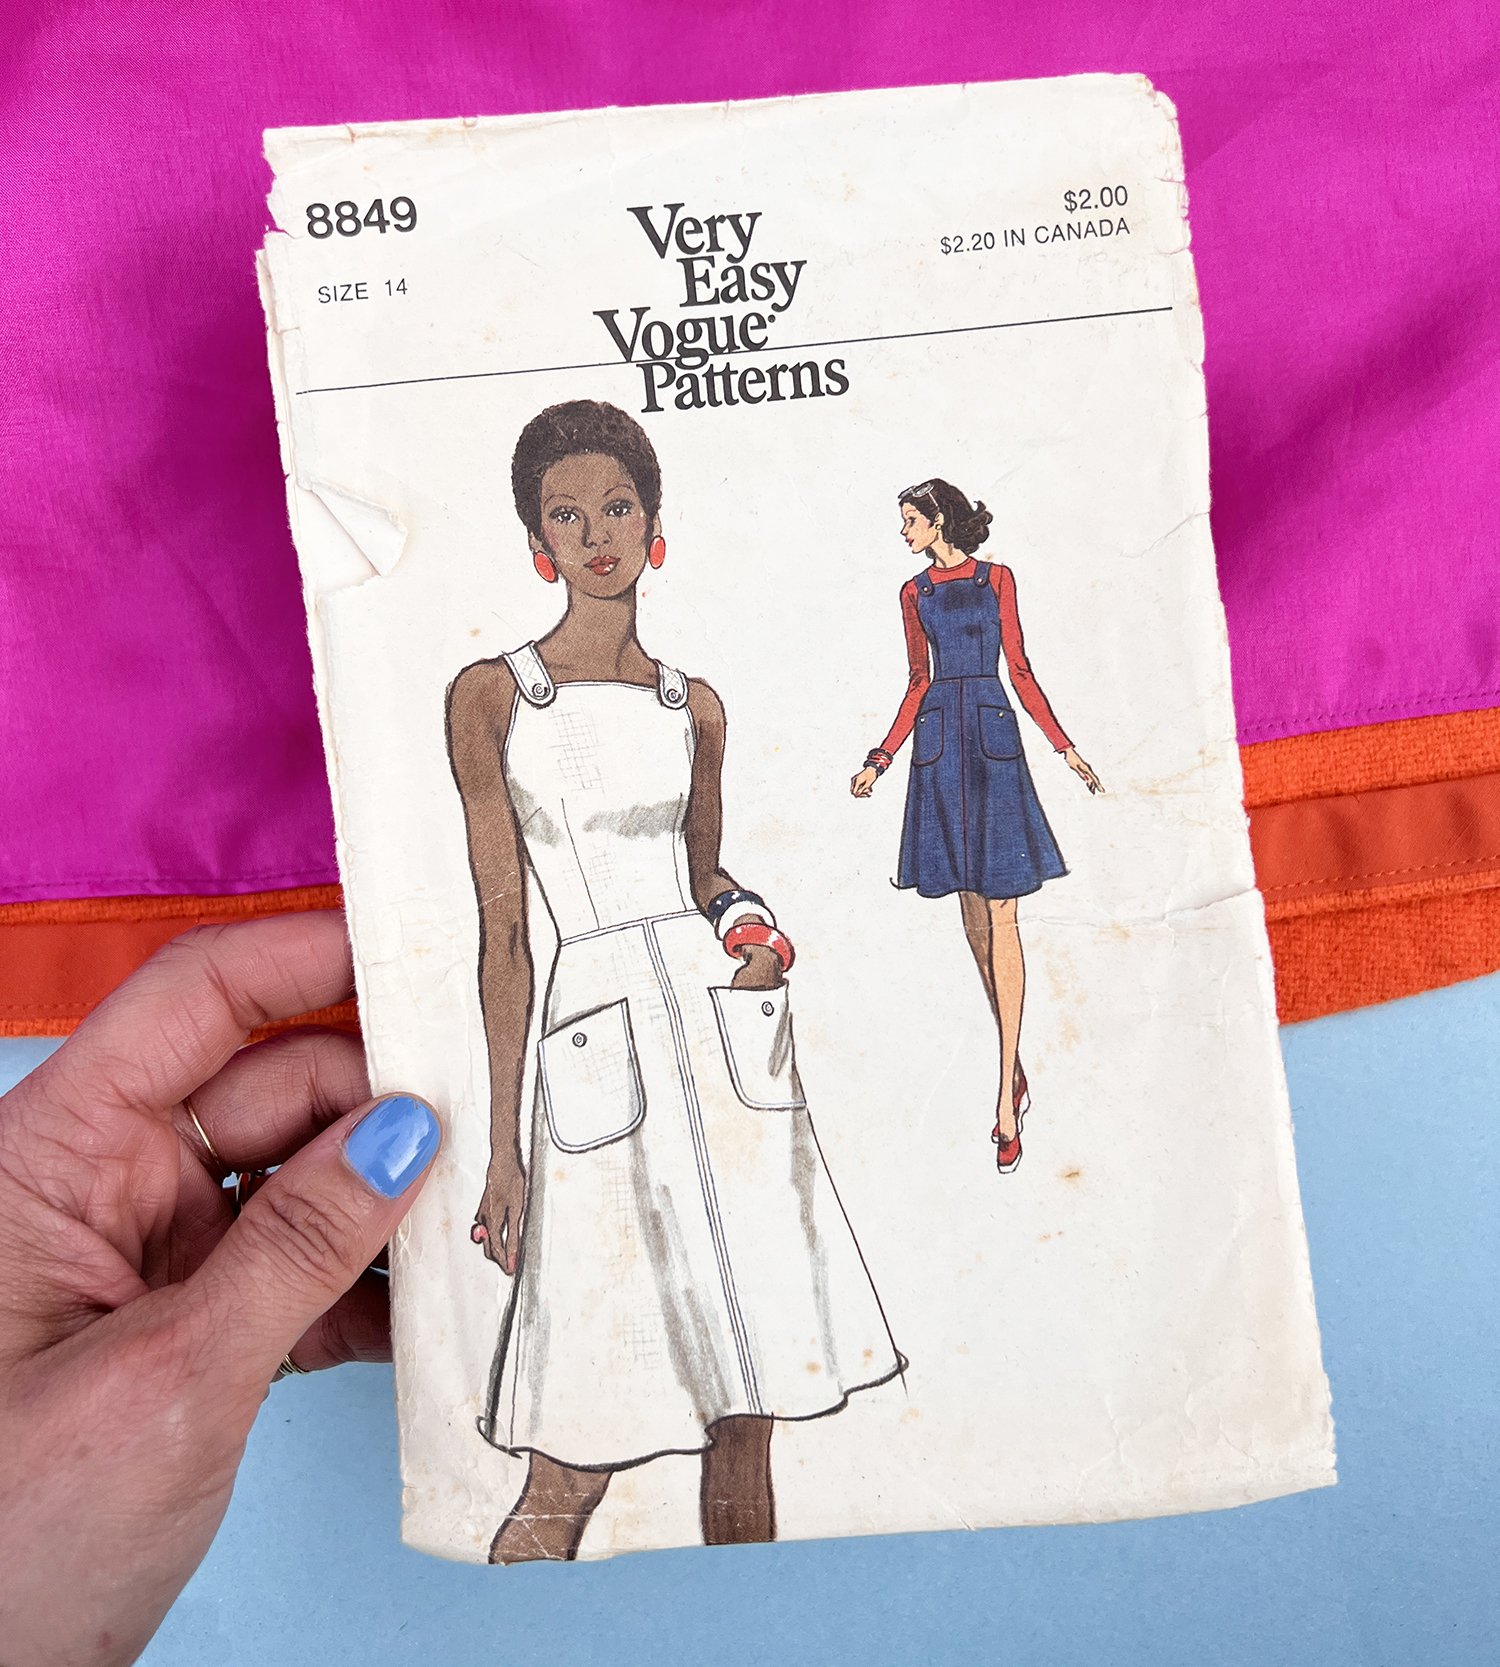
I sewed this pinafore once before, I think in 2018. That dress was a mess: stiff fabric, ill fitting, and I wasn’t skilled at moving or adjusting darts at that time. So I tucked a note inside the pattern envelope with some suggestions to my future self. I took those notes into consideration when working on this version.
Another consideration: this envelope contains size 14; I usually sew size 12 in vintage patterns, though 14 for some Vogues, which can run smaller or have less ease. I am not sure what year this pattern was published, but it’s from the early 1970s.

My revised pattern tissue on the left. On the right is the original pattern tissue.
THE DRAFTING:
The drafting of this bodice is pretty weird. No I’ll say it: I think it’s bad. But it’s workable. Additionally, my fabric is much thicker than what this pattern was designed for. But I knew that going in, and by skipping the facings, I didn’t have a build up of bulk.
Look at the darts - where is the apex? Are they both pointing to the same apex? The vertical dart terminates slightly above the horizontal dart. WTF. I lowered the vertical dart 1.25” in the end, and I think I could drop it even more. I added my usual length above the apex, but then needed to remove 1/2” at the hem. I lowered and completely re-drew the top edge of the front bodice, and if I make this again, I will revise it further.

I made a quick full muslin of this dress so I could fully assess any fitting issues. Out of the envelope, the fit was terrible on me. It may have been improved if I were wearing a bra from the same ear as the pattern - it’s drafted for a very pointy bust. It also has an extremely high neckline, which fully covered my collarbones.
In the end, I achieved a good fit in the bodice, but take a look at the top edge as it relates to my armpit. It comes up really high - I suspect this is for full coverage if you do not wear a shirt under the pinafore, which is one of the views on the envelope cover. But this kind of modesty seems unnecessary, or maybe outdated? I will scoop that out if I make this again. It feels like excess fabric when I’m wearing it.

1970s era Very Easy Vogue sewing pattern instructions.
THE INSTRUCTIONS:
Drafting issues aside, I love the instructions in this pattern. One page is printed on both sides, with two colors of ink. The instructions are very clear and demonstrate nice techniques. That being said, I didn’t use the instruction because I constructed my dress differently. Because I was low on fabric, I skipped facings and pockets. Let’s get into the nitty gritty!

This pinafore is perfectly warm for a crisp fall day!
THE BODICE:
• Lowered apex 1” and added 1” length above apex at the same time - standard adjustment for me. I do this to front and back pieces. (See the photo of my pattern tissue.)
• The vertical dart ends above horizontal dart, as if they have different apexes. Lowered point of vertical dart 1.25” and still could definitely lower it a tad more.
• Lowered center front neckline 2.25” and reshaped the neckline/top edge. Also lowered the armscye 1/2” front and back.
• Lengthened straps 2.5” to accommodate the re-shaping of front.
• Added 1” width to waist.

After trying on the dress with a zipper pinned in, I realized I would need to take in the back. The chalk lines indicate my new stitching line and cutting line.
The back needed a major adjustment for me. I am small across my back but this was fairly dramatic. I removed 5.5" (2.25" each side of the zipper) from the top edge, tapering to the waist.

Cotton bias facing on the wool skirt has been machine sewn to the skirt, under stitched, and then hand slip stitched into place. The lining was simply baby hemmed with a rolled hem foot.
THE SKIRT:
• I have wide hips, so I made the skirt slightly more circular to give myself more ease at low hip circumference.
• Shortened skirt to 22” before hemming.
• Added 1” width waist.
• Eliminated patch pockets - not enough fabric.
• Bias facing for the hem. Sewn on, under stitched, pressed up, and then slip stitched into place. The lining was cut shorter than the shell and hemmed with a rolled hem.

Clipped seam allowances inside the dress.
THE EXTRAS:

The lining rolled to the inside because it was cut smaller, and is then top stitched into place.
Eliminated facings - not enough fabric - and fully lined instead. Lining is some thin poly lining from stash. Cut lining 1/8" smaller than shell all around so it easily rolled to the inside.

I followed the top stitching as per pattern. Cute!

I used a coil zipper & vintage hook & eye from stash.

The lining is hand sewn down around the zipper.
I chose to use two colors of lining for a couple of reasons. The orange was used on the top where the lining could potentially show on the outside of the garment. The pink is a nicer quality of lining, and it doesn’t make a swishy sound, which I wanted to avoid in the skirt.
I tacked the lining to the shell at the waistband, side seams and center front. Made swing tacks at the hem to connect the lining and shell.

Detail of the bottoms. I sewed through all layers around the buttons following the top stitching to securely attach the straps to the bodice.
Buttons are the same as the ones I have for my orange jacket, just smaller. I used 4 instead of 2 so I wouldn't have any leftover.

I do miss pockets on this one! But I don’t think I’ll try to finagle any out of my scraps.

The back has full coverage, offering a lot of warmth, especially in my wool fabric.
I’m on the fence about sewing this pattern again. I have a bunch of 70s pinafore patterns in my stash, and I’ve sewn a few of them before. Most of them don’t require the level of alteration this one did, but then, I’ve done the work to get a nice fit here, so it wouldn’t be complicated. I can definitely see myself wearing a black denim version!
Regardless, this is done just in time for Halloween, so I’ll be wearing this for the next few days! Trick or Treat!! XO, Martha