DIY STUDDED JACKET - COST OF SEWING AND STUDDING MY OWN JACKET
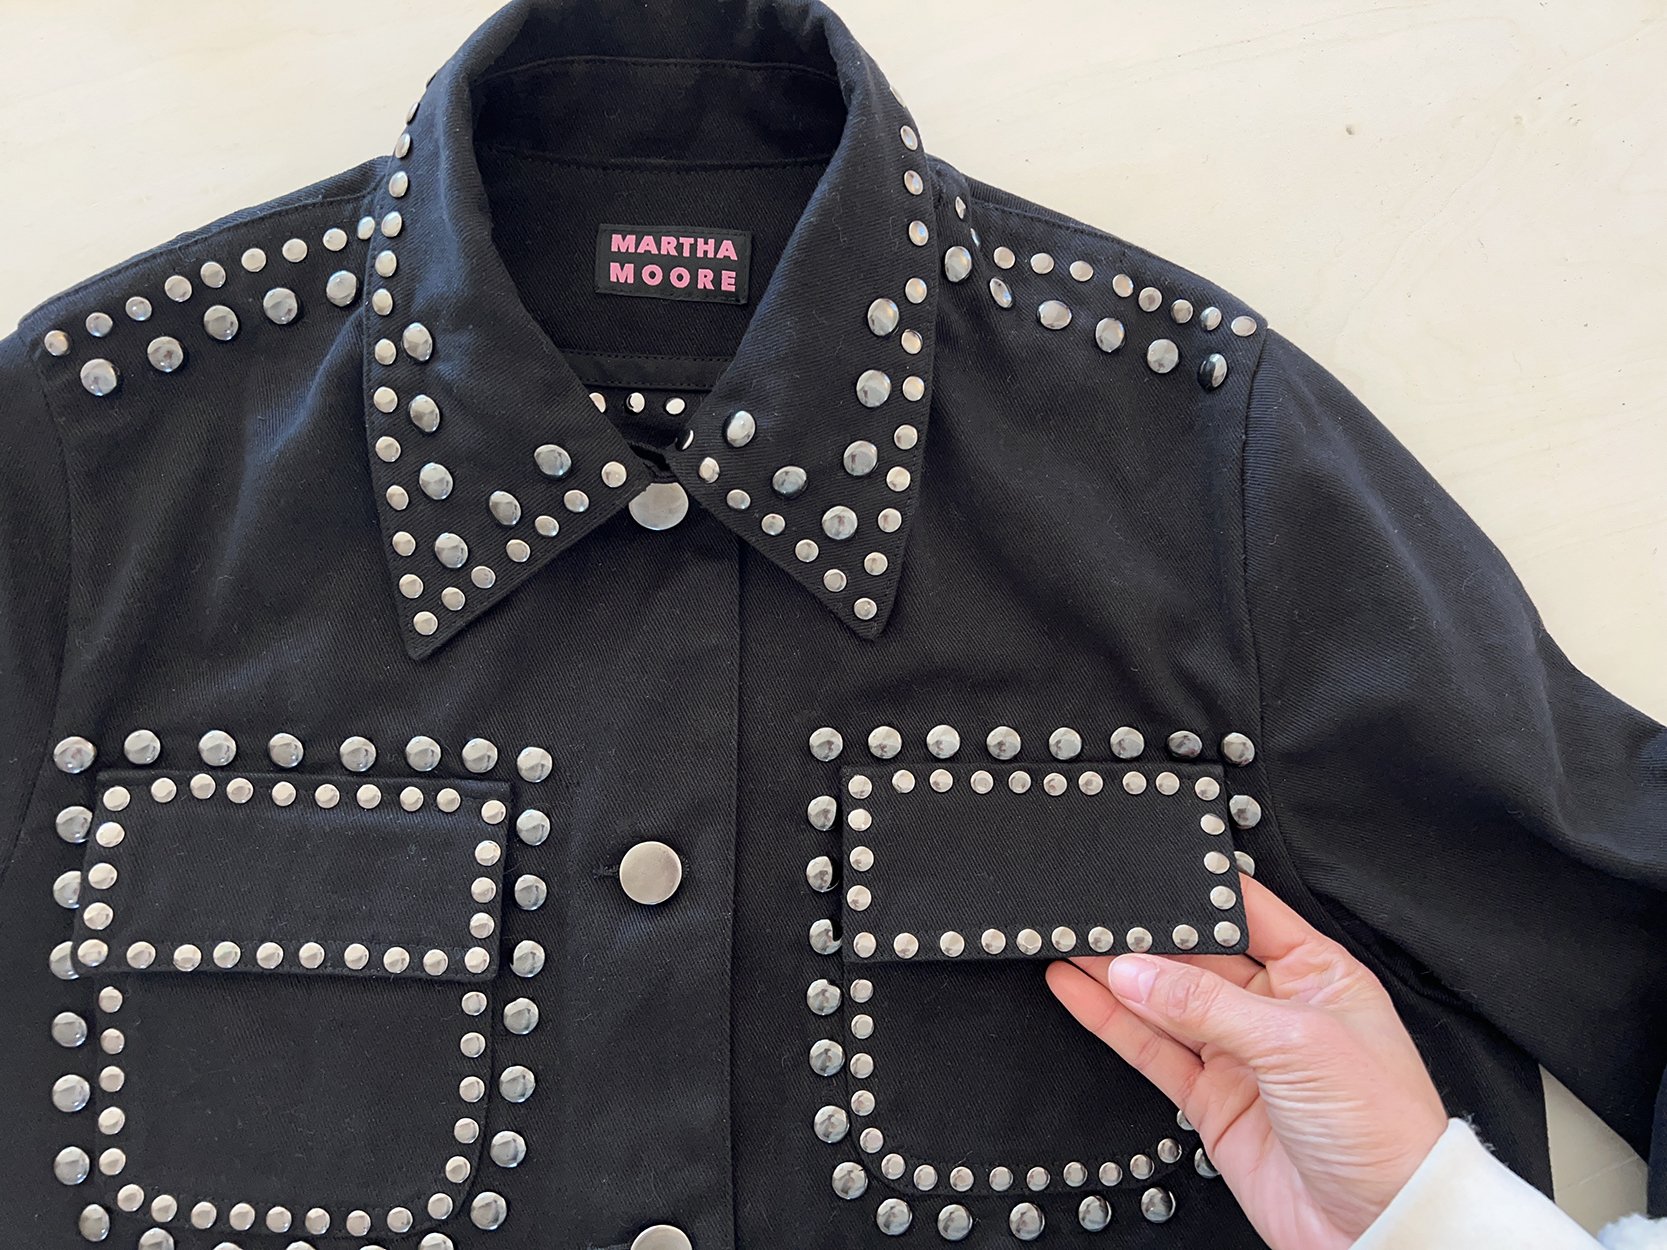
Once you start, you can’t stop! My jacket is still a work in progress, but there has been a lot of progress! Also, all hardware is gunmetal, much darker looking in person than in photographs. I won’t call this jacket subtle, but it is lower contrast IRL.
This jacket started with different intentions from the result…or did it? Maybe my personal definition of things changed along the way.
I purchased this 100% cotton bull denim online with a plan to sew basic black pants, but it’s a little too heavy for that. No problem, it went into the Jacket & Bottom weight fabric stash bin. I’ve owned it for around 2 years. The intention was: Basic Black. Wearable, Easy.
When laying out the button placement, I decided to add some rivets. And then the lightbulb went off in my head! Note to self: don’t wear a pastel mohair sweater or pick up the cat when working with black fabric.
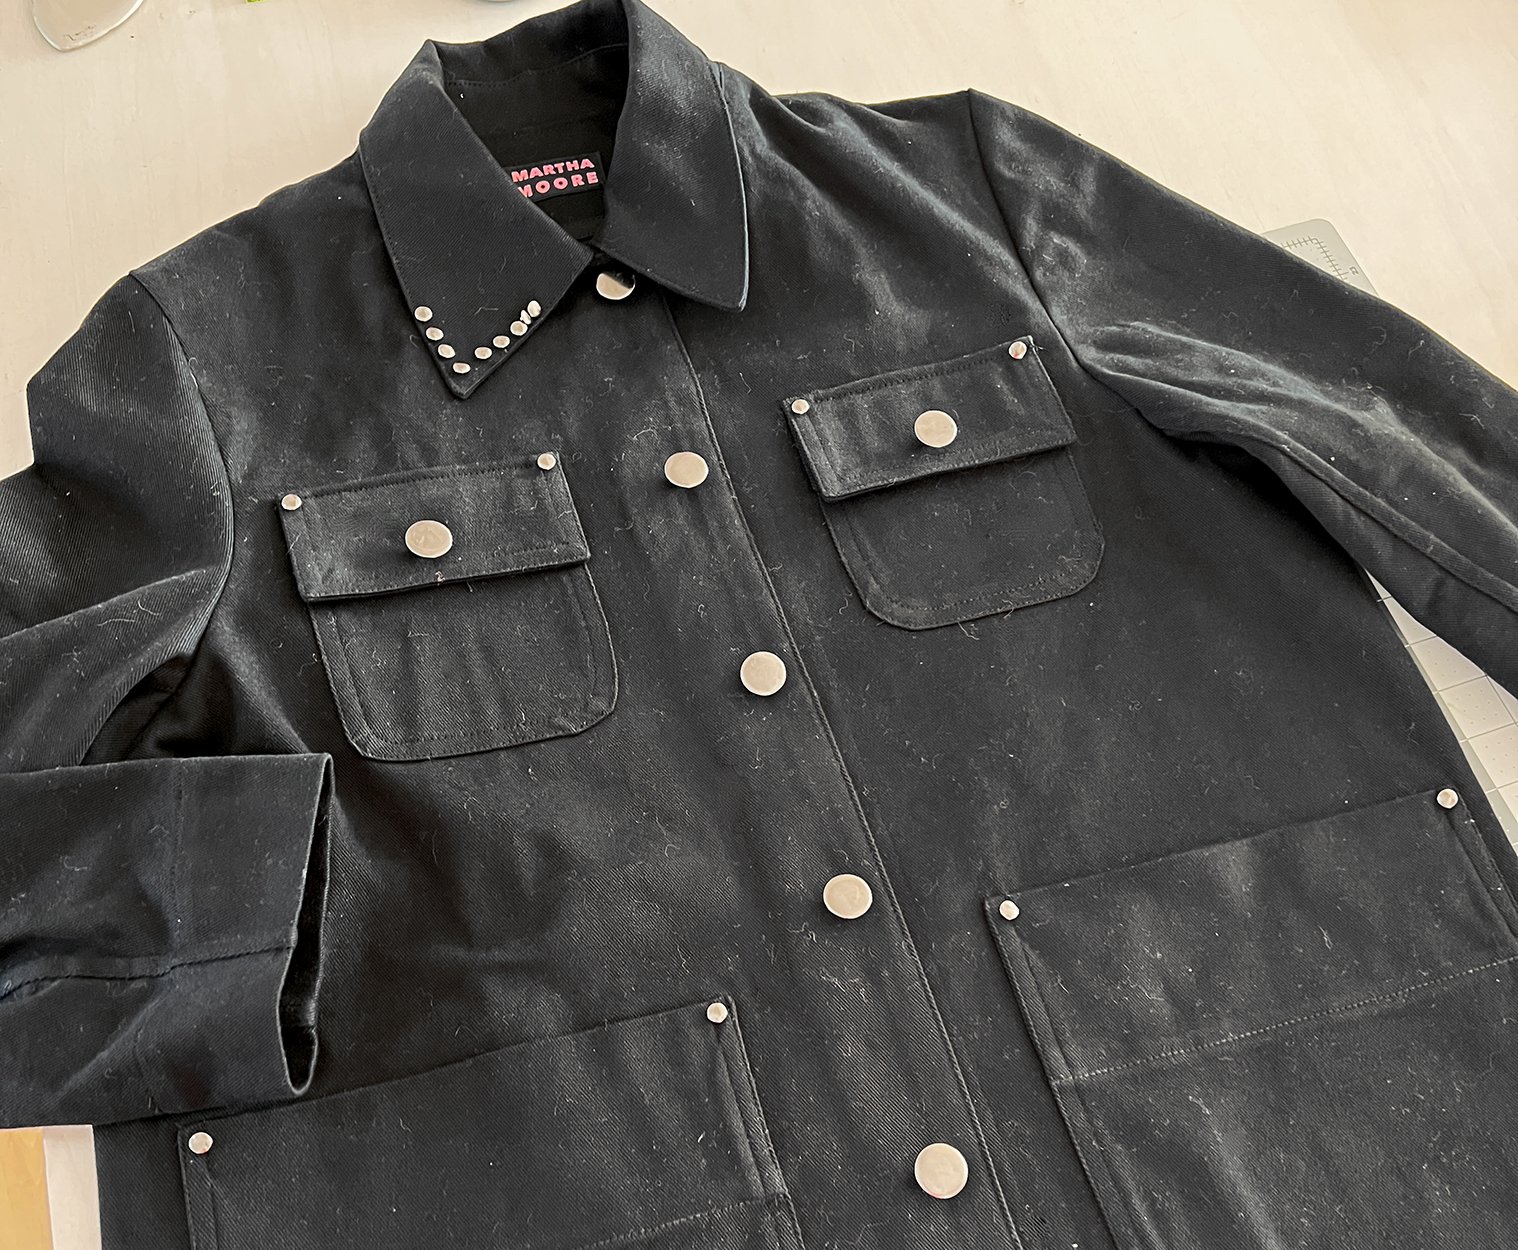
Recently, I thought I found a hole in my wardrobe: a plain black jacket that would go with everything. I finished sewing my Basic Black, Wearable, Easy jacket, and thought to myself: I am never going to wear this. I didn’t love the fit (which I have since modified), and it was SO plain. I could not see myself reaching for it like I thought I would.
The gunmetal finish jean tack buttons looked cool, so I added a couple of rivets. Which is when the lightbulb went off in my head. With nothing to lose, I got to work.
Here is the cost breakdown of the project. This is a good example (for me) of the benefits of owning a stash, being flexible about how garments turn out, and having fun - both in sewing and getting dressed.

I first made myself a version of this pattern in 2020. I made a few further modifications to the pattern for this black studded version, but most of the flat pattern work was already done back then.
PATTERN:
Merchant & Mills Foreman Jacket, PDF: $15.75
Printed and taped together at home. This copy has been used to sew 5 jackets between Jason and me since I purchased it in 2020. Ameratized, that brings the cost down to $3.15 per jacket.

Black bull denim, fusible interfacing, bias binding, and my custom label.
FABRIC:
From stash. I think it is from Ray Stitch in the UK, so I checked my emails for a receipt. I purchased 4 meters for £32. I used about 2.5 yards here. Look, that’s a few layers of math and I don’t care that much. Let’s say the fabric cost $20.00 and not get too stressed out about it.
I used black interfacing from my stash. I prefer a fairly expensive interfacing from SIL Thread, but for this project, I used almost entirely scraps, overlapping smaller pieces to create the bigger pieces. I don’t consider scraps free. Let’s say $7.00
I used one package of Wright’s bias binding to finish the edge of the facing inside this jacket. If I had a serger, I would have simply overlocked this edge, but I have to admit, the way I finished it is very tidy. It is difficult to get a stud through the layers of denim and the bias tape, though. I tend to purchase bias tape in a larger quantity when it goes on sale, as I know I’ll use it. $1.50
Thread is also from stash, Guterman Mara in black. I considered using heavier thread for top stitching, but didn’t feel like swapping thread out between seams, and you can’t really see black on black anyway. $1.50

I know having professional buttonholes is not accessible to everyone, but they will always be worth a trip to the city for me. I love how they look.
BUTTONS & BUTTONHOLES:
Jean tack buttons from Wawak. Sold by the dozen, but I used 5: $1.90
Buttonholes were sewn at Jonathan Embroidery Plus in Manhattan. I was taking another jacket in anyway, and truly, you cannot beat the professional results of corded keyhole buttonholes sewn on an industrial machine that only completes that singular task. 5 buttonholes at $1.25 a pop: $6.25

The heavy duty hand press I used for this project.
HEAVY DUTY PRESS & DIES:
When calculating costs for my blog, I don’t factor in the cost of my sewing machine or my labor. I would if I were doing this for work, but I’m not! So I’m not going to factor in the cost of my heavy duty hand press. But I purchased a die specifically for this project, so that will be included (and for future projects, it may get the “cost per use” treatment).
Double cap rivet die: $30

I used a variety of hand tools from my collection on this project, as well as a couple different kinds of studs. My workspace has been littered with little black dots from when I punch holes in the fabric before applying hardware.
STUDS:
Double cap studs go for around $8 for a pack of 200; I used about 600 on this project. $24.00
Prong backed dome rivets are applied by hand with piers - it goes fast! I used around 300 pieces, but purchased 400 as they were sold in units of 200. $20.00

Inside of the jacket features a very clean finish. I didn’t plan to use studs when I was sewing it - maybe I would have simplified if I made this again. But then again, it looks great in there.
BASIC NOTIONS & LABOR:
I don’t track my time when sewing, as that would be misery inducing for me, nor do I track the costs of basic sewing supplies like chalk or scissors. But this project came together surprisingly quickly and did not require specialty notions until I got into studding.
I cut everything out quickly because I had already sewn the pattern. I couldn’t find the instructions, so looked inside my previous version to figure out the order of construction. Because I don’t have a serger, the interior finishing was a bit fussy, but it’s clean, so I can’t complain.
As for the studding, I marked some areas with chalk dots, but free styled much of it once I found my rhythm. The heavy duty press makes fast work of setting hardware, and the prong studs are really easy to apply to denim (they’re designed for use on leather, so they are very sharp). I worked on the studs in bursts, anywhere from 15 minutes to an hour here and there, between other sewing tasks and household chores. It adds up! I did all the studs in a few days.
TOTAL:
Total: $115.30
Are you surprised? I am! I thought this would cost a lot more. And let’s give a nod to Girl Math: if I wear this like 300 times, it’ll basically free.
I’ll have a separate postwith photos of construction details and the completed garment, and another about my heavy duty press and dies. So keep an eye out for those. XO, Martha