BLACK CHERRY SILK CHARMEUSE - VINTAGE SIMPLICITY 5956

The easiest way to make an over the top silk dress wearable is to pair it with some beat up old Converse.
I’ve had this pattern in my stash for a while. Obviously, I bought the pattern because of it’s incredibly charming cover illustration. I pull it out from time to time, wondering when the moment will come…. Recently, I went to midtown and made a beeline to a specific shop for a specific fabric - I’d finally given myself permission to buy it because I had a pattern selected. But they were closed! No one else was, they just took the day off. I was annoyed for about a second, and then made my usual rounds. I went to a shop I usually walk past (I have to go back to get the name), and found this cherry print silk charmeuse. BINGO! I knew what dress I was going to make.
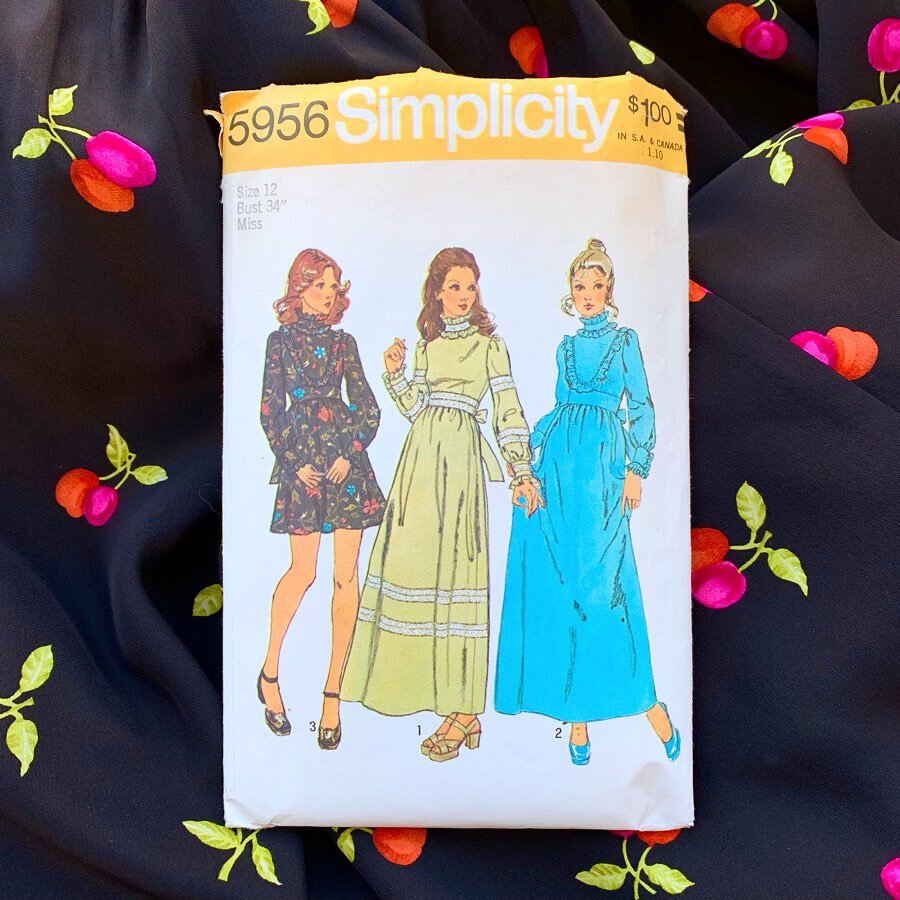
This pattern was published in 1973. I have found that Simplicity patterns from the 70s and 80s require the fewest modification to fit me, so I keep an eye out for them. I always get my usual Big 4 size 12. This pattern includes only one page of very well illustrated instructions. The instructions call for a lot of hand sewing, and what I would consider “Home Ec” work-arounds for techniques that are now pretty routinely done by machine by most modern home sewers. As written, I think the pattern is best for an intermediate-advanced level sewist, and you will get the best results if you disregard some of the hand sewing, and do things by machine, using your previous dress-making experience.

It should go without saying that you won’t enjoy making this if you dislike gathers and ruffles - both things I love! I did all my gathering by hand (2 rows of machine basting stitches, gathered slowly and evenly by hand), and I hemmed all of my ruffles using a rolled hem foot. Learning to use that foot has greatly increased my speed with all the ruffled styles I like to make. My only pattern modifications were my usual of lengthening the bodice 1” and lowering the bust dart in the process. I also graded out the waist by 3/8” because there isn’t much ease in the pattern. In the end, I didn’t need to do this, but I can tighten it with the sash, so it is comfortable and still looks tailored.

The pattern has you attach the sash to the outside of your fully completed bodice with 2 rows of straight stitching, leaving the raw cut edge exposed. Don’t do that! You can just sandwich the sash into the side seams, as I did here.
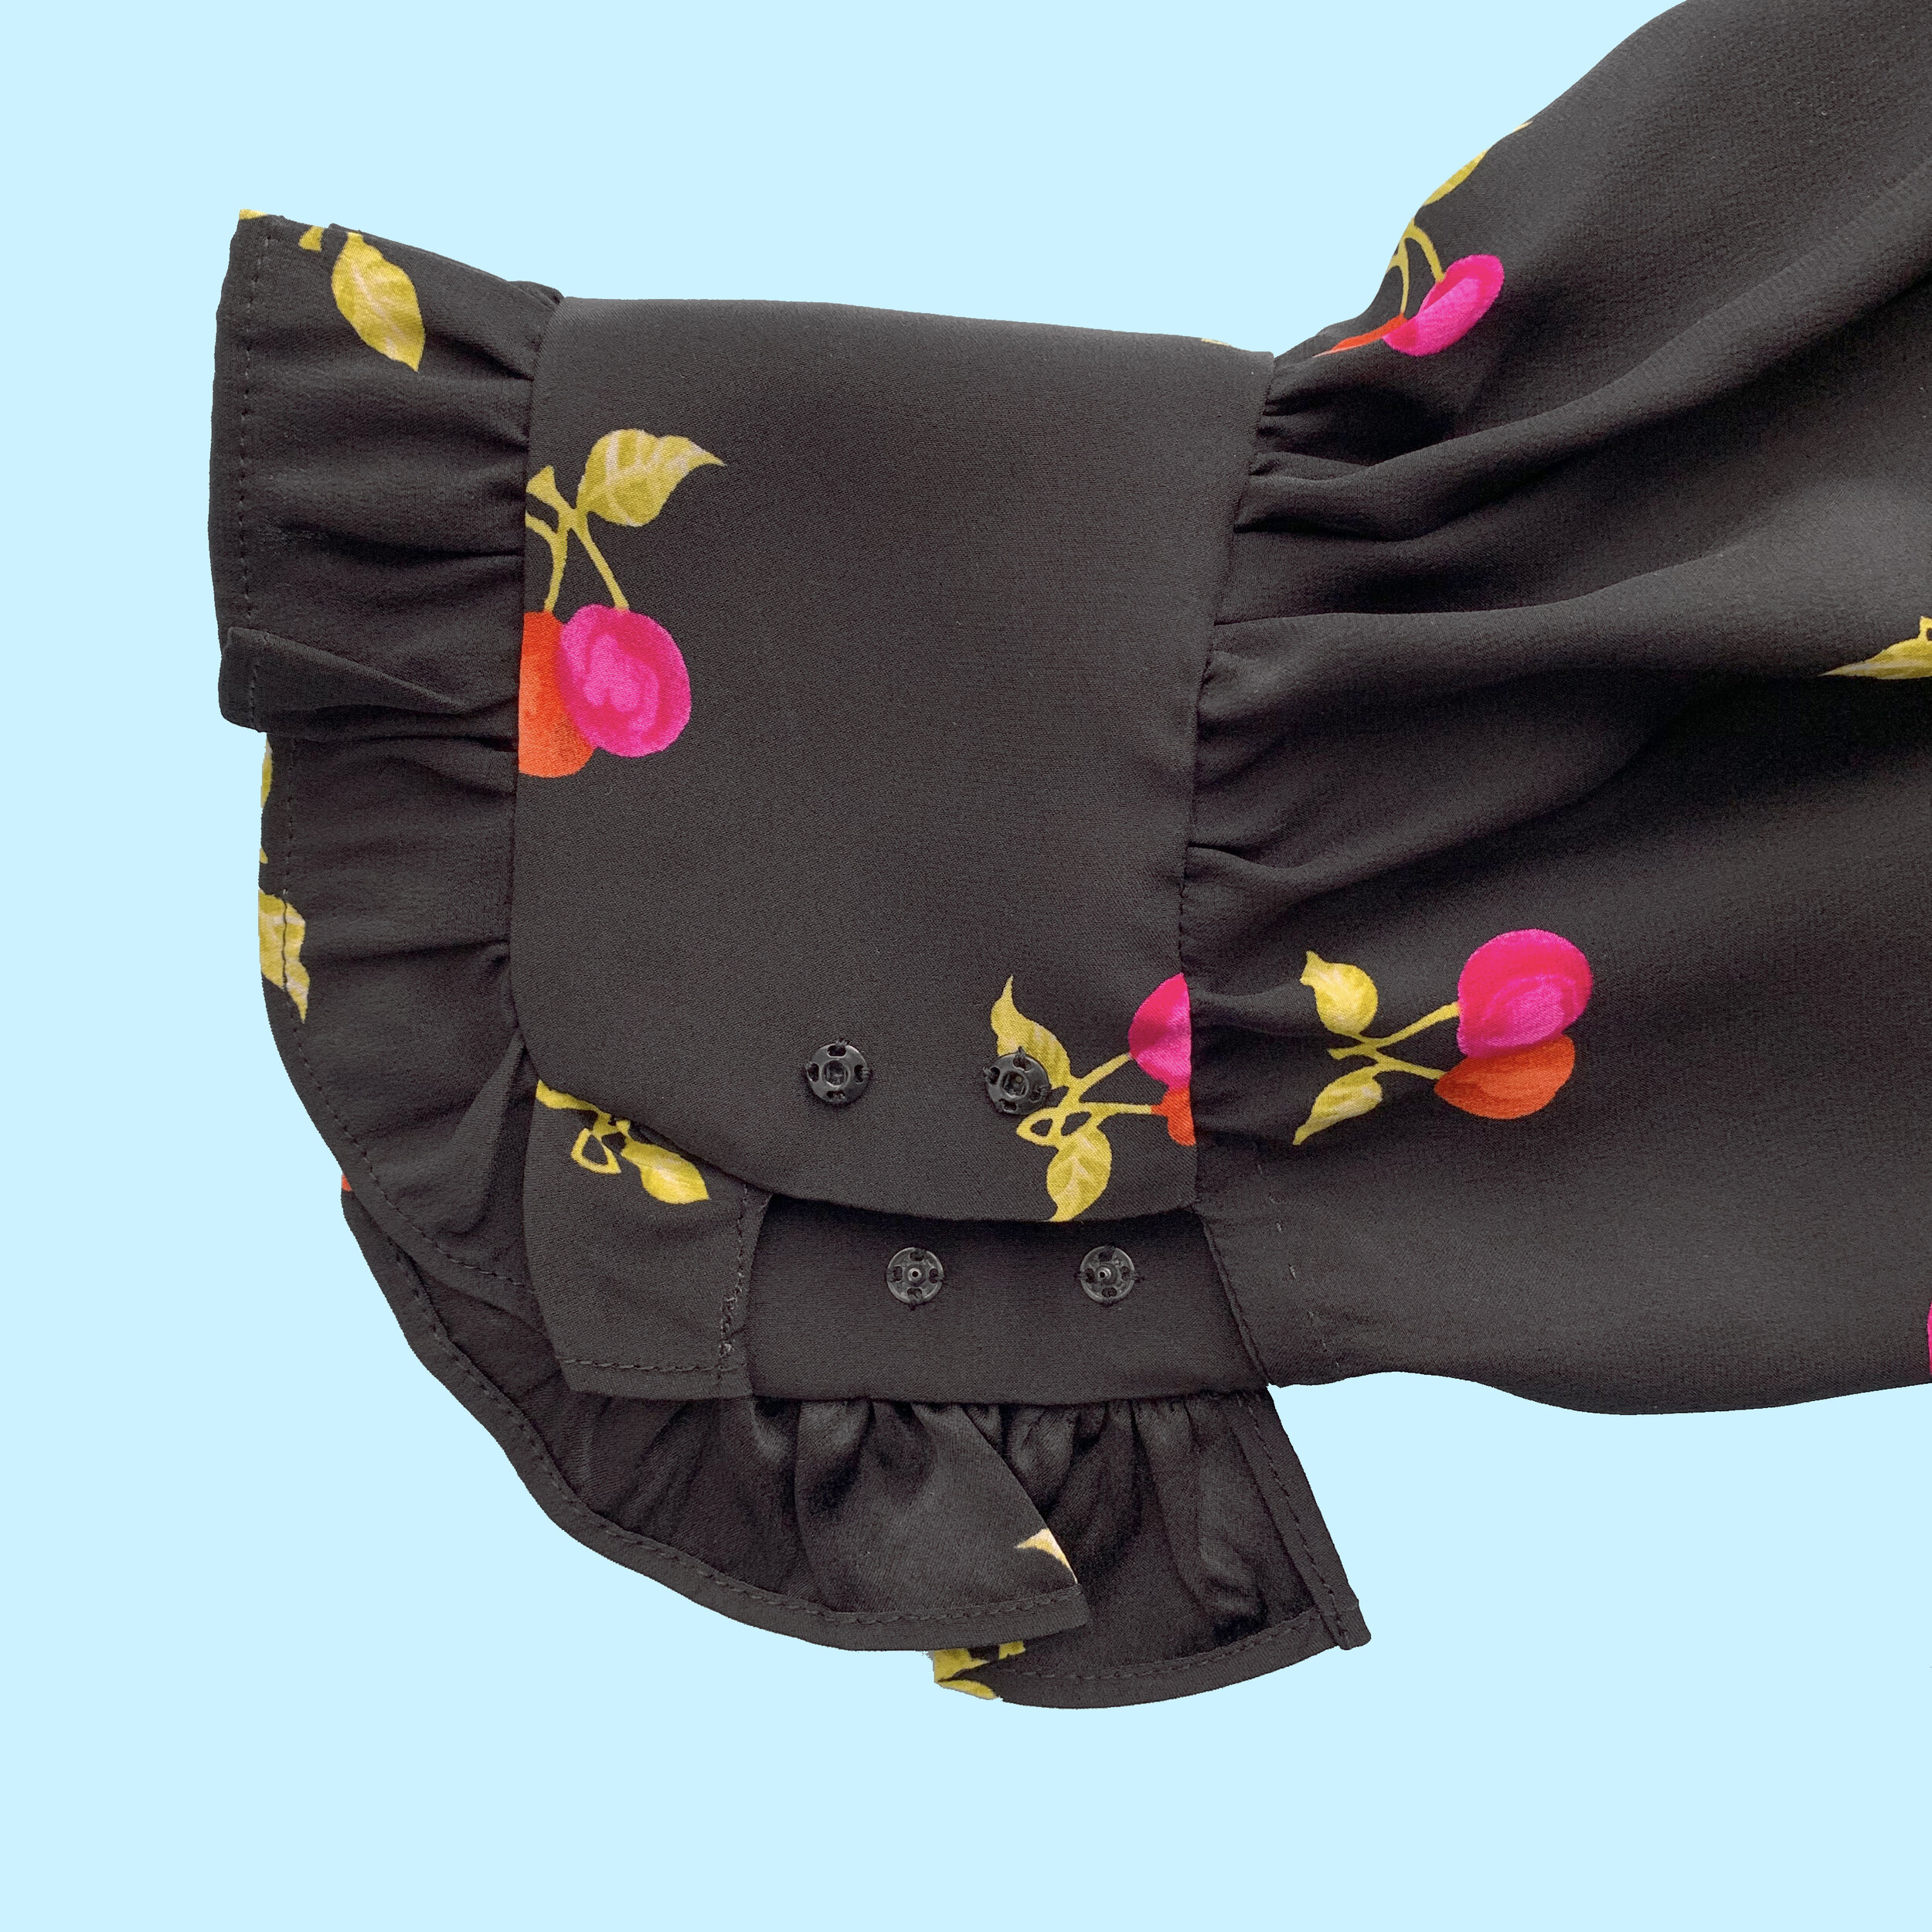
The cuffs are so sweet, and their construction is peak Home Economics: you could use buttons and buttonholes, or you could stay loyal to the pattern and use little sew-in snaps. I always have these on hand, so I kept them, and they are very easy to get on and off, which I appreciate. And it goes deeper. Can you see my hand stitching at the cuff? Here is a process shot:
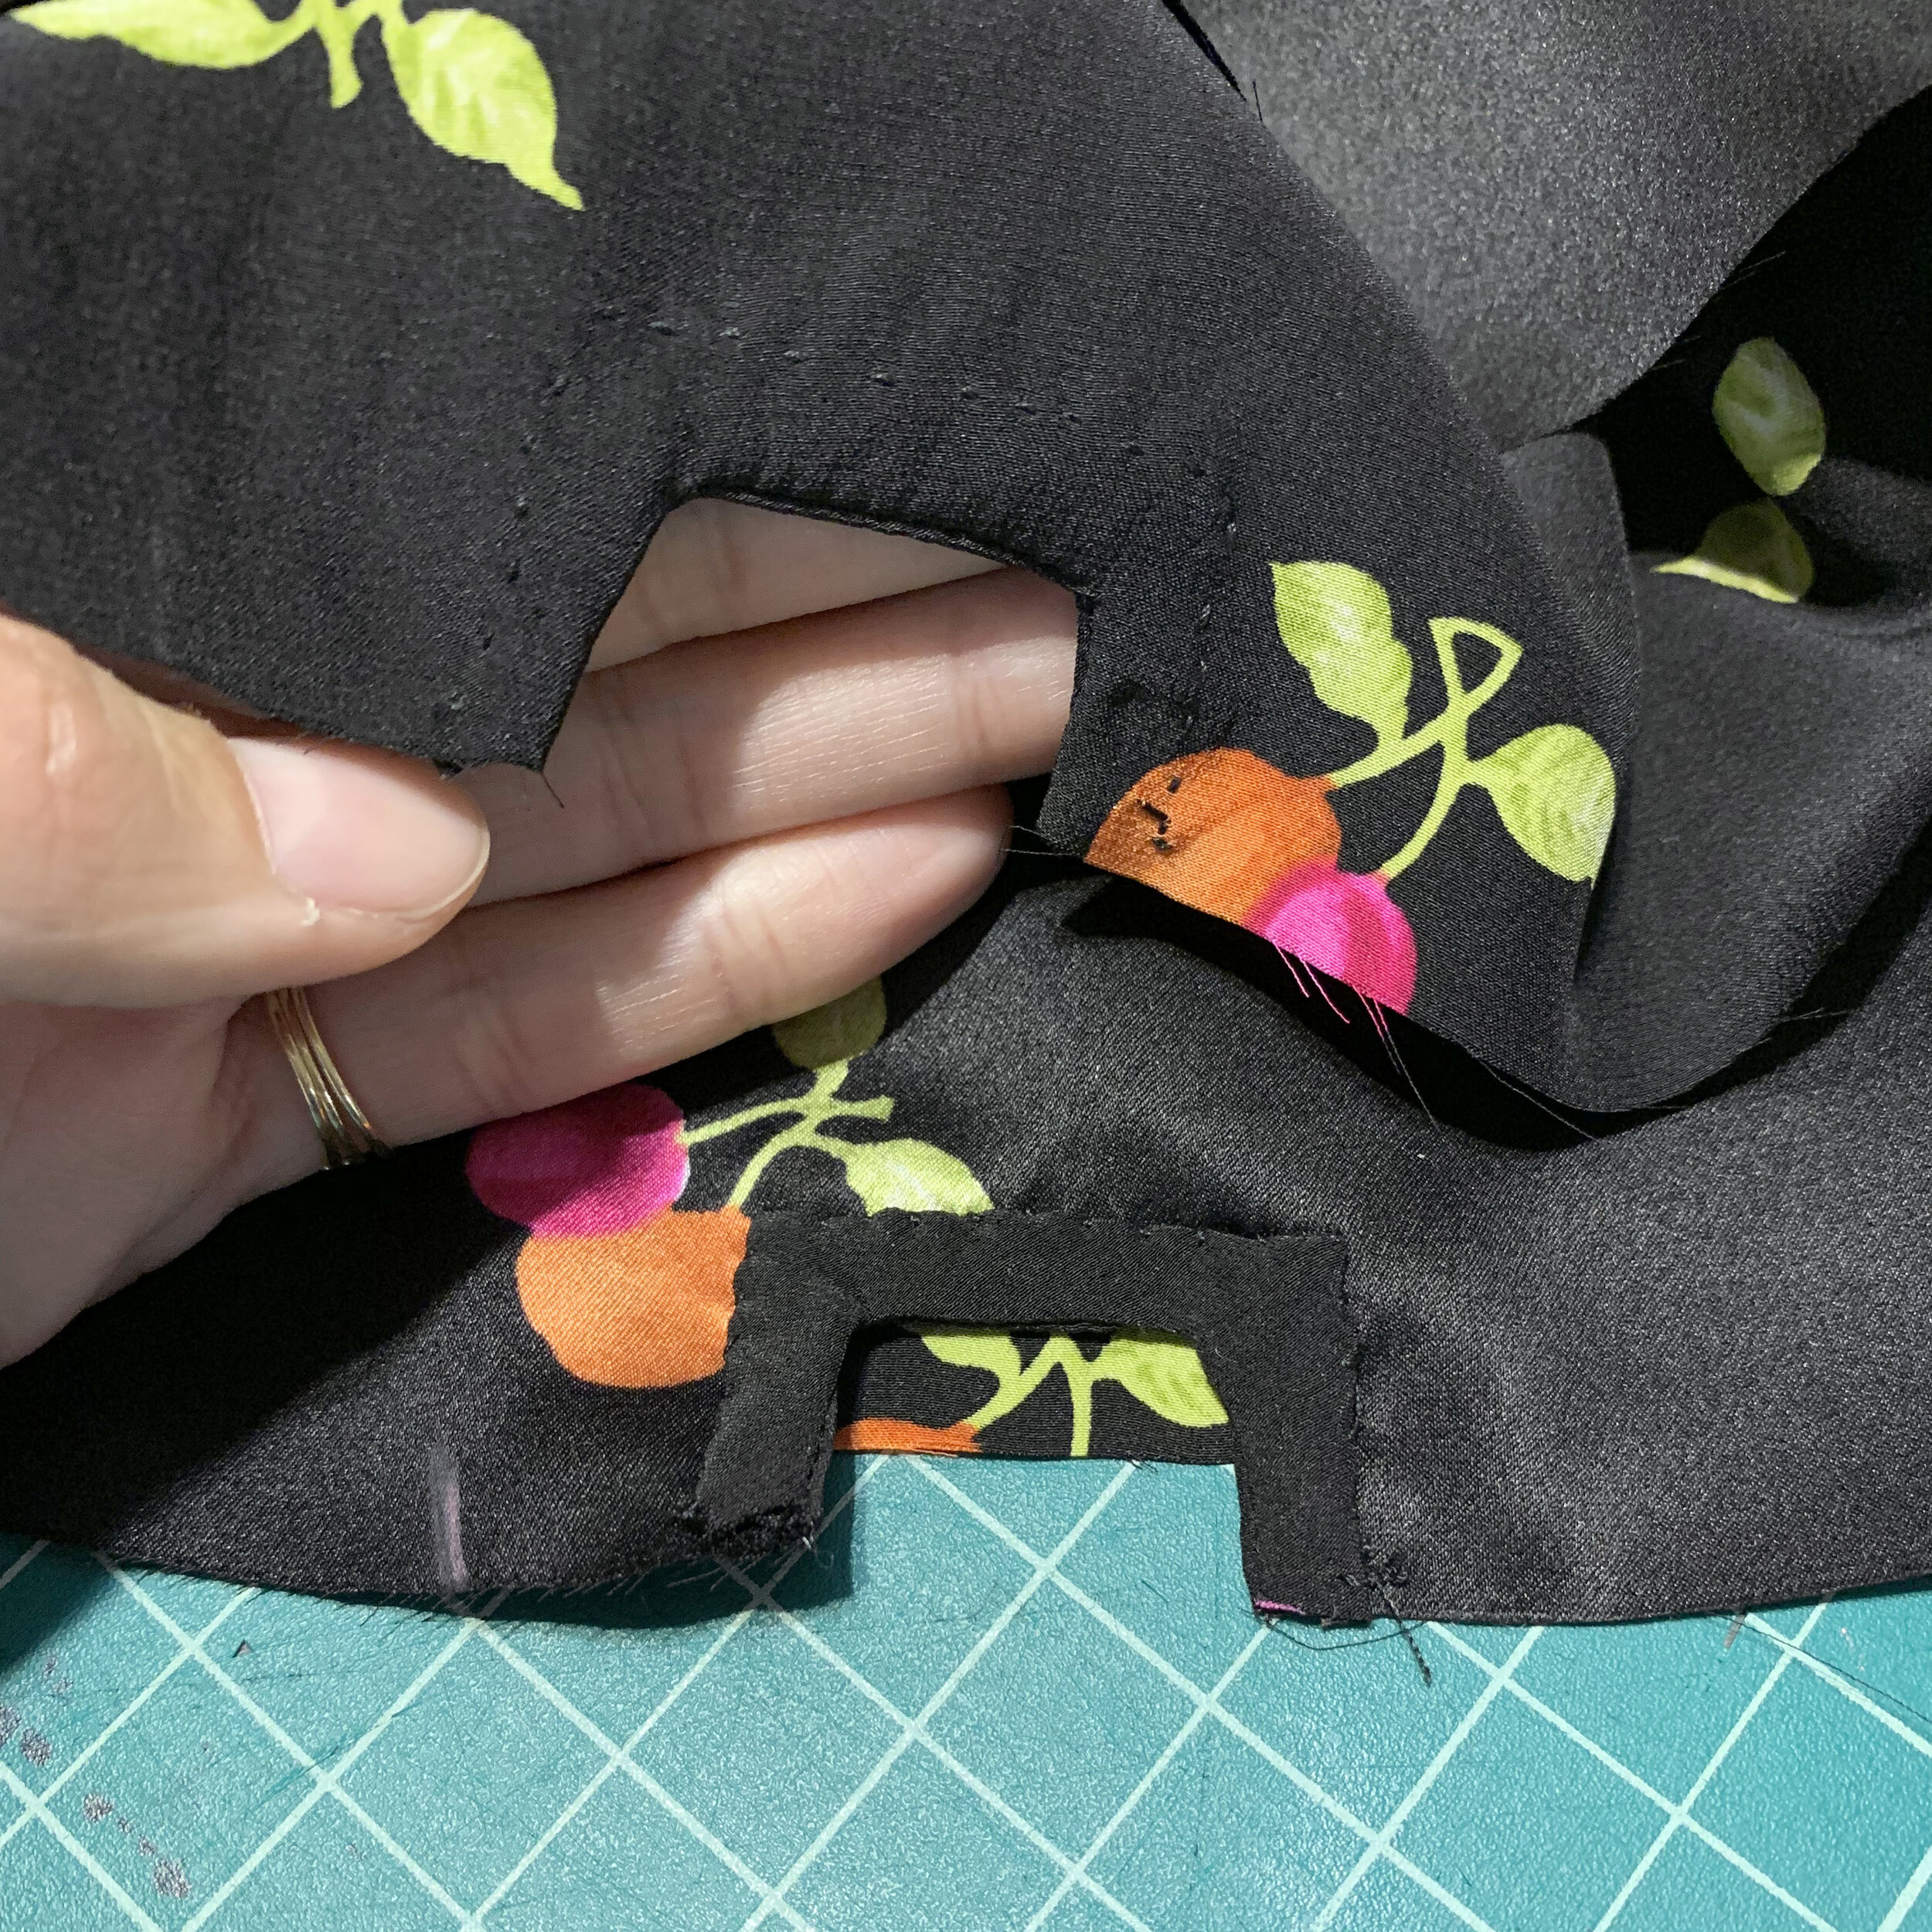
There is no pattern piece for this little facing. Instead, the instructions tell you to get a scrap of your fabric, and cut a rectangle on the bias. There is an illustration indicating where to machine stitch, clip, and then you flip it around and hand sew it into place. This is very fiddly, especially in disobedient silk charmeuse. You could of course edgestitch by machine, but I love this little vintage detail that is only visible to the wearer. Once you snap your cuffs closed, this detail disappears into the fullness of the sleeve.
Here you can also see that the charmeuse has the shiny side to the inside of the garment. This fabric was printed with the matte side as the “face”. I find this more wearable in a dress, and it feels really decadent to have the shiny side to your body. Because my feed dogs couldn’t really grip the shiny side of the fabric, I sewed the first few inches of every seam with a scrap of tissue paper under the fabric. The tissue helps the machine get traction, prevents fabric from getting sucked down, and it tears away easily after being perforated by the needle. I used my walking foot for all the major seams - it was especially helpful when sewing layers of bodice/ruffle/facing, that are prone to shifting around a bit.

I knew I wanted a midi length, so I cut the skirt pieces at one of the lines for attaching trim to View 1. In the end, I had about 1/4 yard of fabric left, so I divided it evenly and added a ruffle at the hem. This got me the perfect length and minimal wasted fabric; win, win! The only other change I made to this pattern was to use an invisible zipper, which I installed with my invisible zipper foot (worth its weight in gold). The pattern does gently tell you, “sew zipper by hand, if preferred.” For the record, I am very fast at hand sewing in zippers, because for years, I preferred it to arguing with my White sewing machine’s wobbly zipper foot.

I know I’ve said this before, but this is truly one of my favorite things I have ever sewn. I enjoyed the process the entire way through, I love my fabric, and yes, this is a style I will wear all winter. I would love to make this pattern again in cotton lawn. I’ve been seeing frilly styles from Batsheva and La Double J, and I had to get in on the silky decadence! Let me know if you sew this pattern! XO, Martha