TUTORIAL: MAKE YOUR OWN CUSTOM BIAS BINDING
There are so many uses for bias binding (aka bias tape): it can replace neckline or armscye facing, add stability to a curved seam, encase a drawstring, or be purely decorative. Bias binding is widely available in a rainbow of colors (and sometimes fun prints), but there are limitations to what you can easily get your hands on.
When I’m sewing plain black or white cotton fabric, using store bought binding is the easiest route to take, and I have nothing against using it. But when I’m using a special printed fabric, or a fabric with a slinky hand (think silk), I find it is better to have the binding be an exact match to my fabric. This way, I know that if I launder the finished garment, both fabric and trim will shrink at the same rate (this ensures nothing gets wobbly and warped), and if the binding peeks out on the outside of the garment while it is being worn, no one can really see it.
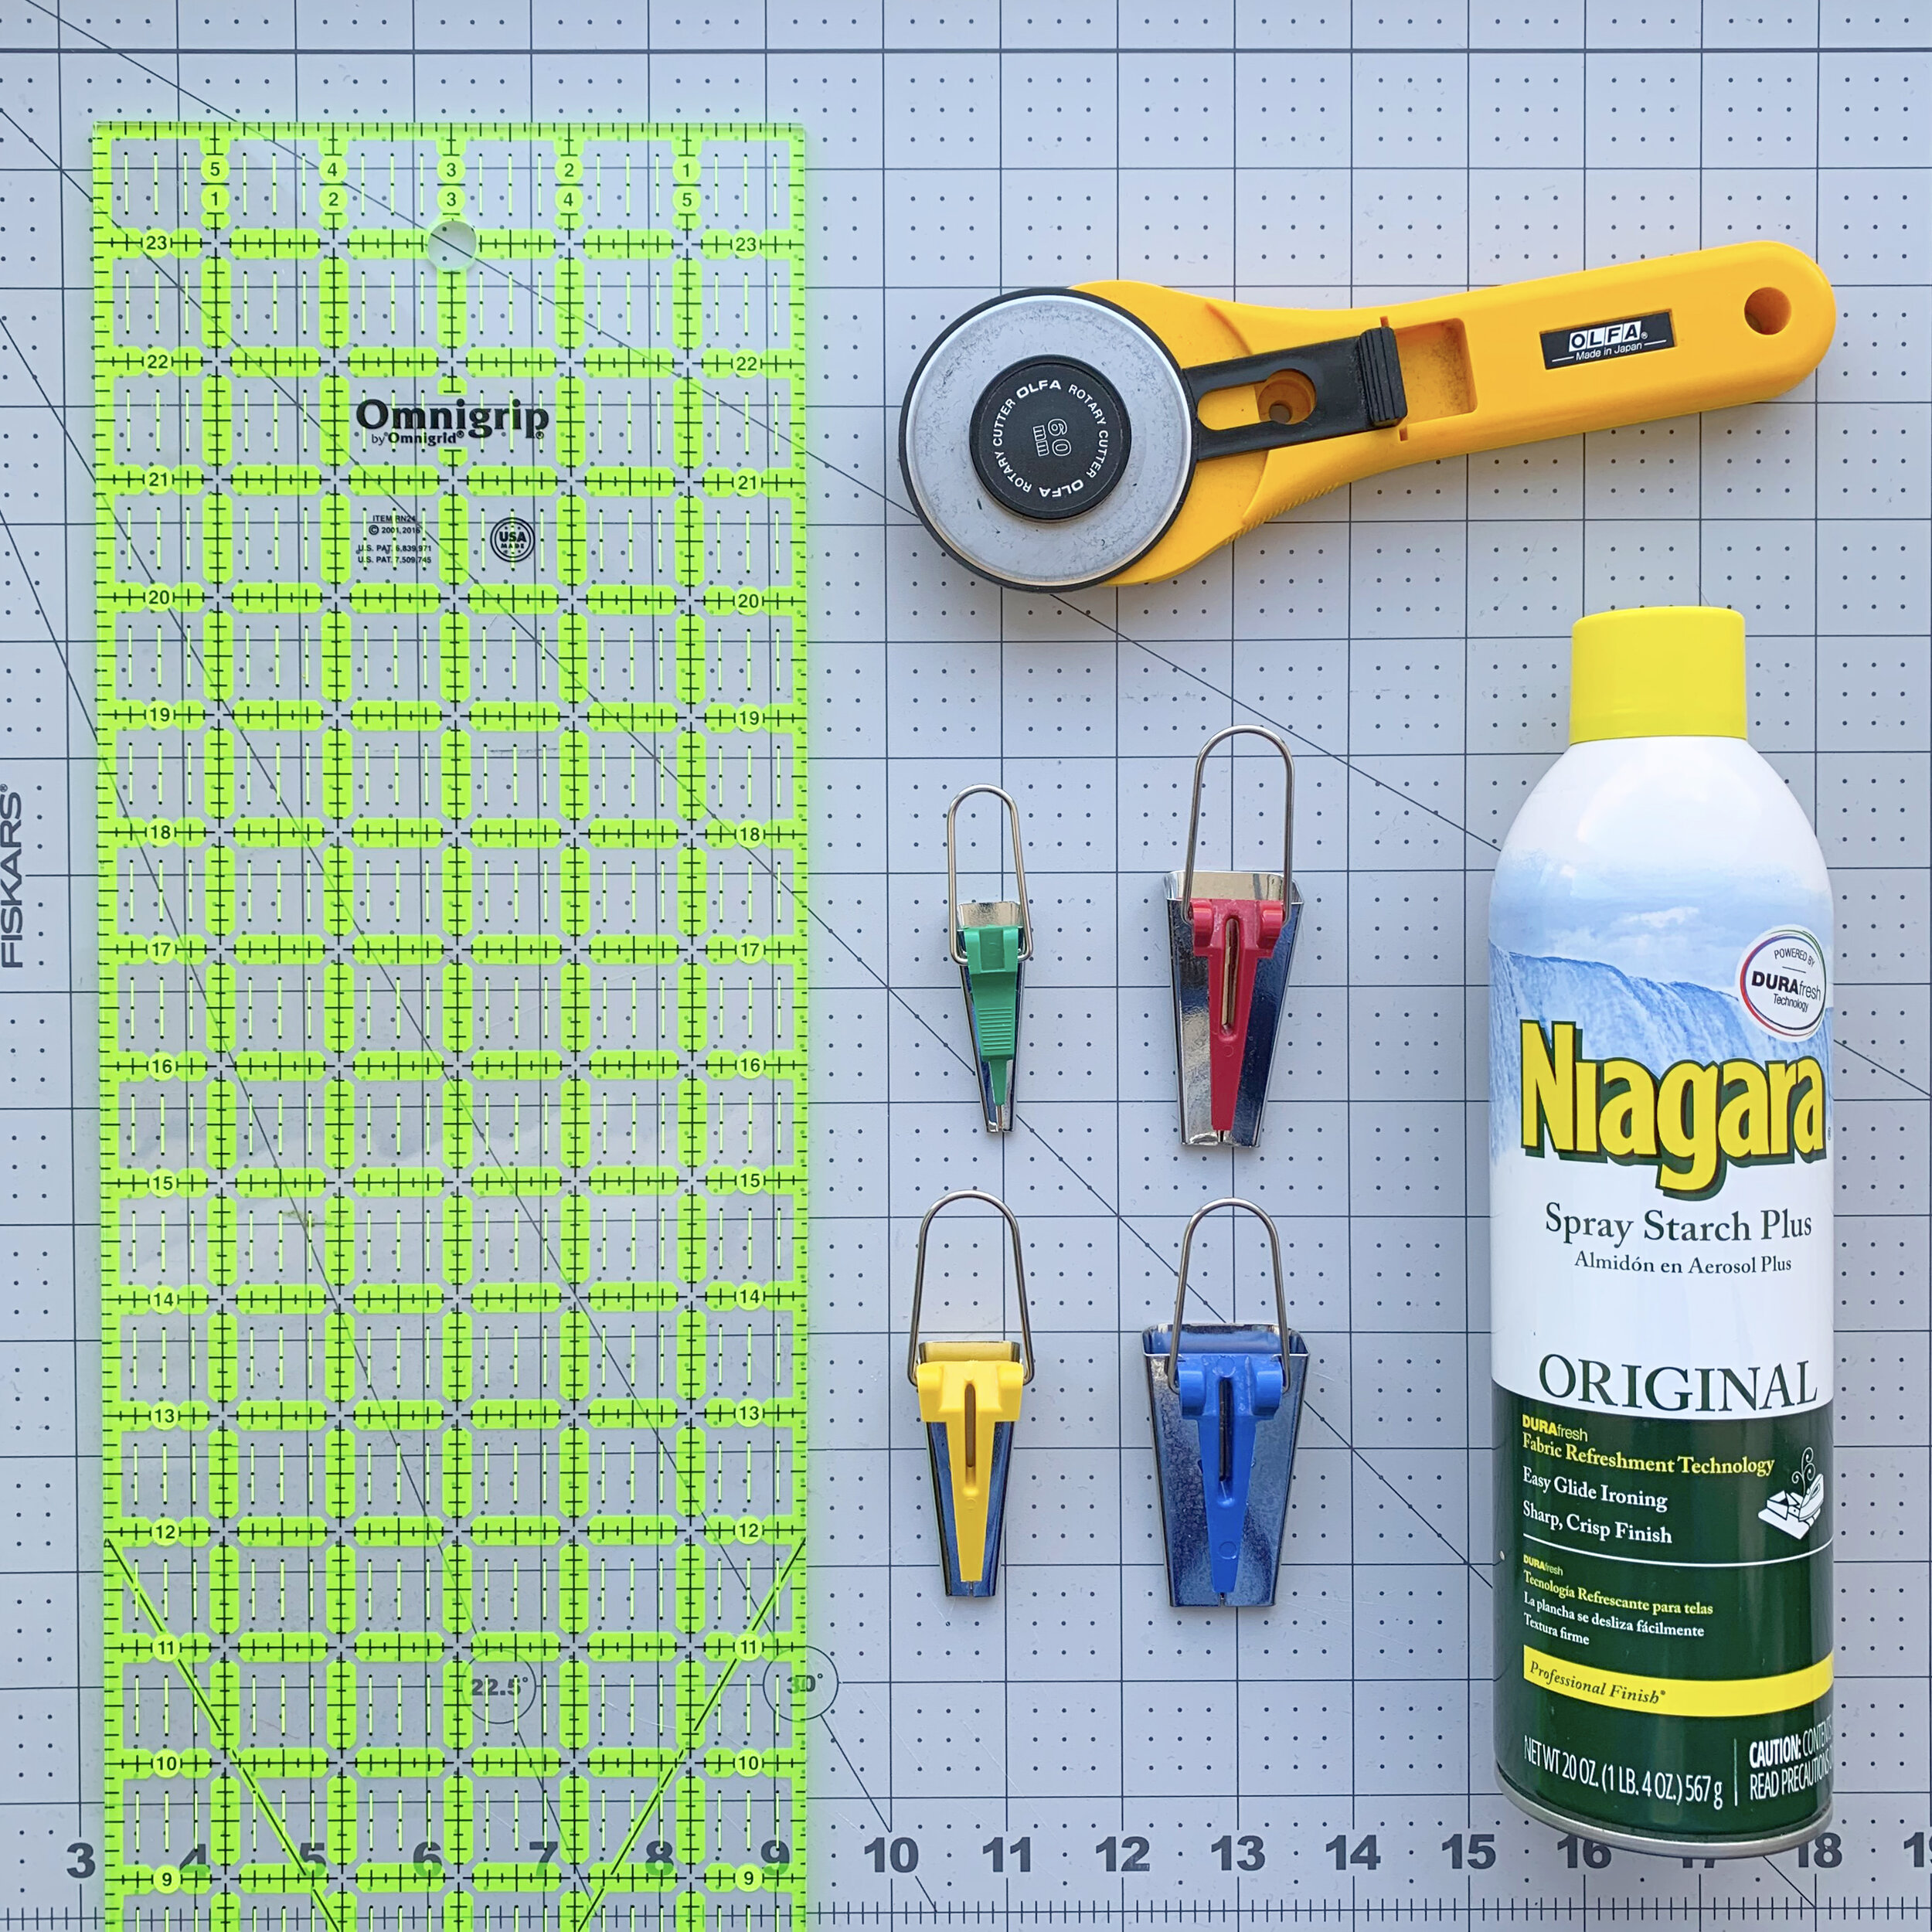
Making your own bias binding takes a little practice and patience, but I enjoy doing it, and the results are always worth it. Here are the tools you will need in order to make some of your own (shown in the photo above):
Bias tape makers - I’m not sure if these are the exact same ones I have, but they are very similar.
Cutting mat - Mine was gifted to me by Fiskars, I have linked to a larger size than what I have.
Ruler - This is my favorite ruler. I prefer a thick plexiglass one for safety reasons. Use extreme caution when using a flimsy or thin ruler - the rotary cutter can “jump” the ruler, damaging your fabric or cutting your hand.
Spray starch - This is optional, but recommended. Some fabrics don’t need starch, but others are unmanageable without it.
Iron & ironing board. You won’t see mine in this tutorial, because I’m in dire need of a new ironing board cover, and just broke my iron!
Fabric, ideally scraps from the project you are working on, with some selvedge attached, or another indicator of the grain (such as a woven stripe, a torn crossgrain, or pulled crossgrain thread).

Step 1. Put your fabric on the cutting mat, and use the mat’s markings and the selvedge to square up your fabric. Take your time doing this, especially if you are using a weird little scrap, or if your fabric likes to wiggle off grain.

Step 2. Find the 45º diagonal marking on your mat. Carefully lay your ruler over the fabric, making sure not to disturb the grain, and match the ruler to the 45º markings.
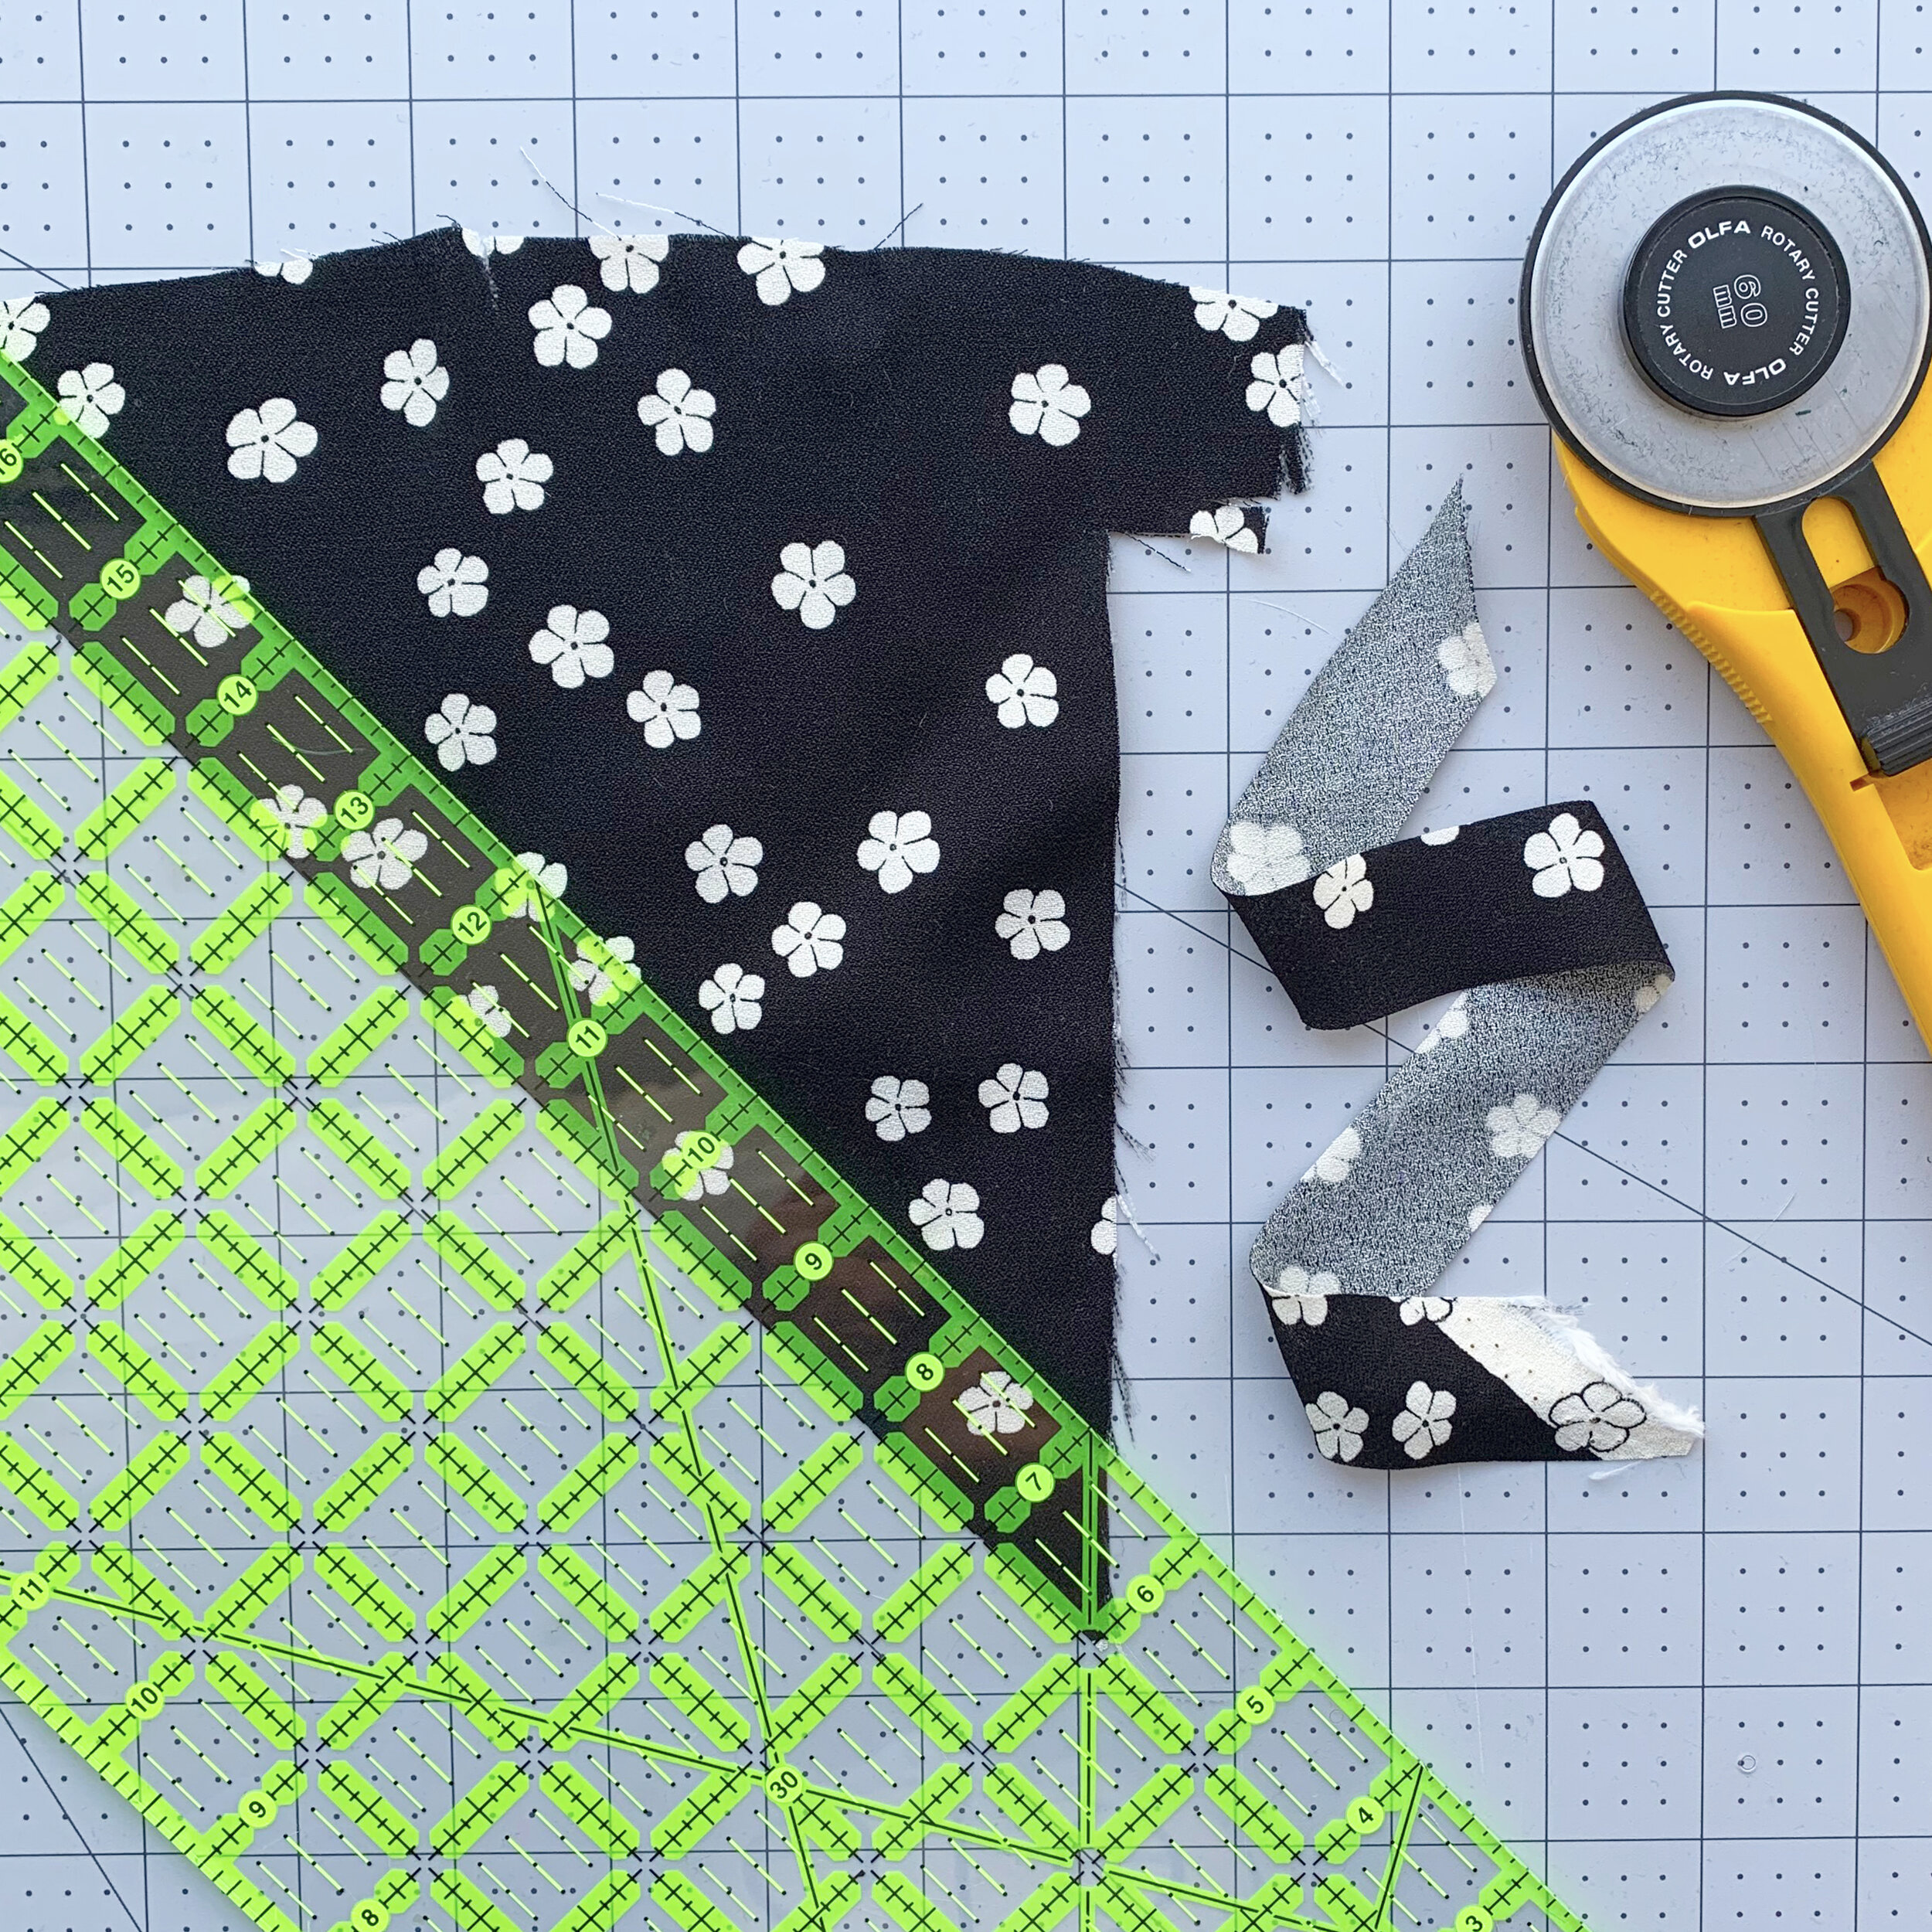
Step 3. Make your first cut. I think it is easiest to proceed after removing one half of the fabric at this point, so you can clearly see the edge of the newly cut bias line.
Step 4. Your pattern should tell you what width of bias binding is required. For this demonstration, I am making 1/2” single fold bias binding. To create 1/2” finished binding, I will need 1” wide bias strips of fabric. The finished width of the binding is roughly the width of the narrow opening on the bias maker. Since I know I need 1” strips, I’m going to proceed with cutting them at 1”, and peeling each one away *gently* as I go.
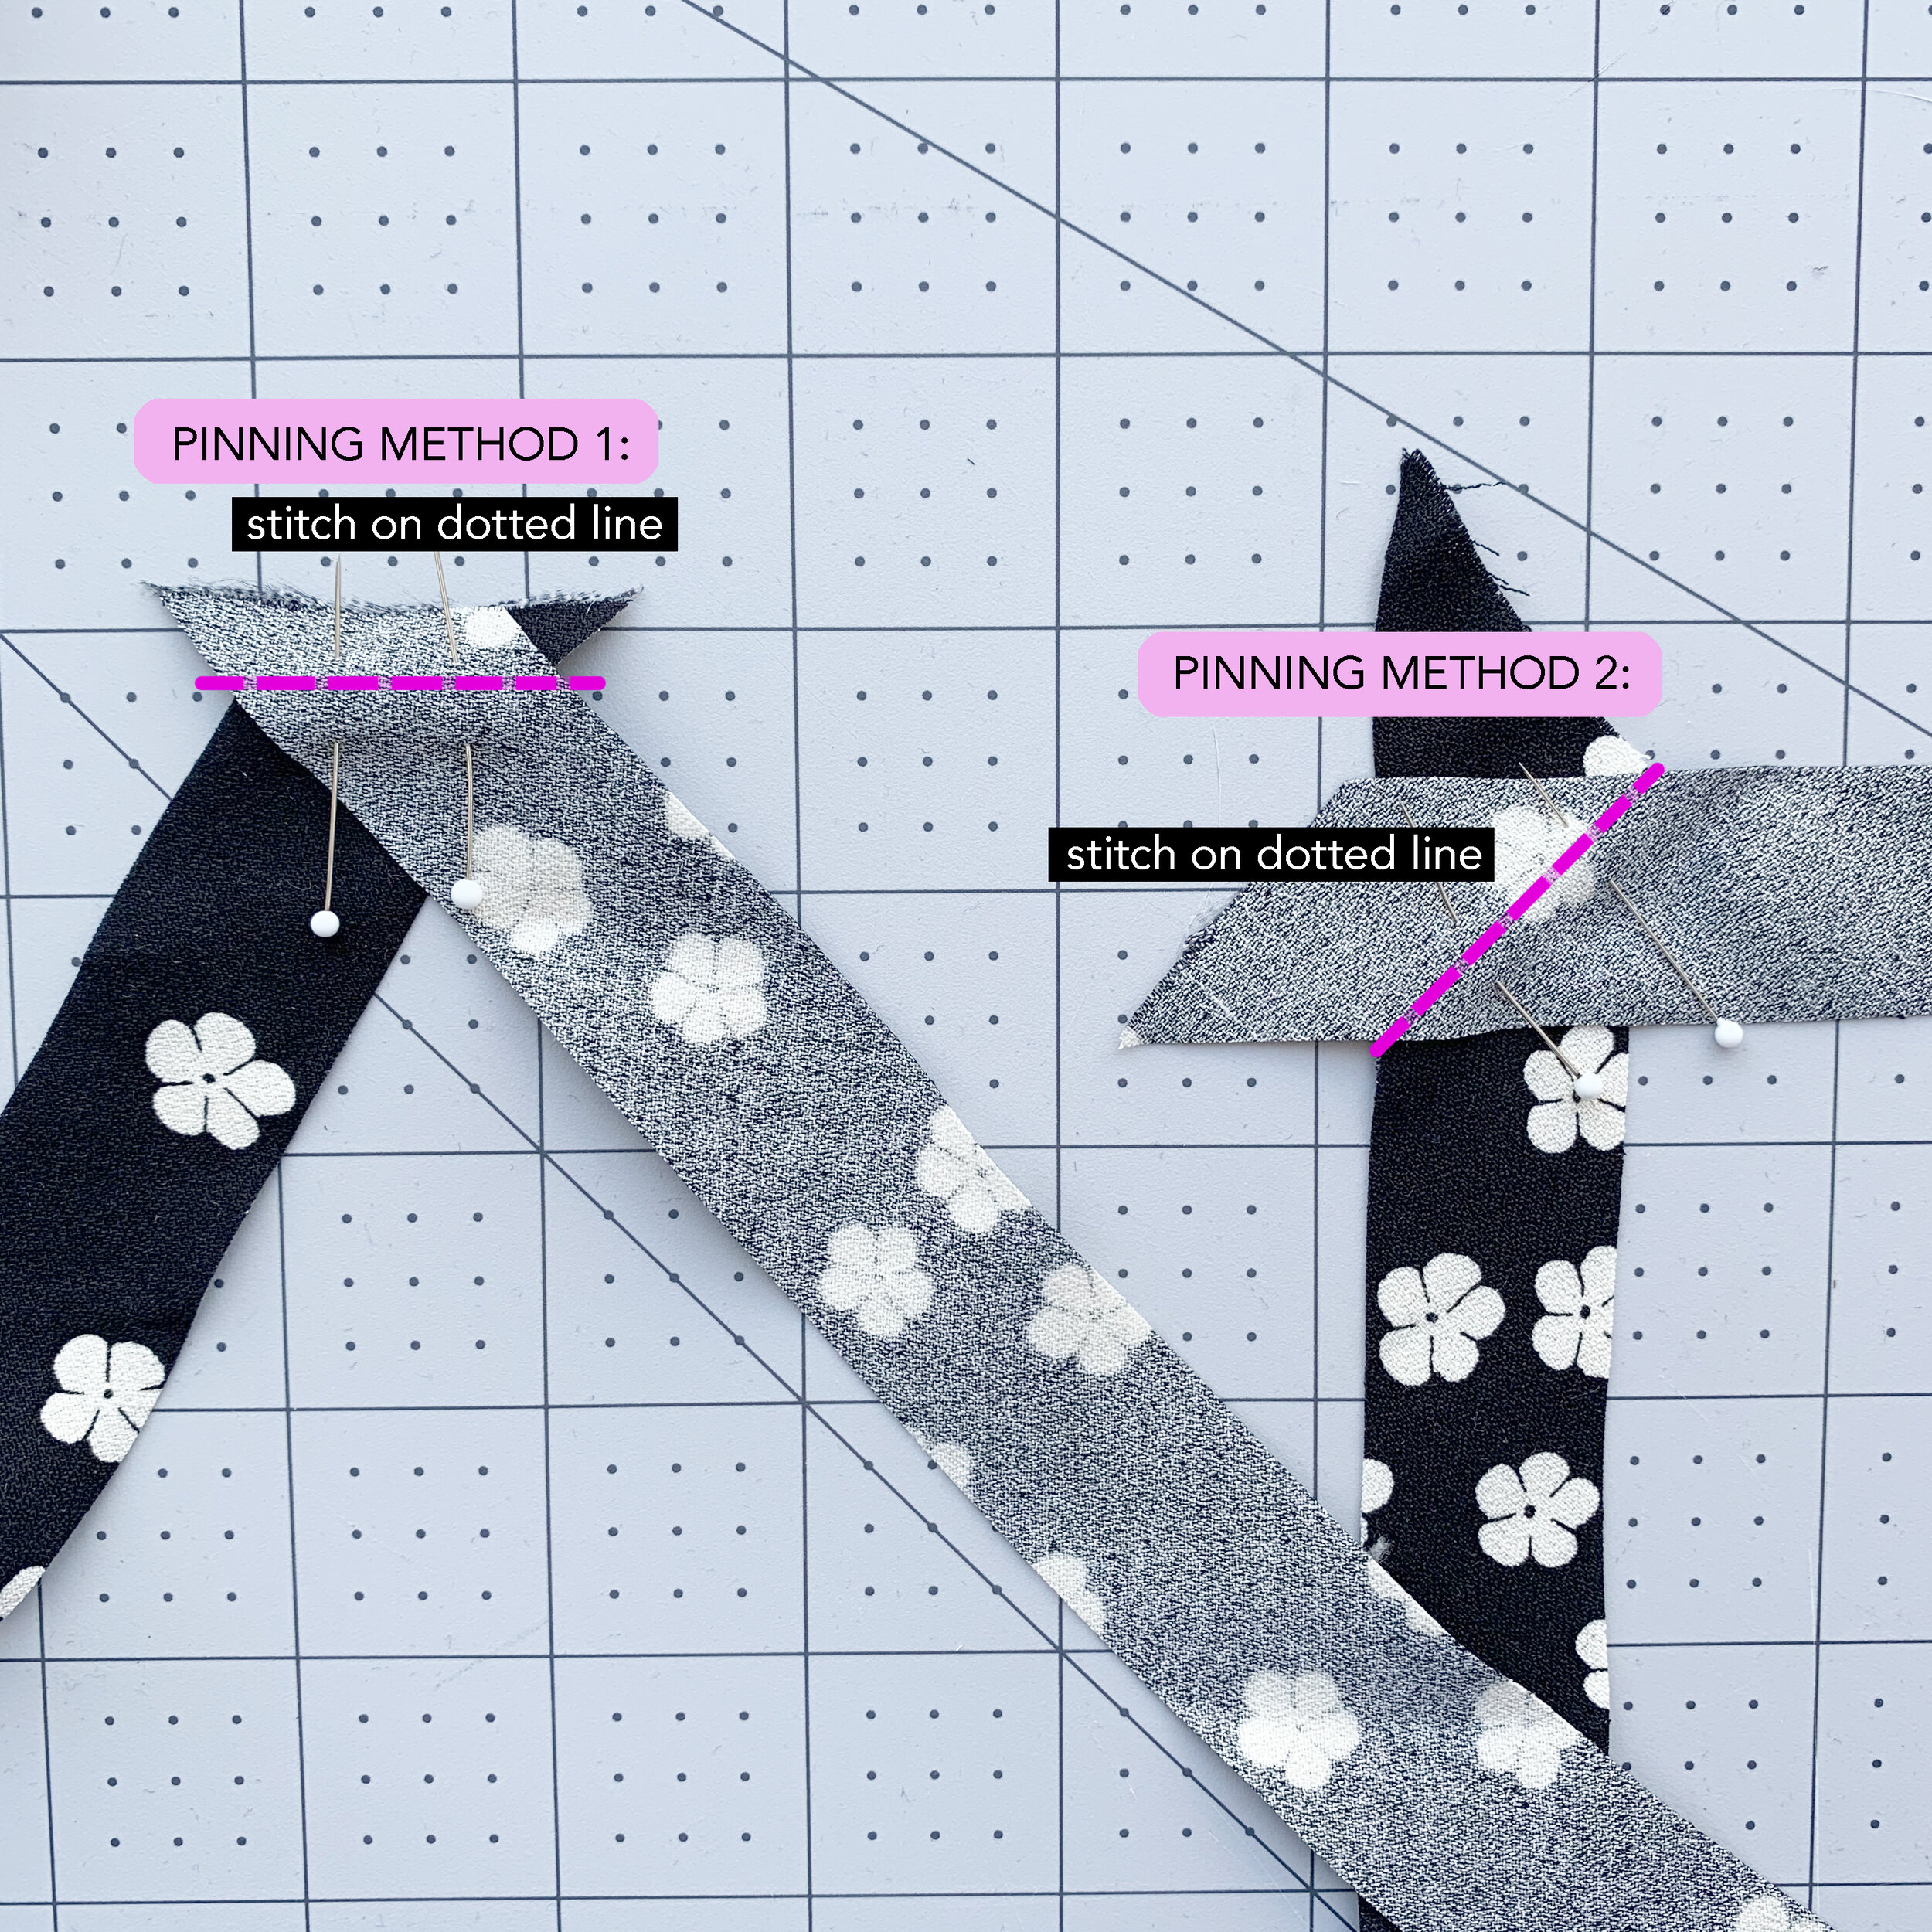
Step 5. To create continuous bias binding, sew the strips together. This part can be a little conceptual. If it is easy for you to see how the diagonal edges line up, do it that way, if not, layer your fabric strips at a 90º angle, sew a 45º angle seam. It is essential to make more binding than you will require for your finished project - this way, you can cut around seams if you want, leave excess at the edges to be turned and stitched under, etc.

Step 6. Everything is sewn together! Great, that’s my least favorite part. Now, trim your seams to about 1/4”, and press seams open. When working with bias cut strips, try not to stretch or distort them. Use a light touch.
Step 7. Turn on your iron. Use the appropriate heat setting for the fabric you are using. Organize your tools on the ironing board. You will get the best results if you are methodical and consistent.
Step 8. LIGHTLY mist your fabric in spray starch. This will stabilize the bias cut strips, and will help them hold the press. For some fabrics, I find it almost impossible to get a good press without starch. Use just enough mist to dampen the fabric, it shouldn’t be wet. Starch can burn, which will turn your fabric brown. It can also get crunchy in an undesirable way, but it will wash out, so if that happens, it’s not the end of the world.
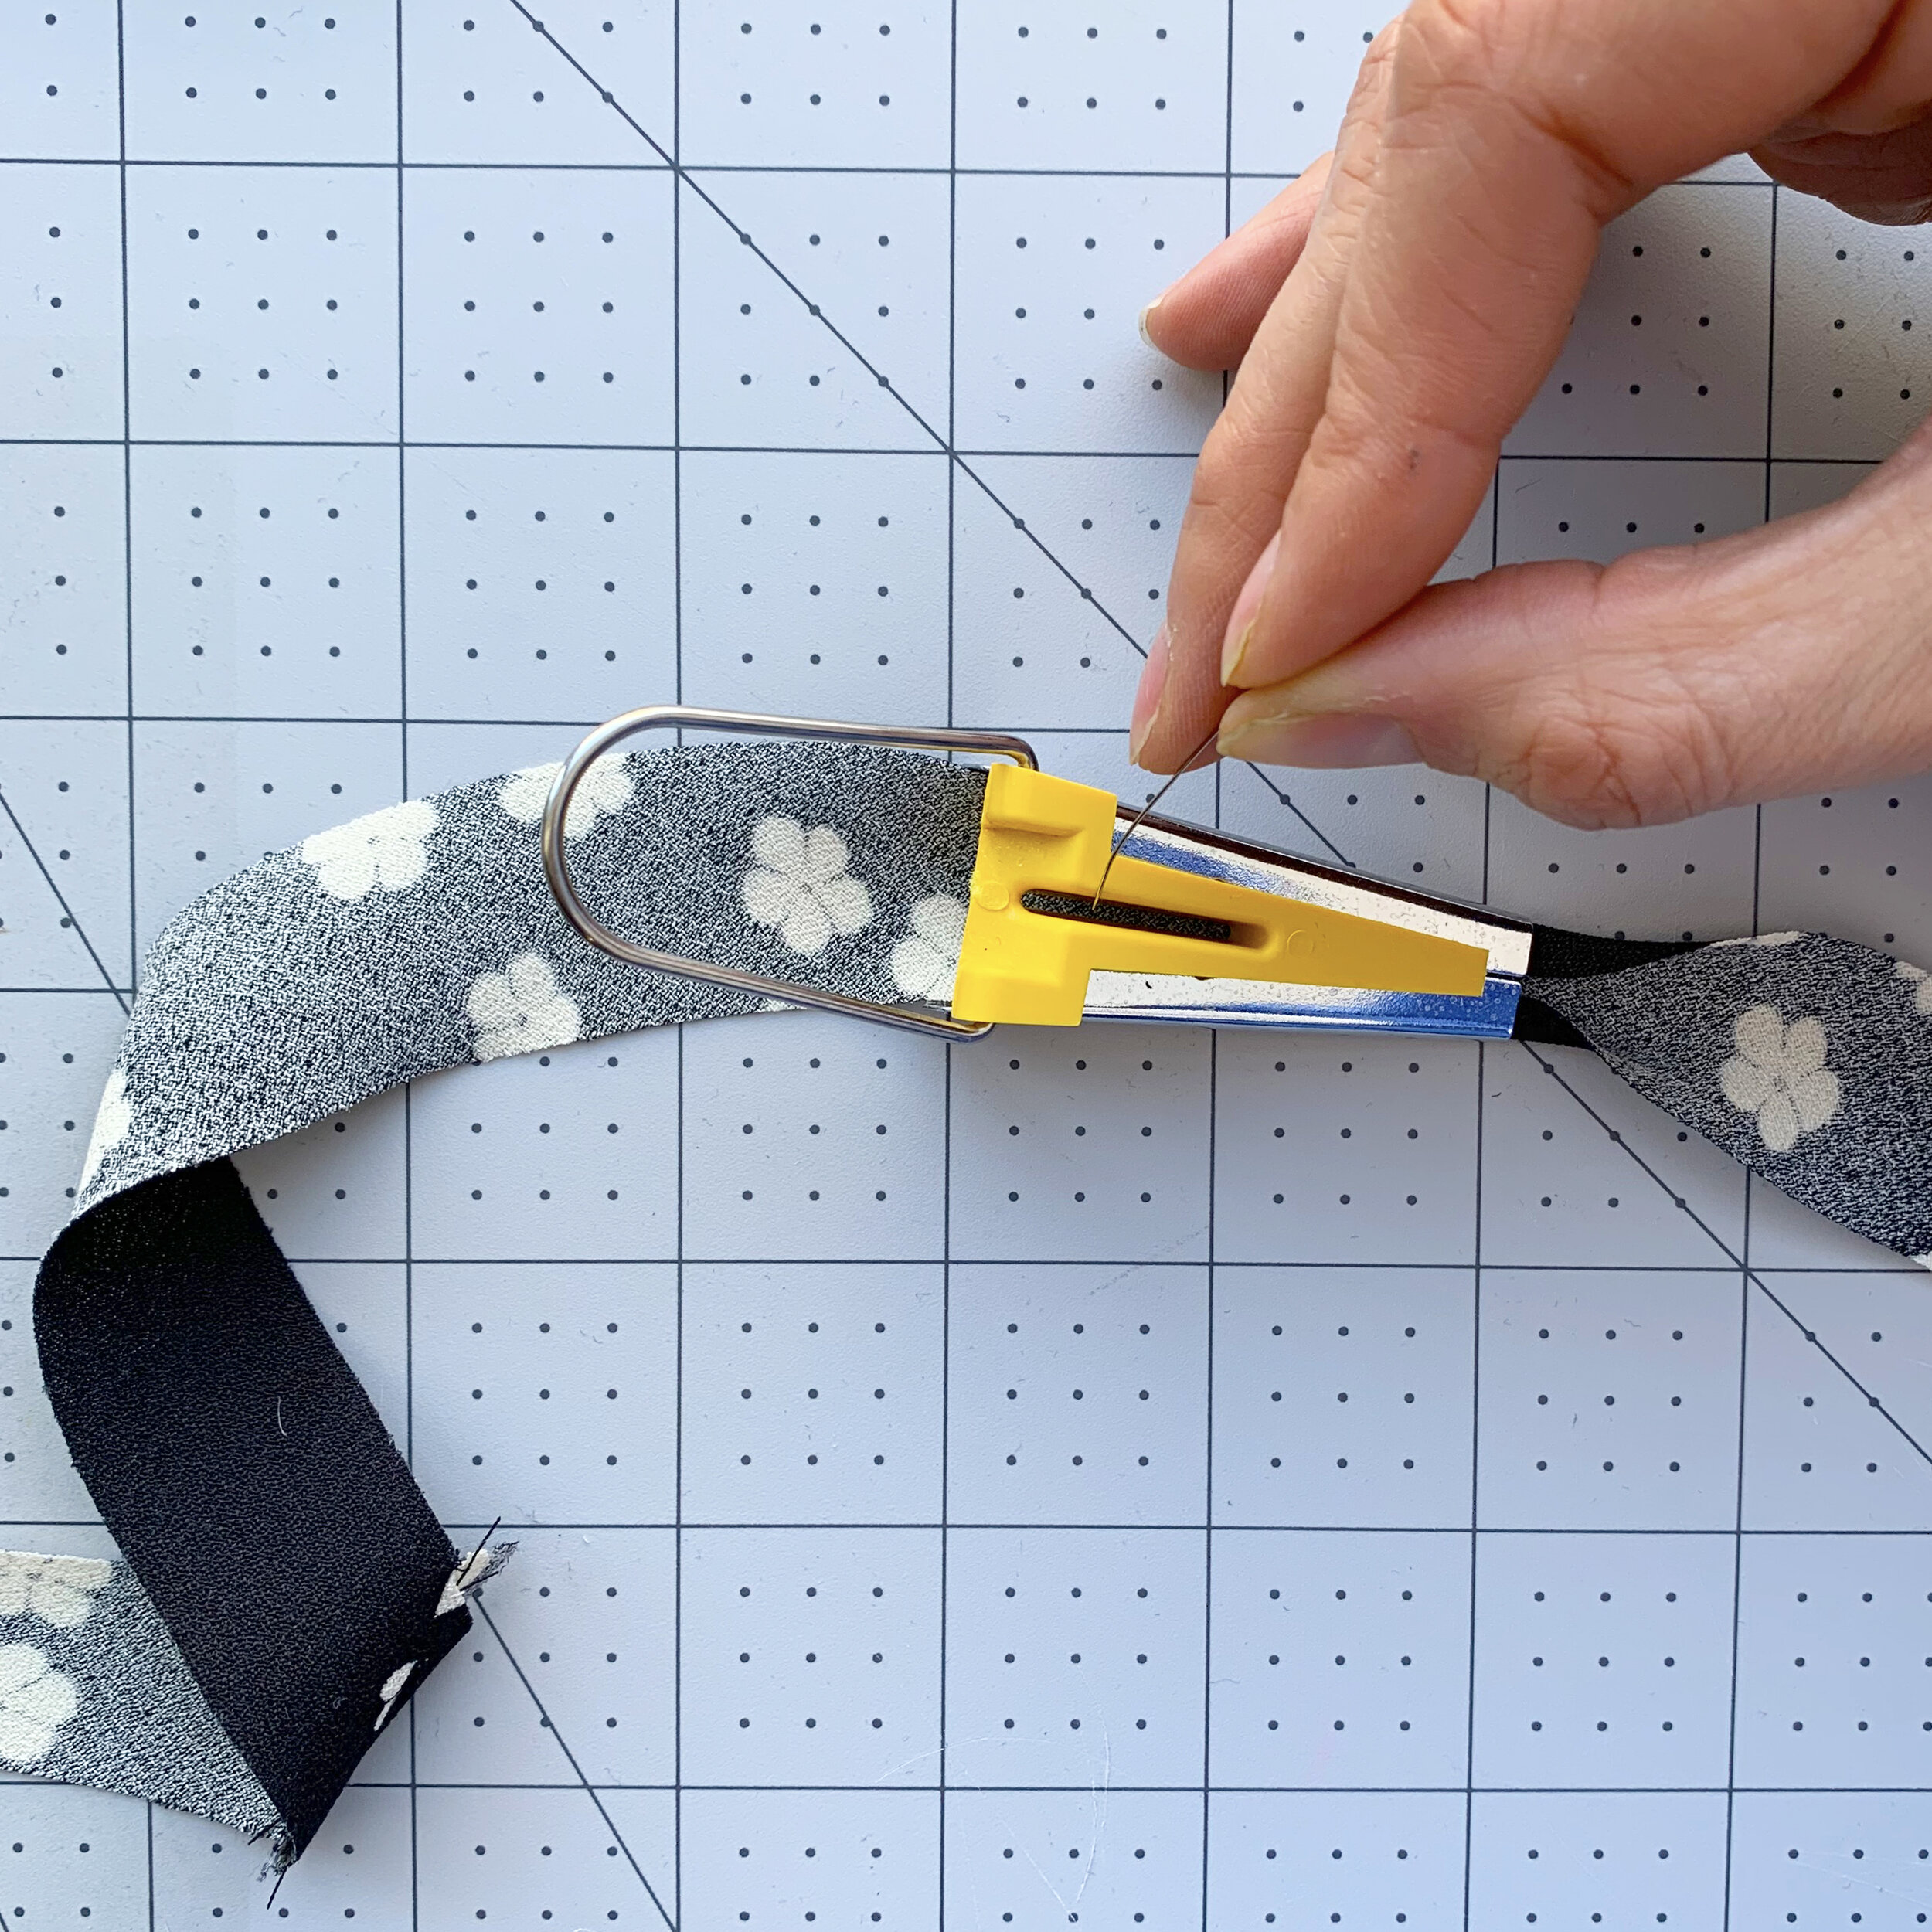
Step 9. Thread fabric through the bias binding maker. Insert a pin or an awl into the slot at the top of the bias maker to guide fabric into the narrow opening. The first few inches are always wobbly for me! It’s ok, you should have made more than what you will need for your project. Sometimes I just pull the fabric back and forth through the maker, until I find the right balance to get symmetrical results.
Step 10. As the fabric exits the maker, place the iron on top of it to press. Don’t slide the iron, as this will cause the fabric to flatten out, negating the work you just did with the metal bias maker. Just pick up the iron, place it down, and proceed with the next few inches of fabric coming through the maker.

That’s it! You now have a roll of custom made bias binding! Personally, I love to make too much so I have some leftover in my stash. I use a lot of similar and complimentary fabrics, so it’s nice to coordinate the trims and interior notions across my wardrobe. You can also use it as a decorative trim on the exterior of a garment, as I did at the neckline here. Additionally, it’s a wonderful way to upcycle your fabric scraps! Do you make your own bias binding? Or do you prefer to buy it premade? XO Martha
If you have found this post helpful, please consider making a “tip” to my Kofi account. Any amount is appreciated, and tips help offset the cost of creating my blog content, and keep this blog ad free. Thank you!