VINTAGE MADE NEW: 1972 McCALL'S 3131 IN PINK LIBERTY LAWN WITH RIC RAC

Sometimes I just want to sew a dress. A simple one, that I can assemble without much critical thought: make my flat pattern adjustments, tissue fit, and get to sewing; darts, sleeves, gathering, hems, presto! I have a new dress. I’ve always been a Dress Girl - only in the past maybe 2-3 years would I tell you I am OK with wearing jeans or trousers, prior to that I would tell you I flat out hate them. So making myself a new dress is usually joyful for me. And we need joy these days!!
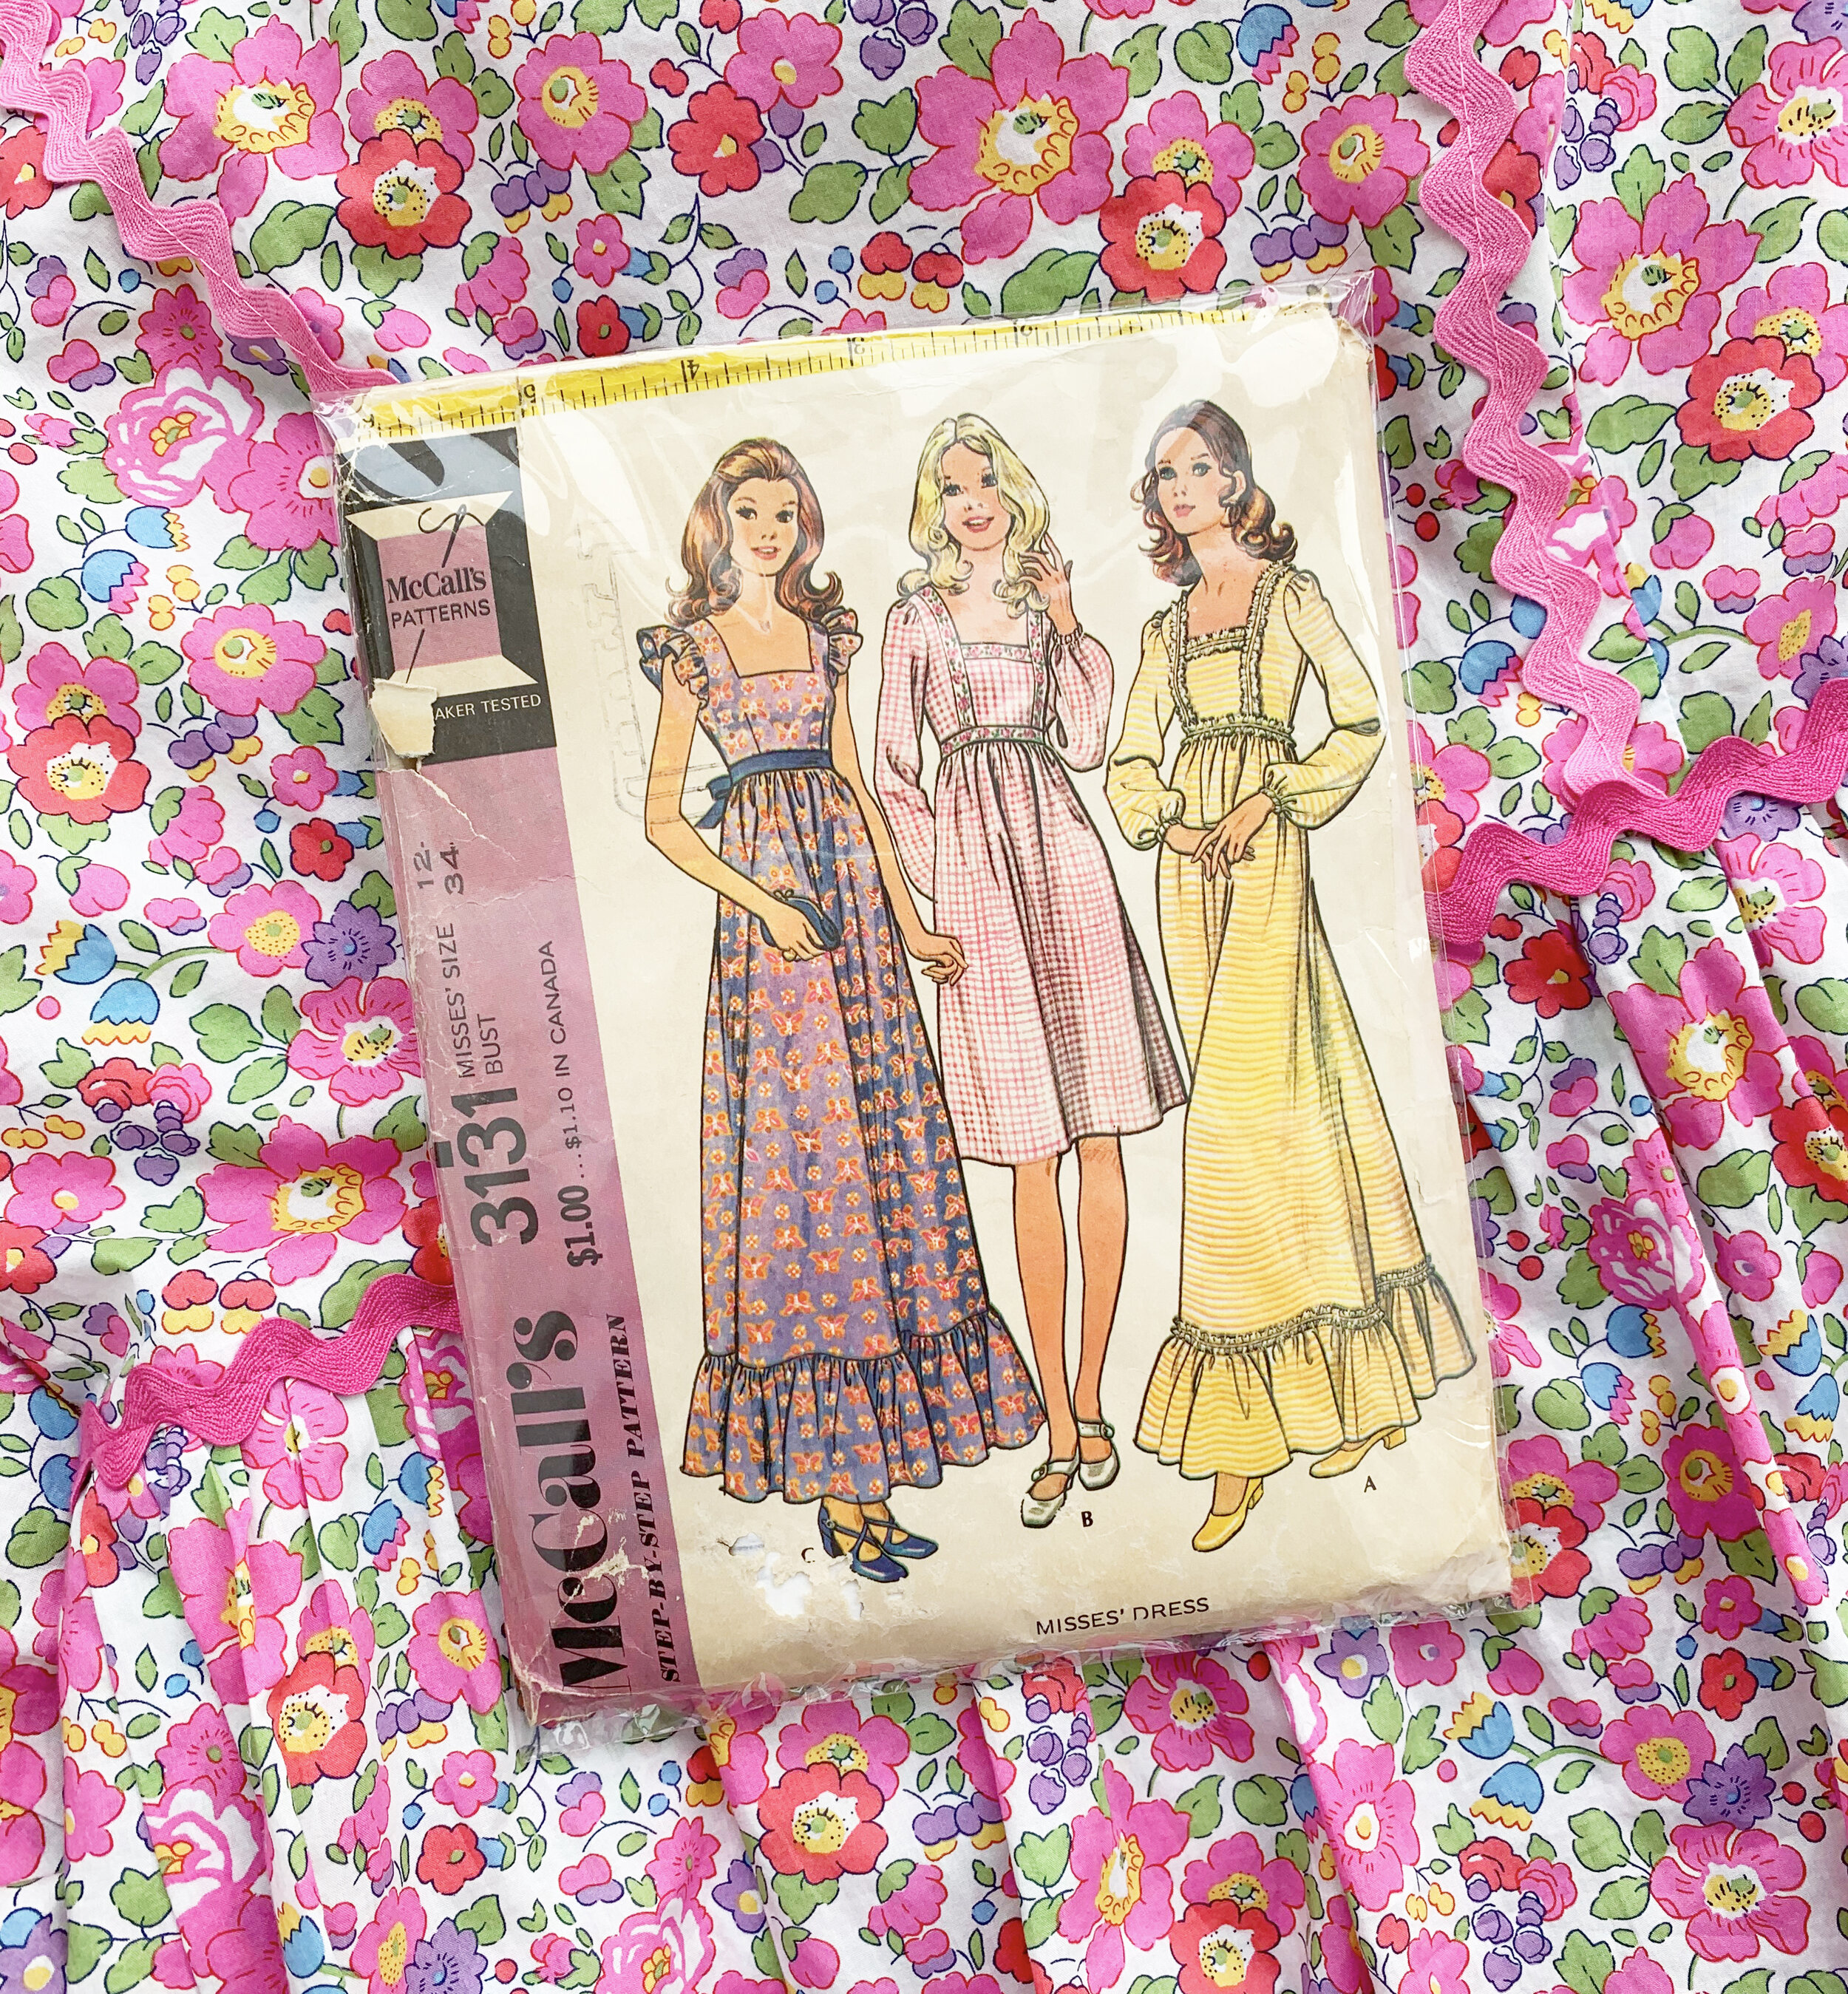
The last dress I sewed was very similar to this one. In fact, I had trouble deciding between the two patterns when I started that project. I went with the 1973 Simplicity pattern for that project because I was confident it would fit well and I loved the sleeve. I own a lot of 1970s patterns, but most of them are Butterick and Simplicity (vintage Simplicity always fits me the best). I only have a few vintage McCall's in my collection, so I think this is the first McCall's from the 70s that I've sewn.
The envelope describes the pattern as “High waisted dress has back zipper. A, C have ruffles. A with novelty trim, B with ribbon trim, have puffed sleeves with wrist elastic. C has armhole ruffle, ribbon tie.” I went with my usual Big 4 size 12, and this pattern is one size per envelope (typical for vintage patterns).
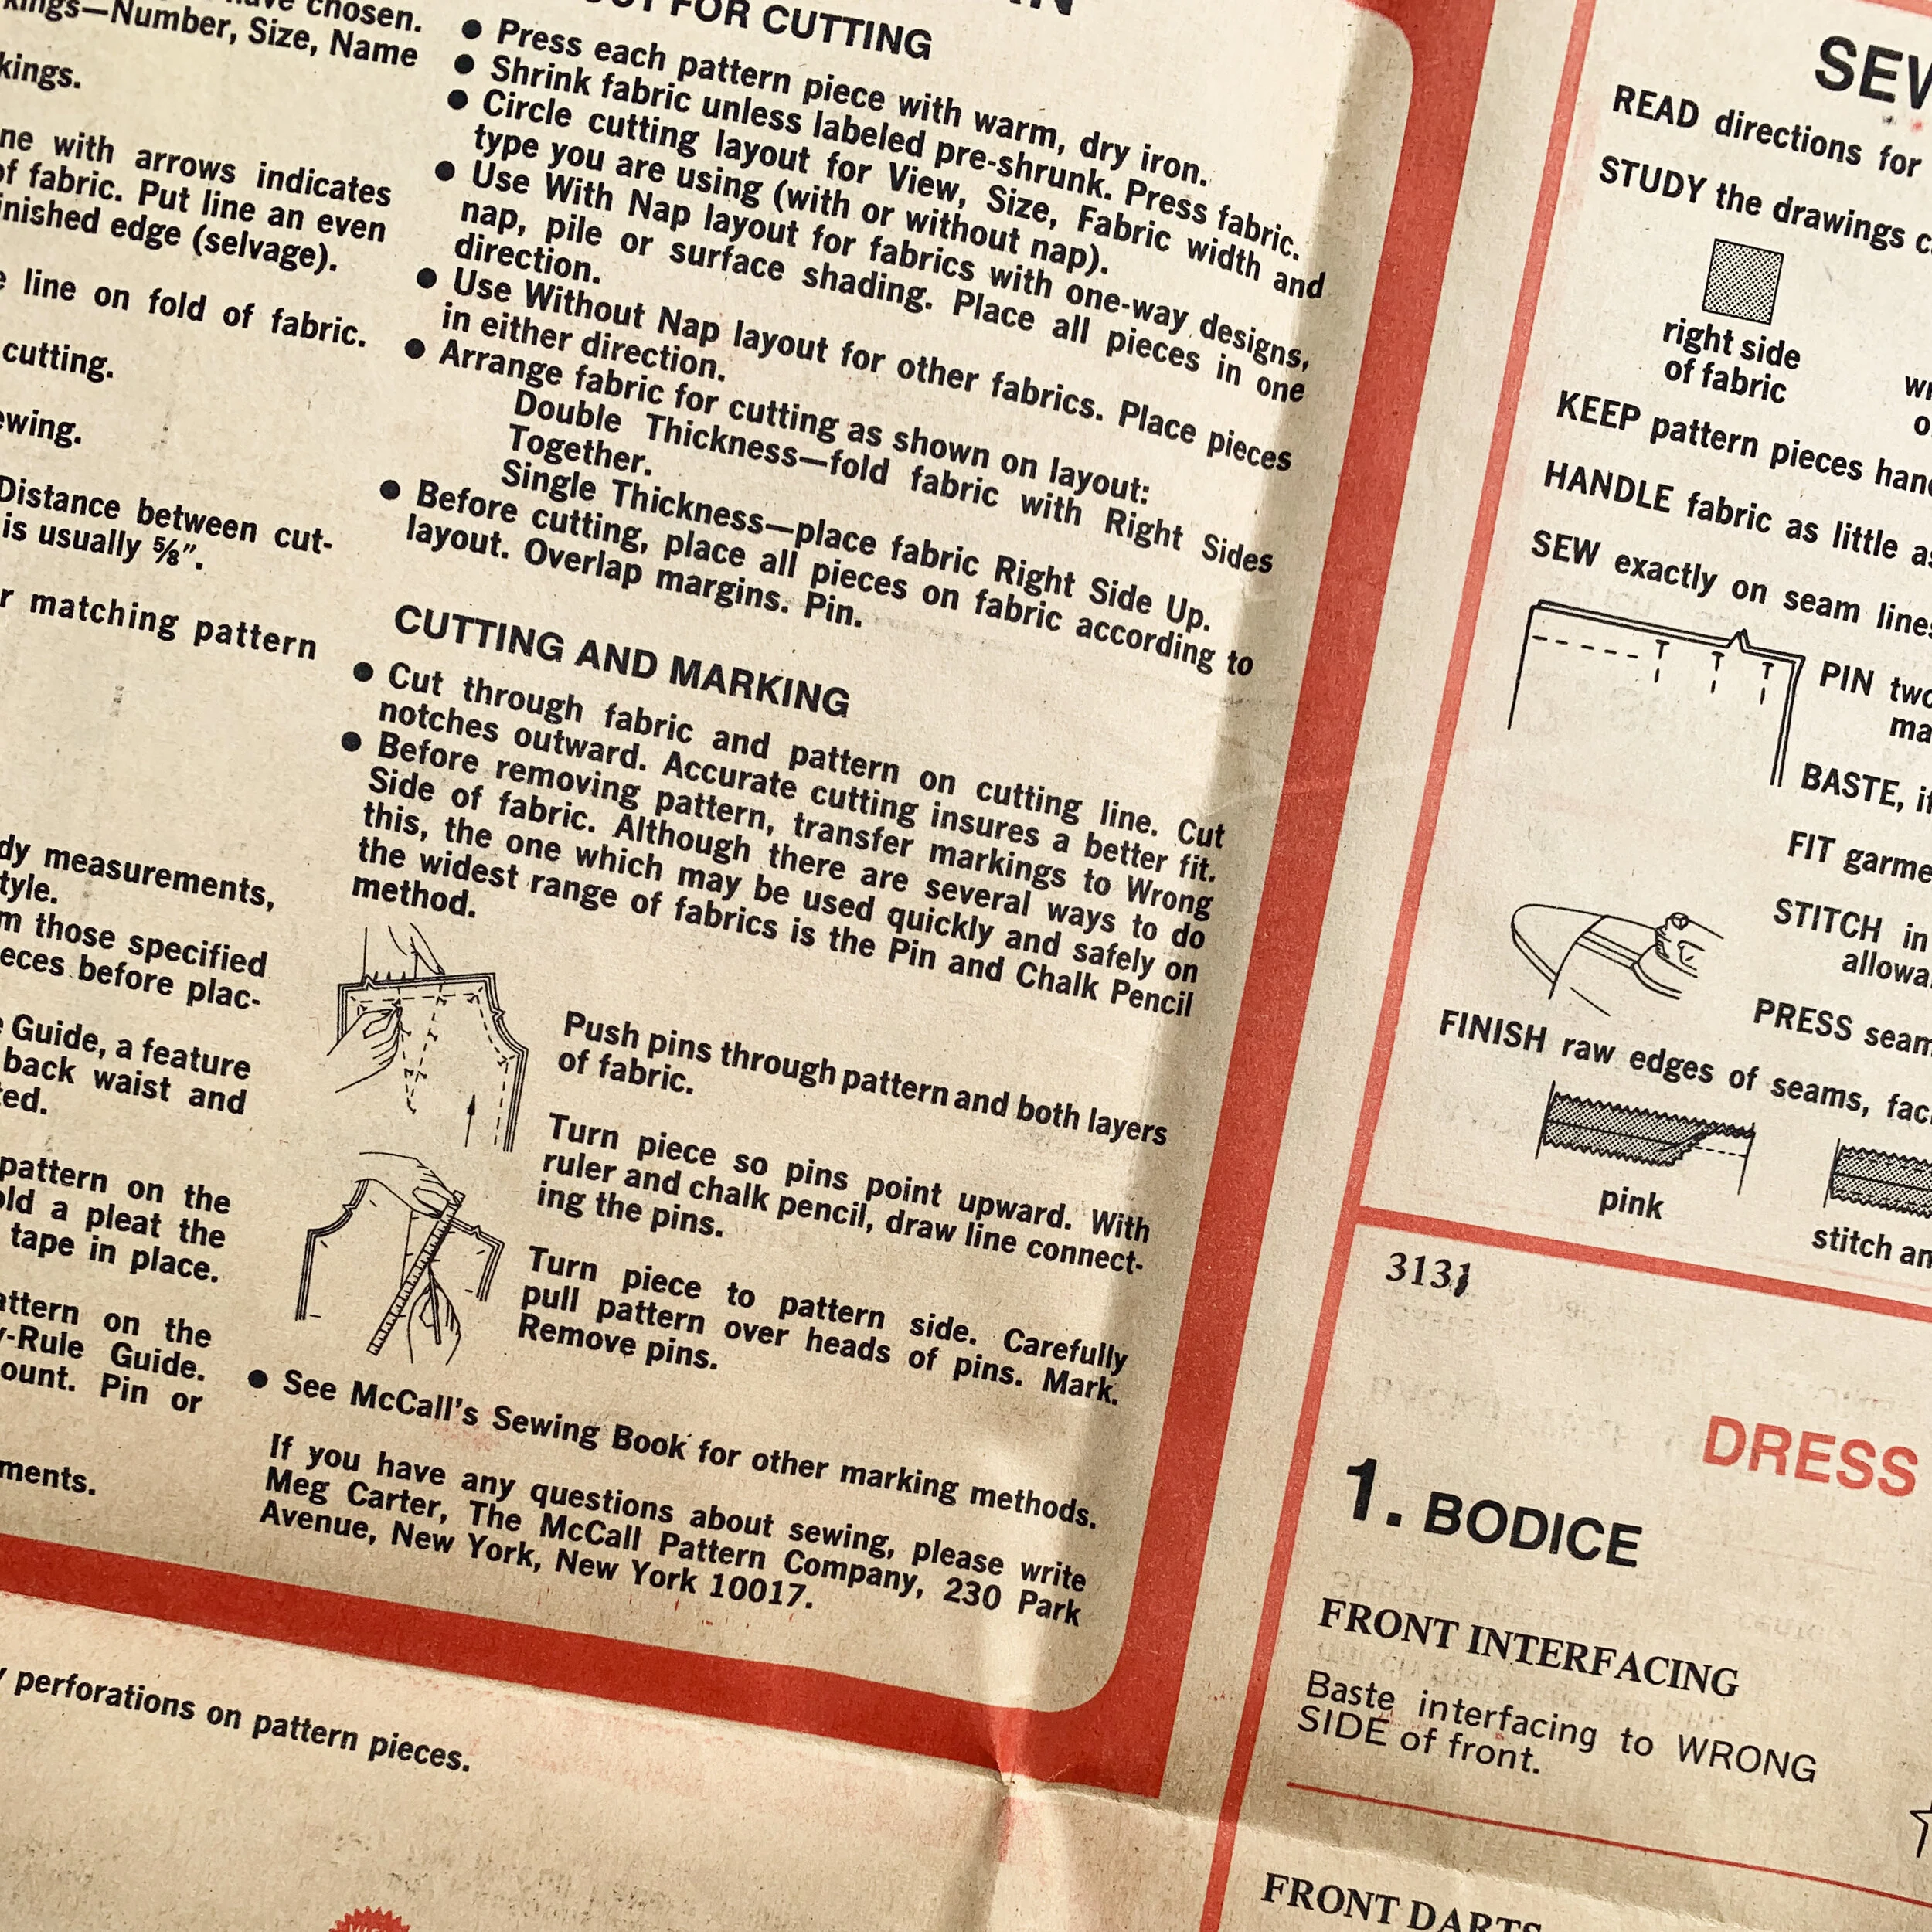
The instructions are great, printed in red and black ink. Honestly, if you read every printed word, including the sections "How to Use a McCall's Pattern" and "Sewing Directions", you get all of the information you need to learn how to sew, in clear, concise language. The methods are a little dated, but I learned how to sew from 90s era McCall’s patterns, and the instructions got me pretty far!
As for drafting, it's quite nice, but seems to be drafted for a shorter height than most patterns. I am 5'8", and always need to lengthen patterns, but needed to do more here than usual, which makes me suspect I won’t like any McCall’s patterns based on that block. I like that the bust darts are drafted with a curve, and the center back seam is also curved. The front bodice piece curves at the shoulder - I’m going to come back to that later. Separate pieces are provided for facing and interfacing, and the interfacing pieces are smaller, to keep excess interfacing out of seam allowances and facing hems.

My fabric is Liberty Tana cotton lawn that my mom gave me for my birthday this year, in April. I’ve been feeling precious about it, because it’s from my mom, and it’s SO pretty. I told myself, it’s not a scarce fabric, just expensive. That was that, I decided to just cut it! I sew with a lot of Tana lawn (I am good at finding it half price) but I’ve gotta tell ya, I actually don’t love most of the prints - they blend into mush from a distance and it makes the colors look dull. But the fabric is a dream to work with: crisp and light, but with a drape, and handles beautifully. It’s grown on me! And I truly love the colors and flowers in this print.

Shoes: Vans (gifted)
I am 5'8" so I always have to add length, but as I mentioned, I had to add more length to this pattern than usual:
• Bodice: 1.25" length added above bust dart (I usually add 1" here), and 1.25" added at waist (I usually add 0-1" here). With these additions, my version looks like the envelope.
• Sleeve: The sleeve is a great shape, but I'm a little tired of having a puff at the shoulder, so I reduced the fullness at the sleeve cap. It's drafted with a sort of upright puff, which is easy to remove by smoothing out the curve at the top. I lengthened the sleeve 3/4" (I usually add 0-1/2" to sleeve length on vintage patterns only, none to new patterns).
• Skirt: the skirt is FULL. Really full. It seemed a bit much to me - both because it would cause so much bulk at the waist seam, but also because this pattern is already a fabric hog. I reduced skirt width 4" at side seams, front and back - removing 16" total fullness from the circumference at the waist, and I added slight curve to the side seam, so the hem circumference is reduced about 10".

As you can see here, I had a good time with interior finishing for this dress. The pattern calls for seam binding at the waist seam for a waist stay. This makes sense given how full the skirt is drafted. I used Hug Snug seam binding, purchased at SIL thread in Midtown ($1/yard and almost any color is available). I bought extra Hug Snug, so I used it on a bunch of seams. It’s easy to use if you are comfortable with slippery wiggly fabric, and once you’ve sewn it down, it presses beautifully. It’s shiny and crisp.
Hug Snug is a ribbon, so both long edges are selvedge, which means it won’t unravel. The down side of this is that it won’t wrap around a curve like bias binding. Because of this, the remaining seams are finished with 3 thread narrow overlock. I used an invisible zipper, so I changed the order of construction to accomodate that, and I added big inseam pockets that catch in the waist seam to hold them in place.

After much deliberation about my trim, I used 2 colors of ric rac from Daytona Trimming. I had purchased a crocheted trim with ribbon running through it, specifically for this project, but it looked too vintage for my liking, and I wanted the fabric to shine.
The pattern calls for trim on the front of the bodice only, but I made mine go over the shoulders to the back bodice, and I left off the horizontal strip of it at the front neckline. Even with understitching (which the pattern calls for), the facings WILL flip out without the lines of stitching that hold down the trim. So the trim is functional as well as decorative.

Whenever I have trouble zipping up a dress, I add a long pull to my zipper. There is something about the spot where this neckline stops - I absolutely cannot reach it! And it’s not that high! The pull works just OK. It always works better for me on a coil or metal zipper. But it does the trick here.

Earlier I mentioned how the front bodice pattern piece has a curve to it - it curves outward at the shoulder. This looked fine to me on the flat pattern and when I tissue fit. But when wearing the dress, it wants to slip off my shoulders. I have narrow shoulders and my left shoulder sits lower than my right. I could adjust the pattern for this if I were going to make it again, but I don’t think I will sew this one again. I think I will add those little loops with snaps inside the dress, to grab onto my bra strap. That’ll tame it.


If you click on the smaller images, they will enlarge.
I compared the bodice pieces from this dress, McCall’s 3131 (1972), with that recent dress I made, Simplicity 9259 (1973). I traced these pieces and modified my traced pieces, so we are looking at them without my alterations. The drafting is similar but different: Simplicity bodice is a little longer (and I added less length to that pattern), and has more darts. The McCall’s has a lower neckine front and back (which I prefer). The crucial difference is that curve at the neckline, going through the shoulder - the McCall’s is curved where the Simplicity has a straight vertical line. This is small difference in drafting that makes a big difference in fit, and for me, the Simplicity version stays on my shoulders, where the McCall’s slips off and feels just a tad too wide.
Additional info: I’ve almost given up on contemporary McCall’s and Simplicity blouse and dress patterns because I require a huge narrow shoulder adjustment, which sometimes doesn’t feel worth it when I can find vintage pattern in a similar style that fits better out of the envelope. It’s worth finding a pattern block that works for you and stick with it!!
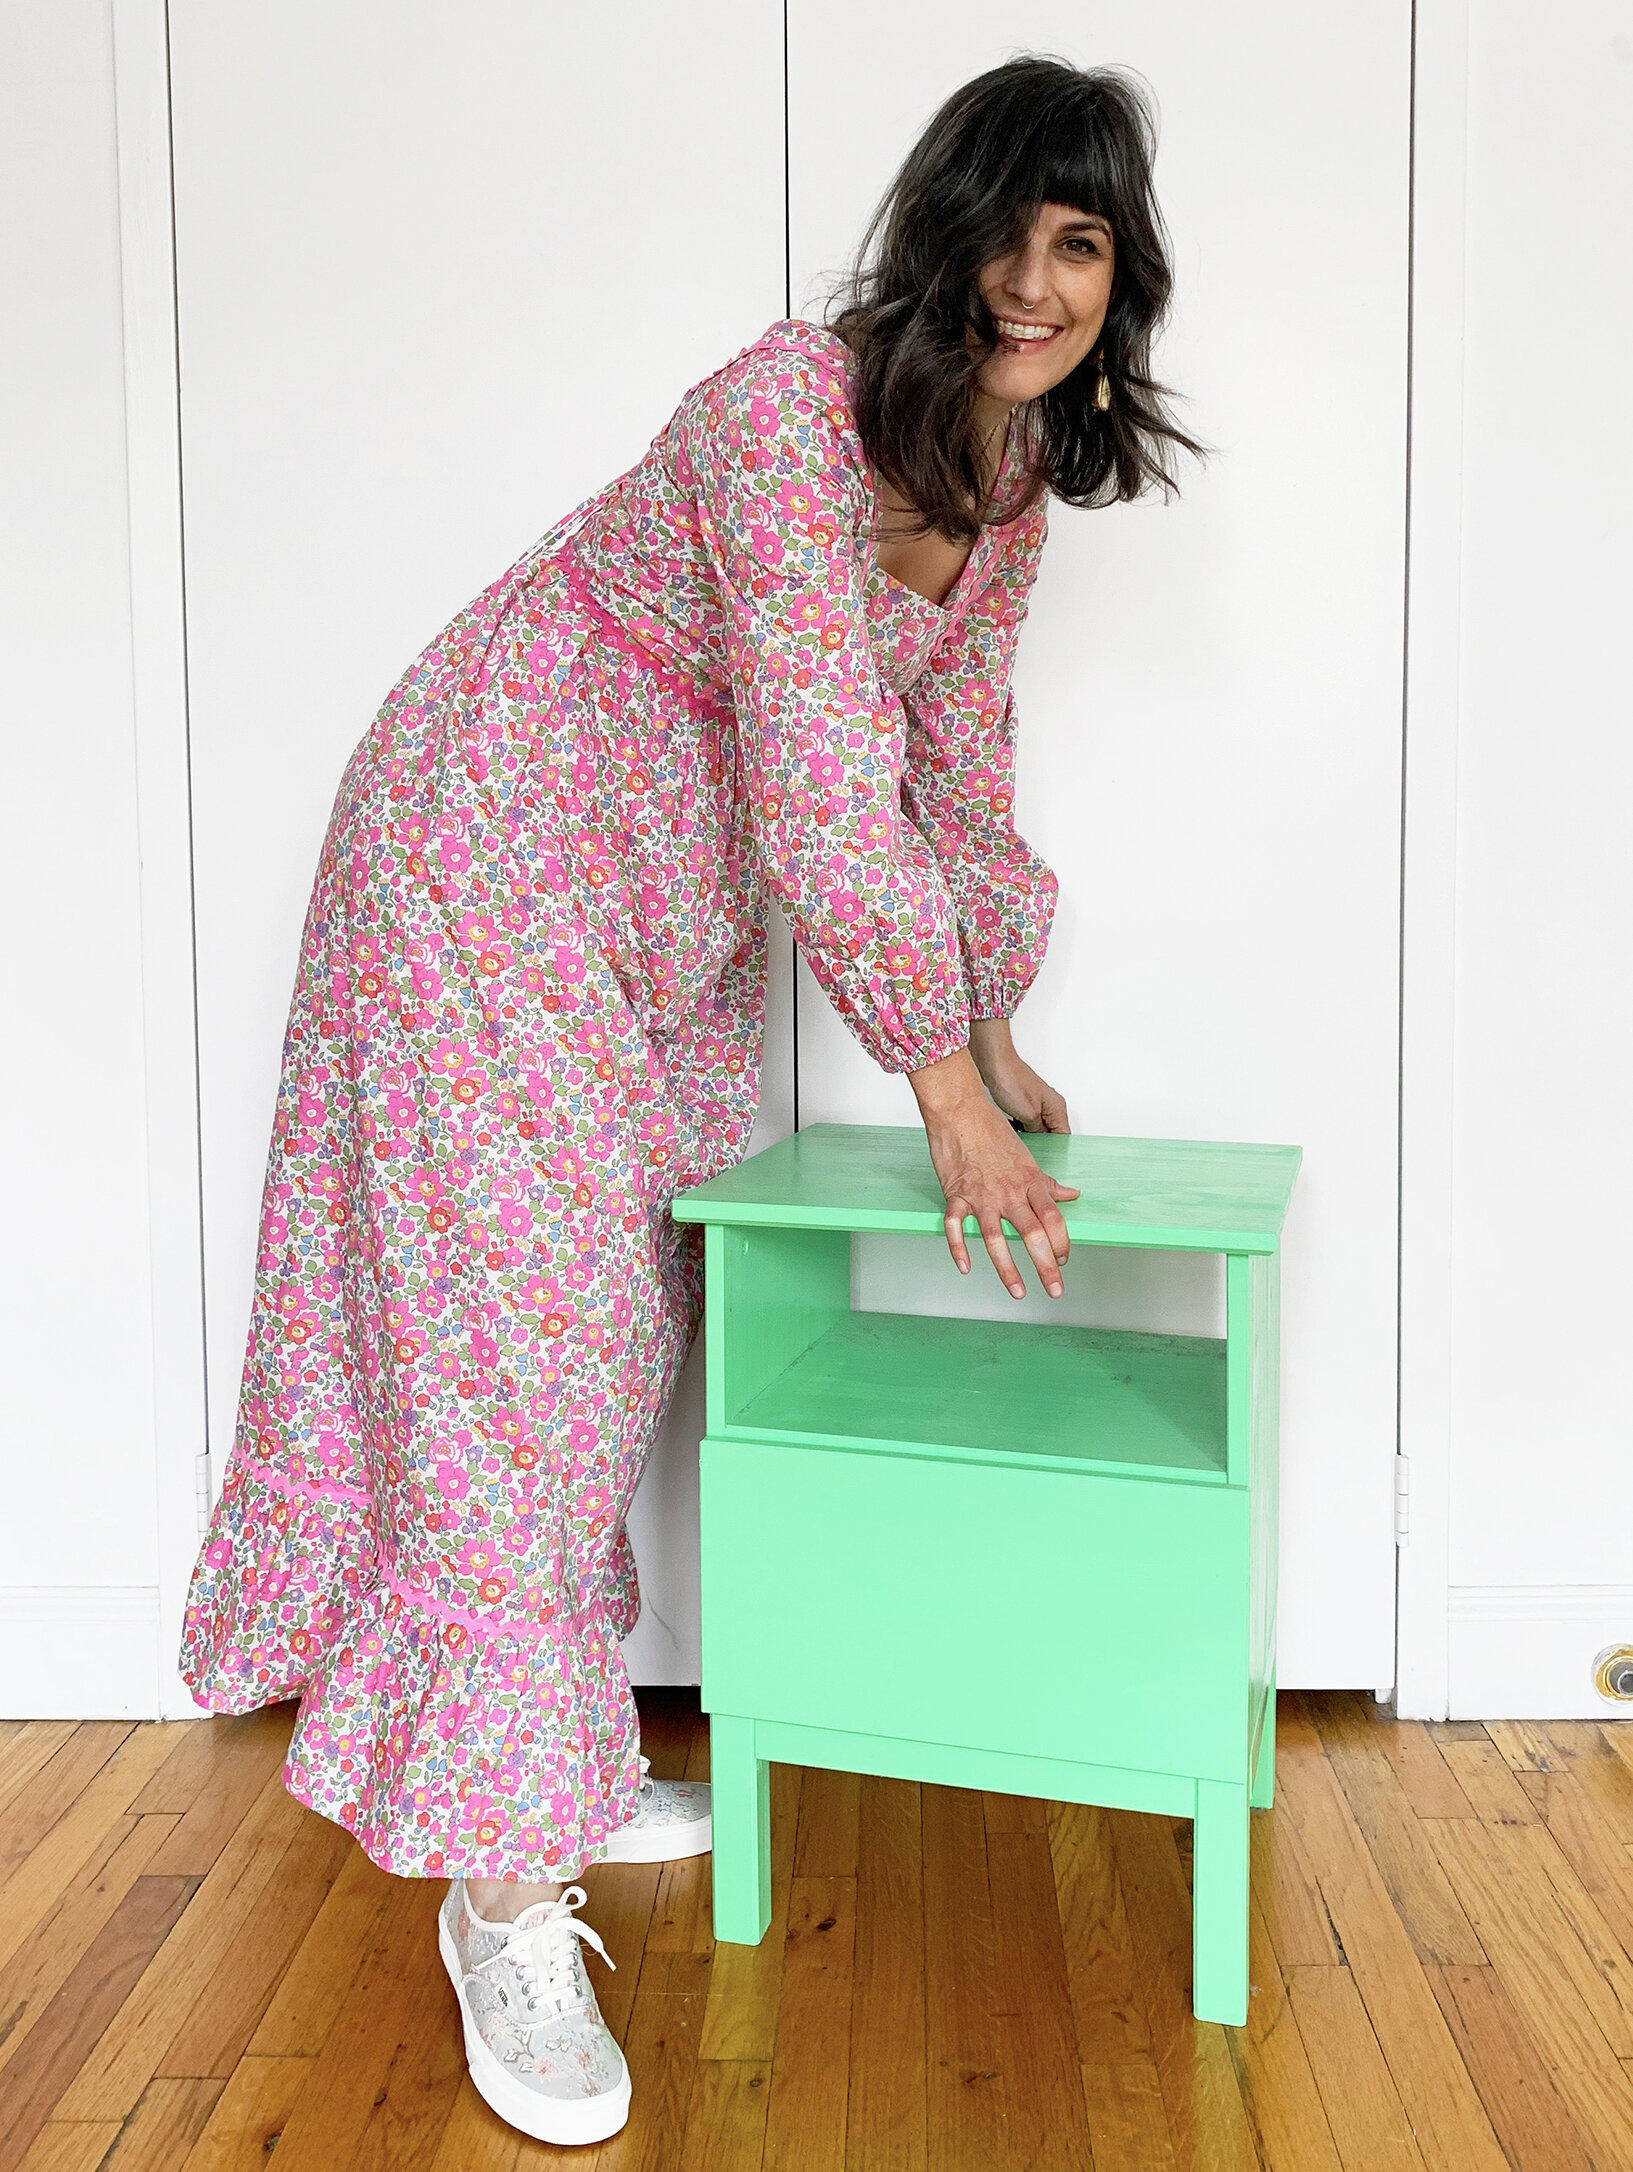


I couldn’t be happier with how this dress came out! I can see myself wearing it at least three seasons of the year. In conclusion: I’m very glad I cut into this fabric. Sewing 2 similar patterns back to back was a great learning experience. I’m still thoroughly enjoying using trim. My love of ruffles will never die. XO, Martha