CAMO CHORE COAT: MERCHANT & MILLS FOREMAN JACKET

Have you seen my closet? It’s overflowing with pink and purple and ruffles. It has become dangerously girly. I needed something to cut through the sweetness. Something functional, layerable, and classic. Personally I didn’t expect a men’s indie sewing pattern to fill this niche for me, but hey, life is full of surprises.

My closet. Yes, I keep it this tidy. There is a chair across the room that is usually buried in my offcasts and laundry.
Jason’s birthday was in June, and because he had expressed a vague interest in learning to sew, one of my gifts to him was the Merchant + Mills Foreman Jacket pattern and a cut of heavy weight linen for a wearable muslin. He was into it! I enjoyed teaching him all the steps. From tracing the pattern to sewing on his buttons, he did it all! And then he ordered more fabric to make a “real” one.
I’ll have to get photos of his projects, because he has now made 3 jackets and 2 button up shirts (for that he used a Japanese sewing book). He requires no alteration for fit, except lengthening for height (he is 6’3”). Am I jealous? Yes.
According to Merchant + Mills this jacket is “Inspired by traditional workwear of the early fifties, the practical and hardwearing Foreman is an unlined untilitarian jacket made to take charge. Features a boxy cut, 2 piece sleeves, a neat square collar, 2 hip pockets and one breast pocket. Can be optionally top-stitched in contrasting thread.”
In case that wasn’t clear: this is a men’s pattern, and the PDF has sizes 36-46. Seam allowance is included and is 5/8”. The pattern instructs you to finish your seam allowances with a zig zag stitch (really? Not even some other suggestions for finishing?), but when teaching Jason, we examined all of our jackets, and decided flat felled seams was the way to go. It’s an improvement and there is plenty of seam allowance for it.

I think this is a nice, basic coat pattern. It’s a great “first outerwear” pattern, and sews up quick enough for a more experienced sewer to make is as a gift. It was ideal for teaching Jason some garment sewing basics, as he was already comfortable using a sewing machine.
I thought the pattern was well drafted, but the instructions were a little lacking. They get the job done, but they aren’t in my preferred order. TBH I often just gloss over instructions, but because I was teaching Jason, I really tuned in, and found room for improvement. An example of something I would change: you are directed to finish the edges of all facing pieces, and then sew them together. Personally I would piece them together, and then finish one continuous edge (smoother edge, less bulk at seams, anchors seam allowances into place).

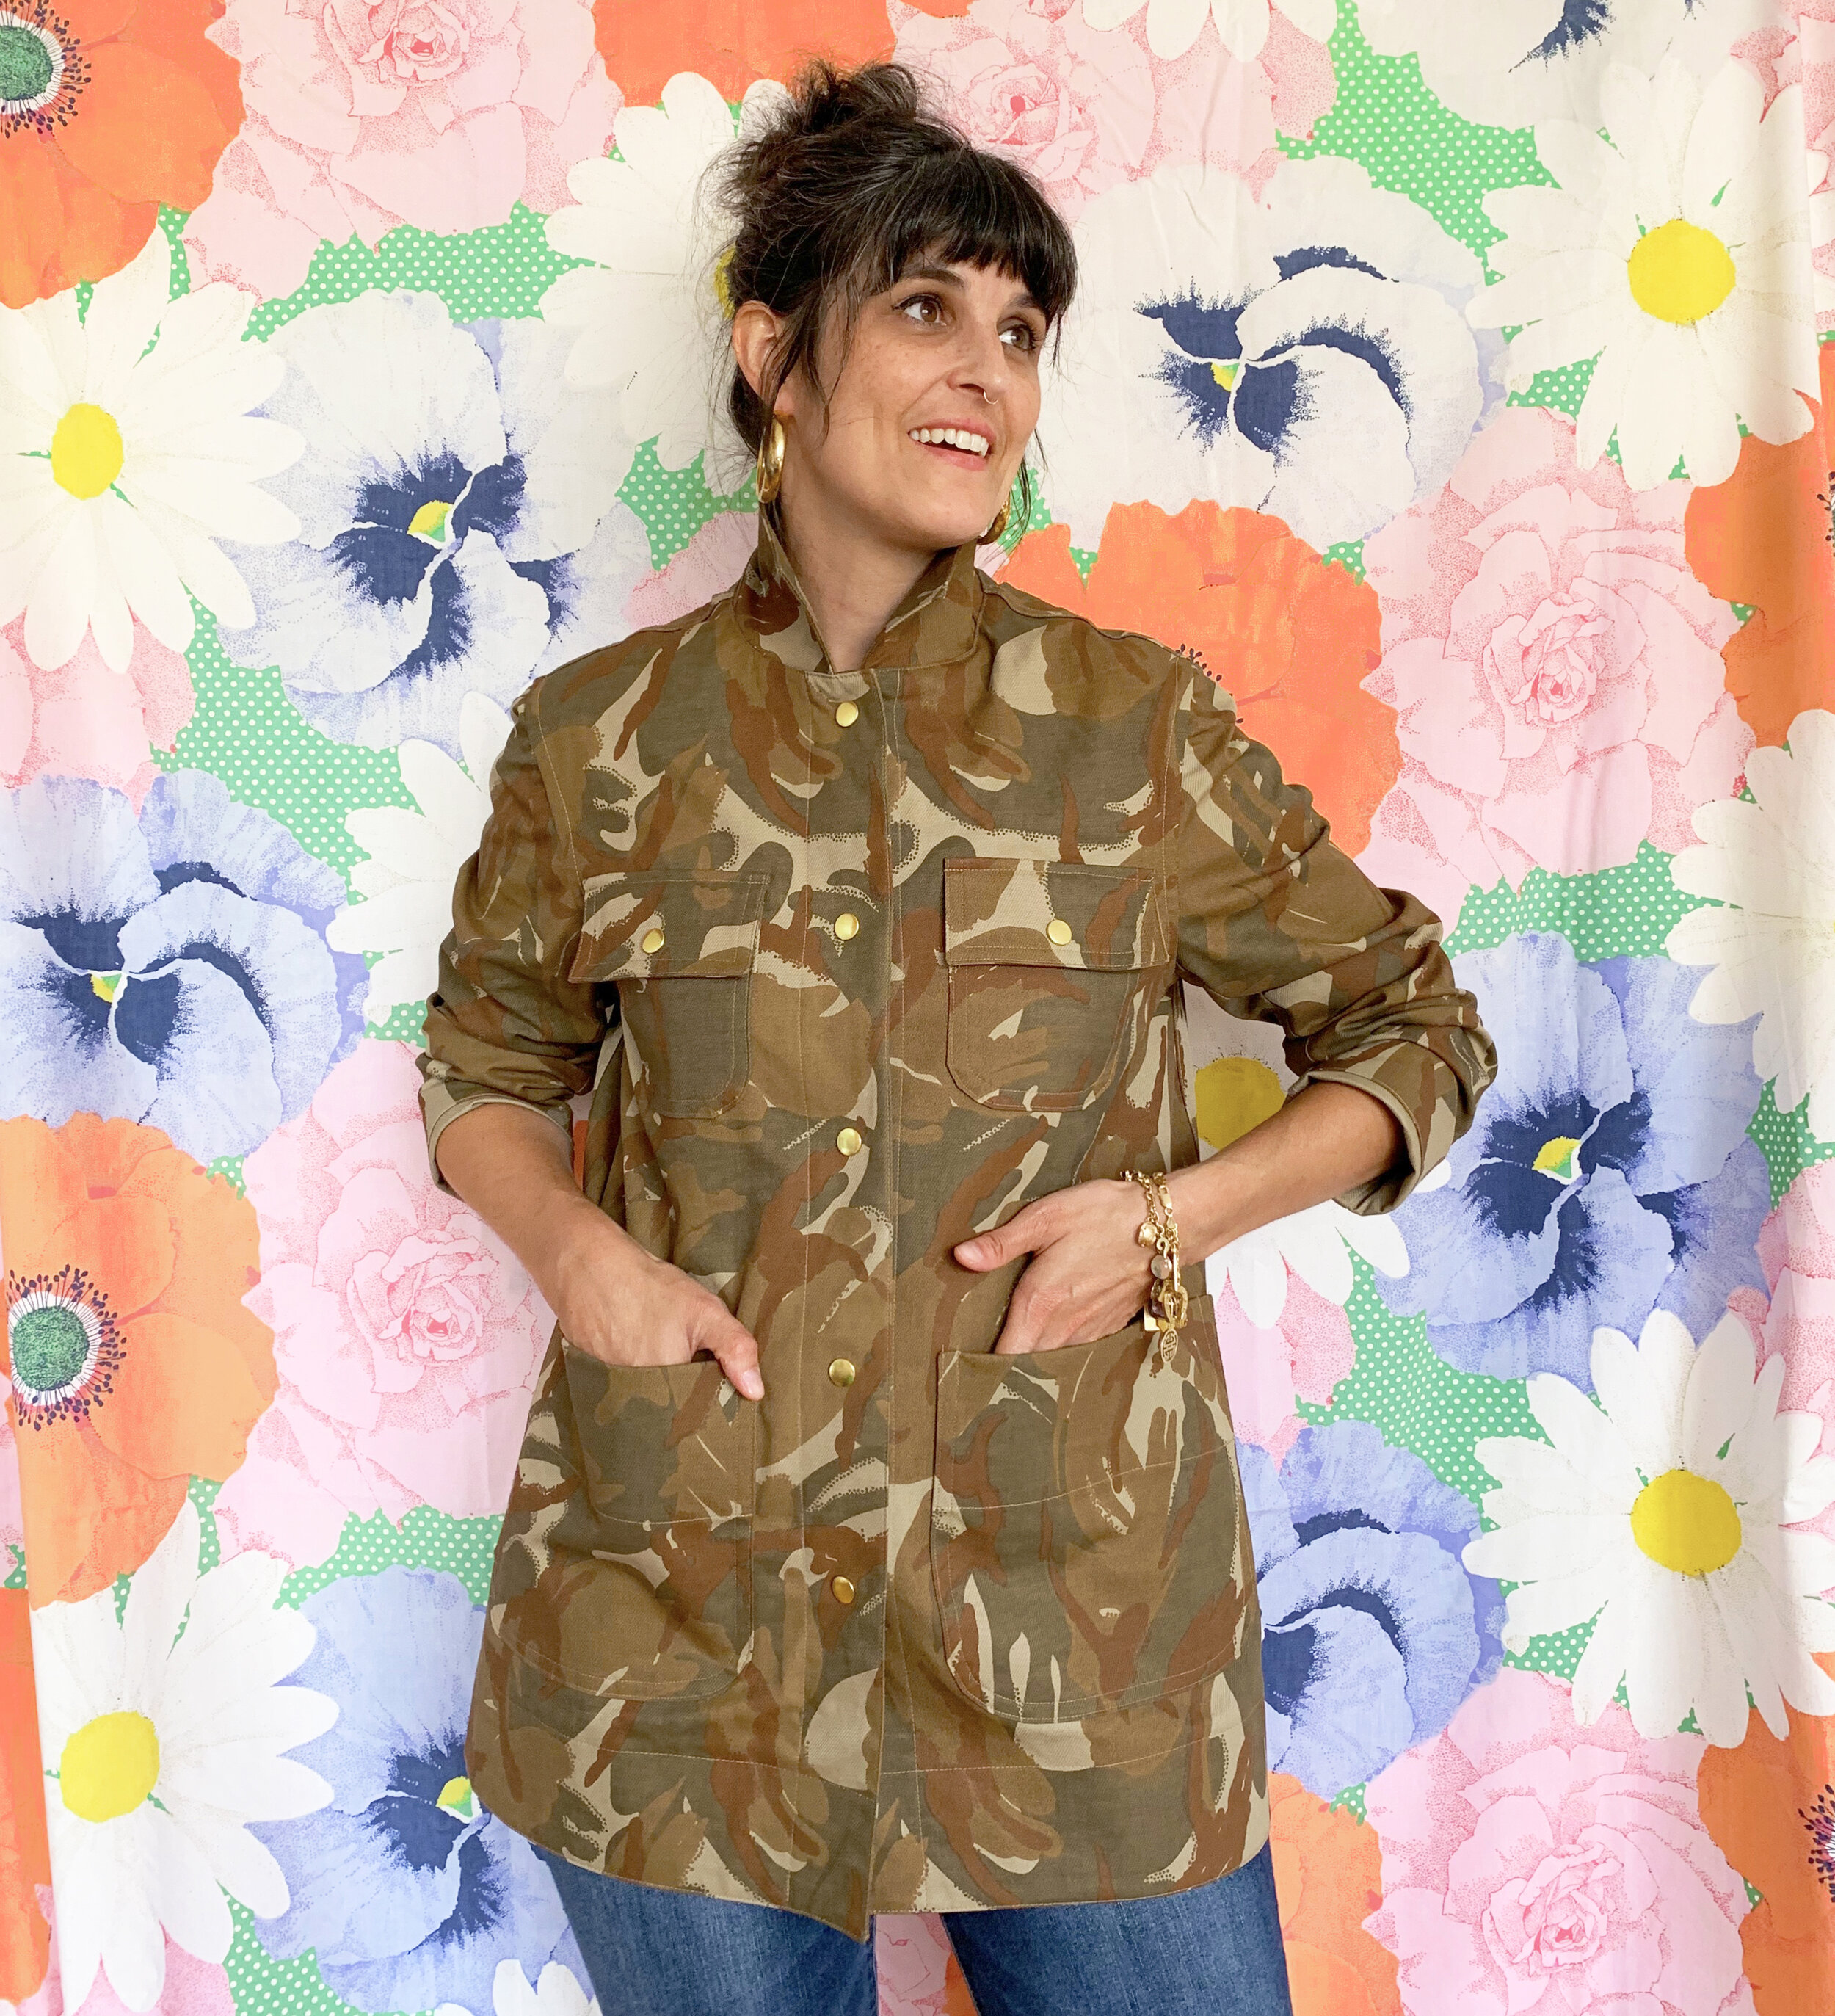
Because this is a fairly simple pattern, there is a lot of opportunity to customize it to your preferences. As always, let’s start with the fabric! I used a camouflage print bottom weigth cotton twill from Fabric Mart (sold out). I don’t usually like camo print, and I hate the classic USA Army camo (it’s a long story). But I found this one appealing. Abstract and kinda interesting. Once the fabric arrived, I knew I would want to use Dritz Heavy Duty snaps for my closures.

The size chart says size 36 is 92cm chest measurement - my full bust is just about that, so I cut size 36, the smallest size, but graded out to 40 at the hips, side seams only. For length I cut size 40 and added 1". My intention was to have a boxy/oversize jacket for layering.
I shortened the sleeves 3/4”, and plan to wear the sleeves rolled and scrunched up. The sleeve head has some excess fullness. Jason’s shoulders/biceps fill this out, but I usually make a narrow shoulder adjustment so definitely don't fill it out. Regardless of who is wearing it, I think it should be reduced slightly. I've seen the pattern sewn up now in linen, M+M waxed canvas, and my Camo twill, and it always has a bit too much puff for my preference in this style. So watch out for that.

The pattern is drafted with curves at the center front hem, I straightened it out to a 90º angle. For the pockets, I made 2 breast pockets, and added flaps to the breast pockets. Moved all 4 pockets in towards center front a little bit, maybe 3/8" or so. I added interfacing to the foldover section of all pockets.

I flat felled all seams except the more forward sleeve seam. I couldn't get in there to flat fell, so that seam has the SA's serged together.
For the armhole seam, I sewed 2 layers of stitching and then clipped the seam at the bottom of the armscye (armpit area). Then I bound the seam allowance in bias binding. I pressed that covered seam towards the body and top stitched it in place, to mimic the look of a flat felled seam on the exterior of the garment.

I Hong Kong finished the facing - this makes a big difference on this pattern. I saw a lot of versions like that when I looked up the pattern on Pattern Review. And I think it is a simple way to upgrade the finished look.
I added a simple loop at the back neckline for hanging - next time I'd sandwich it between the facing/body, but it works, and I didn't follow the pattern for top stitching. I did similar and then some extra.
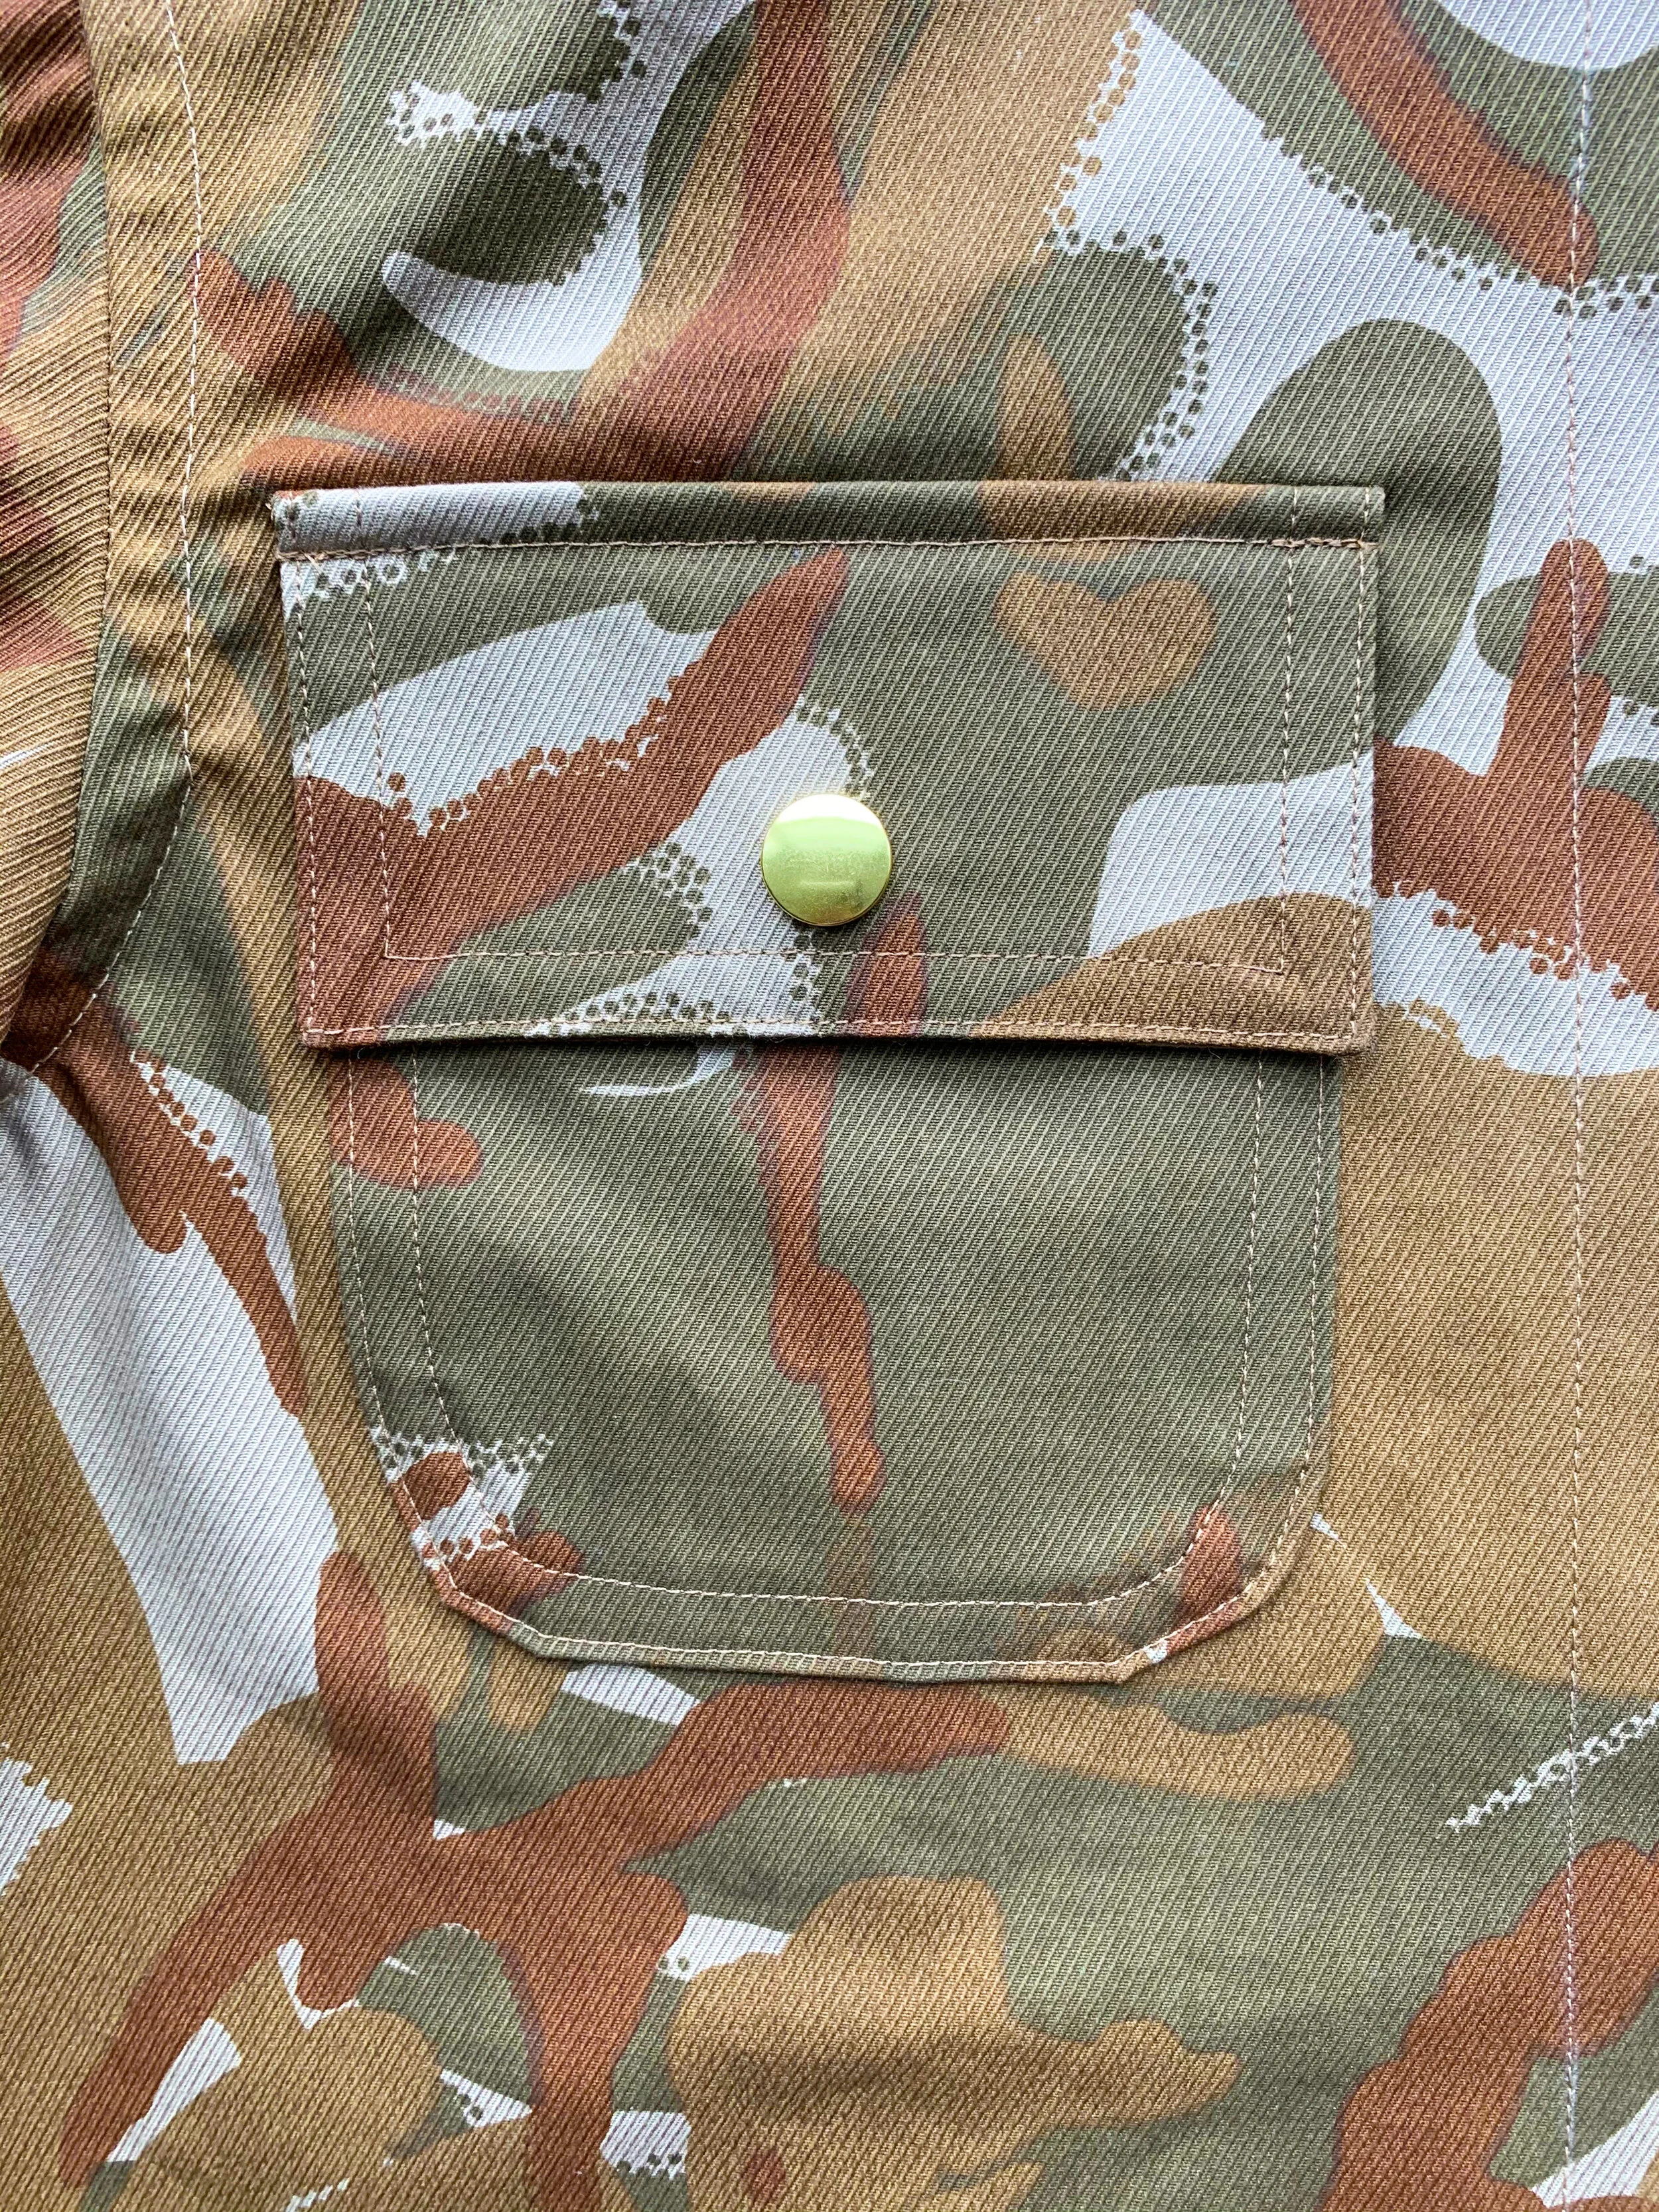
For closures I used Dritz snaps from stash. Pattern calls for 4 buttons, but I think an odd number of buttons looks better, so I used 5 plus the ones on the pocket flaps.
When installing the snaps, I used a small circular die to create a perfect hole in the fabric. I installed the snaps with the basic Dritz tool a hammer. You really have to pound them! You cannot be shy! You need the interior of the snaps to fully crimp to ensure that the snaps are permanently installed and will snap closed. It’s worth taking your time with it, because the finished result really does look professional.

So there it is! I love how this pairs with my lacey silk camisoles, and I’m sure I’ll layer it over some flowy dresses, for warmth and contrast. I really enjoyed sewing this pattern! I’d like to make another version of this pattern with bolder modifications. It’s a great starting point for all kinds of jackets. Let me know if you give this pattern a try! XO, Martha