PROFESSIONAL PURPLE PERSON: McCall's M8046 Corduroy Jumpsuit

Jumpsuits have been trending for a while, and I love them! But I have to watch myself. In 2018 I sewed a bunch of them, and the reality is, I don’t wear jumpsuits that often. Seems like one or two jumpsuits per year is the correct amount for me to sew.
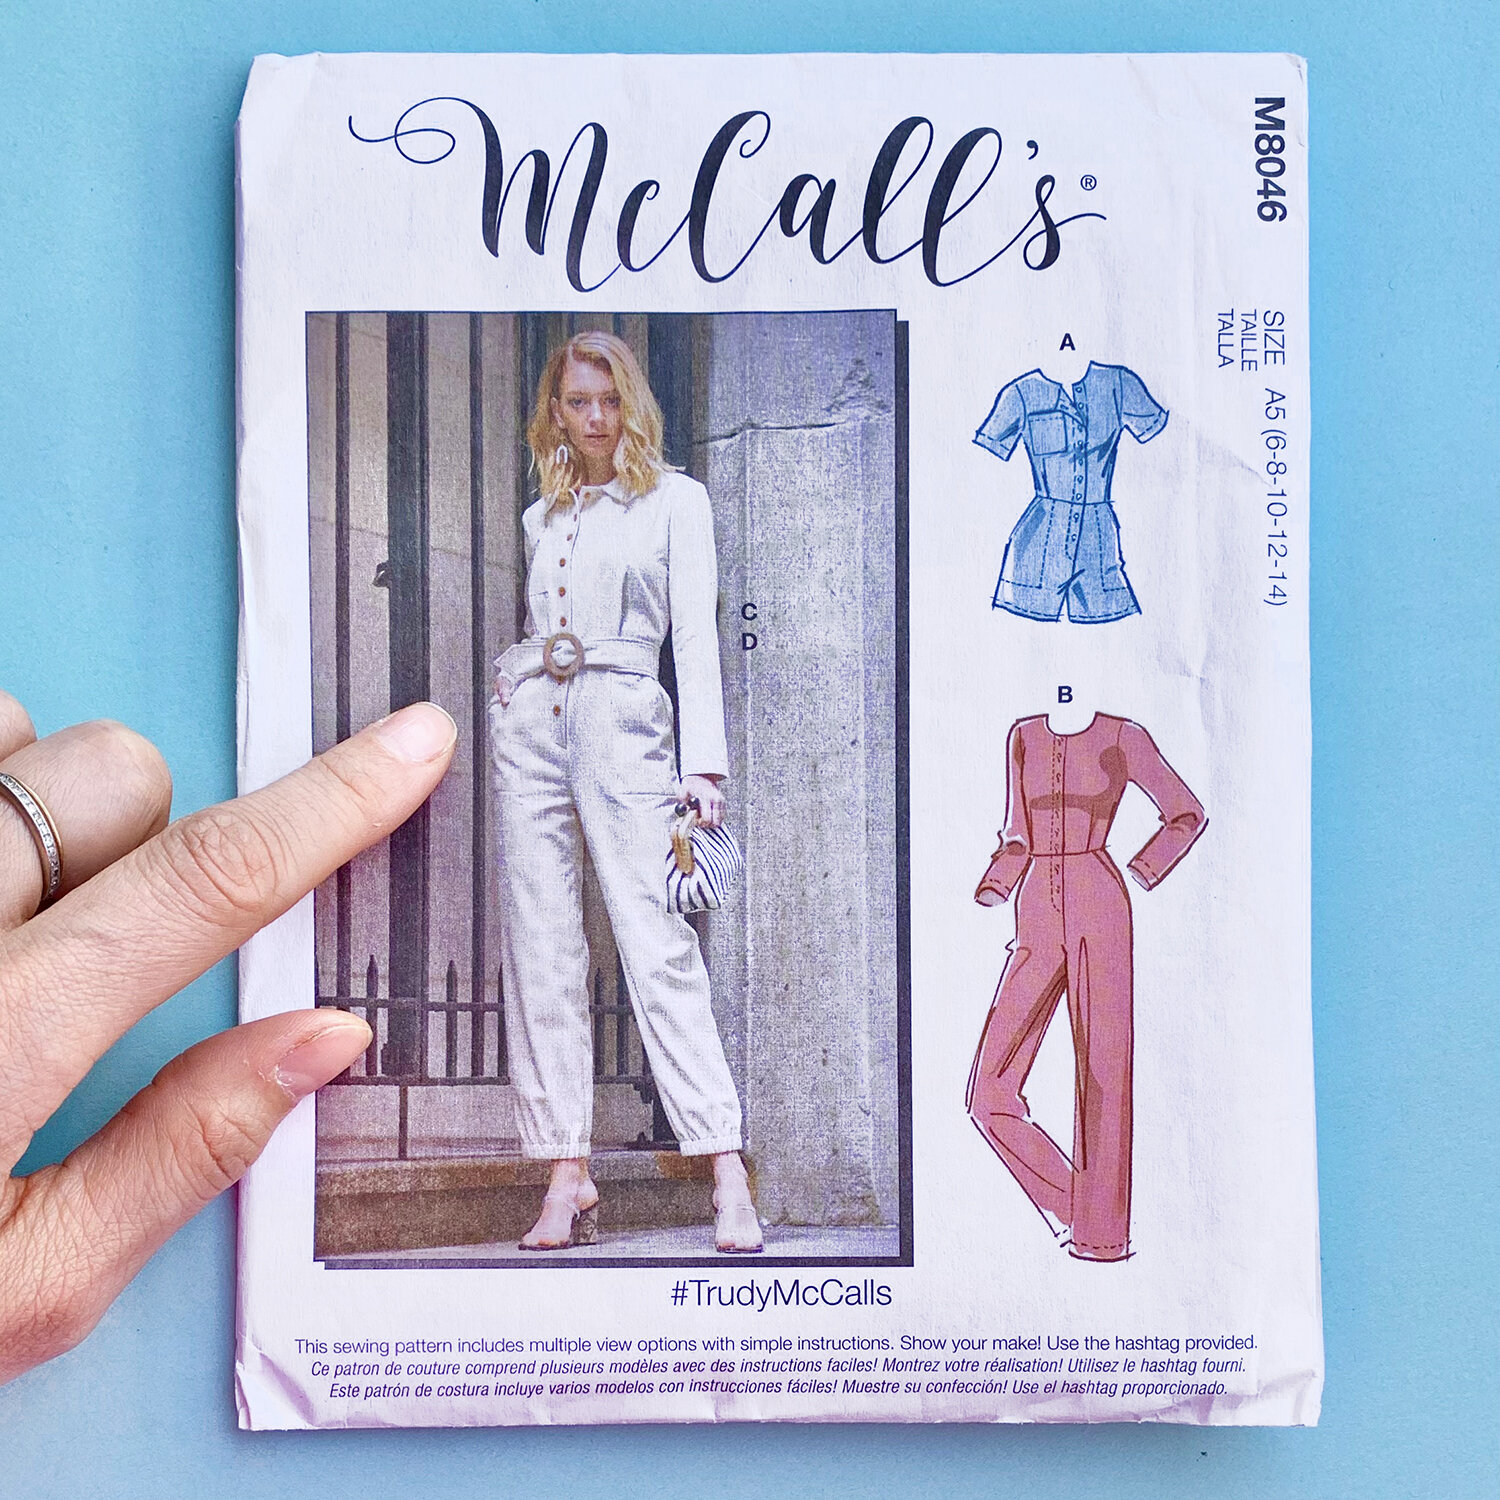
I snagged this pattern during the first online sale following its release. M8046 has simple design lines and uncomplicated construction. I like that it is a feminine with a defined waist, yet has classic workwear details. The envelope has a sparse, weird description: “Button front, side front slash pockets, A,C: front and back patch pockets. C: elastic pant leg. Belt with buckle.” Whatever, I looked at the photo and illustration and knew it would work.

My fabric is a fine wale 100% cotton corduroy with no stretch. I’ve had this in my stash for a while, but I think I bought it on eBay. It’s the perfect purple!
Alright let’s get into it. Jumpsuits can be tricky to fit: you need a top that fits, pants that fit, and enough vertical ease to allow you to raise your arms, sit down, etc. without splitting yourself in half. Add to that mix that I am different sizes on top & bottom - and need to get everything to match up at the waist.
Since I purchased the pattern on sale for $3.99, I went ahead an snagged both size envelopes. With McCall’s, I am reliably size 12 on top, but the size I choose for pants varies wildly because their amount of ease is all over the place depending on the style. The size chart put me at size 20, however I know that is at my low hip ONLY, and I usually need size 14-16 everywhere else (and sometimes smaller through the leg - again, depends on ease and style of the pattern). I measured all pattern pieces, and decided to cut the tissue at size 16 for the pants, and make my alterations from there.

The top went together quickly and easily. I lengthened the bodice 1” as always. I also lengthened the sleeves by 2”, and added some ease to them. I flat felled all of my seams in this jumpsuit - seam allowance is 5/8” as usual for Big 4, and this is the perfect amount for flat felling. In addition to the edge stitching called for in the pattern, I added a second row of top stitching, to continue with the work wear look. I just make these double rows with a single needle and my regular foot, sewing two parallel lines of stitching.
Regardless of how you decide to finish your seams, I recommend flat felling the seam at the back yoke - it seals it up and strengthens an area that does encounter some stress as you move around.

I cut and sewed the sleeves as drafted, and tried them on. They were pretty snug. I don’t know if my arms are big or the pattern is tight? I started lifting weights last March, so I am a little hopeful for the former. Ha! I should measure my biceps. Either way, I wanted to be able to layer a thin turtleneck under my jumpsuit, and the sleeves as drafted didn’t allow it. I added ease and re-cut them. I’m not sure what I added there, maybe 1.25” or similar.

Before I get into pants fitting, have a dislike: the patch pockets. There is ONE pattern piece, to be used both for the breast pockets AND the pockets on your butt, all sizes. Now, we all have different bodies, but you couldn't pay me to put a tiny pocket on my butt - it's unflattering and functionally useless. Also lazy pattern making - just give me another rectangle! I made a bigger patch for my behind. And next time? I’d go bigger.

Ahh, pants. I hate fitting em! Jumpsuits usually have a very easy fit though, and this is no exception. Remember that the crotch will sit lower than on a stand-alone pair of pants, to ensure you can move - if you raise your arms, for example, the whole garment is lifted.
Ok, so I cut my tissue at size 16, and made a couple of my typical adjustments. I added 3/8” to the back crotch extension and tapered the legs to size 14 below the hip. I also added 4” to the leg length - bringing the total length I added to this pattern to 5”. And don’t forget, I made the butt patch pockets bigger!

You can see here that when I sit, it looks like there is excess length in the bodice. But when I stand, it’s the correct amount. Be sure to pin top and bottom together and then move around a bit! Will ensure a good fit.
After basting the side seams of the pants together, I took them in 1/2" at the waist side seams, gently curving out and letting out 1/4" at hip, and then tapering back to my basted seam. I also took in the center back waist 1/2" at the seam. Overall, this reduced the waist circumference 3". I probably could have just bought the smaller size envelope and added width at the hip to size 12, oh well. I don’t think there is excess ease in the pattern - my body includes a lot of sizes, and it can take some experimentation to get the perfect fit.

After my alterations, I pinned to the top and bottom of the suit together, and tried it on. I move around a lot when fitting a jumpsuit: sit, squat, get on your knees, put your arms over your head. Seriously, you won’t regret ensuring you have full mobility without discomfort! And if you have not sewn yourself a jumpsuit before< highly recommend making a muslin to get an idea of how much length you personally require.

Surprisingly, when it came time to sew the waist seam, the back between side seams went together without any easing. Perfect match. The front required easing (as you can see in the picture above) this creates a little rippling where I flat felled the seam. It’s not very noticeable when wearing, and I’m planning on making the belt in the pattern, too.

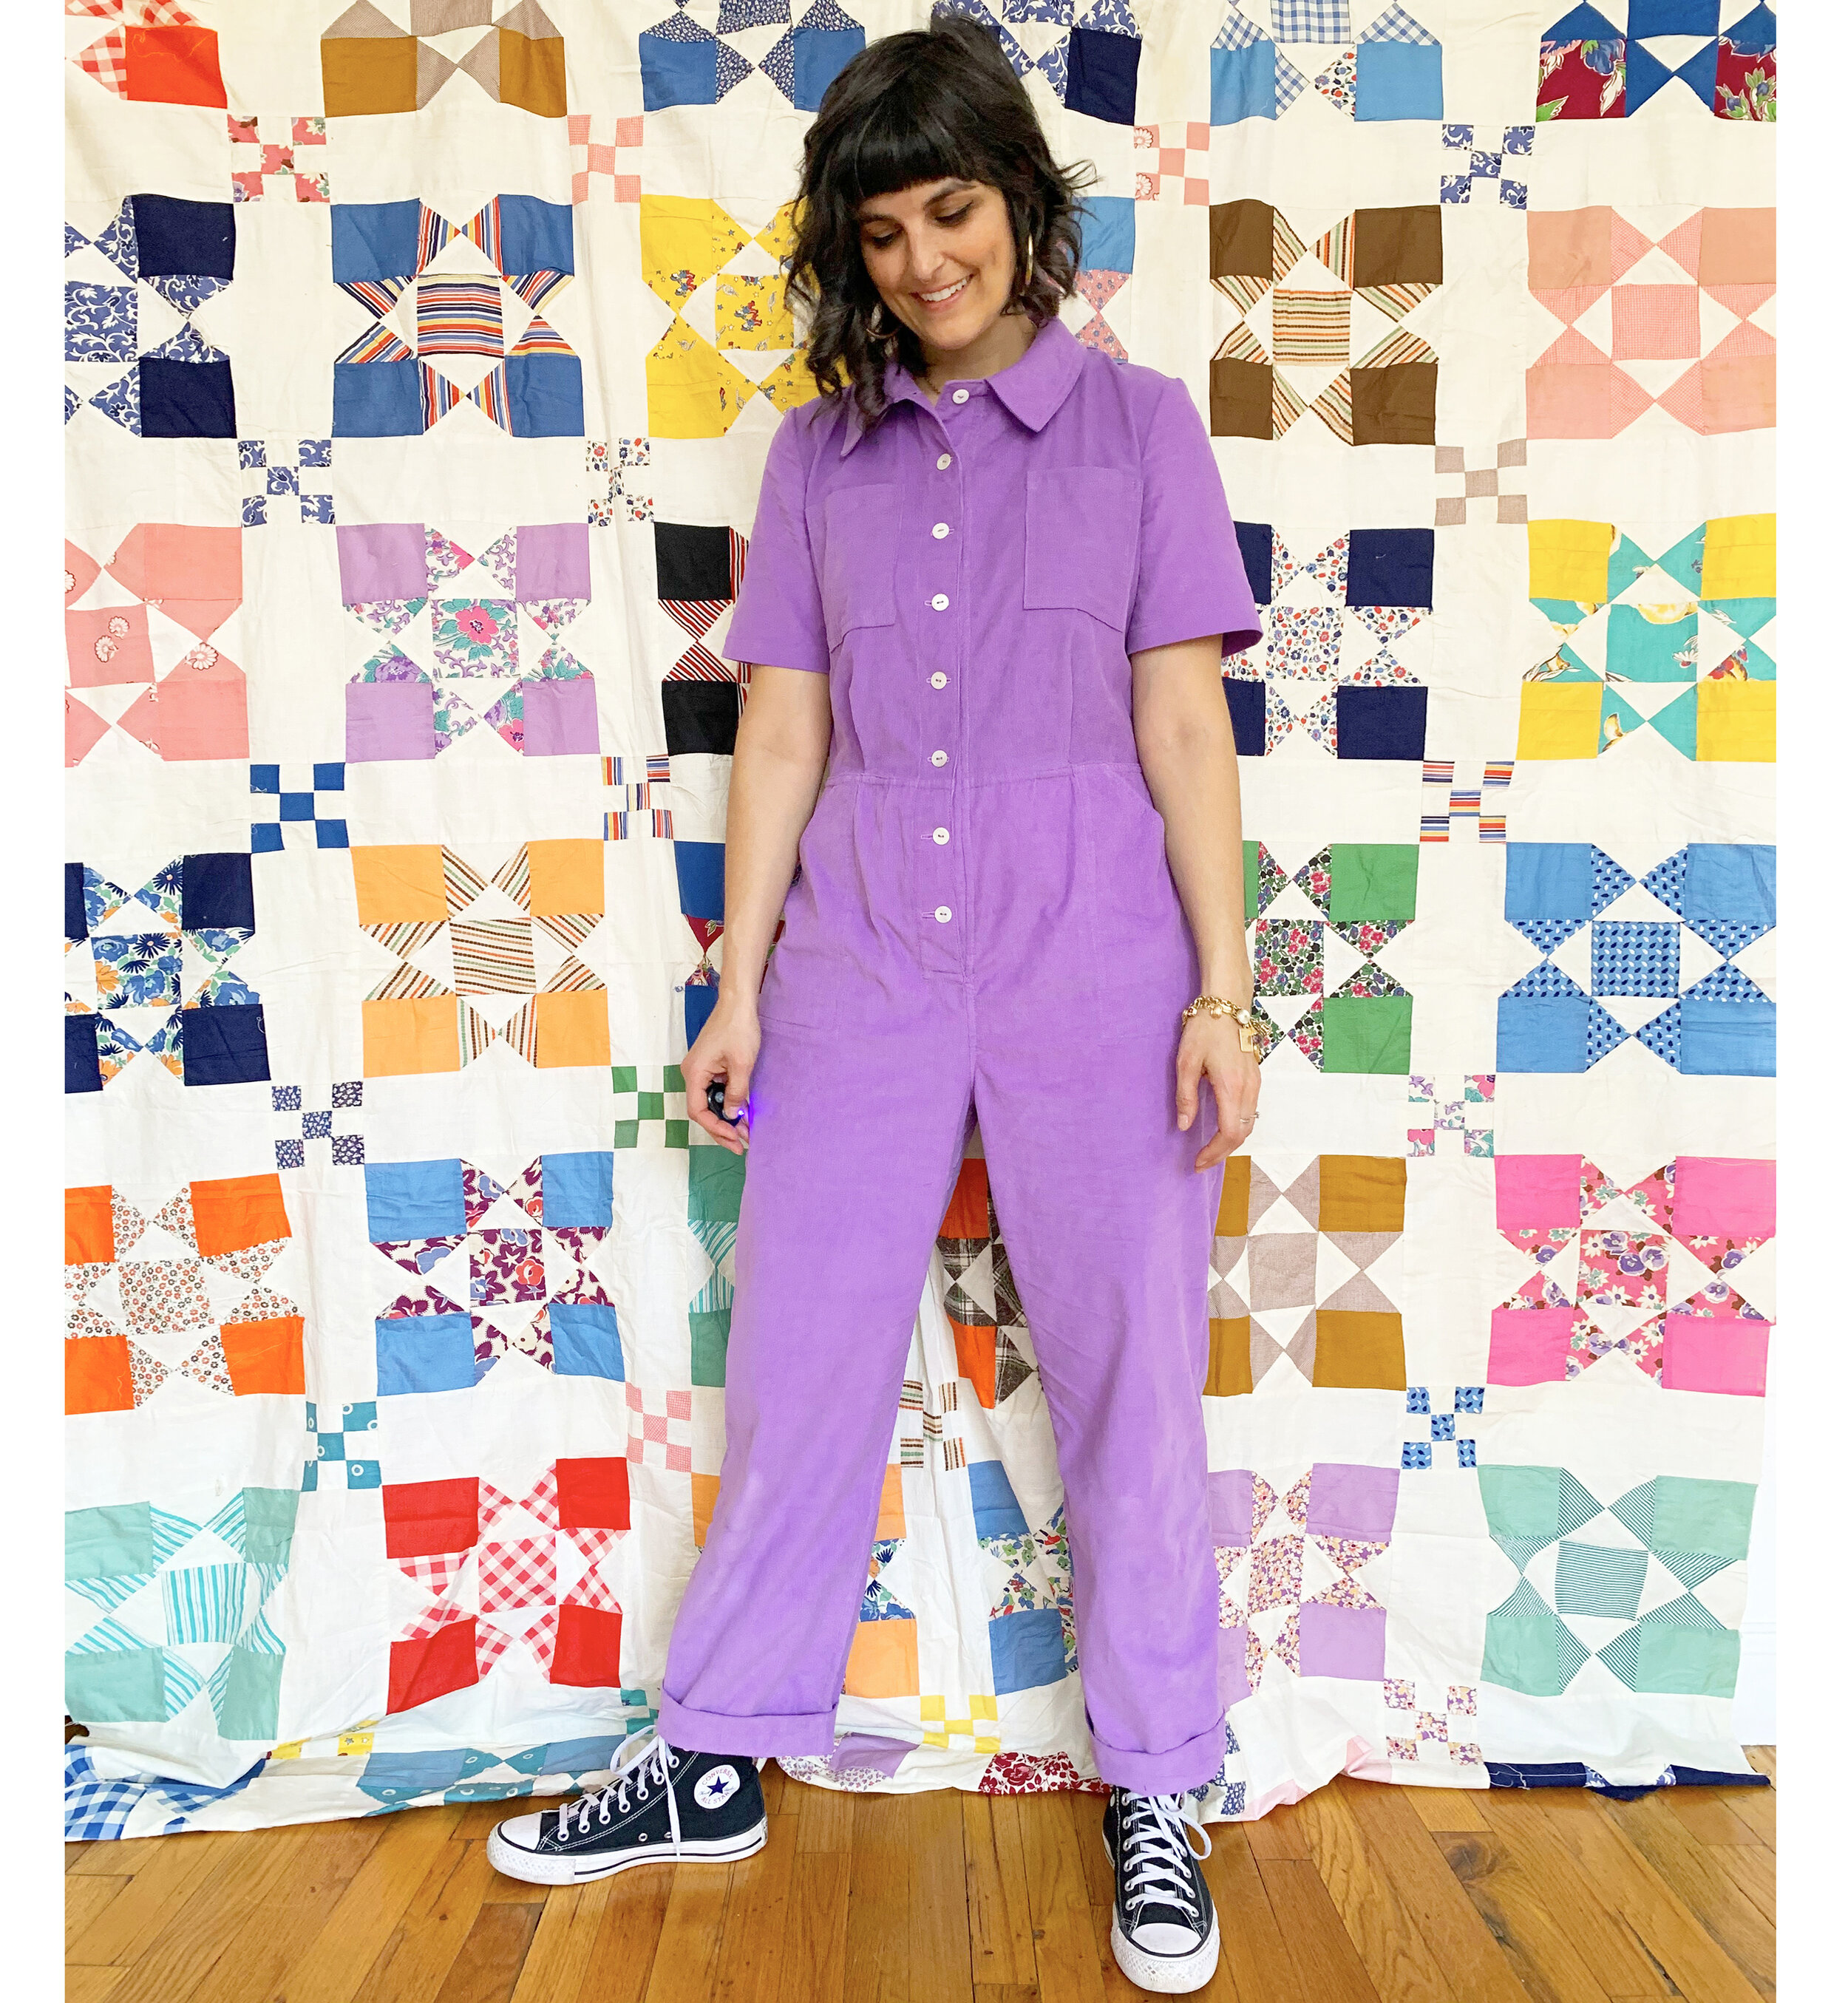
Now that I’ve worn this a couple times, I have some thoughts. Firstly, I should have made vertical buttonholes! I wasn’t thinking when I made the buttonholes - literally didn’t consider the orientation. It’s not a big deal, but i think I could shave off 2 seconds in my unbuttoning time when I need to visit the loo. Vertical buttonholes would be faster!
Second, I need to make a belt! I think the silhouette is super cute without it, but I do like to accentuate my waist. If I make a belt, I will also add belt loops. Jumpsuits are inextricably linked to the question of using the restroom. This has a belt, but no beltloops - how optimistic. What if there's no hook? You just hold the belt? Anyway, something to think about.

Overall, I’m really happy with it! I just purchased supplies to make the belt today, so I’m sure I’ll post about that soon. I don’t know that I will sew this pattern again, but I recommend it. All pieces go together easily and notches match. Even the placket is easy peasy to sew. Let me know if you sew this, I think you’ll feel cute! XO, Martha