I (finally) Sewed A Leopard Coat! - Faux Fur Coat Using a Japanese Pattern Book
Before I dive in to this project: Happy New Year! I put a lot of pressure on myself to write a “First Blog Post of the Year”, which lead to me avoiding writing anything for *checks notes* a couple months. I have some catching up to do, and a bunch of posts I would like to share, but let me move on so I don’t create any more unnecessary pressure on myself!

This is my first completed project of 2022! But it’s been in the works much longer. In January 2020, I wrote a project planning post, and this coat was on the list. I had the fabric and the pattern! I think I’d had them for months prior to writing the post, and I had been imagining the coat for even longer. Well, good things take time!

I have previously written a book review here.
This book has sizes: S, M, L, LL. I typically wear Big 4 size 12, and find that size LL fits similarly to a size 12. The instructions are in Japanese, which I do not know how to read. If you have sewn a few coats before, you will know what to do and can make your way without them. Additionally, the photographs and illustrations in this book are incredibly clear and thorough, and there are QR codes next to some photographs. If you scan the QR codes, they will lead you to a YouTube video of the sample in the photograph being sewn. As a visual learner, I find this book to be a wonderful resource.
Additionally, the book has many options for design details, and within them, things are interchangeable, for example, you can swap collar or pocket options between pattern blocks. For this coat, I started with coat block B and then used elements from various patterns within the book.

I added a seam down the back of the coat so that I could place the darker stripe of the fabric down the center back of the coat.
My fabric is a dead stock Milly fabric purchased from Mood in NYC a few years ago. It's an interesting fabric and was challenging to work with: it has a low pile, about 3/16" long fur. The nap changes direction in swirls, as if to mimic cowlicks on real fur. Cutting it was messy, fibers everywhere.
Luckily, the fabric was block interfaced with a rayon (blend?) weft insertion interfacing. Thank god for that , because this fabric is extremely tricky to press! I couldn't apply interfacing anywhere too noticeable, because heat and steam caused the fur to sort of frizz and curl up (permanently). So: NO steam, LOW heat. I covered my ironing board with a fluffy towel and pressed this fabric face down, with a cotton press cloth on the back side.

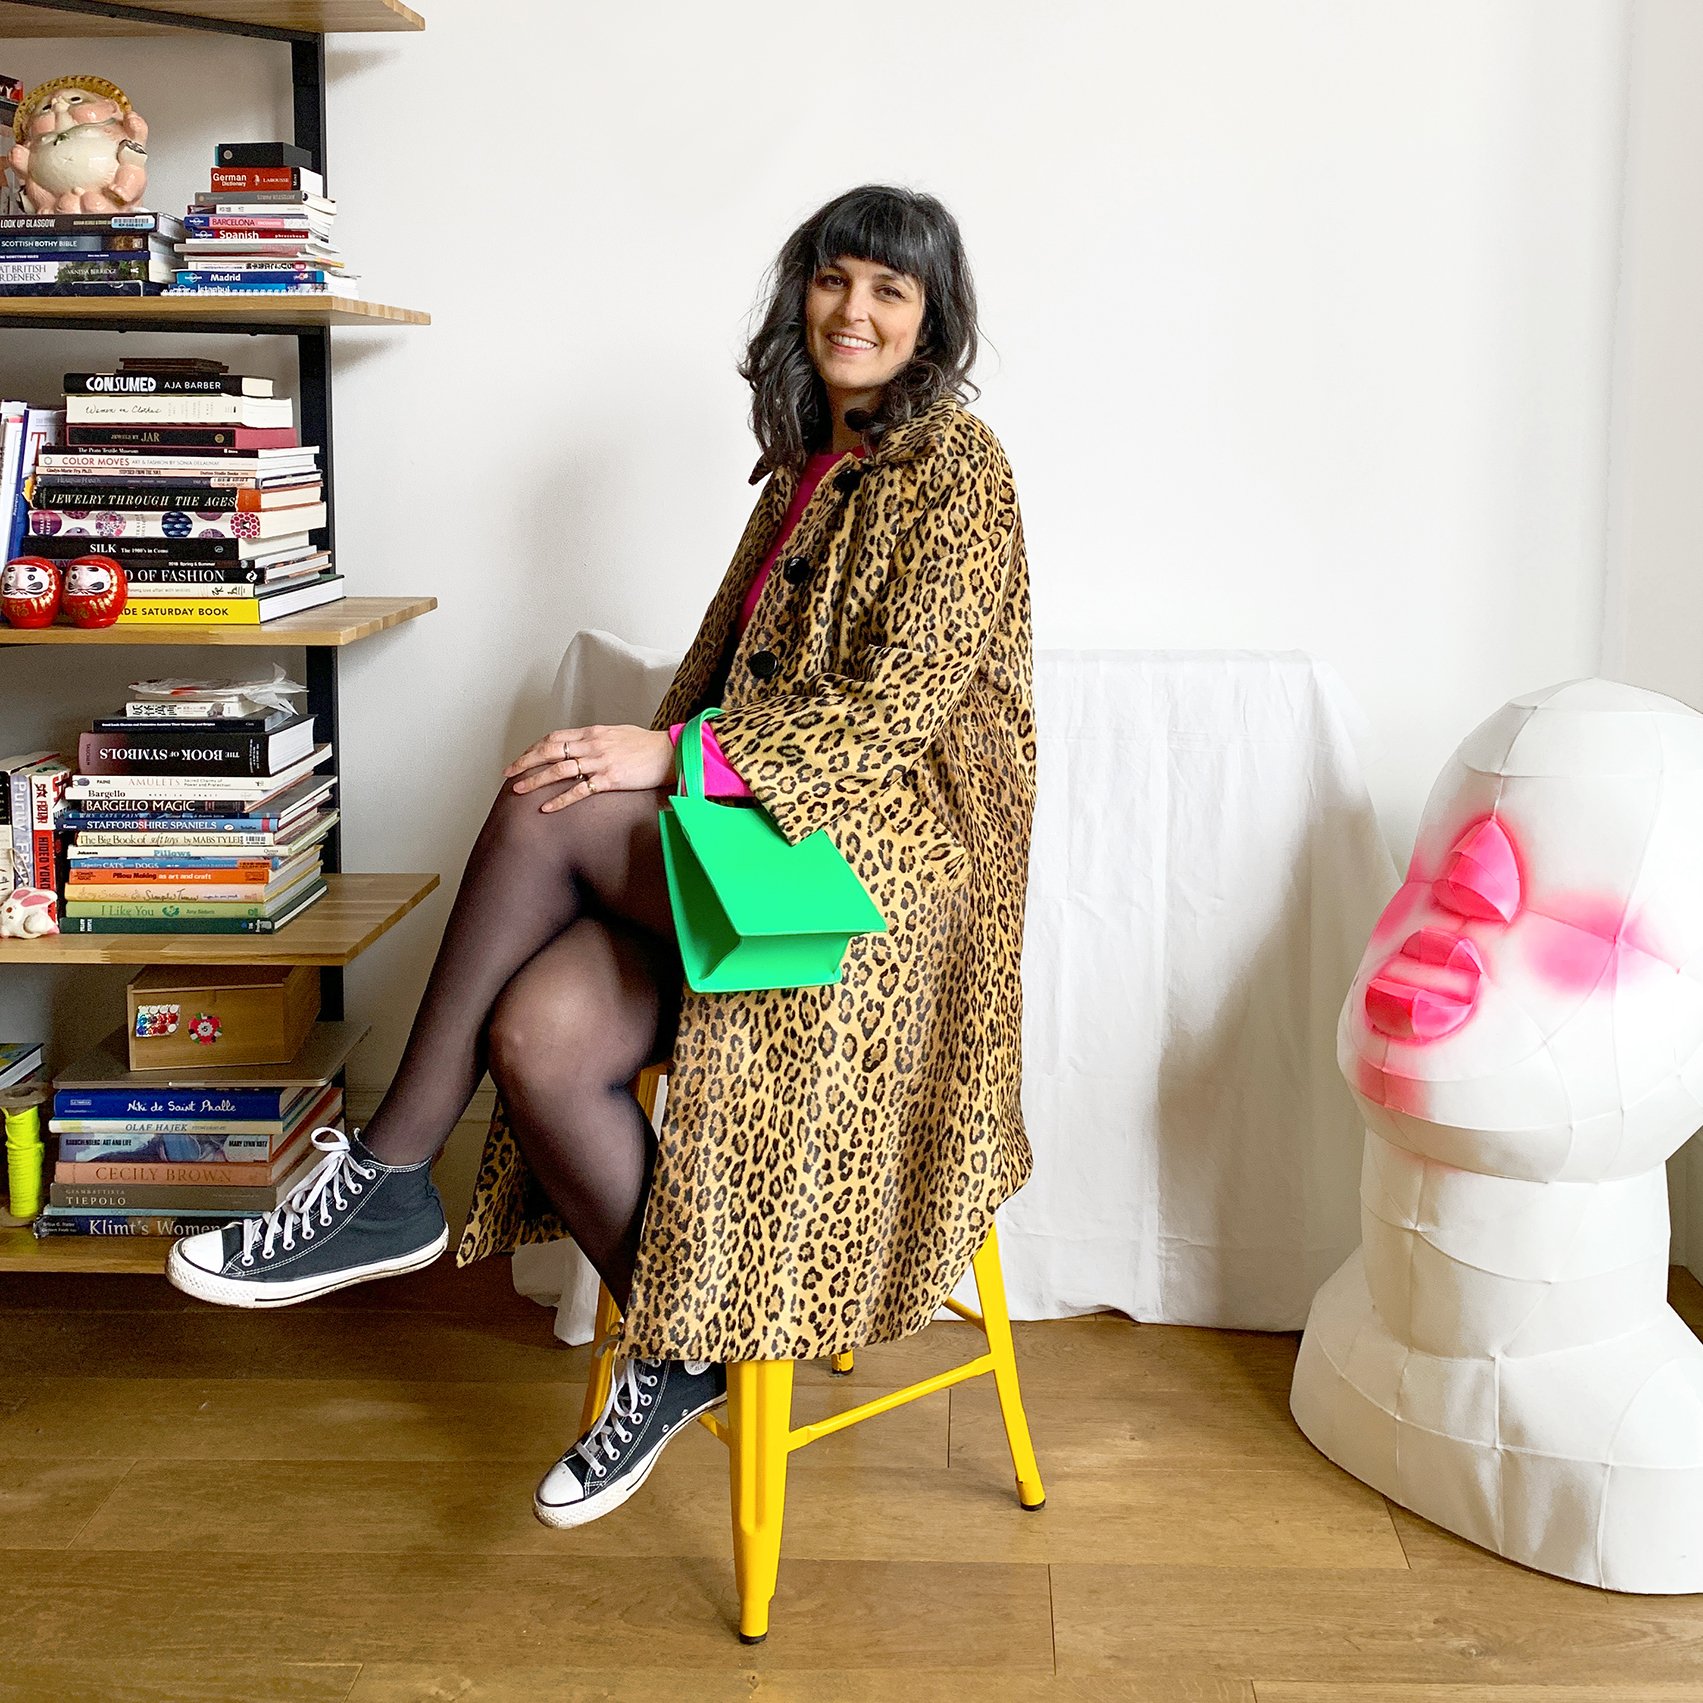
Even though I rarely use them, I love adding a chain to the back of my coats for hanging. It looks so nice!
I used Kasha lining (flannel backed satin) to add some warmth as the fur is on the lighter side. It adds great body to the coat, and is warmer than I expected. You can see here that I added a pleat to the center back of my lining, which is not called for in the pattern (or maybe it is, but again: I can’t read it). The pattern does include jump pleat at the hem & sleeve hems.

A peek at the layered sheets from the Japanese Pattern Book.
The pattern comes on layered sheets, similar to Burda magazine. But the sheets are not very big, so the book tells you to lengthen the body pieces to your desired length (because they wouldn't fit on the sheets at full length). I lengthened the coat body 7" for this version. You must add your own seam allowances & hem allowances. The patterns include notches, but not very many. The patterns are well drafted, but I'd recommend adding more notches if they will make things easier for you to get accurate results (for example when attaching the facing to the collar/neckline).
Click on any of the smaller photos and they will enlarge.


I used the single welt pocket from the pattern, but enlarged it about 15%. I LOVE slanted welt pockets on coats. It a great user experience, very comfortable to put your hand inside, especially if you enlarge the pocket bags.
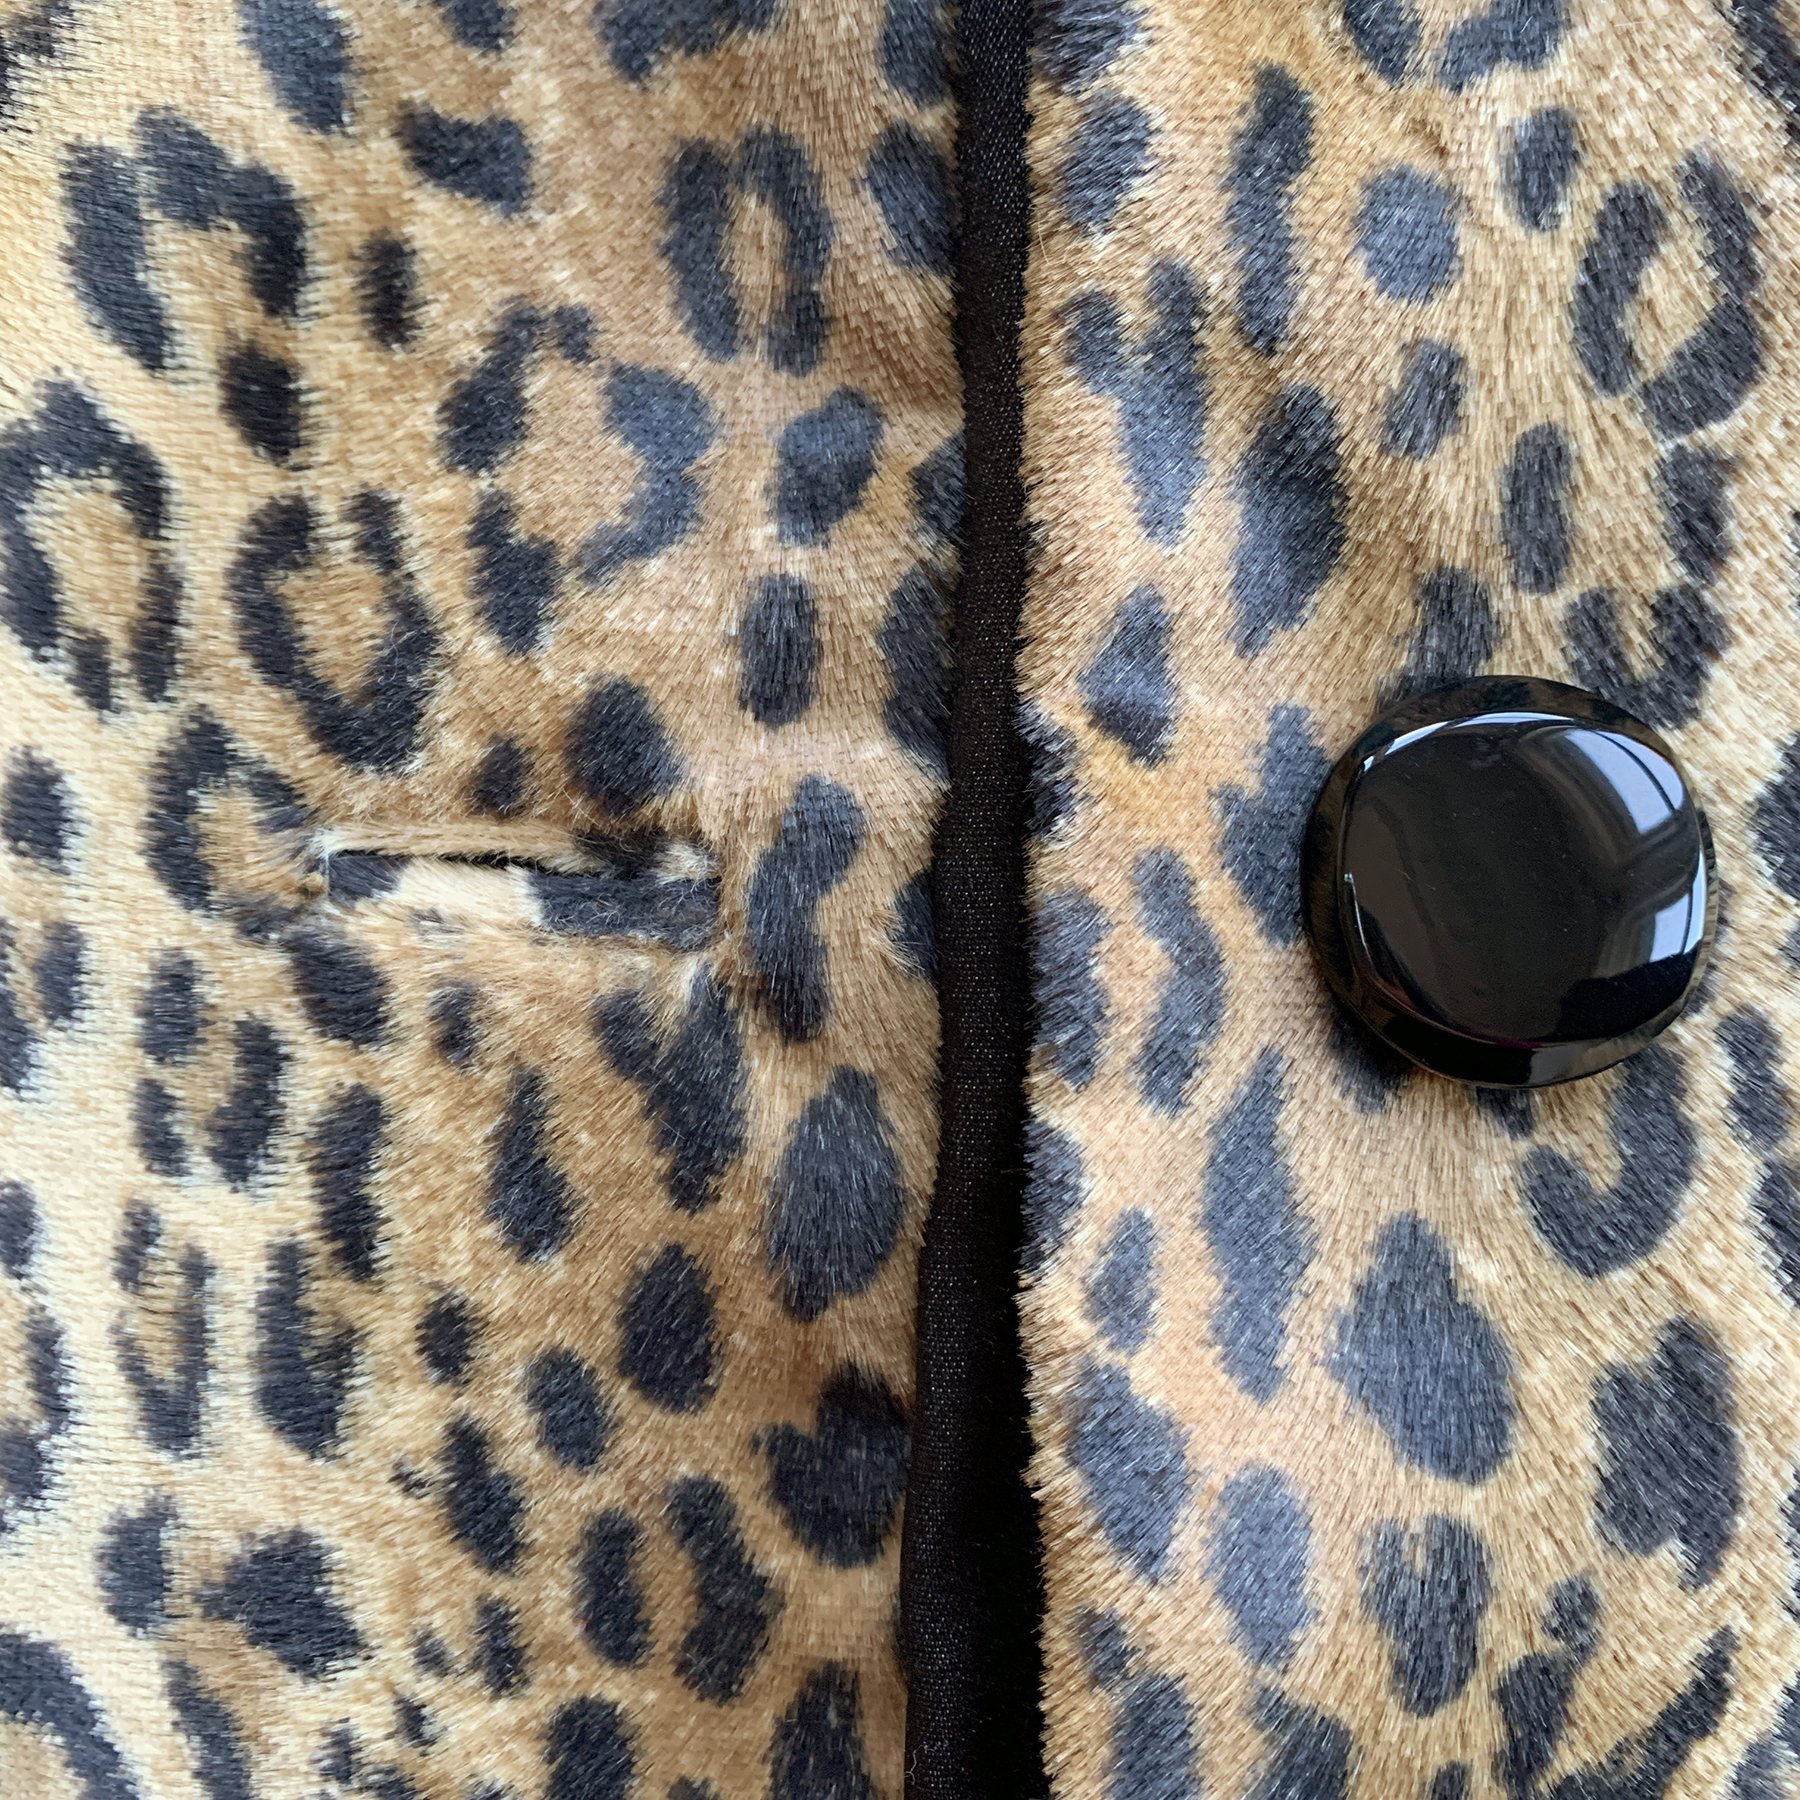
The book includes great instructions for bound buttonholes, which I have used before. But I used a different method because I wanted to have cotton piping cord inside the welts/lips to give them dimension and strength. For the lips of the buttonholes, I found areas of the fabric where the pile was well behaved, on the correct grain, and all in a similar color range. Then I made sure they all have the pile/nap facing the same direction.

I changed the collar from rounded to pointed, and the collar is the only place I added interfacing. I used a firm woven fusible. It was tricky to fuse it to the under collar, but they payoff is the collar is crisp and has nice body.
I can’t remember where I purchased these buttons (definitely somewhere in Manhattan’s Garment District). I know I bought them specifically for this project, so it was fun to finally give them their moment.

I added 1/4" to each side of the sleeve seam, adding 1/2" total to circumference (I prefer a loose sleeve as I like to wear layers), and shortened the sleeve 2.5" to achieve bracelet length. I actually kept the sleeve hem really deep - I didn’t trim the fabric, just folded it up - just in case I ever want to lengthen it later. But generally, I like when my outfit’s sleeve shows under my coat.
I also added a very thin shoulder pad - just one layer of thin cotton quilting batting. I used the pattern pieces to create the correct shape to fit this shoulder. I added them for two reasons: I have narrow, sloping shoulders, and I think it's nice to give a little structure there, and also because there is a shoulder dart and the fabric cannot be steamed, the pad smooths things out a little. So in conclusion, they're present to help the fabric hang better.


To finish the coat, I bagged the lining (I have a reel about that on Instagram), and hand catch stitched my hems in place before pulling the coat through to be right-side-out.

So there it is! Though not the first project I started in 2022, I am pleased that this is the first one I completed. It’s been a few years since I’ve owned a leopard coat (my beloved 60s era vintage one eventually shredded and disintegrated after I was fatefully caught in a heavy rain). Having this classic statement piece back in my closet has me dreaming of some outfits that I am itching to create!
Today is sunny here in Glasgow, and I wore this coat out to get coffee with Jason and to run a couple of errands. A great first outing for a new coat. XOXO, Martha