ADAMS PANT PATTERN REVIEW - I SEWED DAUGHTER JUDY PATTERNS NEW PAINTERS PANTS
A month or two ago, I was sewing muslins for a jeans pattern and posting about it on instagram. The muslins were fine, but it was clear that the intended fit of the design wasn’t going to work for me, and I was getting frustrated. I received a message from Daughter Judy Patterns, asking if I’d like to try the pattern tester version of their Adams Pant pattern, as a gift. After a little research on the brand and the pattern, I said yes. This is actually the first time I have ever accepted a gifted pattern - usually I feel some pressure, or I’m not in the mood to sew that kind of garment. But everything lined up: the offer was timely and it looked like a great option for me. (I was not compensated in any way other than being sent the pattern for free; I paid to have the PDF pattern printed, and I am posting this review just because I wanted to.)
Here is how the pattern is described on Daughter Judy’s website: "The Adams is our take on a classic painter's pant. Generously fit through the hip and thigh with options to choose between a darted or elasticated back. We recommend sizing up or down for a more relaxed or fitted look."
This pattern comes in two size ranges, drafted on separate blocks - DD 0-20 and JJ 16-34. The difference in the blocks is explained in the pattern instructions and on their website. I personally have never worked with a pants pattern that provided all of the information this one does, such as finished thigh circumference measurement. This made it easy for me to choose my size. Additionally, The designer has shown the finished garment on models of all different shapes and sizes, both on their site, and on instagram, which is always informative.
MAKING A MUSLIN:
Based on my measurements, I decided on size 12 everywhere except the hip side seams, where I graded to 16. This is my usual size range for a lot of pattern brands. I typically only make a muslin for pants, where I always find it necessary (I’m comfortable skipping it for most dresses & blouses). I leave off the details for my first muslin, my aim is to get a basic idea of the fit and determine if I’m starting with the correct size.
I thought my first muslin looked pretty good, but made the following tweaks:
• Let out front and back inner thighs to size 16, kept the rest of the inseams at size 12 - basically, I extended the crotch point about 1/4" on both front and back, blending to nothing a few inches down the leg.
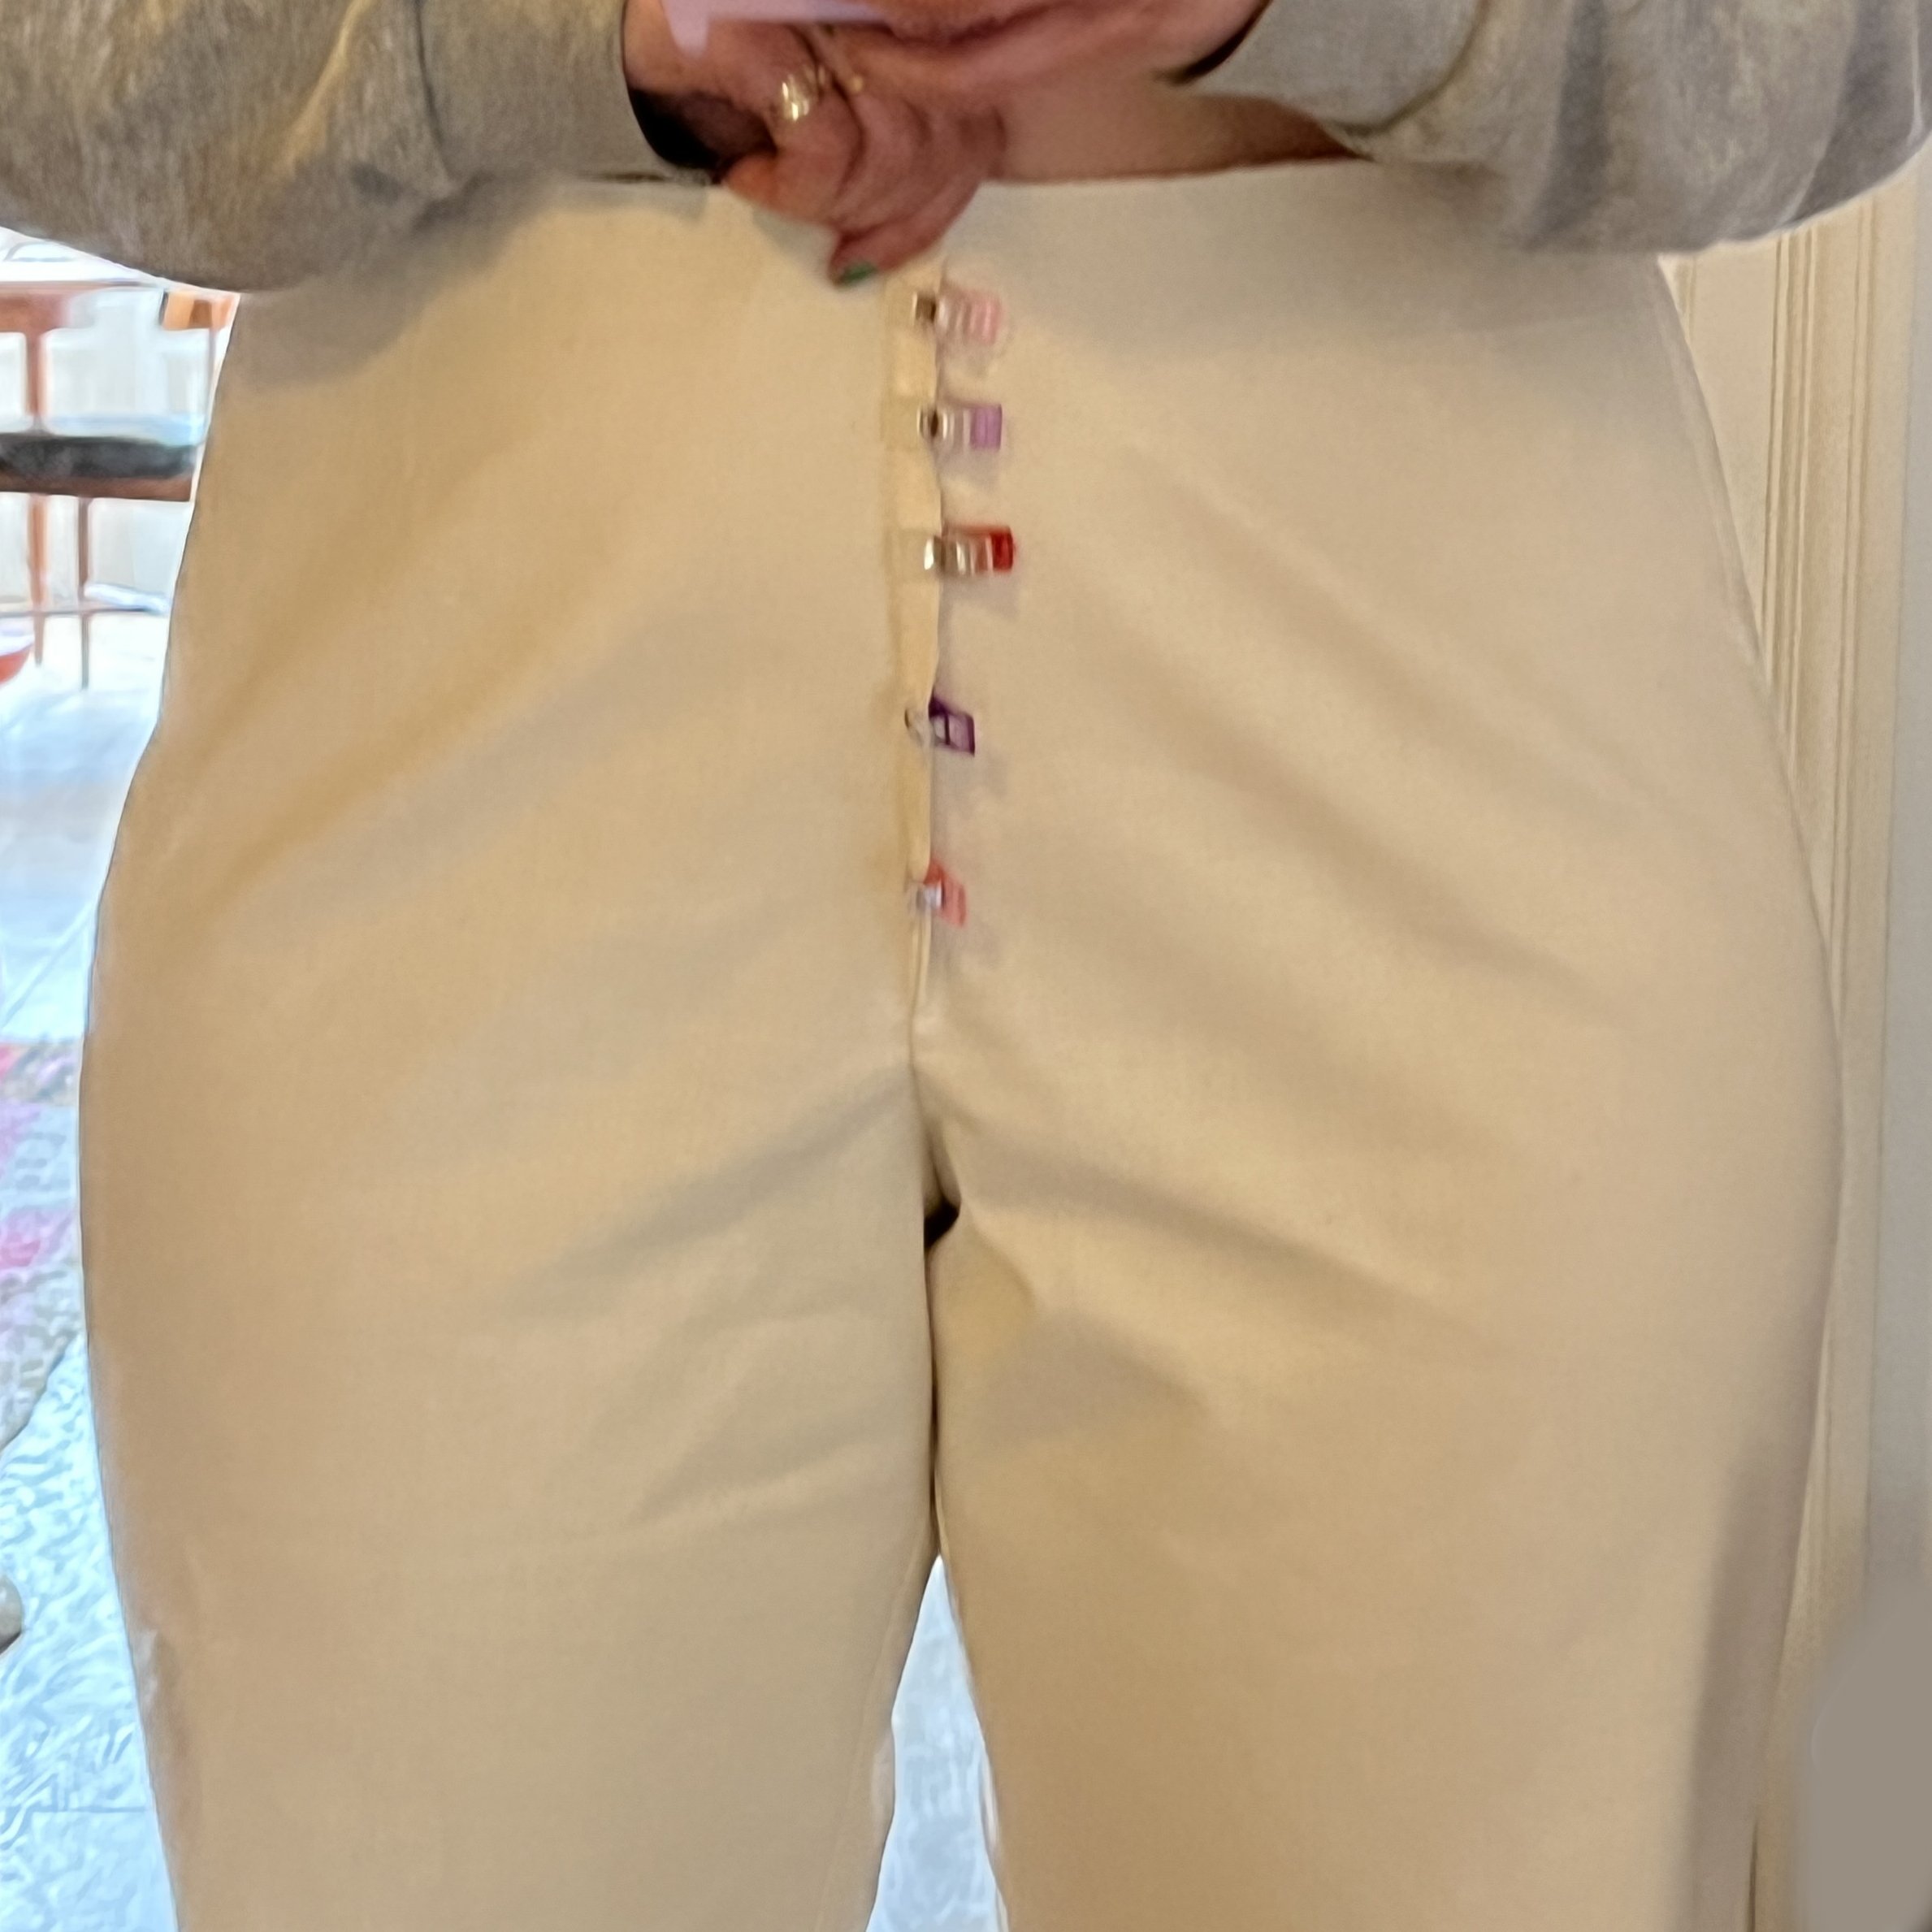
• I was getting a funny bump in the seam along the back rise. This is a part of the pattern that is a straight line, but it is at an angle. I pinched out that bump (see photo). Transferring this to my pattern meant slashing across the pattern piece, closing up 3/8" at the CB seam, keeping the outseam the same length. I've never needed this kind of adjustment before, but the issue was resolved.
• To compensate for the above modification, I added 1/2" to the top of the CB pattern piece. I did 1/2" instead of 3/8" so I could try them on and trim it/smooth it as needed, and also to ensure that when the pieces were sewn together, it would be a smooth line on the waistline edge, not a V shape. This worked well.
MATERIAL & TOOL SELECTION:
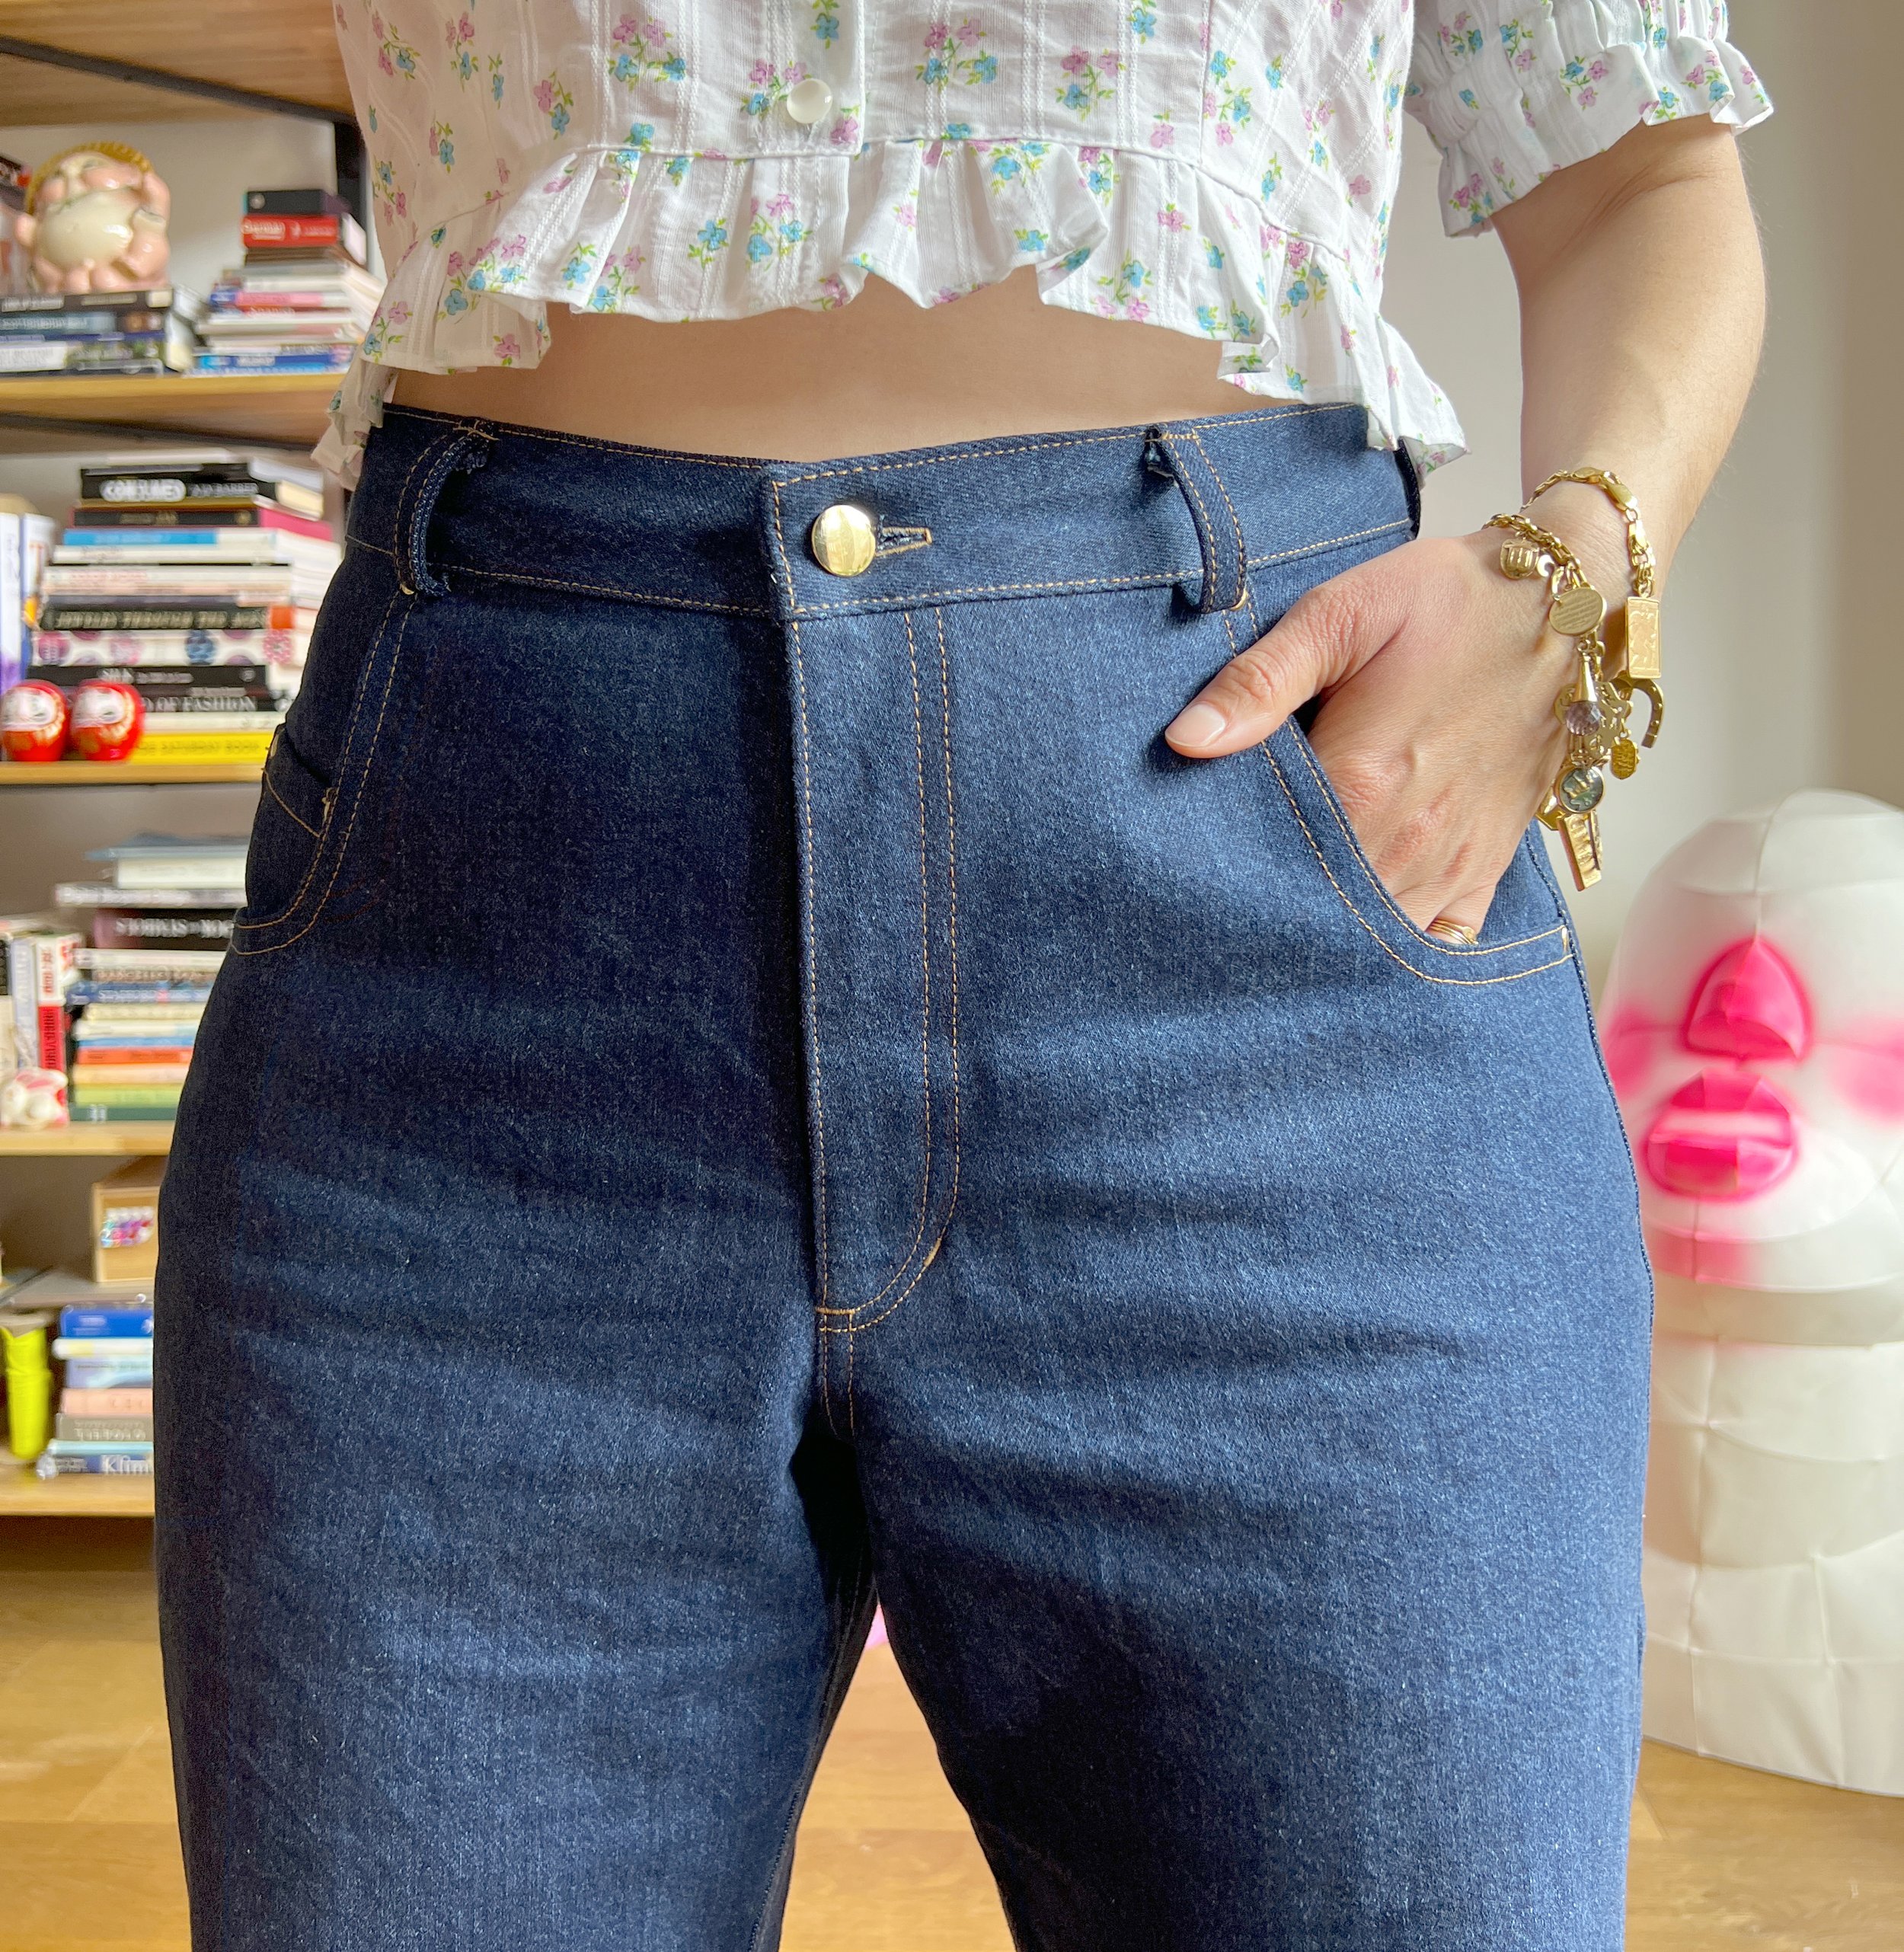
I have a couple cuts of nice denim in my stash, so I pre-washed them in the machine on hot, and hung them to dry (only because I don’t have a dryer). I chose this bright indigo 100% cotton denim from Merchant and Mills. I bought it in the last year, but it is no longer on their website. I am not sure the denim weight, but it is the heaviest denim I’ve ever sewn with, and it has no stretch.
For the pocket bags, I dipped into my deepest stash and selected this quilting cotton that I acquired while working at an incredible quilting store when I was 21 (I am now 39, seemed like I should use it!). All hardware is from my stash (jean tack button, rivets, YKK metal zipper).
I decided to sew on two machines to avoid constantly re-threading and changing thread tension settings:
• Construction on my Singer Quantum Stylus 9960 with a Jeans needle and Gutterman sew all thread.
• Top stitching on my Bernina 153QE with a top stitch needle and Gutterman Heavy Duty thread.
• Bar tacks and buttonhole were done with sew all thread in the same color as my top stitching (both machines got angry otherwise).


If you click on the above images, they will pop out.
INSTRUCTIONS:
This pattern is advertised as appropriate for Intermediate sewers. While the assembly is pretty straightforward, the finishing instructions are minimal, so I think that is a correct recommendation. If more finishing instructions are added to this pattern, I think a wider range of sewers would find it more accessible.
On the page before the cutting layout, where I missed it the first read through, the instructions state, "We recommend finishing all edges before beginning. You can finish seam edges in any way you prefer; overlock, binding, pinking, etc. to prevent fraying." I don't ever finish all my seams before beginning - it creates extra bulk (example: 2 serged edges sewn together, when you could have sewn them together, and then serged the seam allowances in one pass). When making jeans/pants, I find it better to “finish as I go” ie, sew a seam, then finish the edges, but in areas like fly construction, it’s better to finish seams first, then sew.
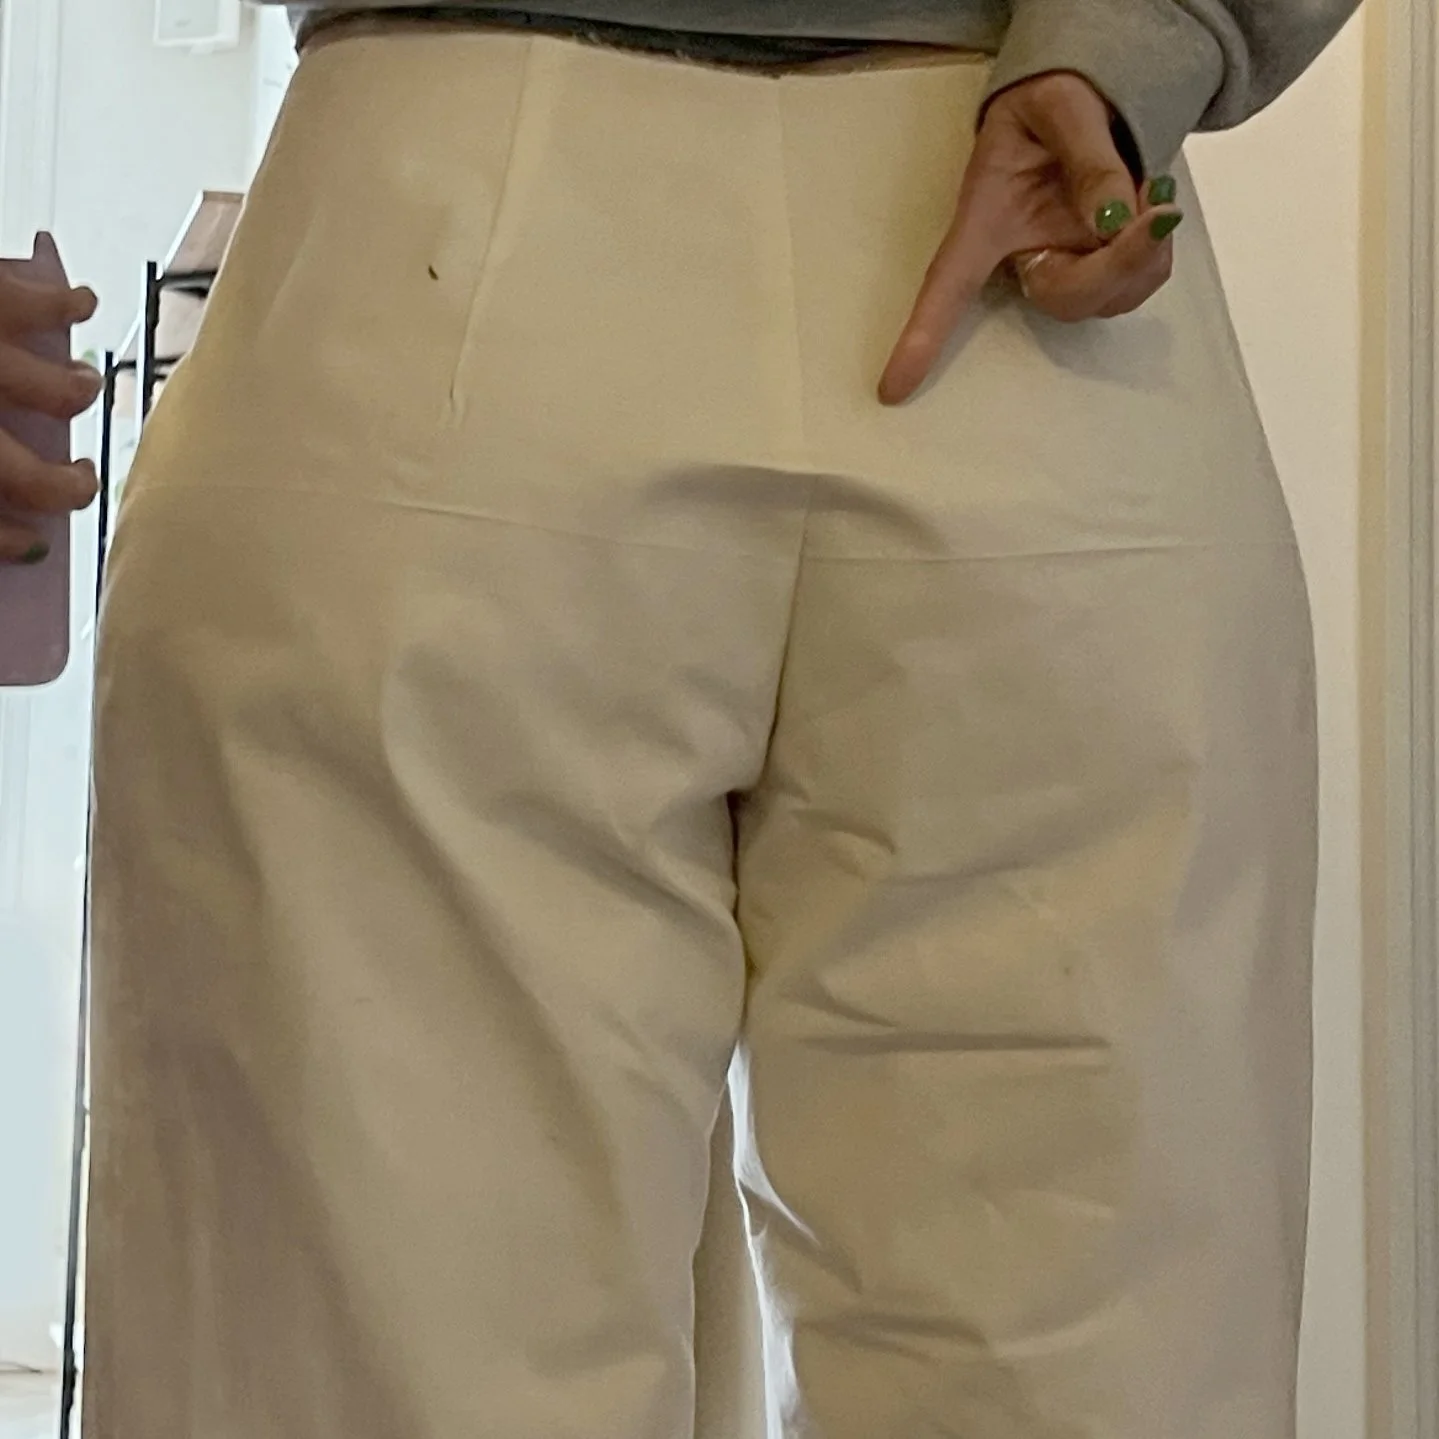
If you own a serger, you can make these pants very clean inside, however, if you don’t, the pocket bags (shown above) may not get an ideal finish, because the only way to finish the edges is to finish each piece separately (see photo on right). I don’t love that. Next time, I will cut 2 of the piece that acts as a pocket stay, and French seam the bottom of the pocket bag - just make sure your fabric is light weight enough to be added into the fly construction without causing any problems (cotton lawn would be a good choice). Weather you own a serger or not, this would be a cleaner finish imho.
One last thing to look out for: as a devoted Big 4 lover, I did find myself getting stuck on some of the terminology (which is explained in a glossary). For example: the pattern tells you to "Deco" stitch, I would call this top stitching; pattern says "back tack" where I would say backstitch.

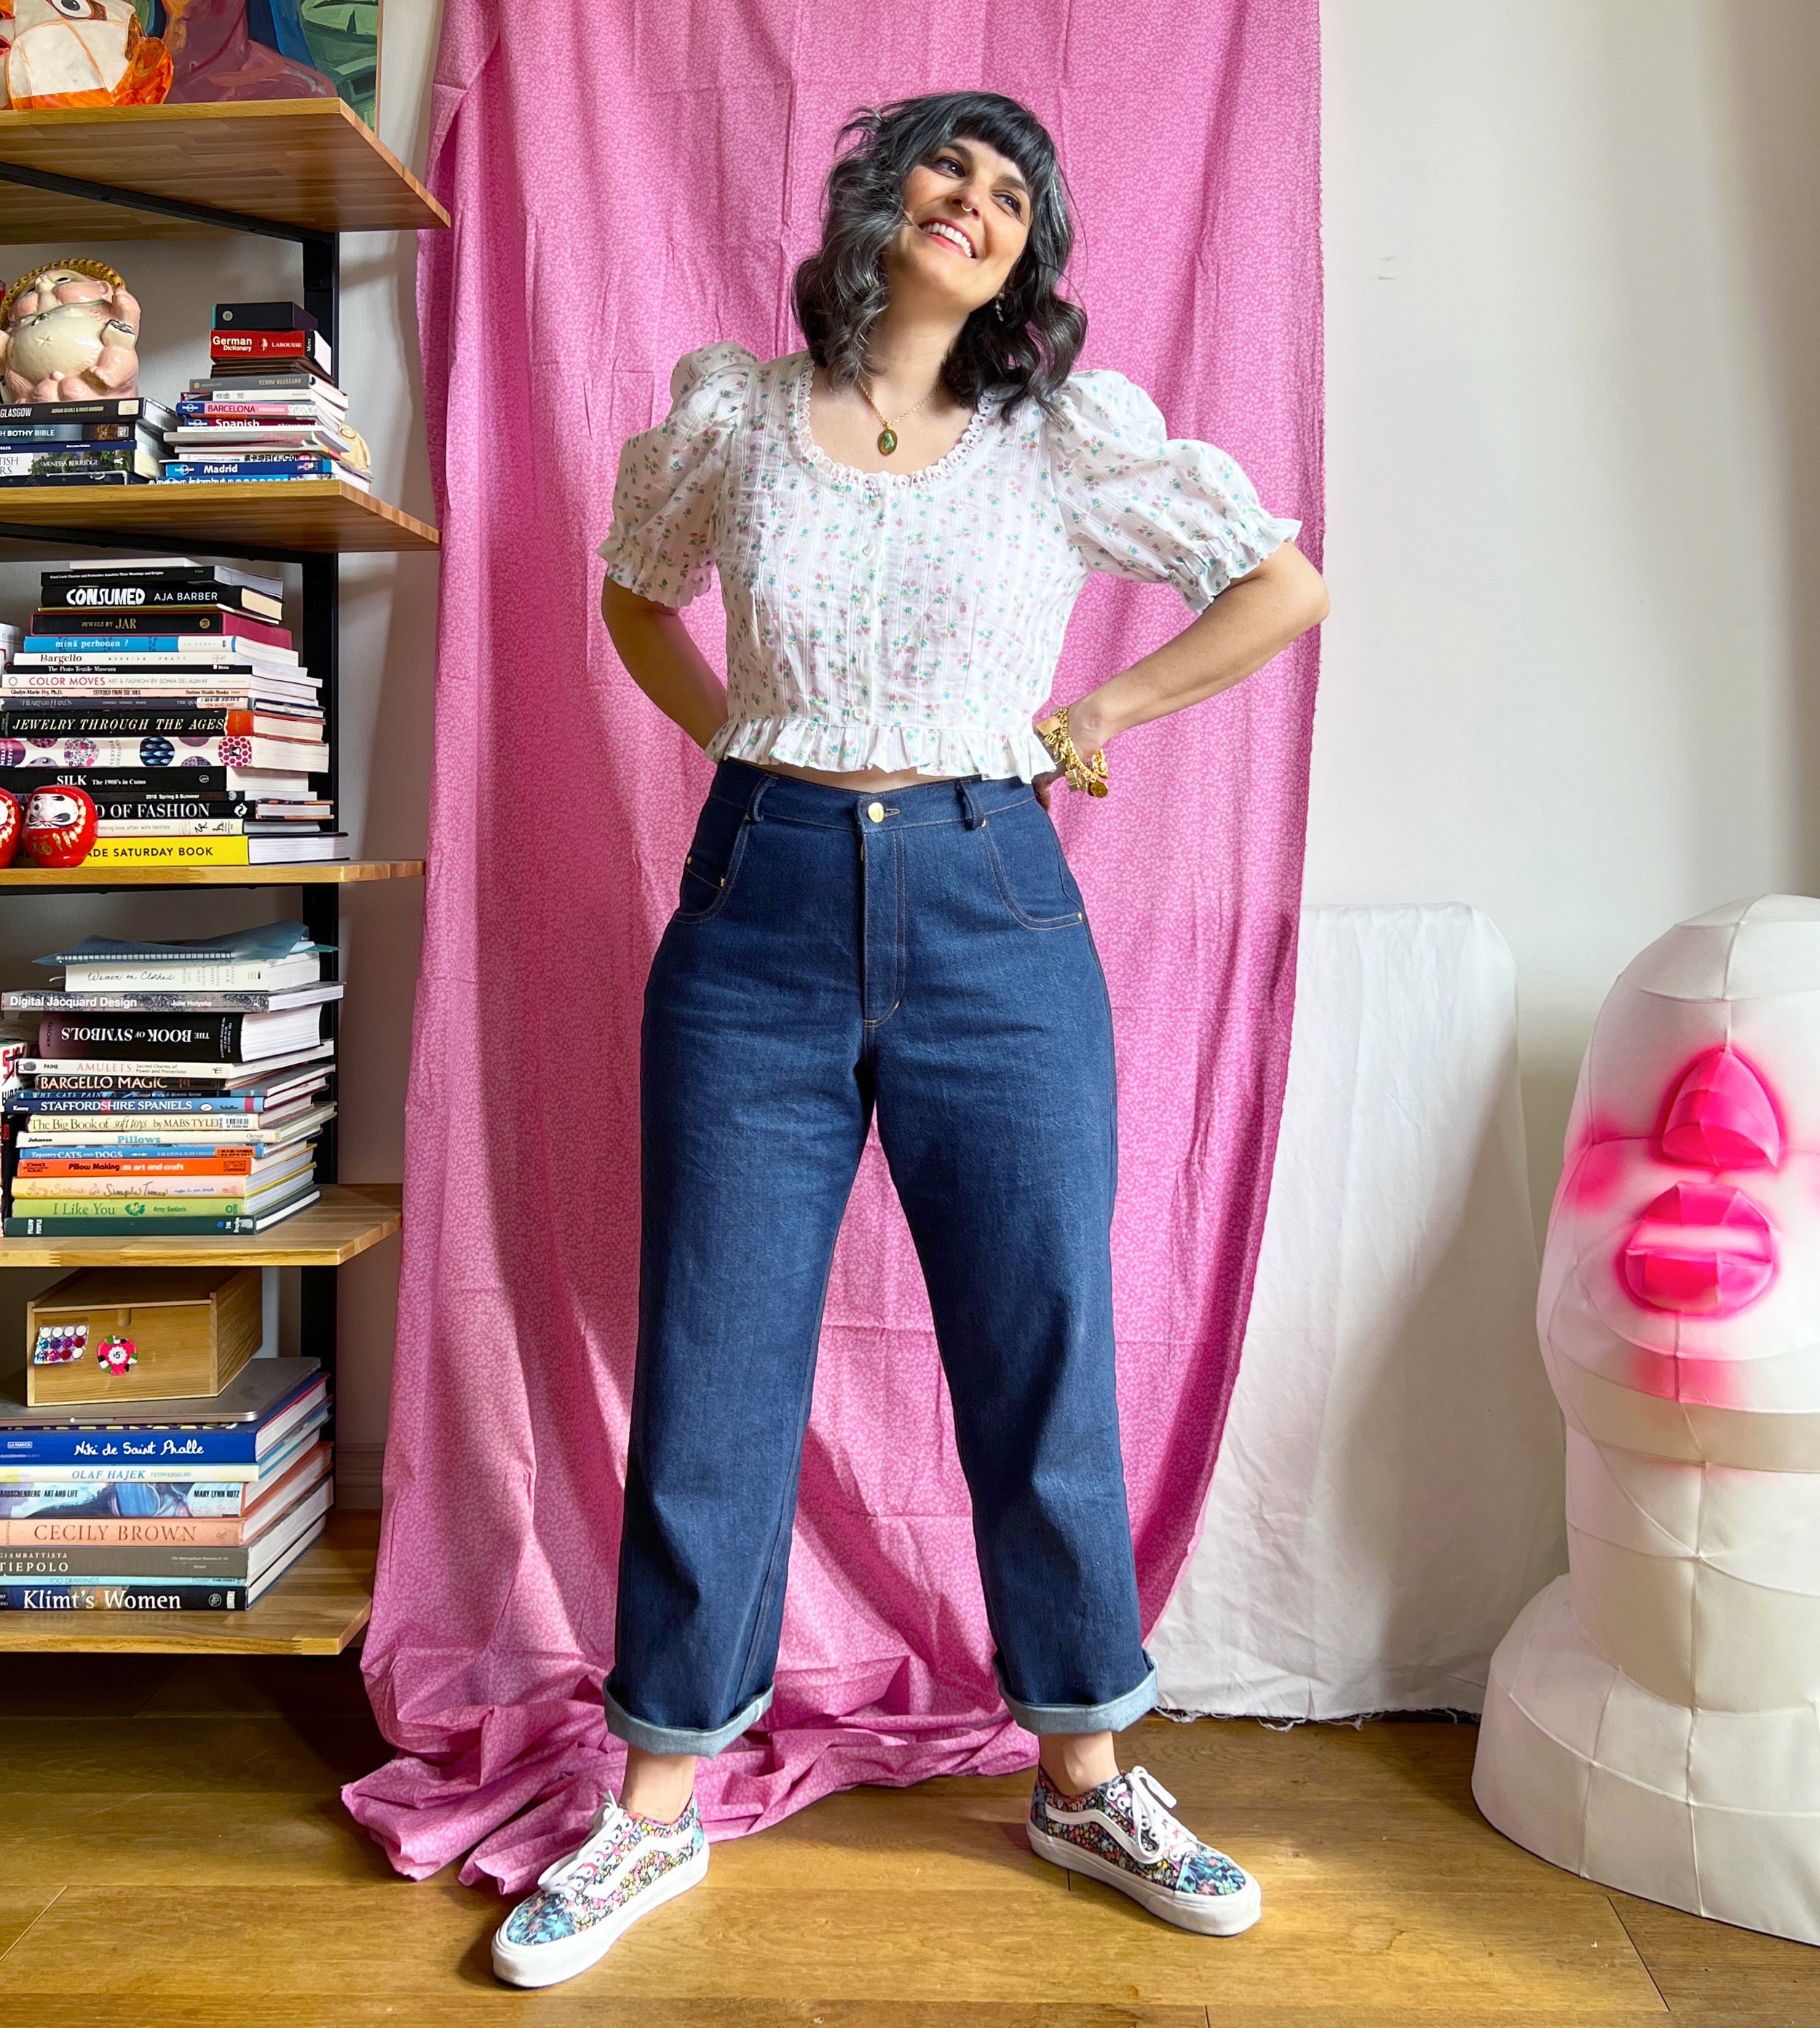
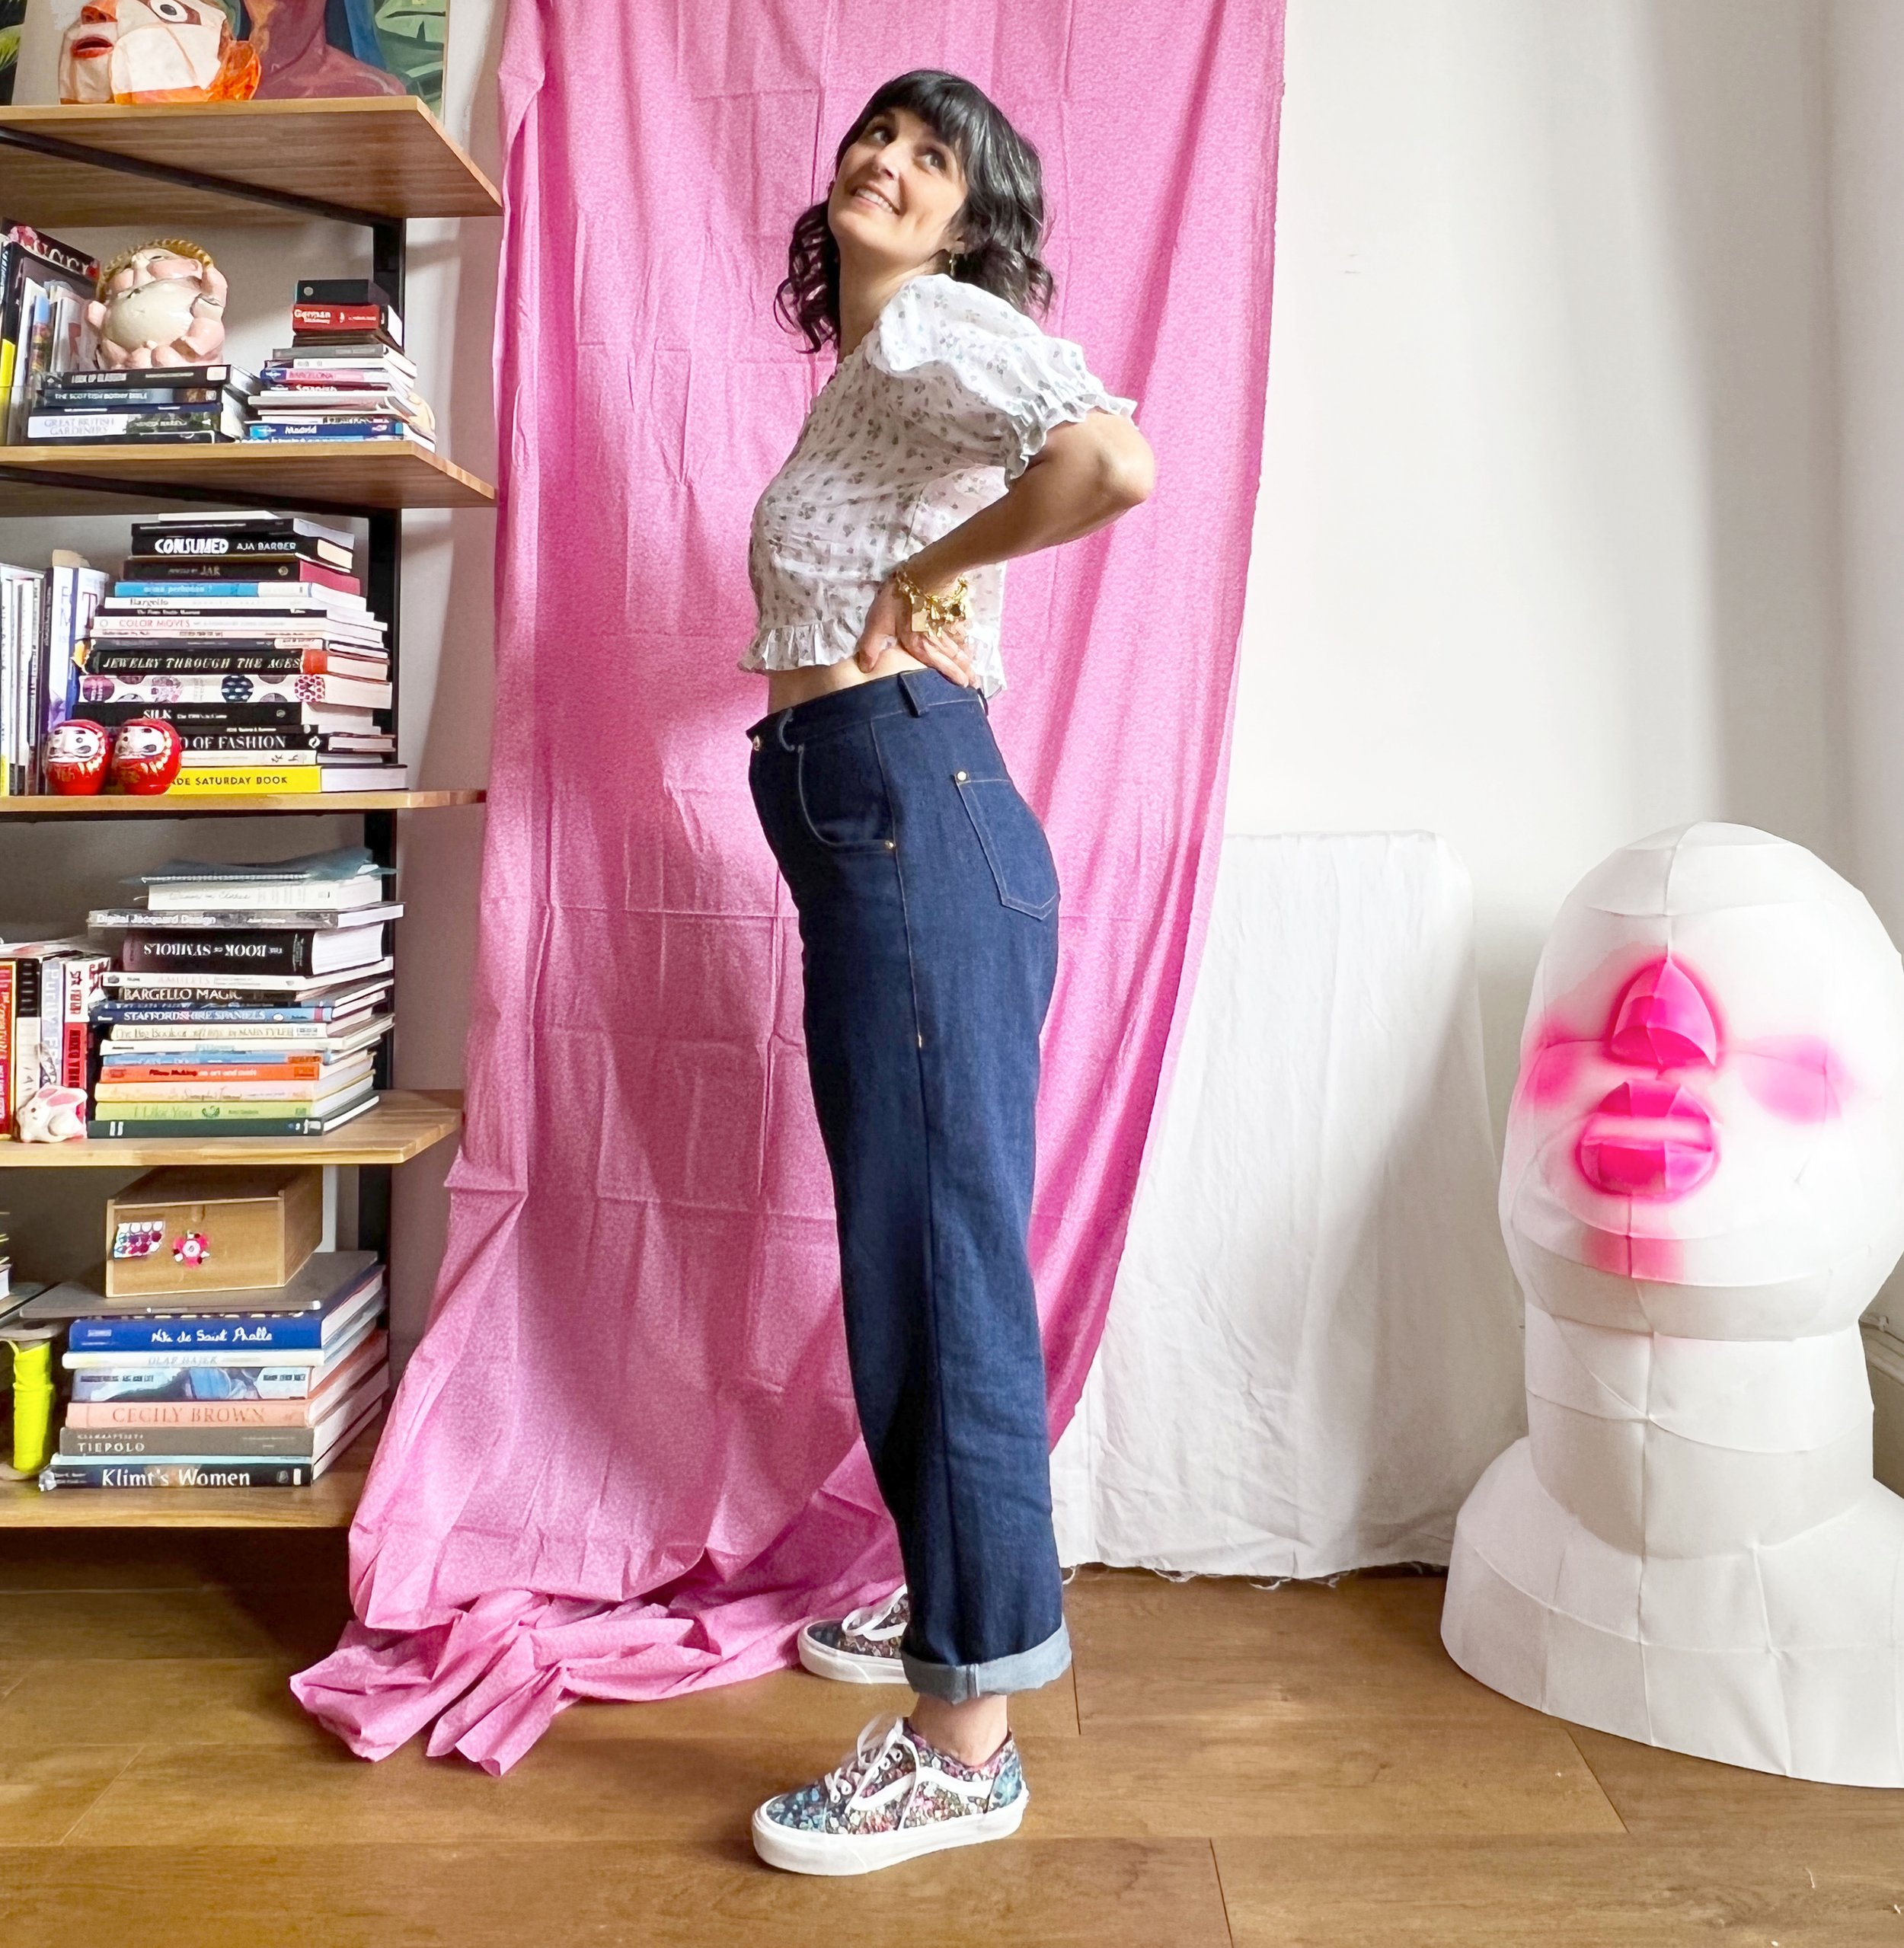
SEWING MY VERSION:
I transferred all modifications from muslin to my pattern and got to work.
• I sewed up until it was time to sew the side seams and then tried on the jeans. They were looser than my muslin. This denim has some mechanical give. I took in the side seams 1/4", removing 1" circumference in total.
• I also found there was excess fabric between my legs now - I could remove some of the crotch depth. But I had already top stitched, so I'll save that for next time. Basically, what I added to my muslin here, I didn’t need in the end.
• Fly instructions are fine, but I ended up doing it in a way that is more familiar to me. The lack of seam finishing instructions was interesting to me here specifically, because making a fly includes adding a zipper, finishing seams, and adding top stitching - there's a lot going on and guidance ensures you won’t forget something. There is a small notch in the drafting of the J curve (you'll see if you have the pattern). I ended up marking my seam lines and cutting it off when serging - so if you need to do the same, don’t sweat it.
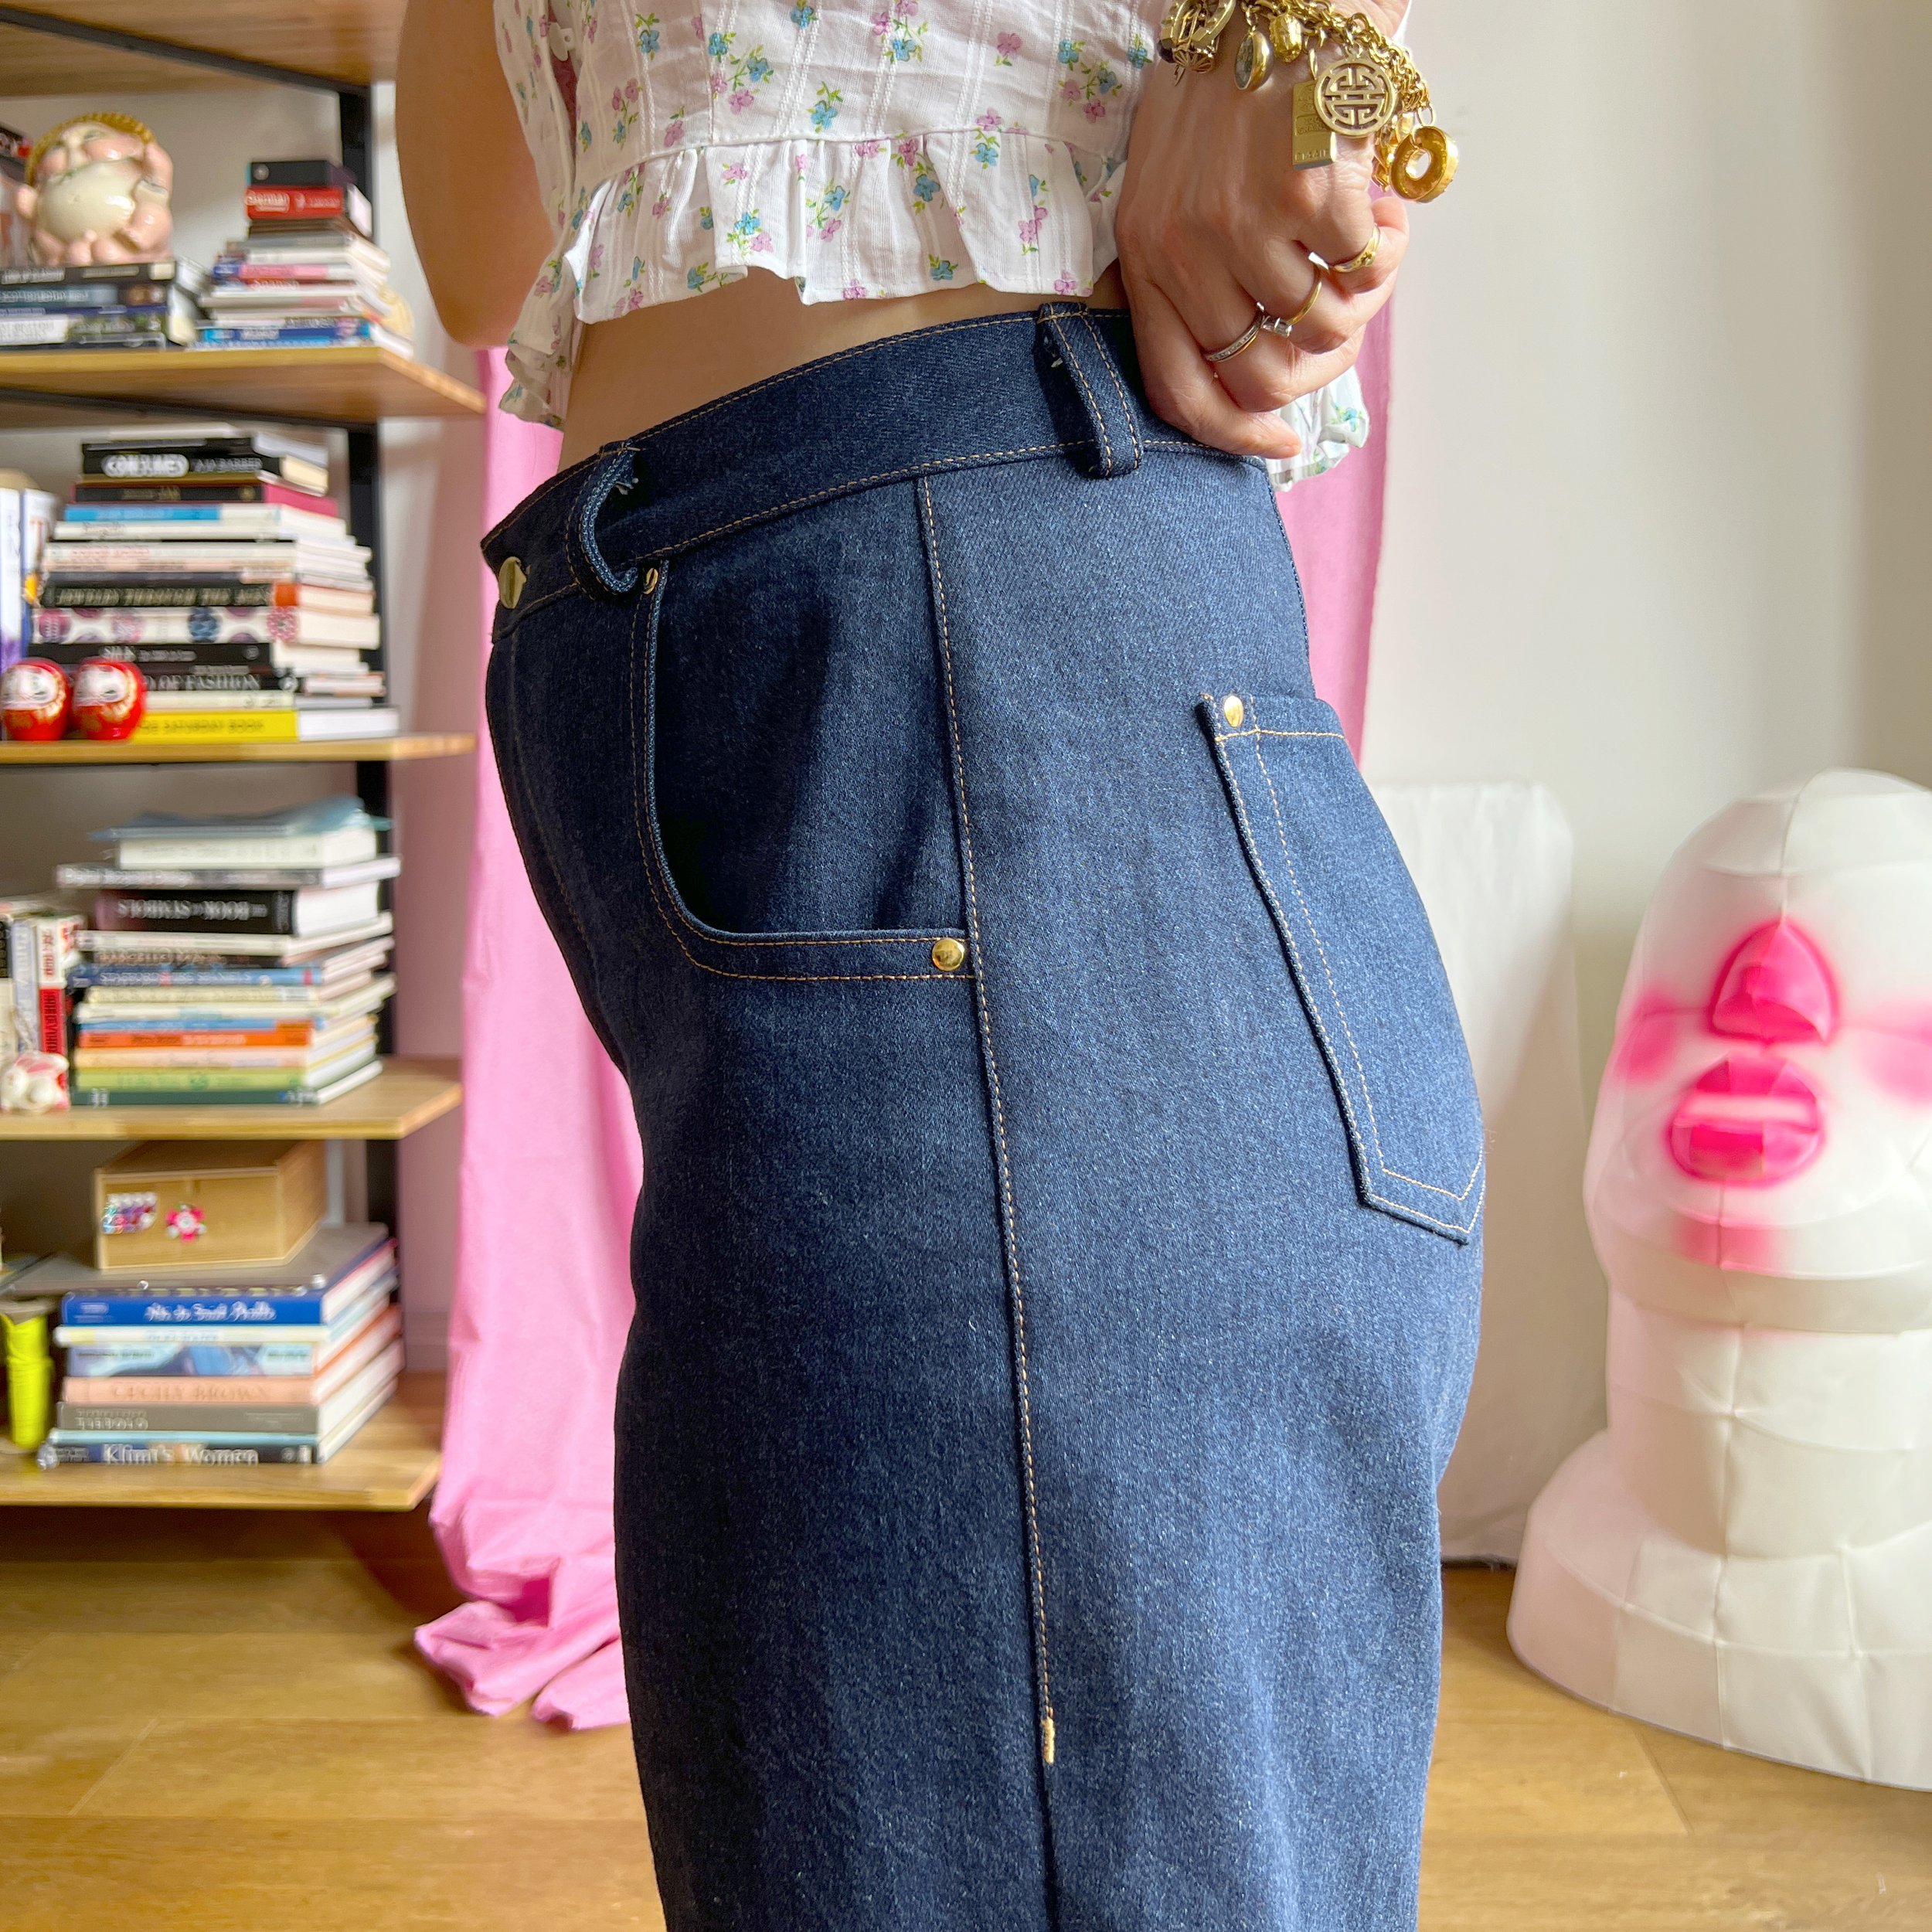
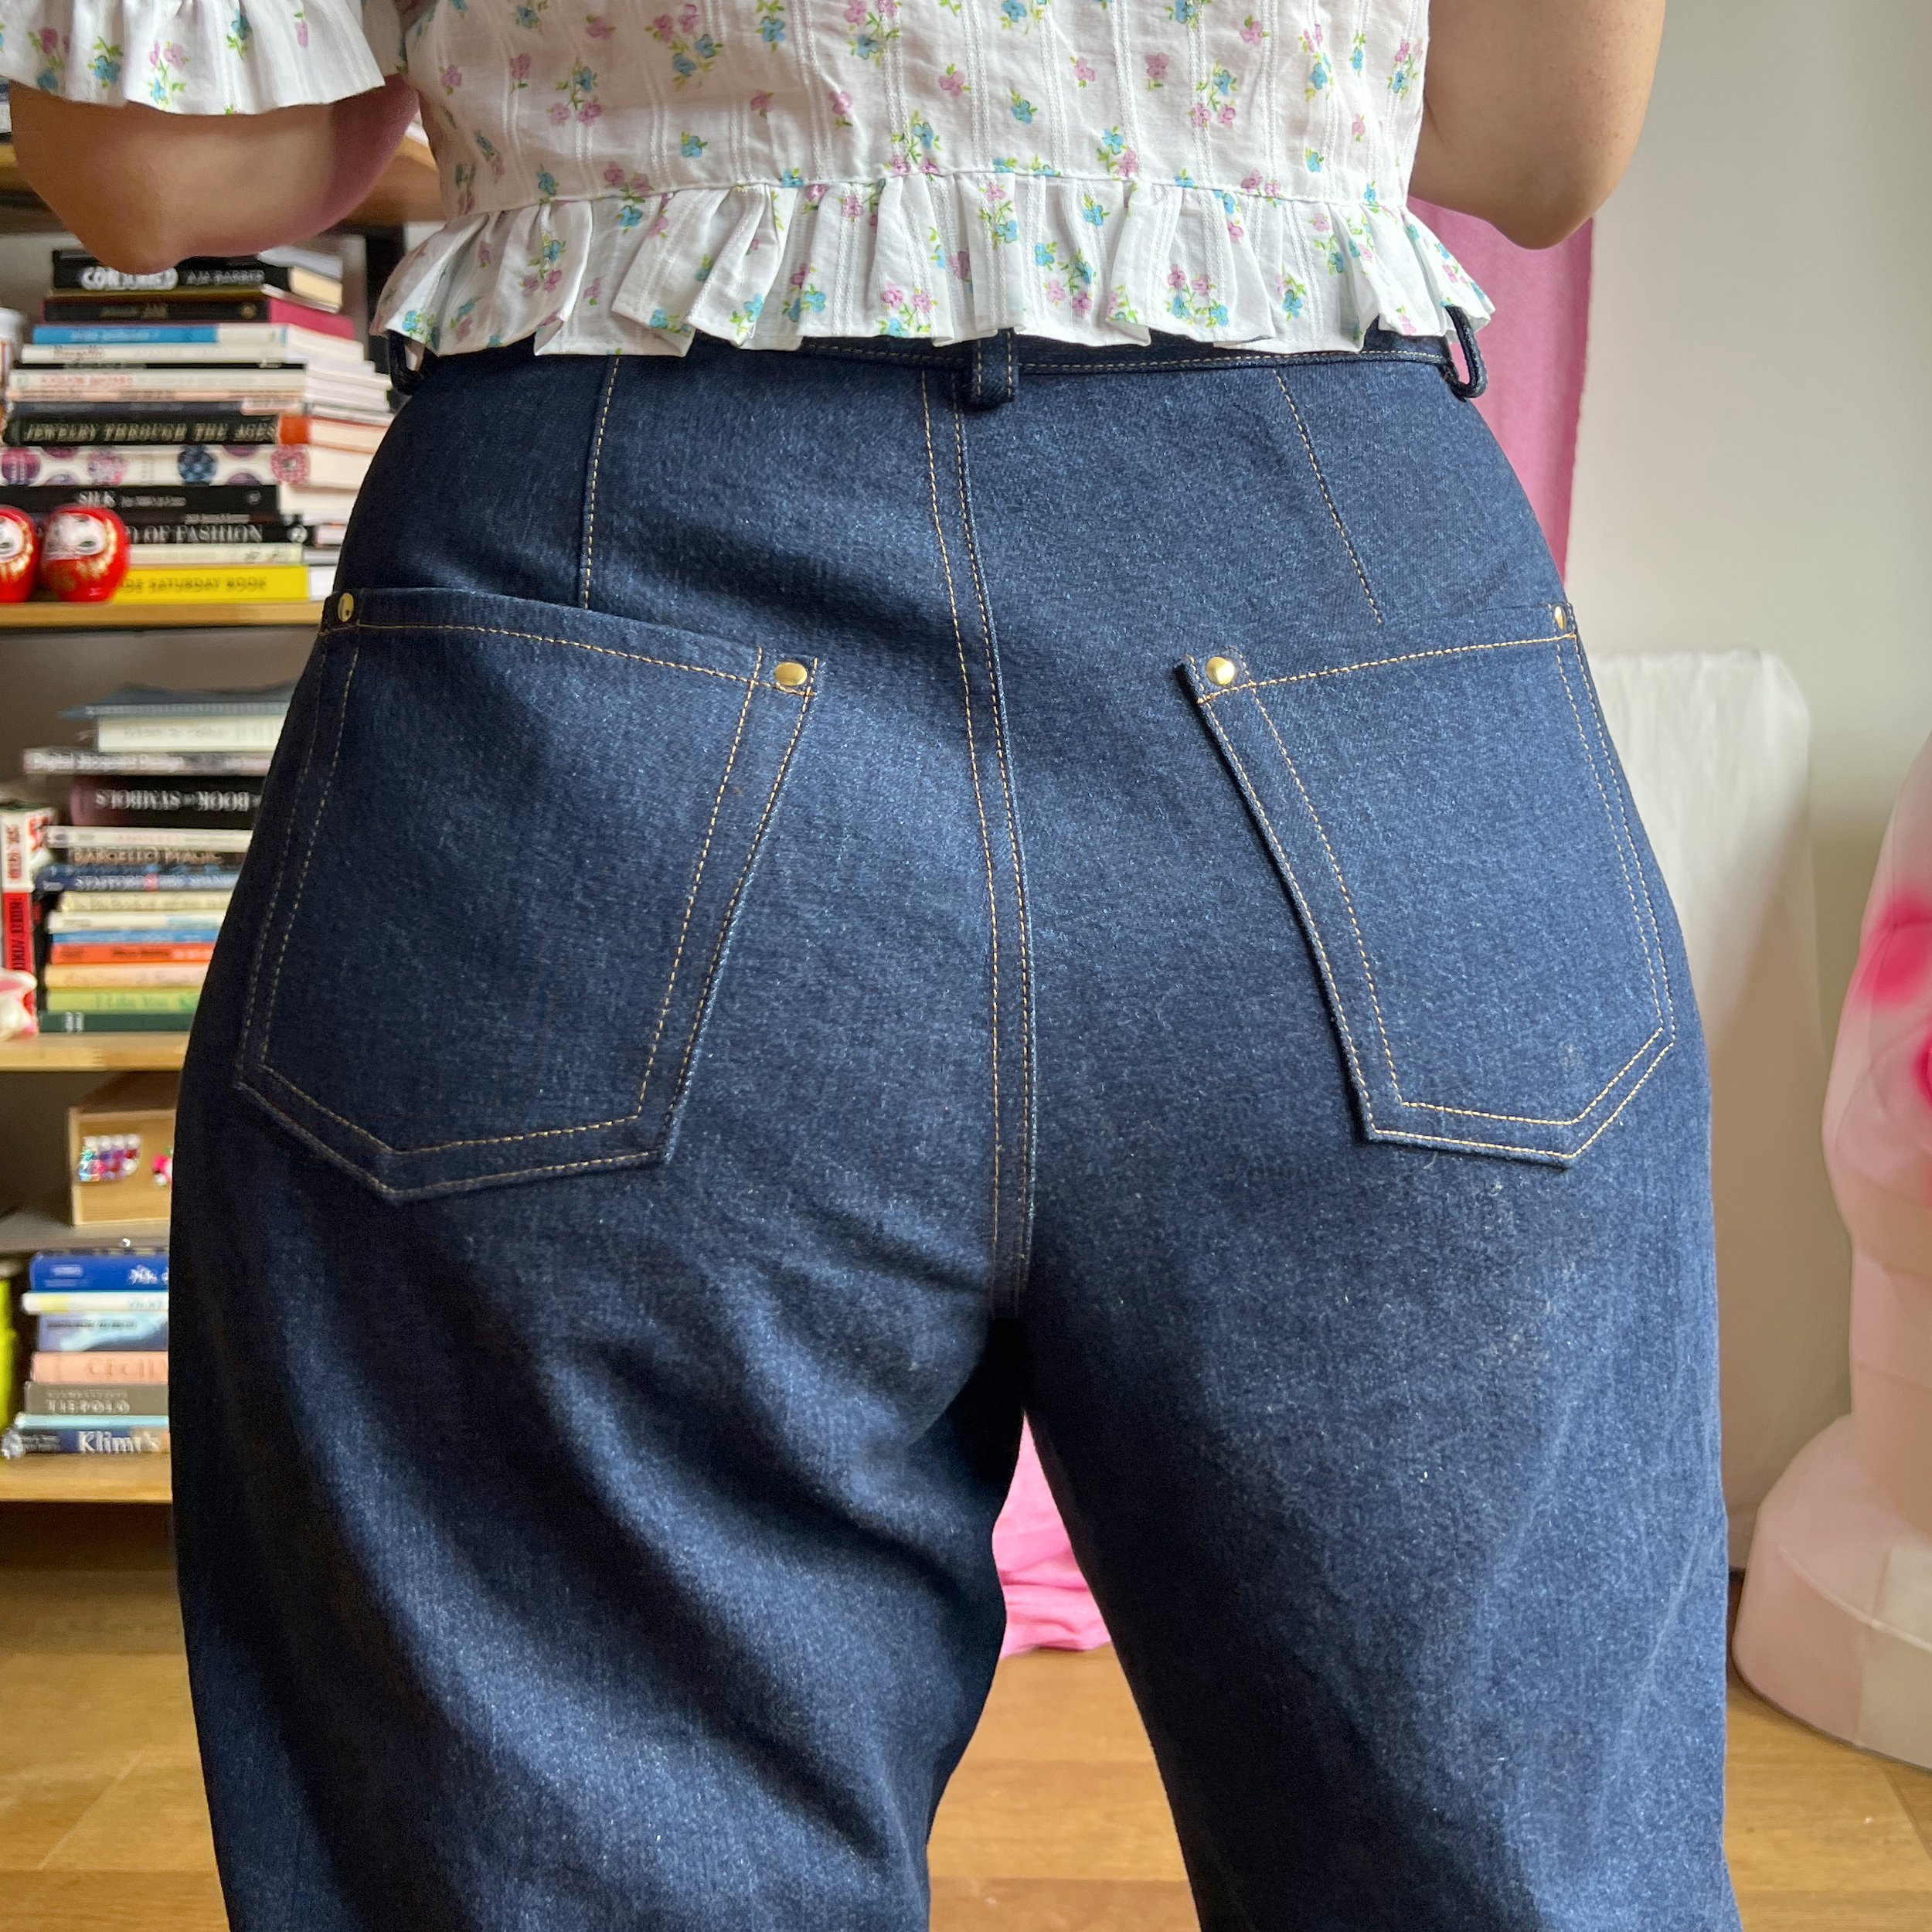
• I made regular flat pockets for the back pockets. Pattern comes with pockets that have some dimension to them... I don't want to add any volume to that area. Next time I'll make bigger pockets with rounded corners.
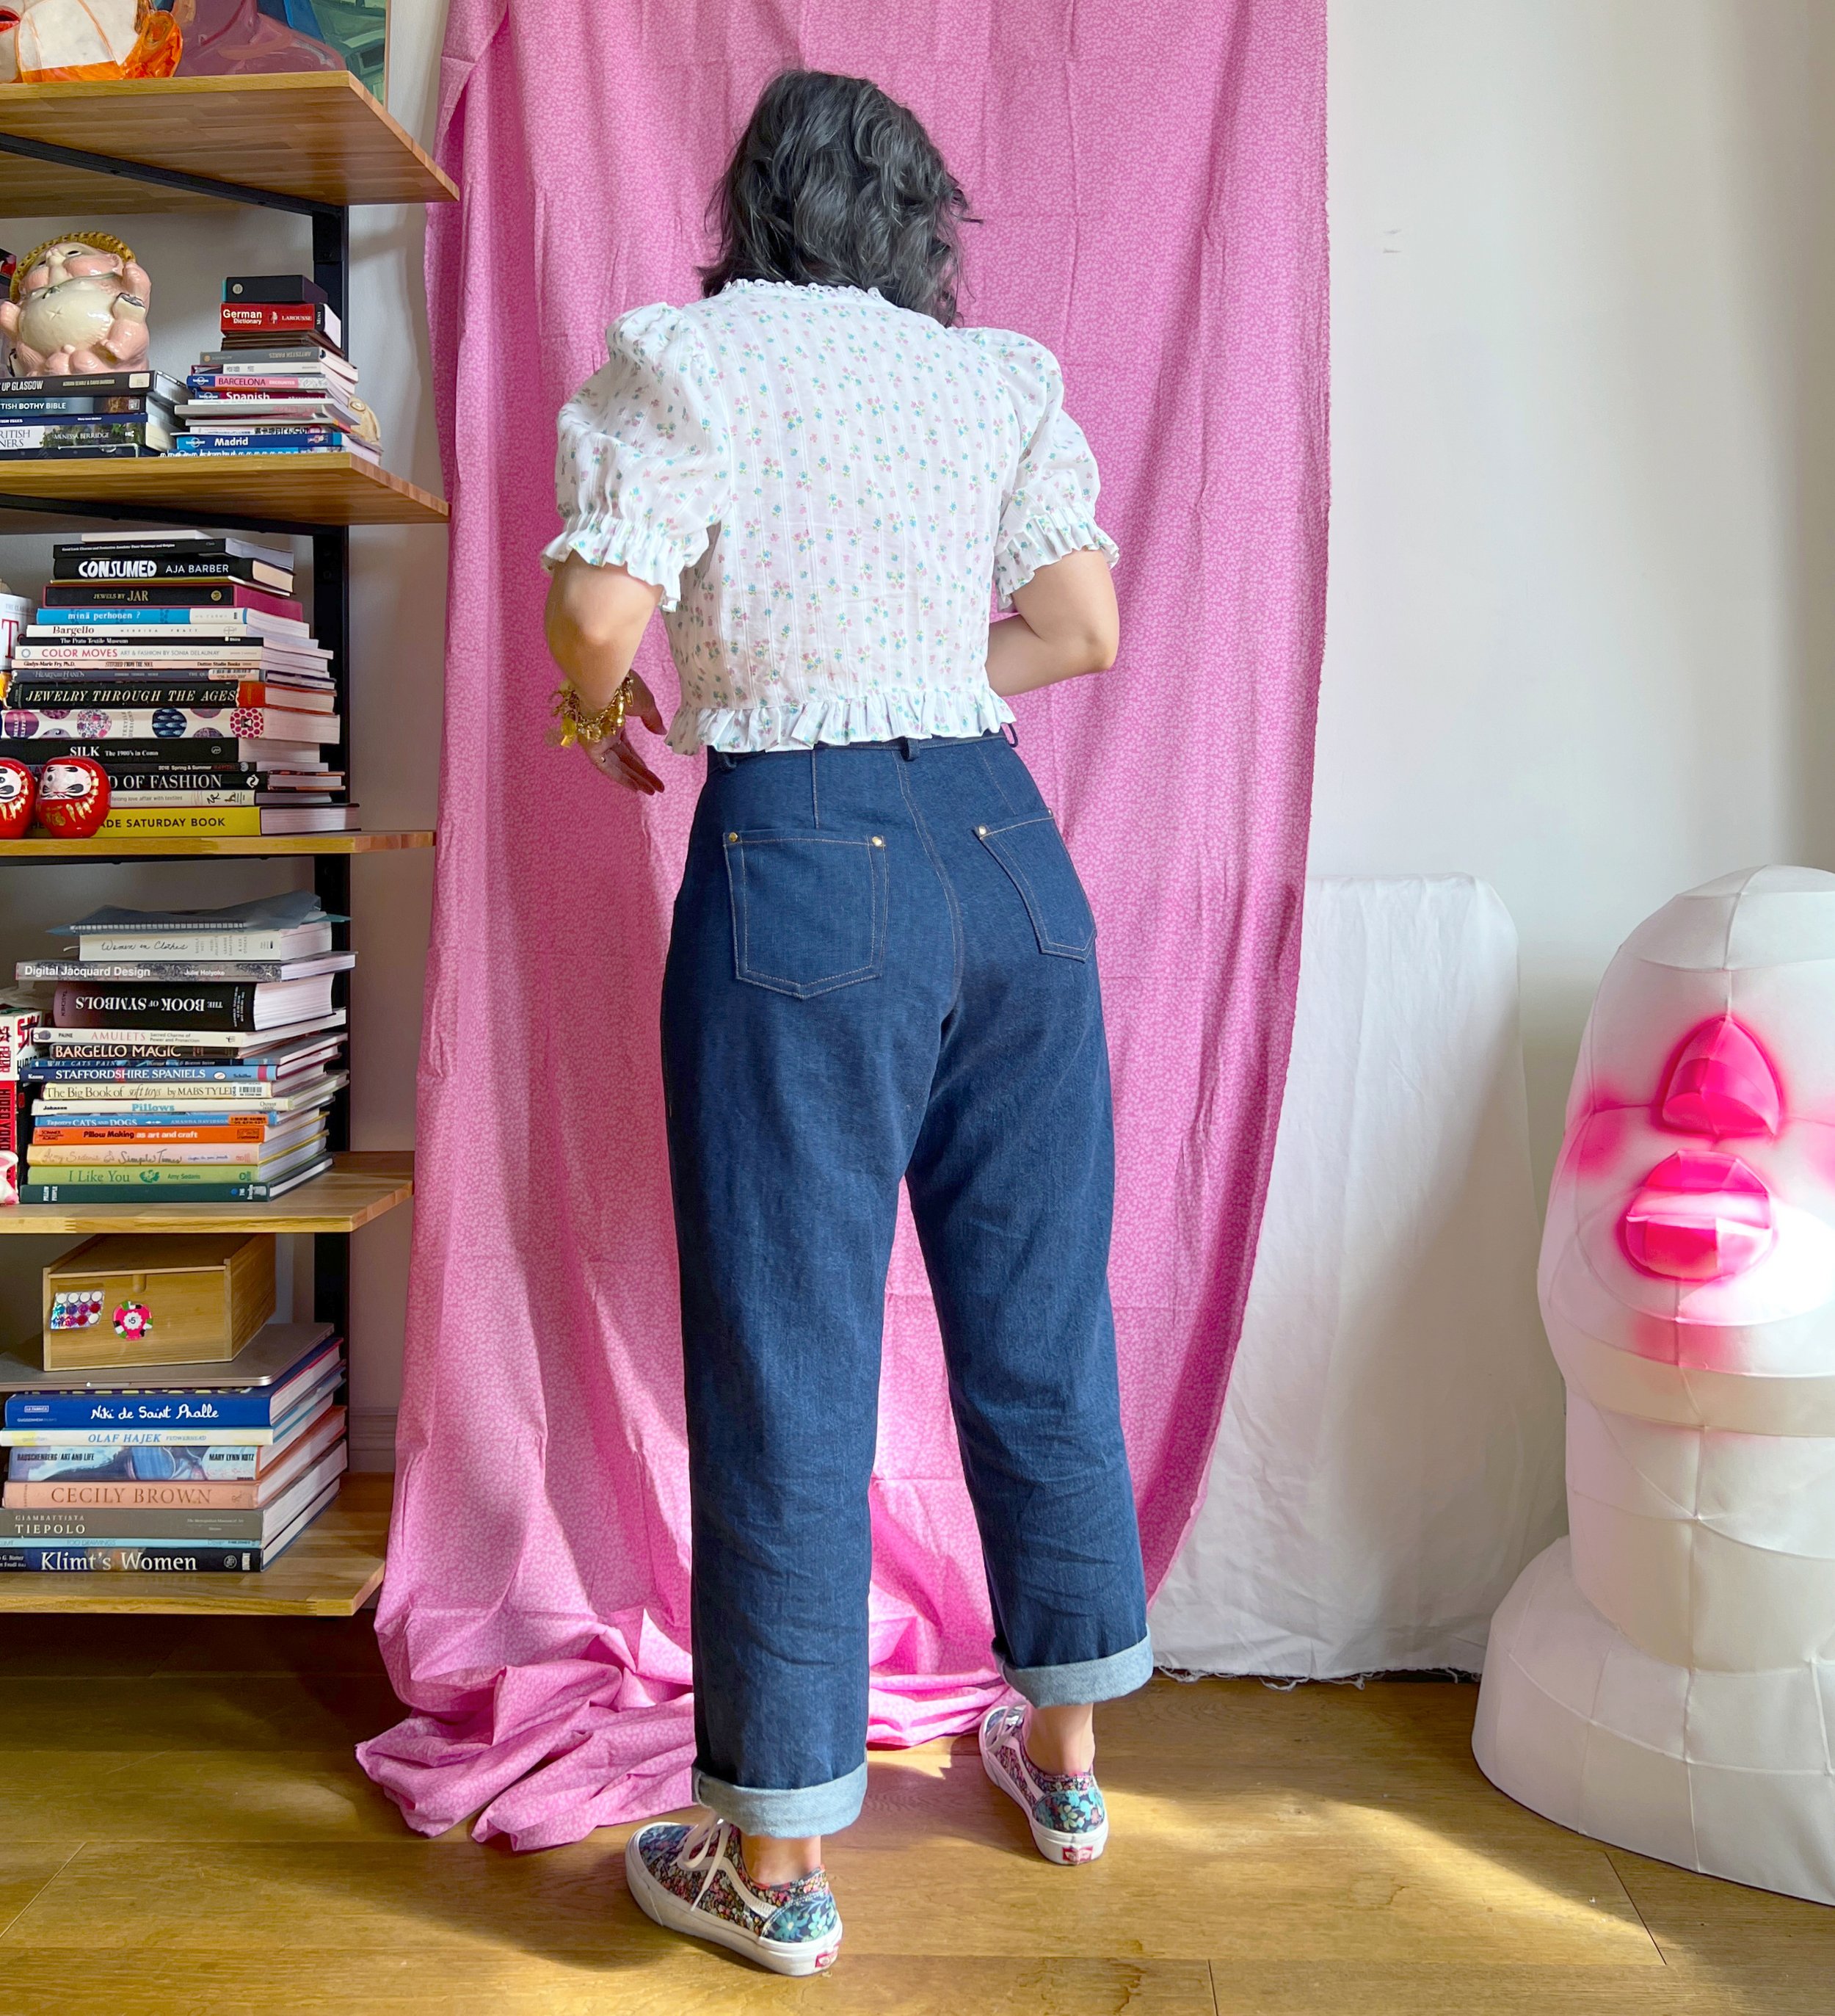
• The DD block is drafted for a 5'6" body; I am 5'8" and needed to add 3" to the leg length to achieve the cropped look the the pants are designed to have. I am not particularly leggy for my height. I wish I had added another 1.5" so I could roll them. I ended up adding a hem facing to buy myself another 1" in length. So this pair is 4" longer than as drafted.
• I added more top stitching than the pattern calls for, as well as a bunch of rivets. I like shiny things.

CONCLUSION:
I enjoyed sewing this pattern, and after wearing them for a full day yesterday, I found them extremely comfortable. This shape of pants is a little outside of my comfort zone, but it’s exactly what my wardrobe has needed: jeans that are comfortable enough for a day of movement. I love the curved waistband and deep pockets.
The drafting is solid, and I’m already planning another pair….maybe black? Or unbleached cotton? I recommend the pattern to anyone who is comfortable sewing pants/jeans without too much handholding. But there are so many resources available these days (online tutorials, YouTubes, and even other pattern instructions), that anyone could tackle these if they wanted to, and I think you’d likely get a nice fitting pair of pants!
XO, Martha