BLANCA FLIGHT SUIT - IN DEPTH SEWING PATTERN REVIEW
As per usual, I am behind schedule with my posting here. Perhaps that’s something I’ll work on in this new year. But let’s not get ahead of ourselves. Here is my final sewing project of 2022: the Blanca Flight Suit by Closet Core Patterns. Let’s get right into it.
PATTERN PRESENTATION & BASICS
The presentation of this pattern is fantastic: nice paper envelope with a comprehensive instruction booklet and classic brown printed pattern tissue. The instructions are extremely thorough, but rely more on words than images - my personal preference is for less verbiage, a terse sentence is more clear to me than an elaborate paragraph, however, I know I am in the minority with that POV. Any question you may have is most likely addressed in the instruction booklet.
One pet peeve I encountered in the instruction is that it isn't until page 13 of the booklet that the seam allowance is revealed. It is "5/8" unless otherwise noted", and there are places where you will use 3/8", 1/2" or 3/4", indicated ONLY in the written instructions (no dots or markings on the pattern tissue), so you have to be reading along. I think the seam allowance could have been 1/2" everywhere except the front zipper placket (where it is 3/4").
To offset that, I will say the design is classic with nice details that are fun to sew. I love the zipper pockets and the zipper shield at center front which prevents the cold metal zipper from touching your skin. Great top stitching instructions (not that you can see it on mine).

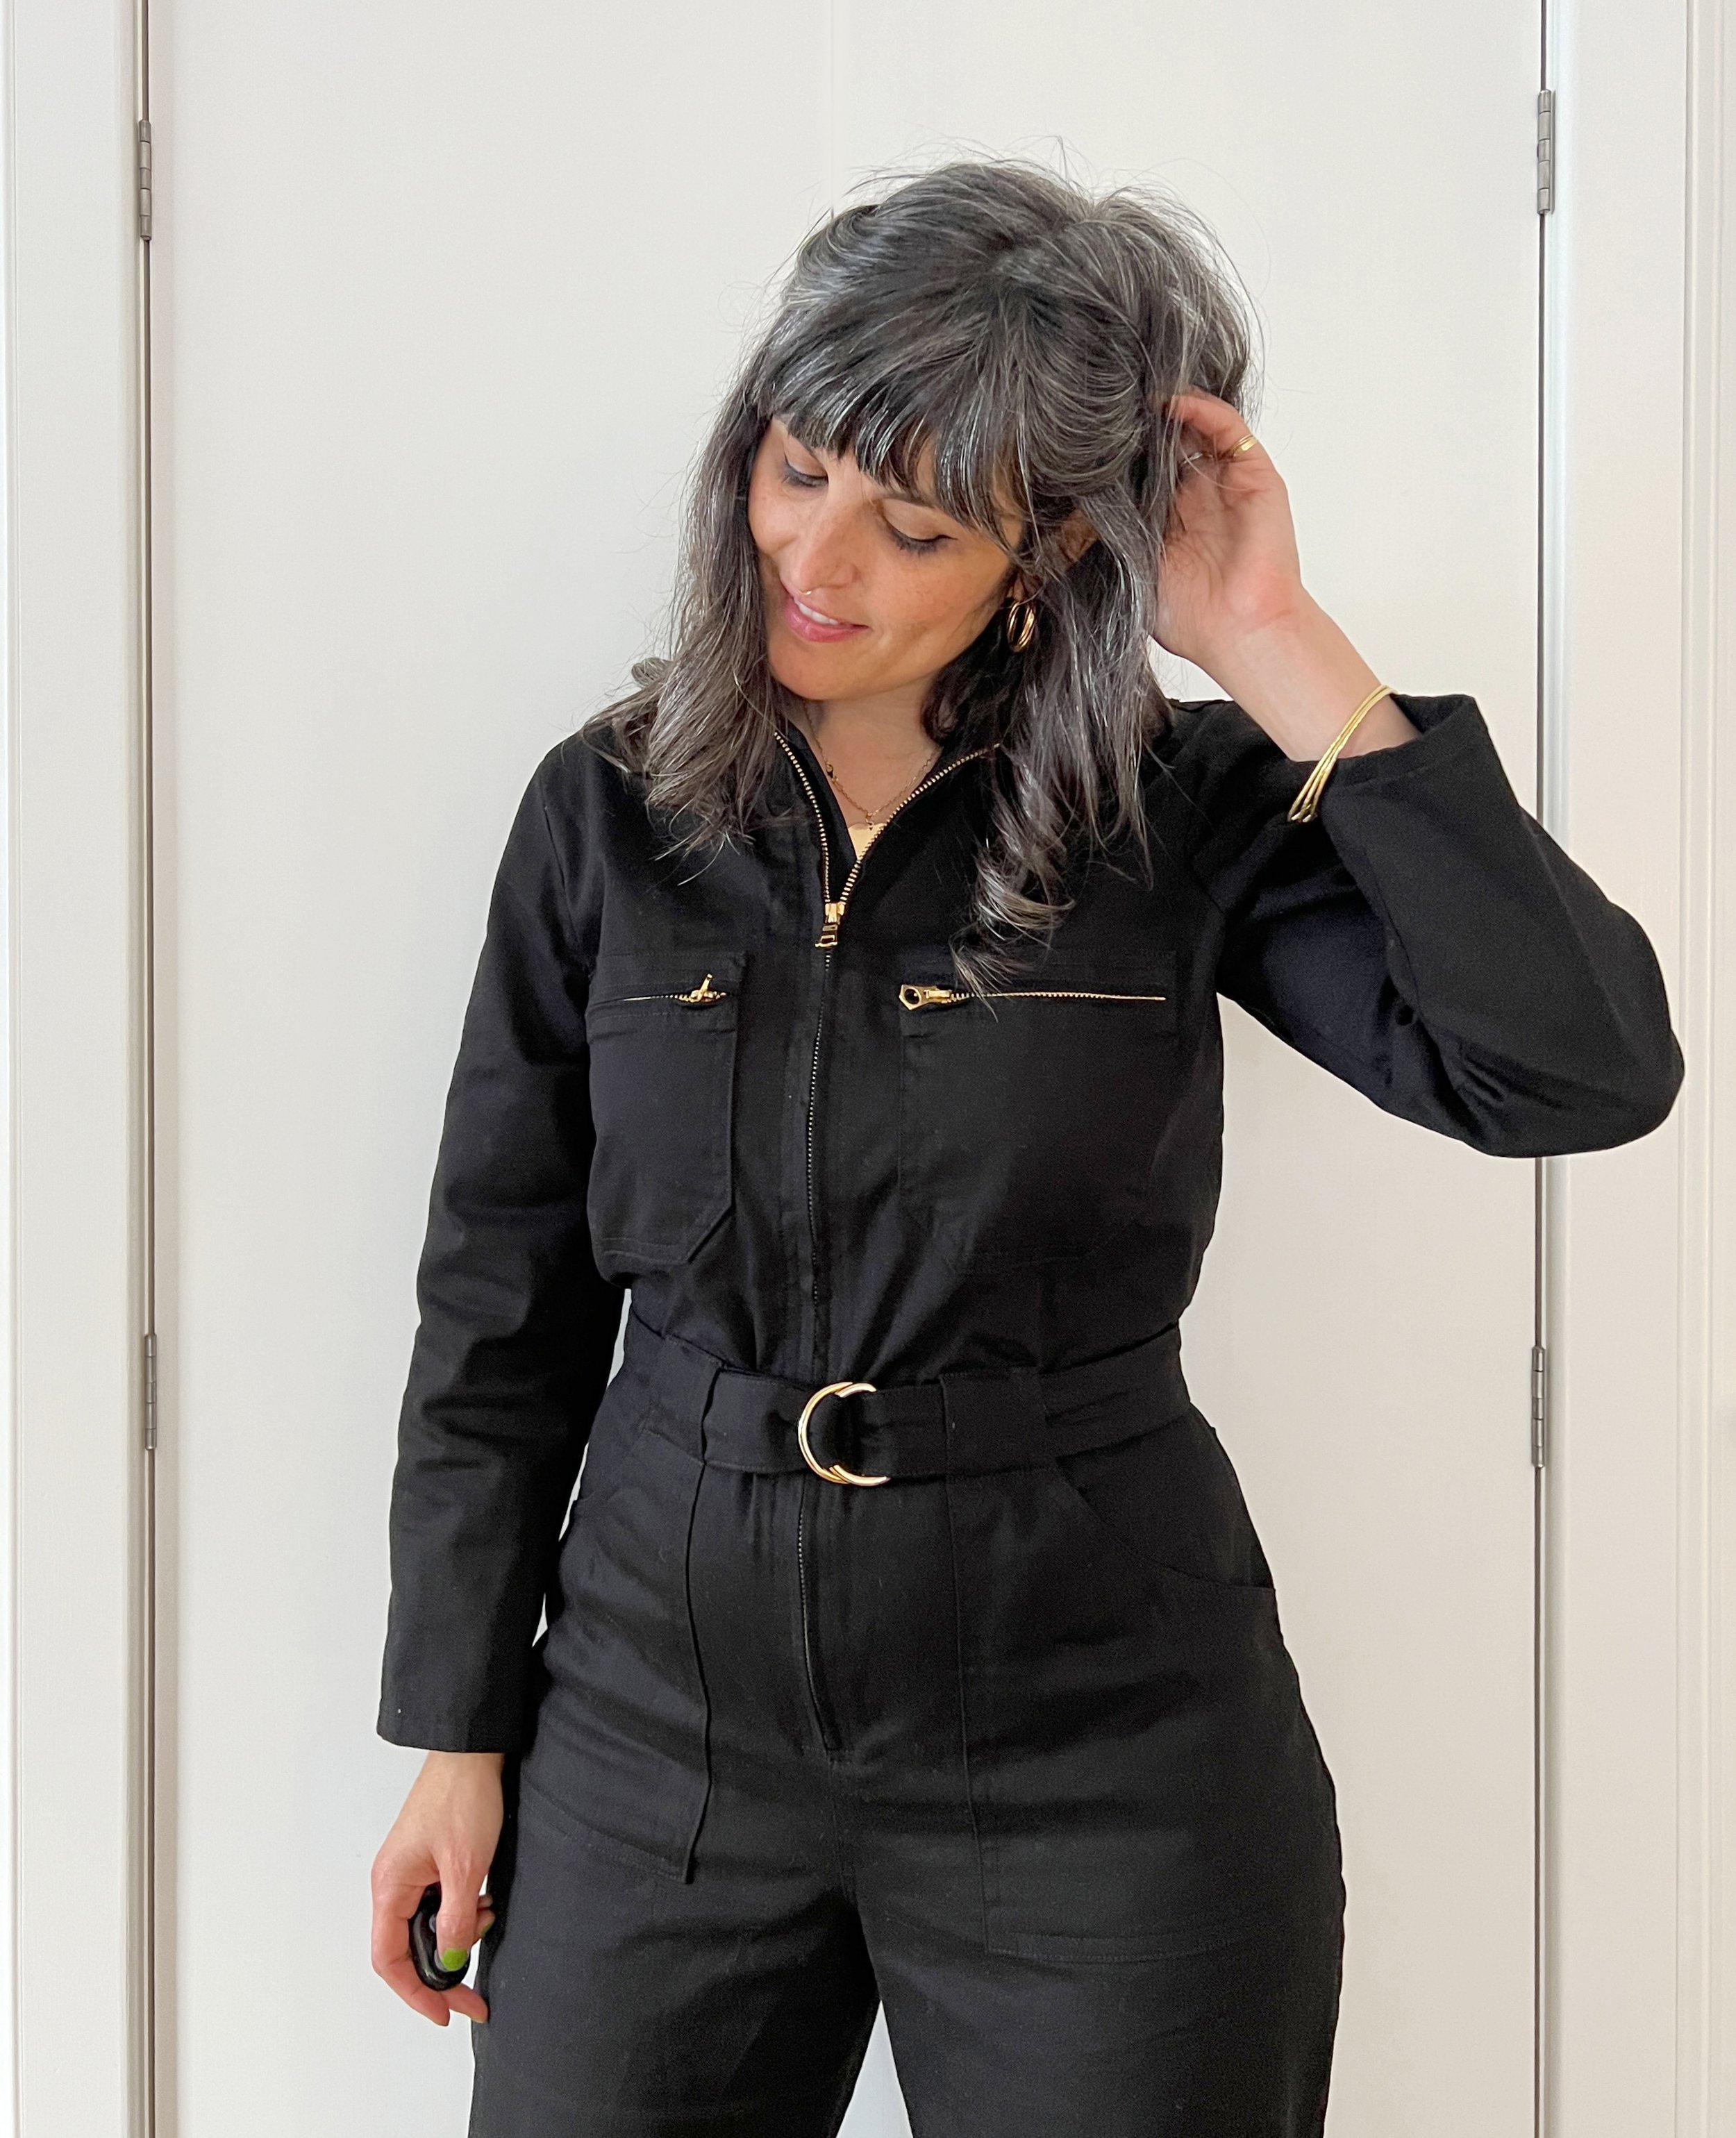
My finished Black Flight Suit.
PATTERN ANALYSIS BEFORE SEWING
Digging in and looking at the pattern pieces proved that I would need to alter this pattern a bit to get my desired results. I prefer a few specific design details in a jumpsuit, or I simply will not feel comfortable wearing it:
A waistband that sits on or near my natural waist, preferably elasticated for comfort.
I want it on the fitted side. Jumpsuits require a lot of fabric, and I don’t want any excess flapping around, it’s just not my personal style. I am especially sensitive to this in key areas: wide shoulders and wide bodices are Not My Thing.
The crotch cannot be too dropped - while you need length ease for movement in a jumpsuit, too much makes me uncomfortable.
Having said all of that, let’s take a look at some of the design details that make Blanca, well, Blanca. And let’s analyze how these two sets of information may be at odds.
Blanca features a non-elasticated, non-fitted waistband, which appears to fit below the natural waist on a lot of people (I have poured over the instagram hashtag and read many blog posts). The instruction booklet suggests adding elastic to the back waistband, but it is not considered a pattern view.
Seeing so many versions sewn up gave me pause: the shoulders look wide on many people. Two things caught my attention: lots of people decided to leave off sleeves (was this because they didn’t feel like altering ones that didn’t fit as desired?) and many are posing with hands on hips, which conceals many fit issues (I say this but then I POSED THAT WAY TOO!?!?). Hands on hips also reveals that the jumpsuit has a lot of width ease below the armpit, through the sides. I would need to look out of these issues and adjust accordingly.
Based on everything I’ve seen, the bottom half of the jumpsuit seems to fit everyone well. Closet Core always shines with jeans and pants. Exciting!
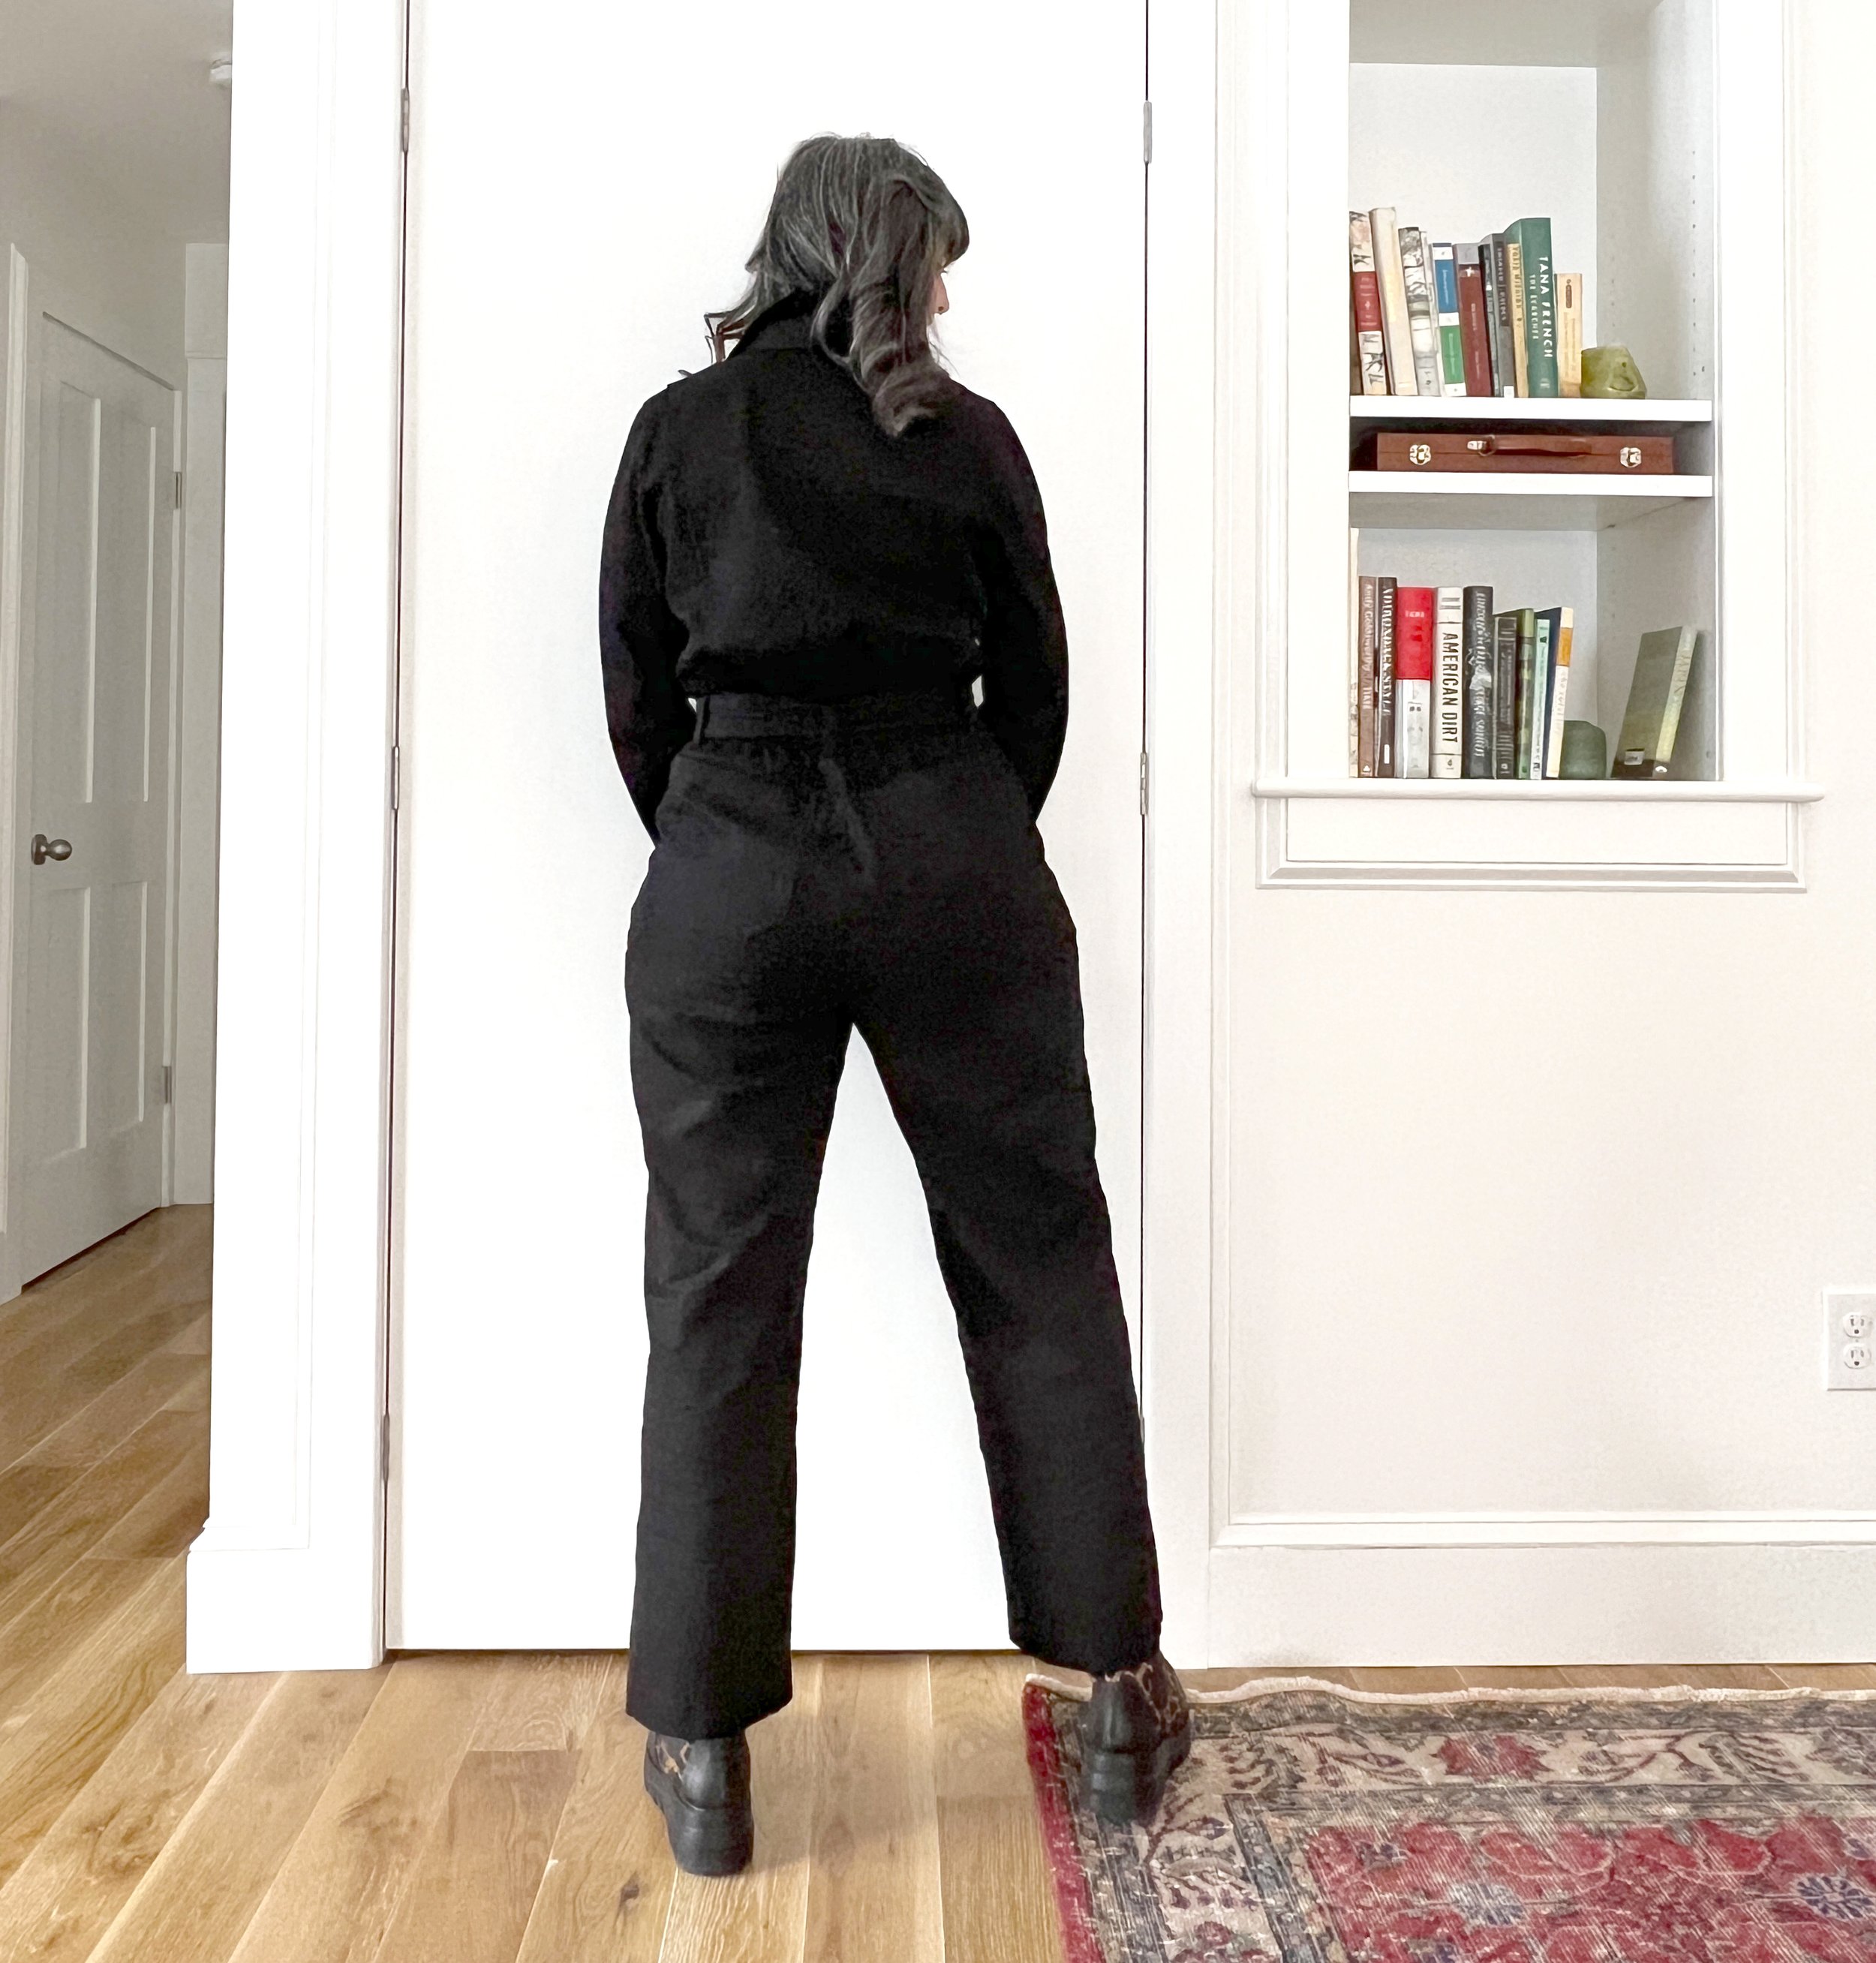
Hard to see any details in solid black, but I am really pleased with the fit of the pants portion of this jumpsuit.
SIZE CHART
Closet Core has their own size chart, which I found accurate for this pattern. You have some flexibility in sizing, based on how much wearing and style ease you prefer. The chart put me at 12 on top, and 16 for the pants, which is what I cut. I cut the waistband at 14 to ease the transition between sizes. I ended up taking in the pants and waist at the side seam, so I think I could have cut 12 on top and waist, and 14 for the pants. As my fabric has some stretch to it, I would stick to the original sizes if I were working with non-stretch fabric.

You can see here that adding 1” to the bodice length was unnecessary - in fact it caused the whole bodice to push upwards towards my ears. This may have been fine in a drapey fabric like linen or rayon, but would not work in my 7oz denim. You can also see the shoulders are quite wide on me.
MUSLIN
I made a “wearable muslin” for this project, which in the end doesn’t fit me well enough for me to feel comfortable wearable (but it is a fully finished garment). For the muslin, I added 1” length to the bodice above the apex, which is a standard pattern modification for me. This made the bodice comically long - it’s quite long to begin with! I also learned that, as suspected, the shoulders were extremely wide on my narrow shoulders.
Before cutting anything, I pulled out my Lander Pants pattern (I've reviewed a few times). The version I used for my most recently reviewed pair, is similar to the pants section of this jumpsuit, though the crotch curve is a different shape (note: I have significantly modified the Lander to get it here). That confirmed my size choice. I prefer the crotch curve on the Blanca!! Will be borrowing that!

Adding custom, shiny zipper pulls (sliders) and matching D rings elevated the whole look.
MATERIALS
Twill from Joann: 97% cotton, 3% spandex. I'm guessing 7oz but don't hold me to it. Only a little bit of stretch, which is nice in a jumpsuit.
Zippers: I used a 22" long YKK #5 for the main zipper, 4.5" long YKK #5 zips for the pockets, all with customized sliders, purchased from Zippers and Thread. I have a blog post reviewing a few zipper sources.
PATTERN ADJUSTMENTS
I shortened the bodice 1/2" at the lengthen/shorten line. I wish I had taken 1/2" out of the front and 1" out of the back, but it's fine, as is, I have plenty or length ease for movement.
Shortened bodice an additional 1/2", but then added 1/2" length back to the rise - effectively raising the waistband 1/2".
Cut bodice at 12, waist at 14, graded hips out to 16. In the end, I took in the side seams. I could have cut straight 14 on the bottom - this depends how much ease you desire in the circumference.
I added elastic to the back waistband, which is suggested in the instruction booklet, but isn't included as a view. As drafted, you're stuffing 1.5" wide elastic into an exactly 1.5" wide channel, which also encloses 3 layers of seam allowance, top and bottom. Not ideal but it works - I’d consider adding 1/8” to this channel if I made it again. I added top stitching.
Lengthened legs 1/2"
I did not line my front patch pockets, both because it always seems weird to me to make a pocket so thick, and because I can seen the lining fabric peeking out on a lot of versions online. I used bias tape for the facing at the curved pocket opening. Then for that short area on the straight size that becomes the belt buckle, I added top stitching *before sewing down the pockets*.
As drafted, the shoulder seam is very wide, like a cap sleeve on me. The sleeve is not really a dropped sleeve, it has a curved shoulder cap. In my muslin this looked...bad on me. Studying versions online, I think the shoulder seam is wide on a lot of people. If the cap was drafted more flat, it might sit better, like a true dropped shoulder. Anyway, it was not workable for me, and this definitely depends on the shape of your body. I basically totally redrafted the armscye and the sleeve cap by comparing Blanca to McCall’s 8046, melding them together, and then reworking the sleeve so it would correspond to the new armscye.
I don't have a serger right now, and this is something that would benefit from that kind of interior finishing. I made do: some flat fell seams, but mostly I trimmed SA to 3/8", zig zagged, pressed to the size and top stitched down. I can go nuts for finishing but I wanted to be easy on myself - I sewed for many years without a serger! It's fine!
Random note: for the breast pockets, I think the 5" zipper length only works for the largest size, and even then it could be tight. Otherwise you may need to yank a few teeth to get the zipper down to the exact size. Instructions for how to do this are included in the booklet.

Here you can see the back pin tuck detail, the elasticated back waistband (usually hidden under the belt), and the way the pockets unfortunately buckle outwards as a result of the elastic. I may add a button at the center top of each pocket to hold things in place.
THOUGHTS AFTER WEARING
In the end, I got this jumpsuit to fit how I wanted, but I acknowledge I was cramming a square peg into a round hole. I think you’ll find the most success with this pattern if you embrace the silhouette as drafted.
As for my adjustments: the waistline is easily made fitted with the additional of elastic, but this causes the back pockets to buckle outward, which doesn’t look great. I’m pleased with the fit of the bodice, but overall, the jumpsuit still feels too long to me - I could remove 1-1.5” vertical ease, keep my range of motion, and feel more comfortable wearing it (this is really interesting to me because I am taller and have never had this issue before). If sewn in a softer fabric such as linen, these details would make more sense, especially the back blouson. But in more firm fabric, it’s not quite what I like. So take your fabrics hand and drape into account before sewing this project (or any project!).
I haven’t mentioned the pin tucks on the back bodice. This detail is fun to sew and adds interest to the back, but if you launder your jumpsuit (which I have), you need to iron this detail back in place. Otherwise the fabric flattens out and you are left with just the pin tucks, no pleats/folds. For this reason, I would omit this detail if sewing again, and narrow the back pattern piece accordingly.
The pants on this pattern are awesome. It’s comfortable and doesn’t cause wrinkles on the back thigh. No notes!
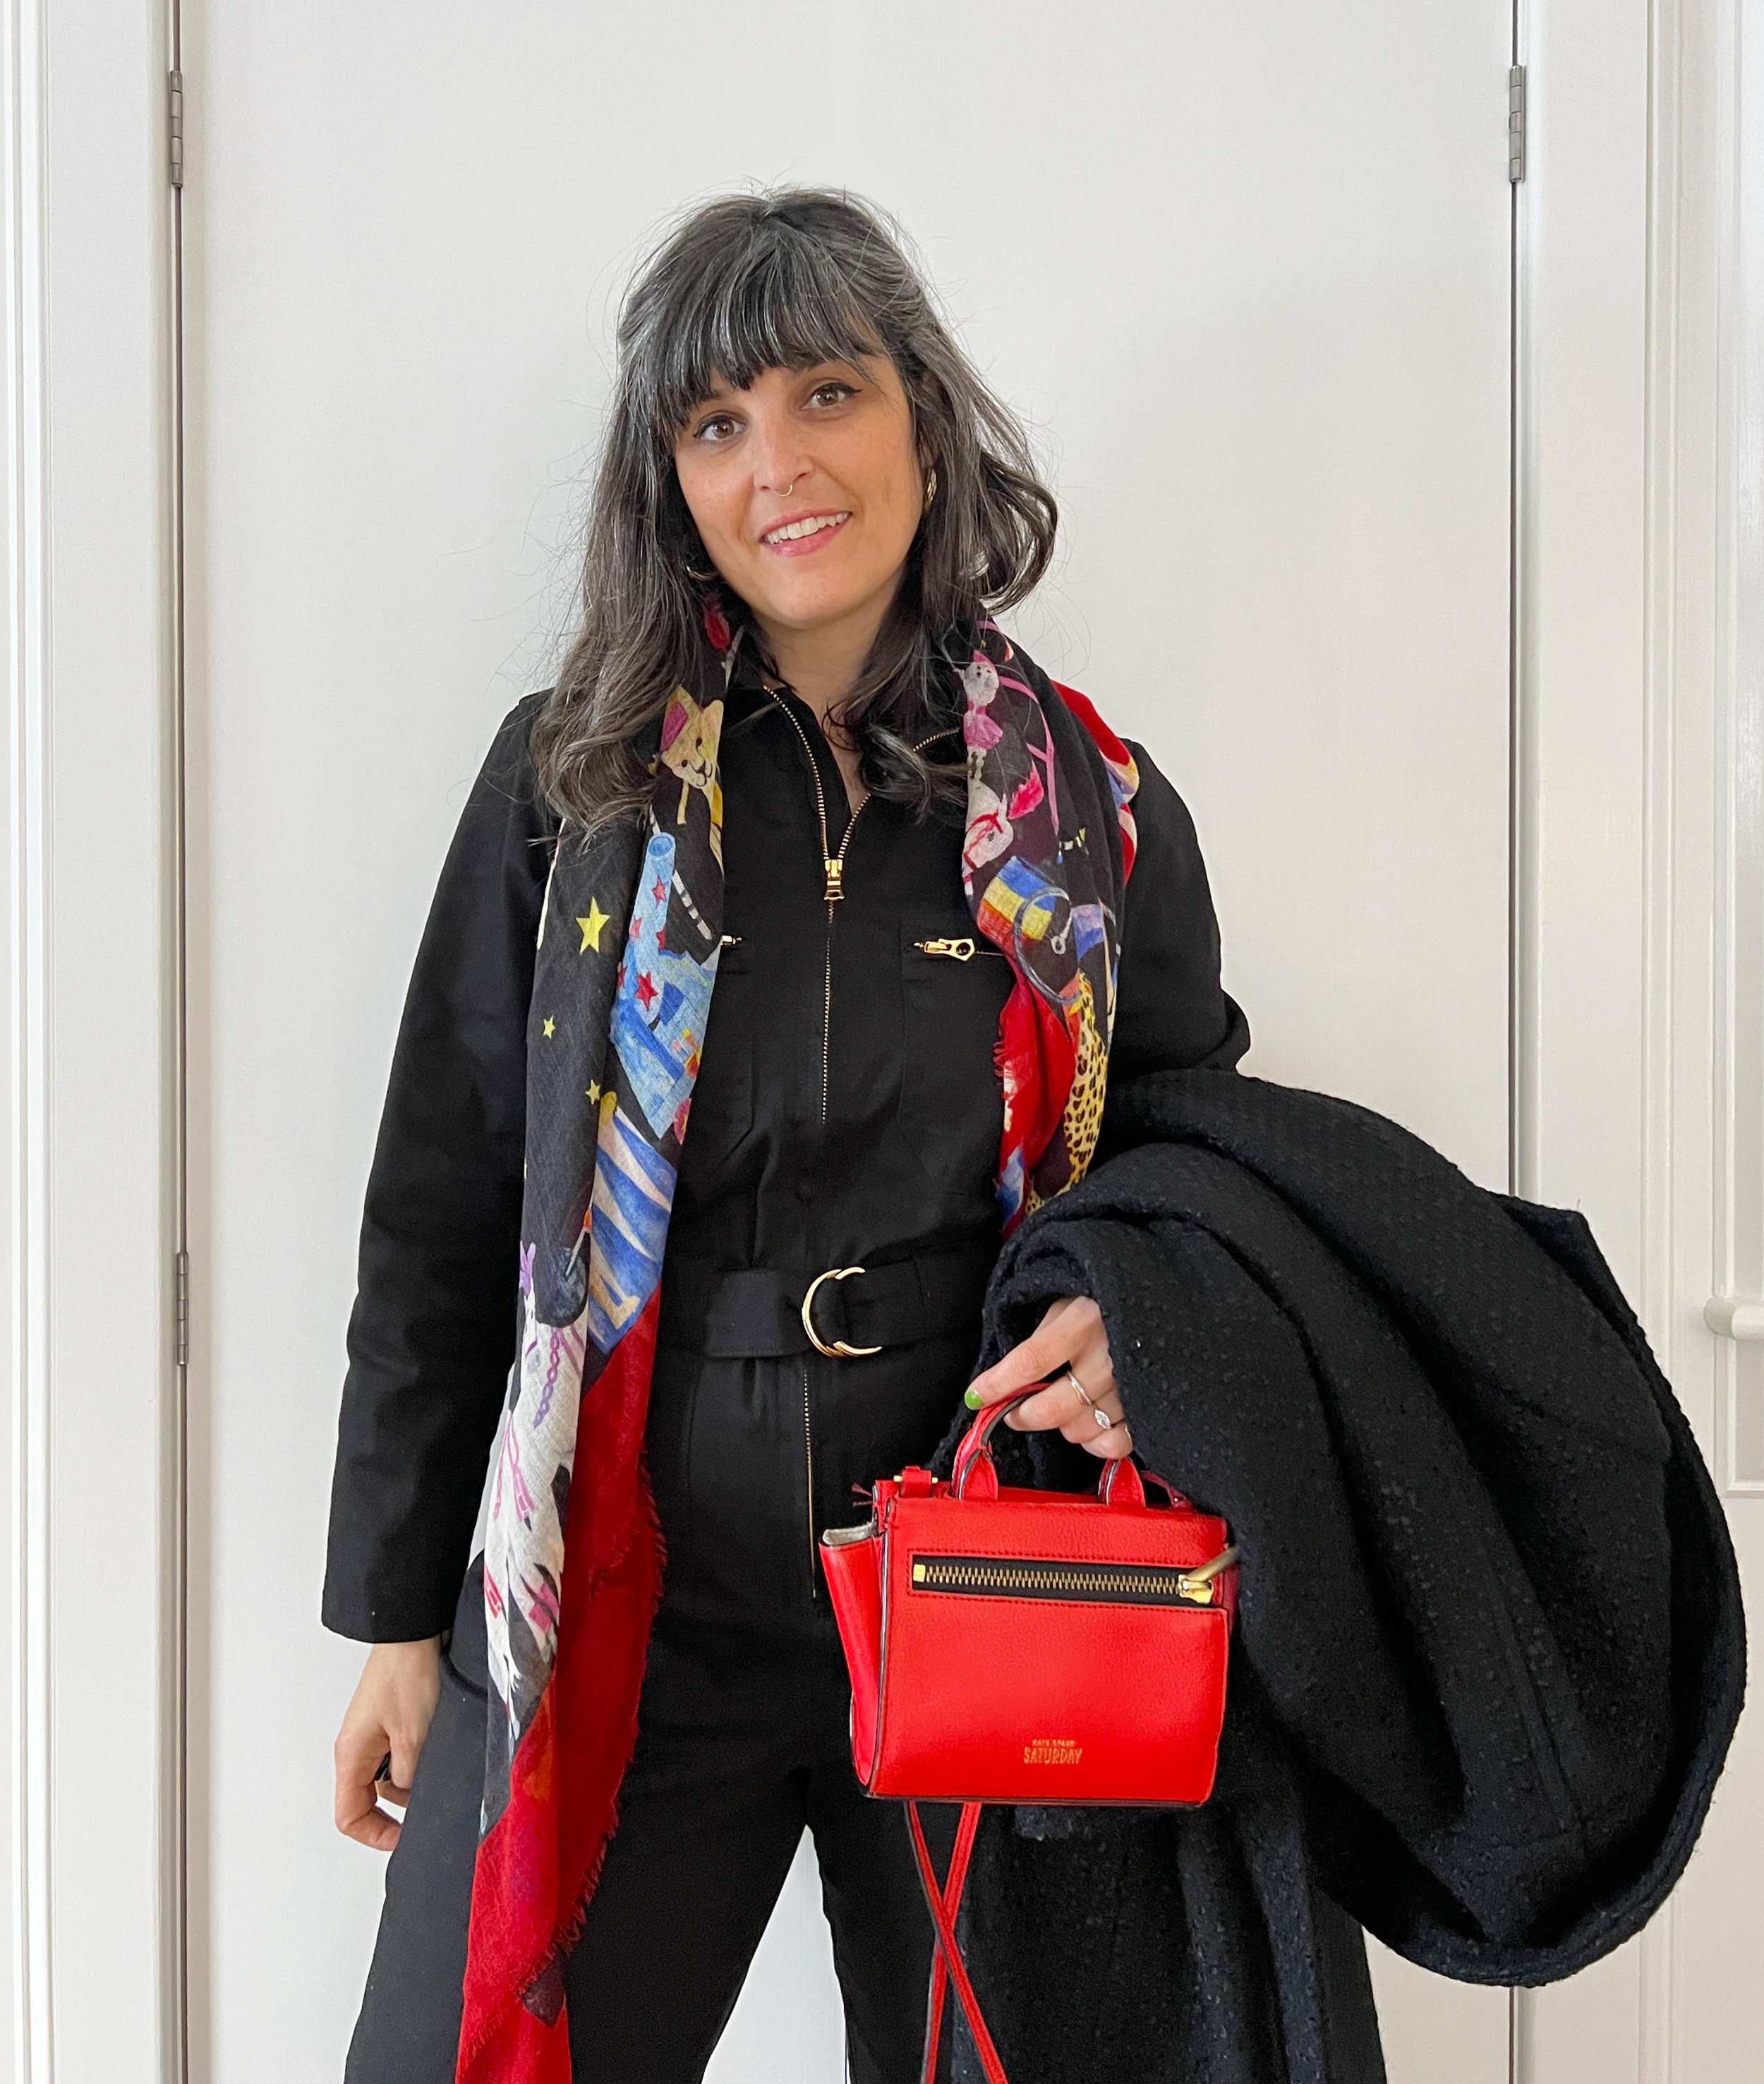
Though a flight suit is a workwear classic, this version dresses up well!
CONCLUSION
The Blanca Flight Suit goes together easily and the instruction booklet walks you through all steps. It’s a good pattern! And it is pretty accurate to what “real” flight suits look like. If you’re looking for a more fitted jumpsuit, this may or may not get you where you want to be. I am not sure if I will sew it again, but I will absolutely be making a pair of pants out of the bottom half of this pattern. If you read this far, I assume you’re sewing the pattern - I hope you get the jumpsuit of your dreams! XO, Martha