CLASSIC WOOL COAT - BUTTERICK B6720 PATTERN REVIEW
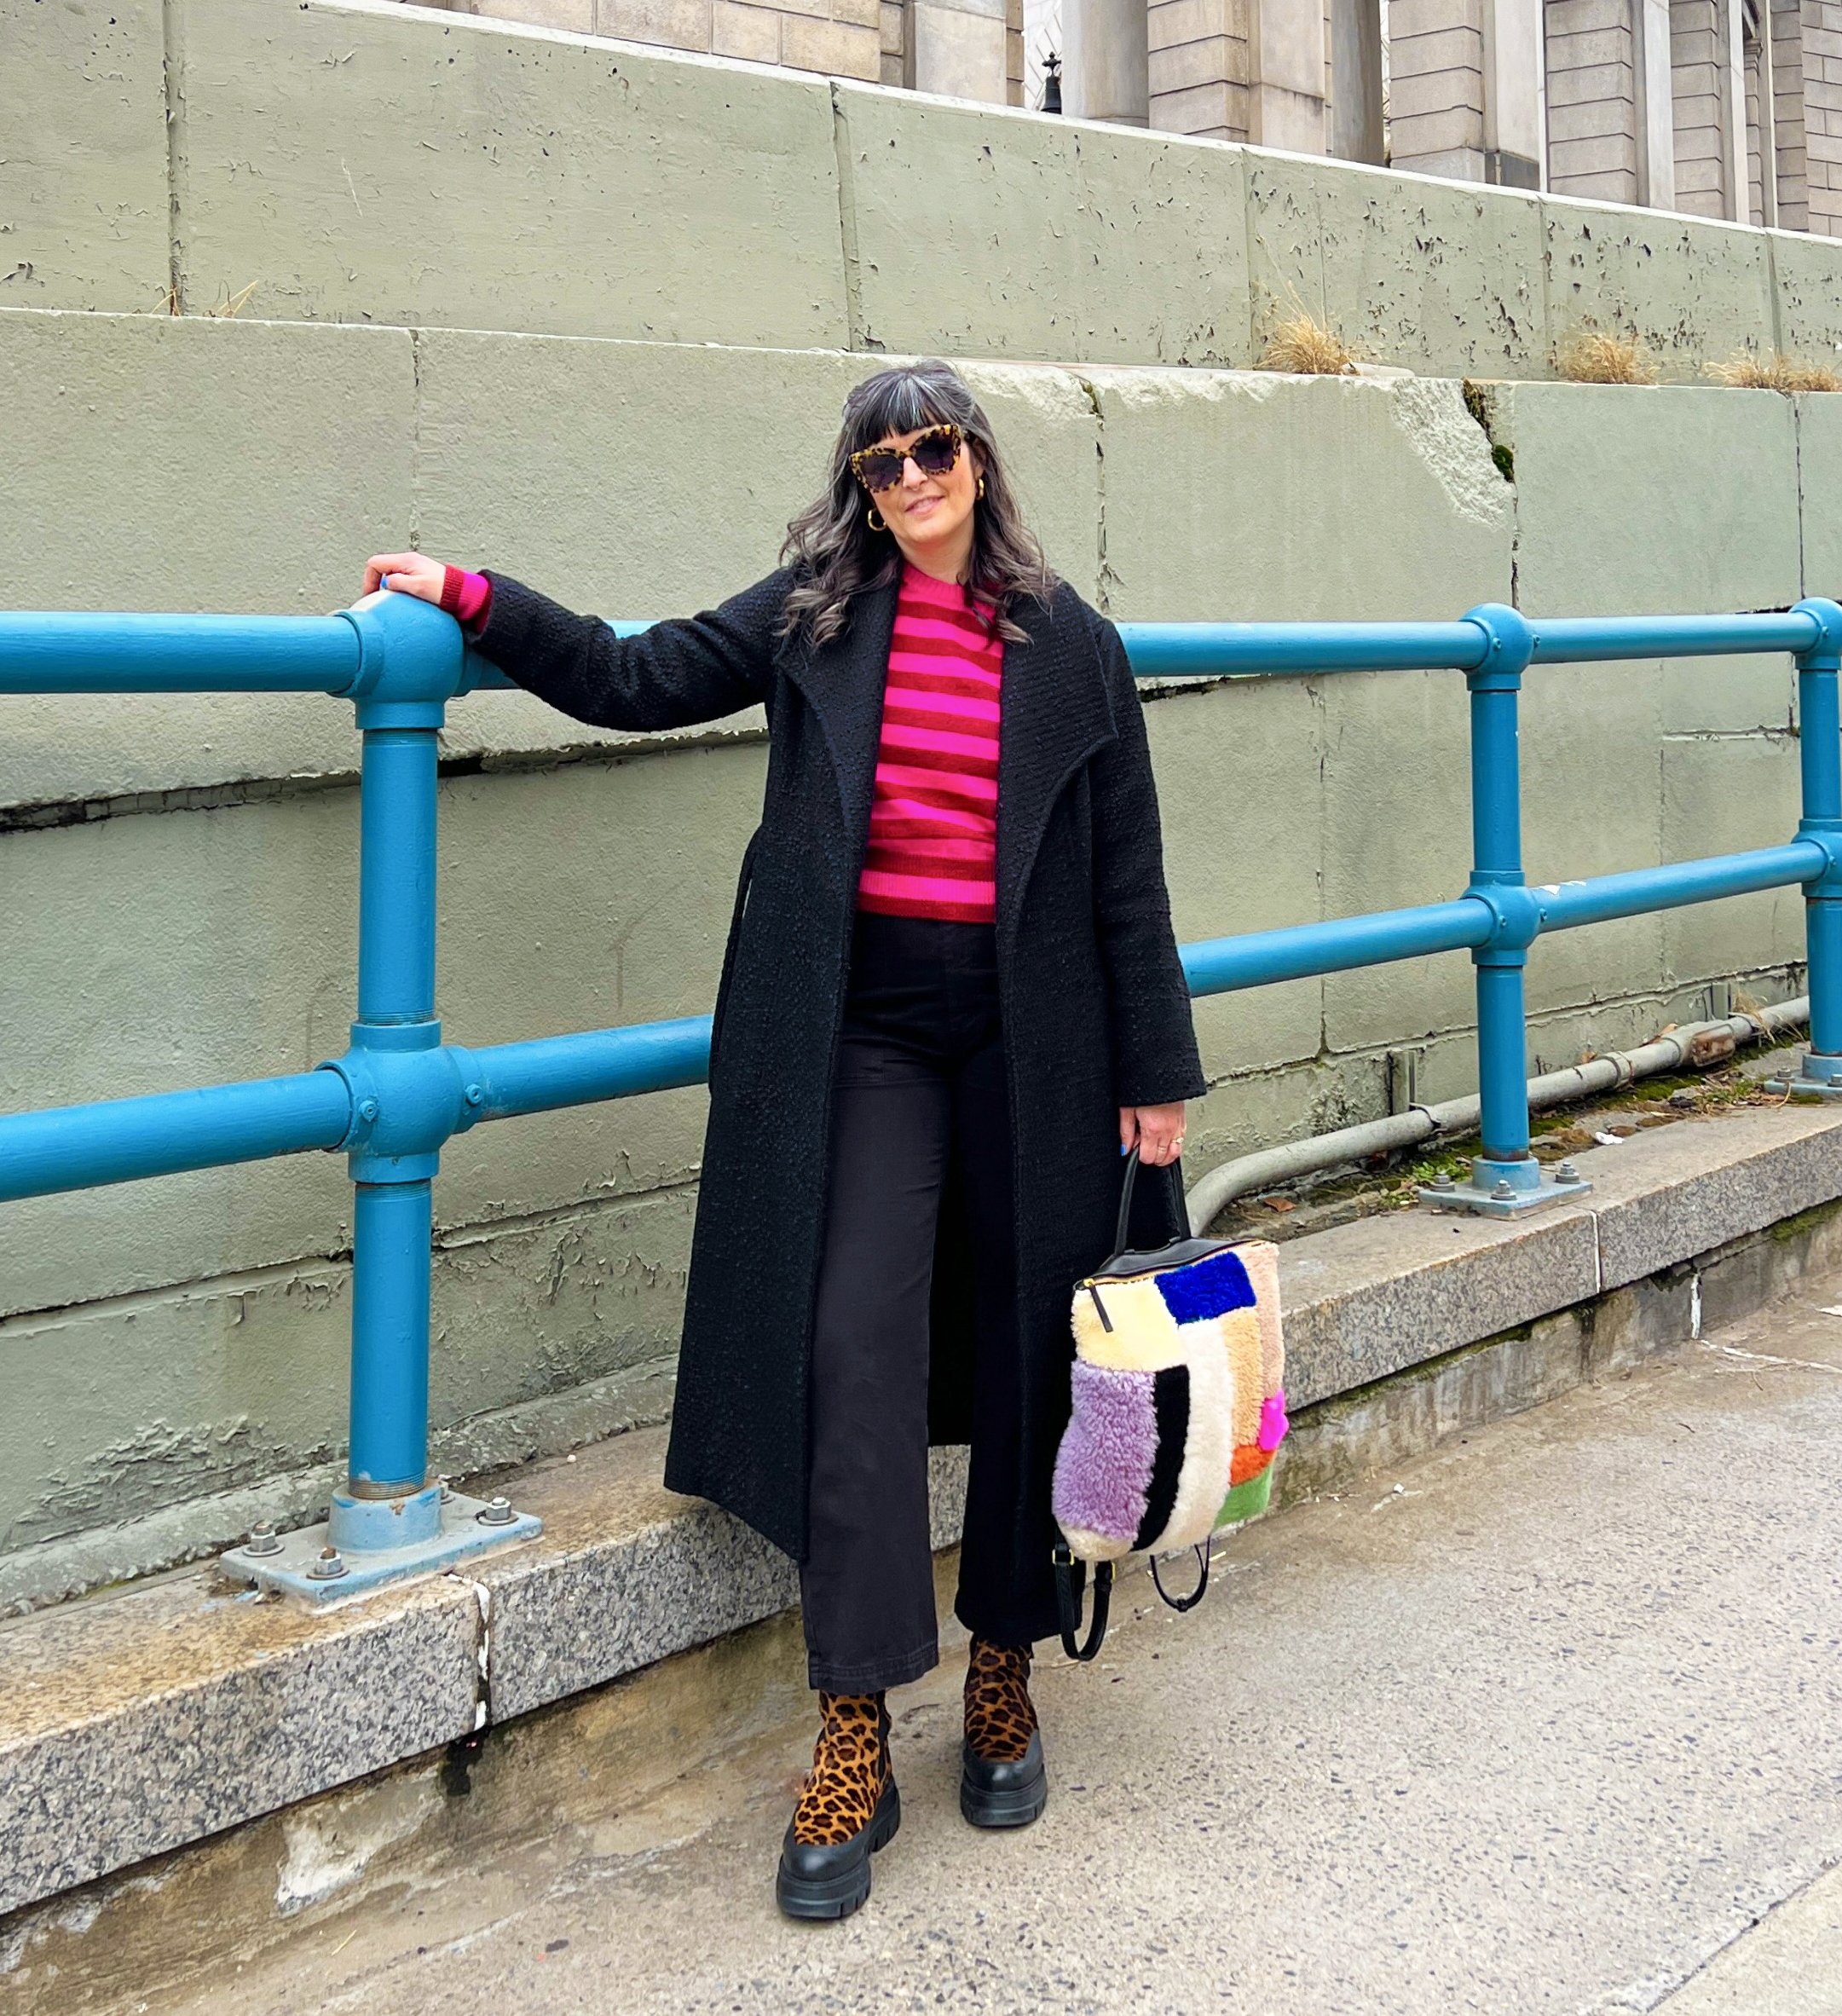
I prefer to wear this toasty wool coat over skirts and dresses, but it worked great over a more casual outfit today. Here I am walking over the Manhattan Bridge.
This coat has been a few years in the making. On a 2019 trip to Tomato fabric store in Tokyo, Japan, Jason purchased this fabric, which was being sold as deadstock Dior. At a price of about $25 per meter, that seems dubious, but why look a gift horse in the mouth!? I was immediately jealous. The fabric sat for years before he told me I could use it to sew a coat for myself, as long as he approved of the pattern (I think he was joking, but I ran it past him anyway).
I actually sewed this coat about a year ago. I think I finished last March. But I haven’t had any occasion or appropriate weather to wear it until recently. I’m so happy it is in my closet - I don’t think I’ve owned a solid black coat in about a decade, and it feels pretty chic.

I love the contrast of matte, felted wool and shiny, wiggly viscose.
MATERIALS USED:
My fabric is woven and felted. The texture is dense and bouncy, but still pretty drapey for coating. The viscose parts are sort of an untwisted yarn, nice and shiny. I had a generous 3 meter cut (Tomato usually cuts generously). I measured it to be 3.75 yards.
It has no nap, but selvedges were a little ruffled from the felting so I needed to trim off a couple inches there. I played advanced Tetris to make the pattern fit on my yardage, it is a fabric hog. I recommend tracing off a second facing piece if you are also trying hard to make it fit.
Lining is a viscose twill lining from Sister Mintaka. This is the second coat I've lined in this fabric, it makes a very nice, slippery smooth lining.

PATTERN INFO:
Per the pattern envelope: "Lined, loose fitting jacket and coat have front extending into collar, front pocket with band, two piece sleeve and self fabric belt. A: contrast lower sleeve. B: button trim. C: topstitching on pocket band and lower sleeve."
This pattern has S/M/L sizing, with M corresponding to sizes 12/14. I typically sew a 12 in Big 4 patterns, so I cut my tissue at 12. I found this pattern to fit True To Size, but if you are the smaller size (Example: you are 12, not 14, and making Medium), then it will be a bit bigger on you, so it will fit someone size 14, and vice versa. As it is a wrap style, this sizing seems fine. Envelope says "loose fitting", I'd say "semi-fitted".

I added carriers (aka belt loops) and swapped the patch pockets for roomy in-seam pockets.
INITIAL THOUGHTS:
• The instructions are very clear and easy to follow. Good order of construction.
• This is a simple, classic style that will stand the test of time. A good one to have in your closet.
• There is a belt, but no belt loops are included in the pattern. Weird, but easy to fix.
• I’ve read all the online reviews I could find, and multiple other sewists called out the wide shoulders. They are drafted wide. I think this draft is typical of the current Butterick/McCall's block, so I wasn’t surprised. But it’s something to look out for.

The collars are fully faced with a deep facing. When worn closed, this means you have four layers of fabric (plus interfacing) at center front - that makes the coat quite warm.
PATTERN ALTERATIONS:
My usual Big 4 bodice size is 12, pants size 16. I am 5'8". I cut out size M (12/14), and started with my typical adjustments:
• Lowered apex 1"
• Lengthened bodice 1"
• Graded out to size L at the hip, just at the side seams - wish I had done so at center back, too.
• 1" Full bicep adjustment because I wear bulky sweaters and prefer a wider sleeve. Turns out I didn't need this and the upper sleeve is a little loose. I might take it in? I'lll wear it a bit first.
• Lengthened sleeve 1".
THE SHOULDERS:
• Measuring the tissue, I knew I would need to reduce the length of the shoulder seam at least one inch.
• I made a 5/8" Narrow shoulder adjustment - normal method along shoulder seam/armscye (Front Side and Back pattern pieces). Then I made a 5/8" narrowing adjustment to the Front pattern piece, at the shoulder seam near the princess seam (front only). I was a bit perplexed how to further narrow the shoulder on the Back without distorting the armscye, so I added a dart at the shoulder. My fabric is just thin enough to get away with this. These changes narrowed the shoulder seam 1-1/4" total, and I am happy with the fit.
• Pattern calls for 1/2" shoulder pads. They really improve the hang of the coat.

Pattern includes clear instructions for this lovely swing tack, which holds the hem of your lining in place. It’s the same technique you see in hair wraps or some friendship bracelets. The hem of my coat was interfaced, serged, pressed up, and secured in place with a blind catch stitch. The lining was simply hemmed by machine.
FURTHER CONSTRUCTION DETAILS:
• Added interfacing to: upper back, upper shoulder, hems
• This fabric is very bouncy! so keeping seams flat presented a challenge. Where possible, I clipped one seam allowance, then pressed both SAs to one side, and top stitched in place. Where I couldn't do this (side seams, sleeve seams), I serged the seam allowances, pressed open, and hand tacked down SAs to keep them in place.
• Added belt loops / carriers to the side seams, only takes a scrap of fabric!
YARDAGE LIMITATIONS:
• Eliminated patch pockets and replaced with roomy side seam pockets. I made the pocket bags out of scraps of Kasha (aka flannel backed satin) so they are toasty. For the back side of the pocket bag, I pieced the Kasha with self fabric, so if the pockets pull open, you just see the wool.
• To keep my pocket bags in place on the interior of the coat, I put 2 swing tacks on each pocket bag. The tacks are attached to the pocket bag seam allowance, and anchored into the princess seam.

Here you can see how I sandwiched a colorful strip of bias cut fabric between the lining and the facing. This detail looks great when the coat is worn open, and is a fun thing to show off when someone can’t believe you sewed your own coat.
LINING DETAILS:
• Added pleat at center back lining for ease/movement
• Bagged the sleeve lining - I left the coat open at the hem (hanging lining) as per the pattern because I might want to alter that sleeve, so wanted to keep easy access. You can easily bag this lining, you just might want to add a back neck facing.
• Added a 1/4" decorative strip of folded fabric (it's Liberty Tana lawn) between the facings and lining for a bit of color.
• Pattern uses the same pattern pieces for both shell and lining, however, the tissue indicates where to cut the lining shorter than the shell. A back neck facing would have been nice! I would have drafted one, but I didn't have any fabric to spare.
• Pattern instructs you to put French tacks between the lining and shell. There's a clear illustration for this. It's the same technique as making a friendship bracelet or hair wrap, and makes a very nice tack!

The back of the coat. I did not have enough fabric to add a back vent - I just barely eked out the coat as it is. There is enough of an A-line shape to have walking ease, but a vent would allow more comfort when sitting.
WHAT I’M MISSING:
• Really wish I'd had enough fabric for a back neckline facing.
• Also wish I'd had enough fabric for a center back walking vent. There is enough walking ease without it, but for sitting, etc. it would be more comfortable!!
• This is the first time I've made a coat with a hanging lining. I definitely prefer a bagged lining - I think it wears better over time and I like that the guts of my coat are full enclosed with a bagged lining.

CONCLUSION:
I love the dressy feel and I know I’ll reach for this any time I want to pull together a chic evening look in the winter. I recommend the pattern. It's a classic design with easy construction, and the collar and front facing make it quite warm. There’s lots of room to personalize it a bit, and it would be a great option for a brightly colored fabric! Thanks for reading! XO, Martha