PINK & RED COLOR BLOCKED TWO PIECE - SAGUARO SET PATTERN REVIEW - FRIDAY PATTERN COMPANY
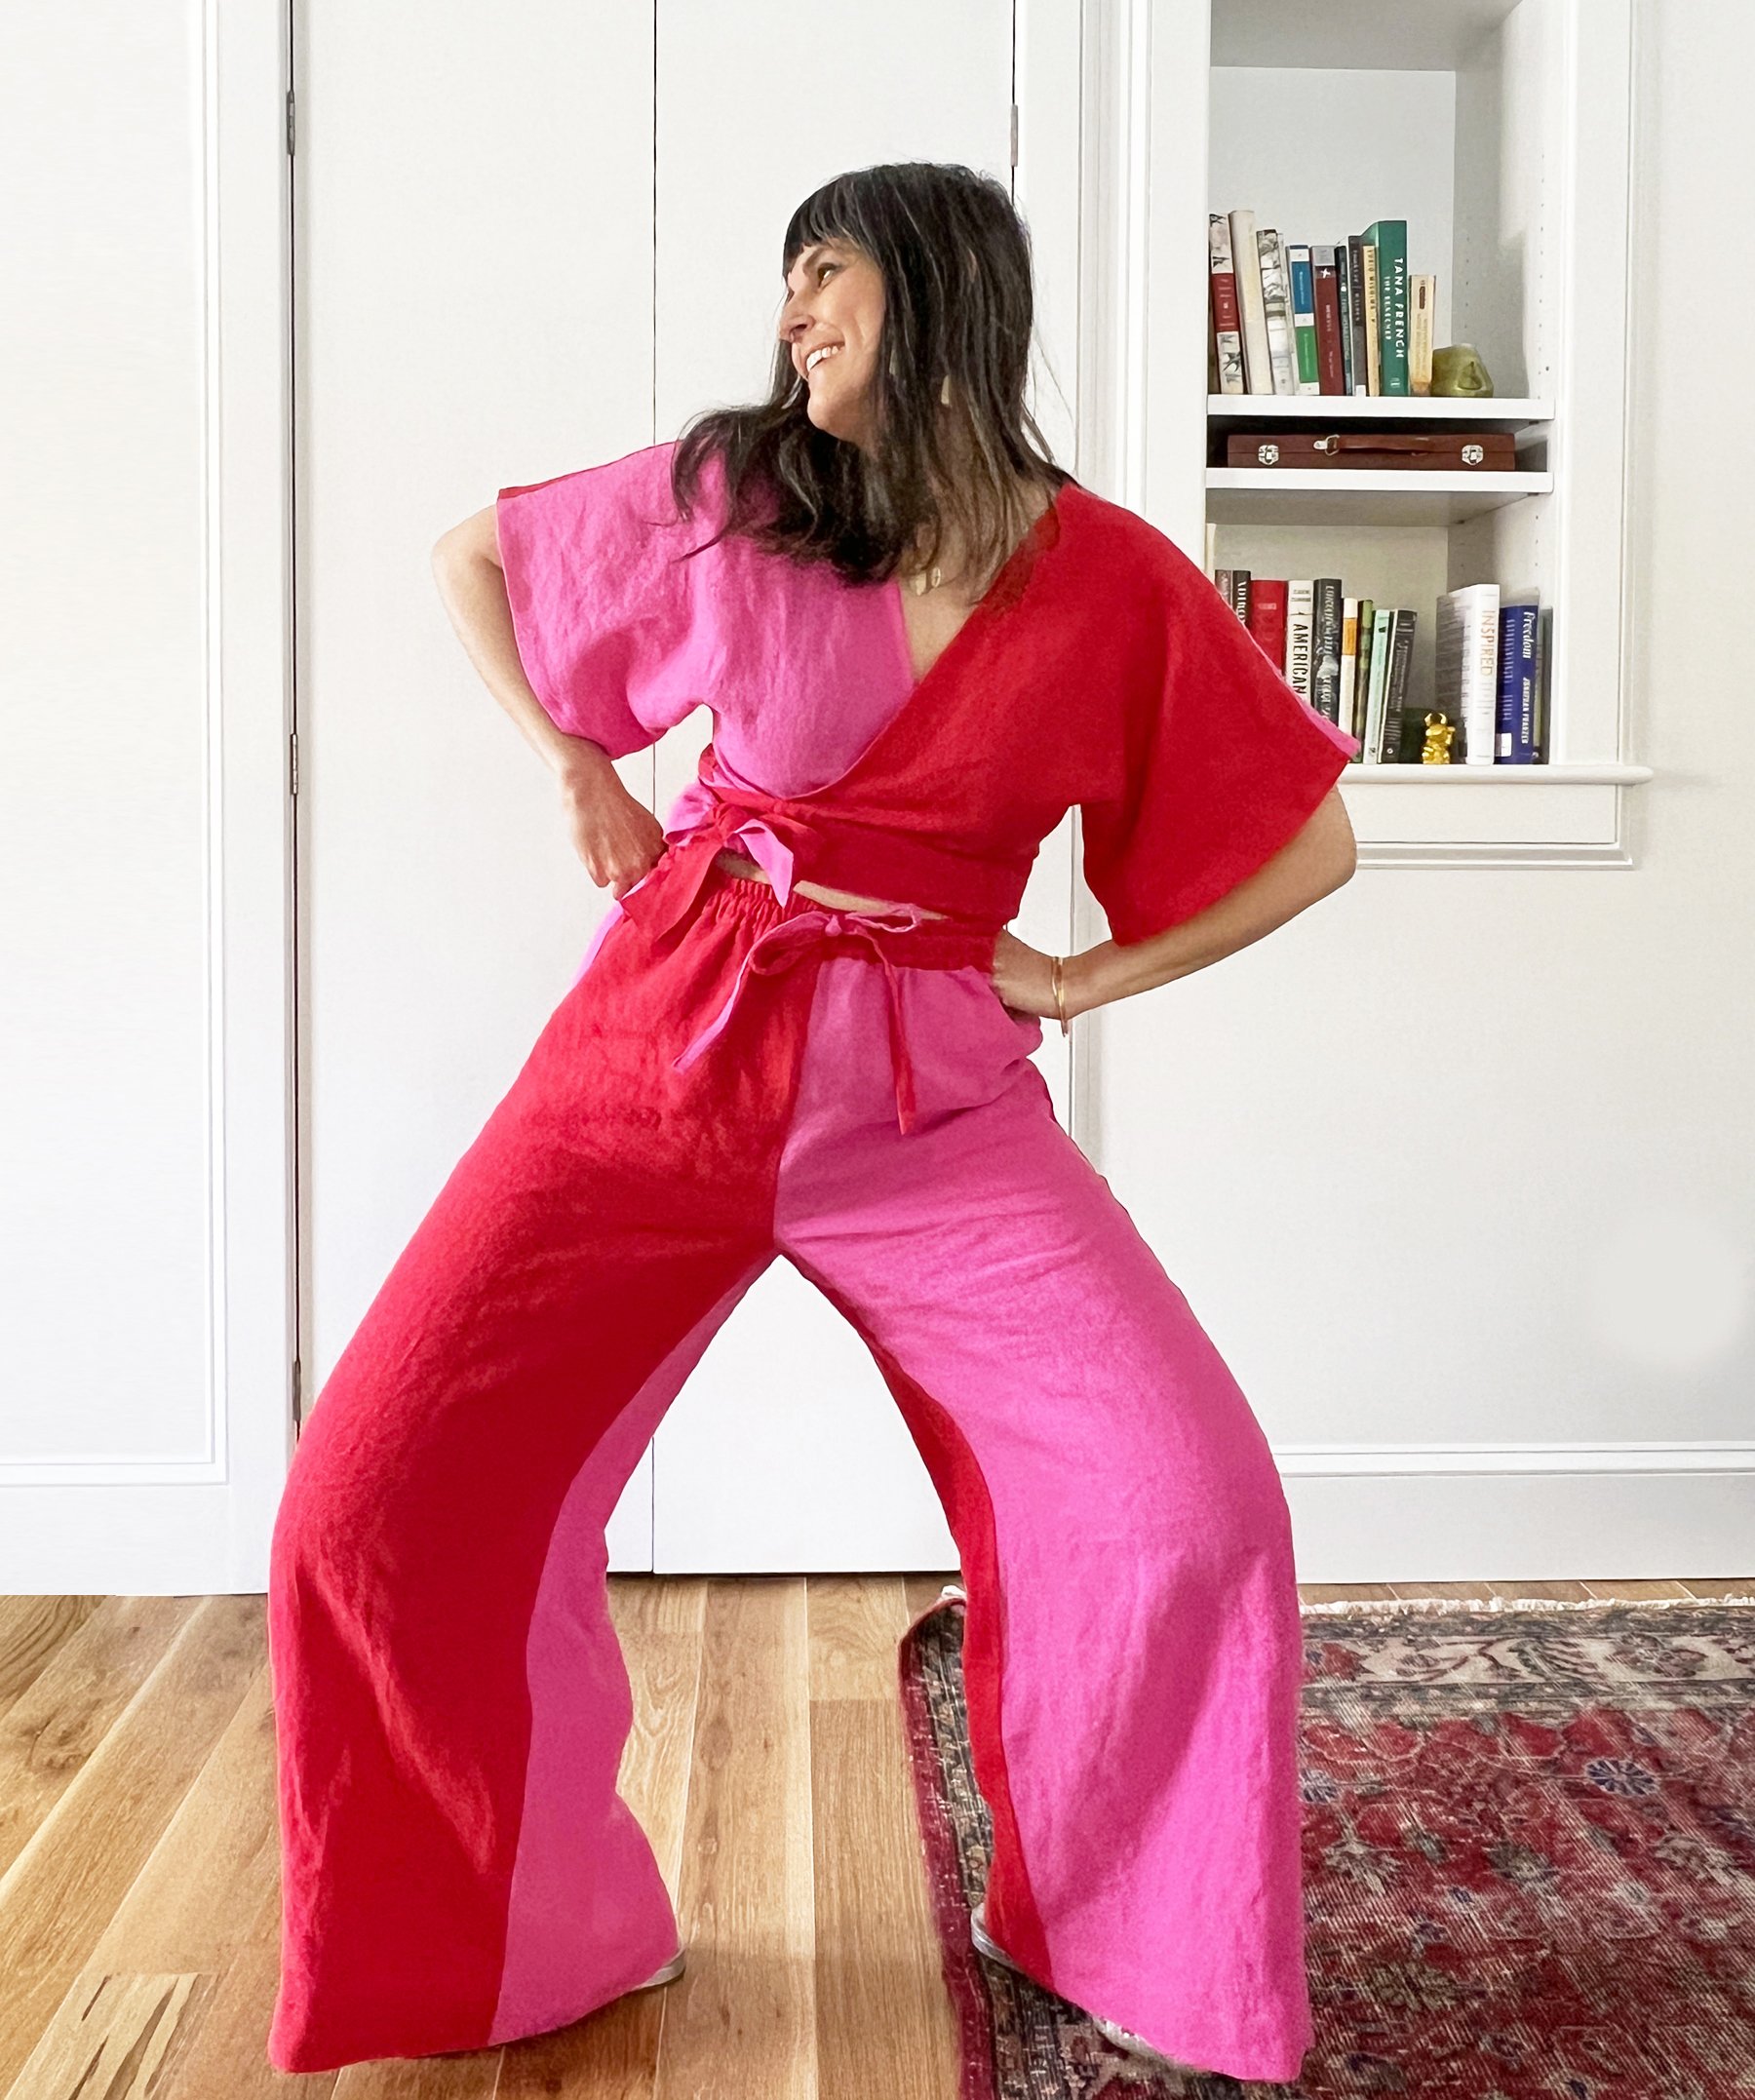
I love the sculptural effect achieved through the combination of the pattern’s style lines, flat felled seams, and linen fabric that holds its shape.
The last few times I’ve been on a beach vacation, or even just set foot in New York during the summer, I’ve been acutely aware that I don’t currently have the right clothes for HEAT. Yes, of course I have sun dresses, but some of them just shouldn’t be subjected to a long day of running sweaty errands. So this winter, I decided to sew myself a Resort collection - simple, fun garments that are intended to be worn when its hazy, hot & humid out (as I type this, I have a hot water bottle in my lap and it is 33ºF outside).

The look of a jumpsuit, but in two pieces that can be mixed & matched with other wardrobe basics.
THE PATTERN:
This pattern has been super popular on Instagram, it is Friday Pattern Company’s Saguaro Set. At first it didn’t really catch my eye, but once I started thinking about what to wear on a sweltering August afternoon, I was drawn in.
Per the pattern envelope: "The Saguaro Set is a two piece woven set made up of elastic waistband pants and a pullover top. The pants feature roomy pockets and a waistband with a drawstring. The top has a plunging V neckline that includes an optional tie closure. You can wear the top backwards or forwards. This flowy set is easy to sew and fun to wear with endless options for customization."
Sizes XS/0 - 7X/32 (32”/81cm -60”/152cm chest) are all in one envelope. Per the size chart, I am M for the top, and L for the pants. That is what I cut. I suspect this was designed with a beginner in mind, as every step is clearly explained and the booklet says there is a video tutorial on YouTube.

The bows compete a little bit - I may tie the top in a different way. But I’m happy with it for now.
FIRST IMPRESSIONS:
Pattern has a beautiful presentation in a sturdy envelope with an illustrated instruction booklet. Tissue is same quality as Big 4 tissue (my personal preference - but PDF is also available). I love that it’s an easy to sew, simple casual style, comfortable lounge/casual wear.
There are a few things I am not wild about:
• Seam allowance is 3/8" and suggested seam finishes are serging or zig zag. A bigger seam allowance would allow more finishing options (especially considering many beginners don't have a serger).
• Some may require an FBA to the top, or various adjustments to the pants to accommodate a round booty, hips, or tummy etc. IMHO this pattern will fit best out of the envelope if your bust/waist/hips measurements are not dramatically different.
• Front and back armscyle/bodice are the same - this has been the case in the other patterns I've made from this company, and is why this pattern says it can be worn with the V neck at the front or back (the neckline would be very high if worn backwards). I'd prefer front and back to be drafted differently. For this style of cut-on sleeve it works as long as you select the correct size.

I had fun with color blocking and changed my thread color frequently in order to always match the fabric.
MATERIALS:
My fabric is medium weight linen from Fabric Mart - same quality in 2 colors. I think I used about 3 yards total at 60" wide. I washed & dried on HOT, twice, for a soft, rumpled feel. This yielded an astonishing amount of lint.
Dritz soft waistband elastic - Pattern calls for 2" wide but I went with 1.5" wide. I don’t know that I have enough waist available for 4” of elastic (from both the top and pants), and I couldn’t stop thinking about those shorts boxers wear in the ring. 1.5” gives me the same look, and I find it more comfortable.

Nice fit through the back, however this kind of cut-on sleeve has a tendency to make weird folds when it goes under your armpits. Not too bad here though.

The ONLY place I was too lazy to change my thread color was on the pants drawstring!! Oh well, no one will be inspecting it so I’m gonna let it go.
PANTS:
• Cut all seam allowances (pants & top) at 5/8” and used French seams and flat felled seams throughout. These pieces look great inside out!
• Added 2" to leg length when cutting my fabric. I only increased the finished length by 1" but gave myself a nice deep hem. I am 5'8".
• Horizontal balance was off on my body, so I lowered Center Front by 1", blending to nothing at side seams.
• Reduced waistband height to 1.5", it is drafted for 2". I enclosed all seam allowances inside the waistband, where the pattern has you do otherwise.
• Made pockets deeper and wider - I thought they were pretty shallow as drafted.
In general, these were super fun to sew - simple construction, everything went together as expected.

You can see the straps are quite long so they can wrap around the body in both directions.
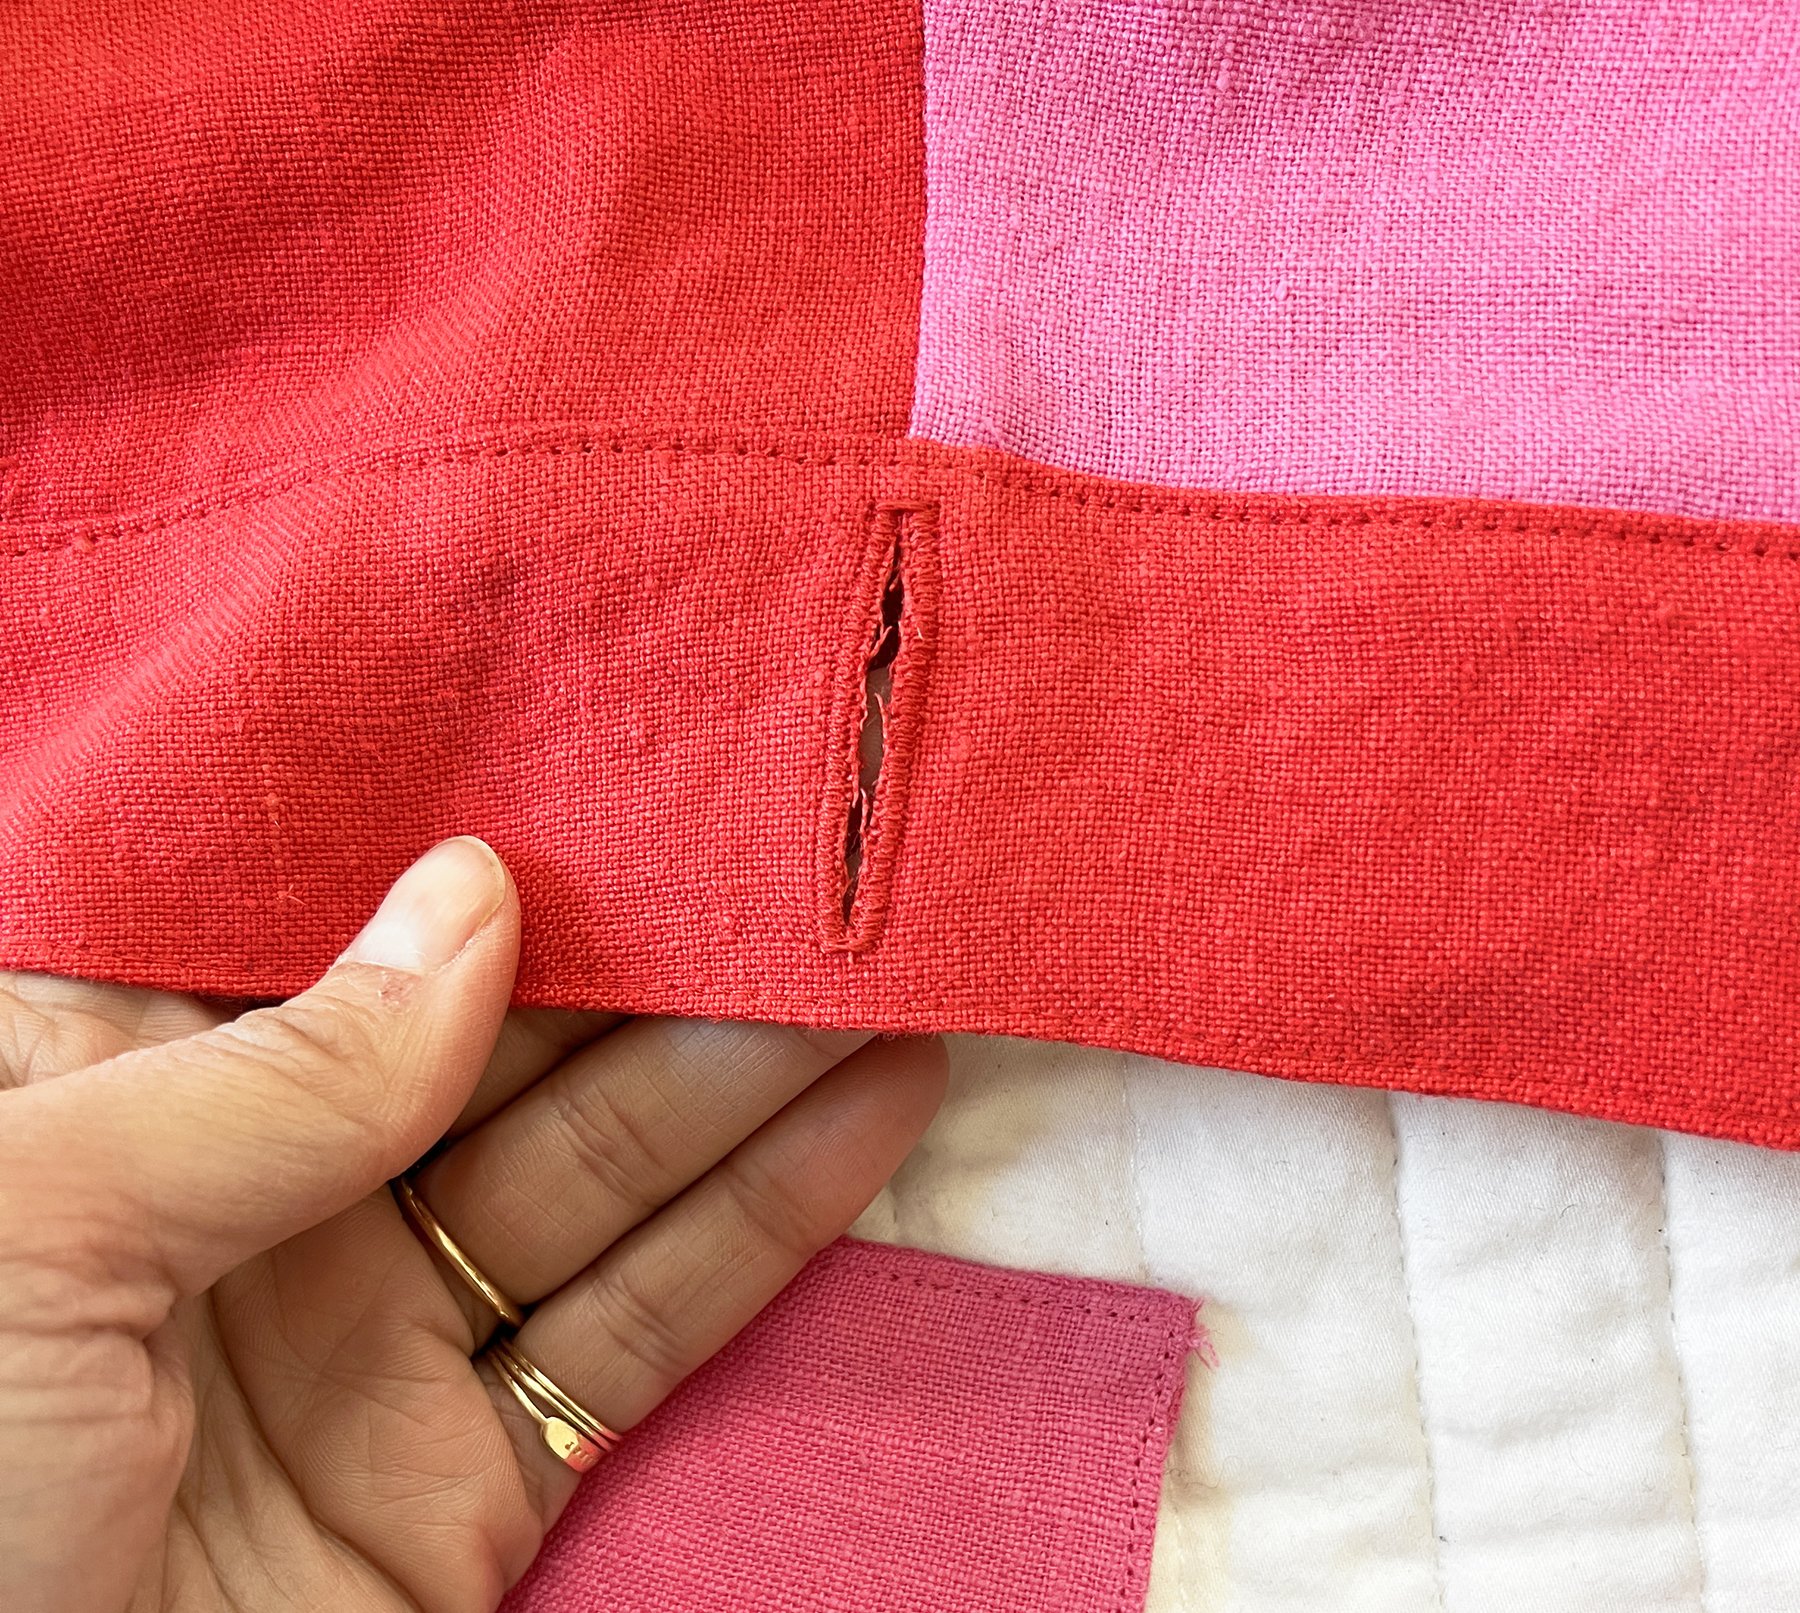
Long buttonhole at the side.

The strap passes through the buttonhole, keeping everything laying flat and adjustable.
Top:
• Added seam down center back for my color blocking.
• Added 3/4" at the lengthen/shorten line - adding 1" here is a typical adjustment for me.
• Something I suggest to anyone using a wiggly or stretch prone fabric (linen, rayon) is to stay stitch the front neckline to prevent stretching.
• I did sew this as per pattern, with the elastic casing (though I reduced it to 1.5" elastic). And I really didn’t like it.
• IMHO if you need to get the top on over big boobs, but wish to have it fitted around your ribcage: good luck! I found this difficult to achieve, and uncomfortable. A real struggle to get on/off, and the scrunched fabric was an uncomfortable sensation around my ribcage (doesn't bother me with the pants waistband).
• I wanted to save the top, and make it as easy on myself as possible. I cut a realllllly long waistband. Attached it to the top and extended it. I started with these straps at like 72" or something crazy, tried on the top, and trimmed them down after tying them a few different ways. This band is 1.5" tall.
• I put a long buttonhole at the left side seam, where the straps go over/under each other, this helps everything lay flat.
• This modification makes the top more comfortable to me, easy on/off, and more coverage at center front, and gives me some control over how much skin is visible at the midriff.

FINAL THOUGHTS:
While I’m happy with the result, I won’t sew this top again - I’ll reach for something with more nuanced drafting. I will sew the pants again, in fact I’ve already completed another pair.
The pattern is expensive (Paper pattern is $24, PDF is $20 plus whatever it costs you to have it printed) and a cute style, but there is no complex drafting or techniques. The value is the instructions, which have a positive, helpful tone, hold your hand and clearly explain everything. If you’re a beginner ready to tackle a two piece set and some elastic casings, this one will do it for you!
I had fun taking my time with all the finishing, and it was worth it: the inside is as clean as the outside. Very satisfying! I look forward to getting all hot & bothered in this set! XO, Martha

Leaving you with an outtake because they are always my favorite photos! :)

Pin it!