THE PERFECT WOVEN CROP TOP - NEW LOOK 6722 PATTERN REVIEW

I’m just waiting for hot weather to wear this matching set!
I recently sewed myself a color blocked Saguaro Set, but the truth is, it was my second time working with that pattern. Prior to that, I had sewn myself these wavy gravy checkerboard pants, and then ran out of fabric to make the wide sleeved top included in that pattern. I set things aside, planning to try to find this fabric again next time I was in the city (which I did!). After completing the pink & red version, decided I would prefer a smaller top to pair with these billowing pants, which worked out well because it would require less fabric. I began my search for a small, fitted top.
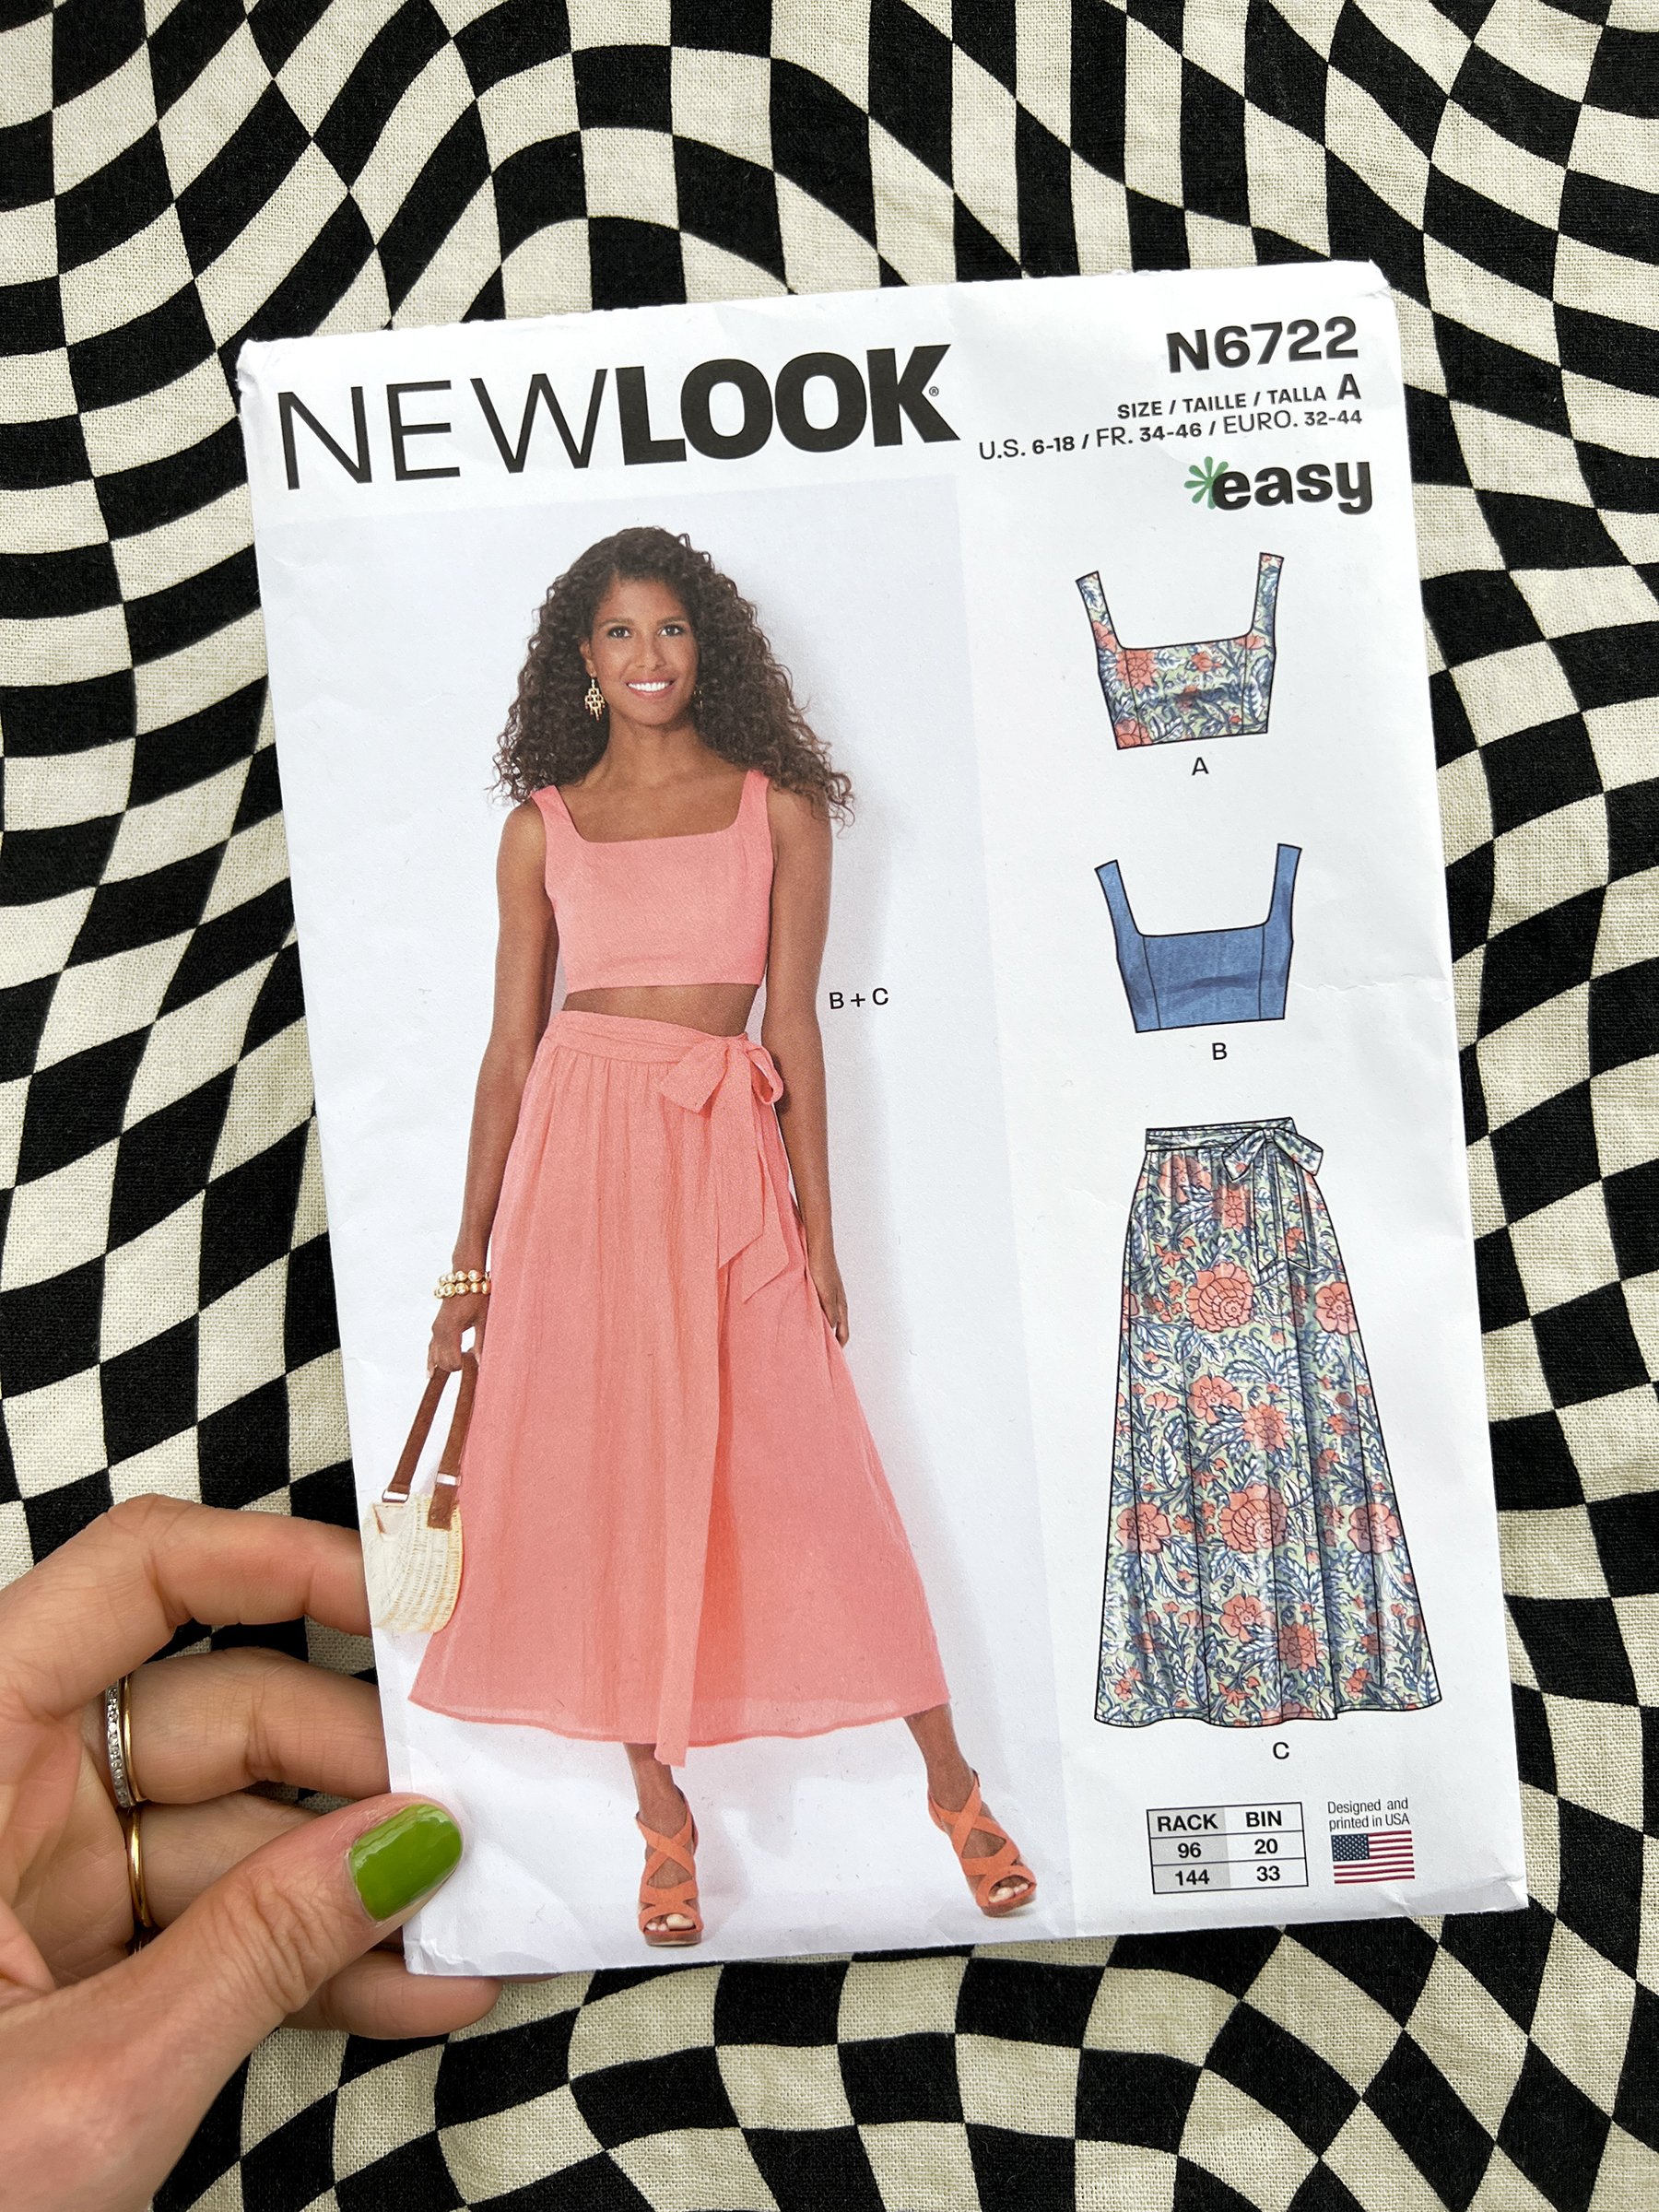
Per the envelope: "Separates set includes bra top and wrap skirt. Top has center back zipper and princess seams with variation for elastic back smocking. Skirt has waist ties, side seam pockets and elastic waistband."
THE PATTERN:
Enter New Look 6722. If I’m being honest, I don’t pay a ton of attention to New Look patterns - while I have nostalgic feelings and lifelong loyalty to brands like McCall’s and Vogue, I don’t have a deep history with New Look, and I find it annoying how this brand nests patterns (pattern pieces are often nested every other size, for example: 10, 14, 18 instead of 10, 12, 14).
That being said, I saw this on the rack at my local Joann for $3.99 and thought: it’s perfect. And you know what? It is.
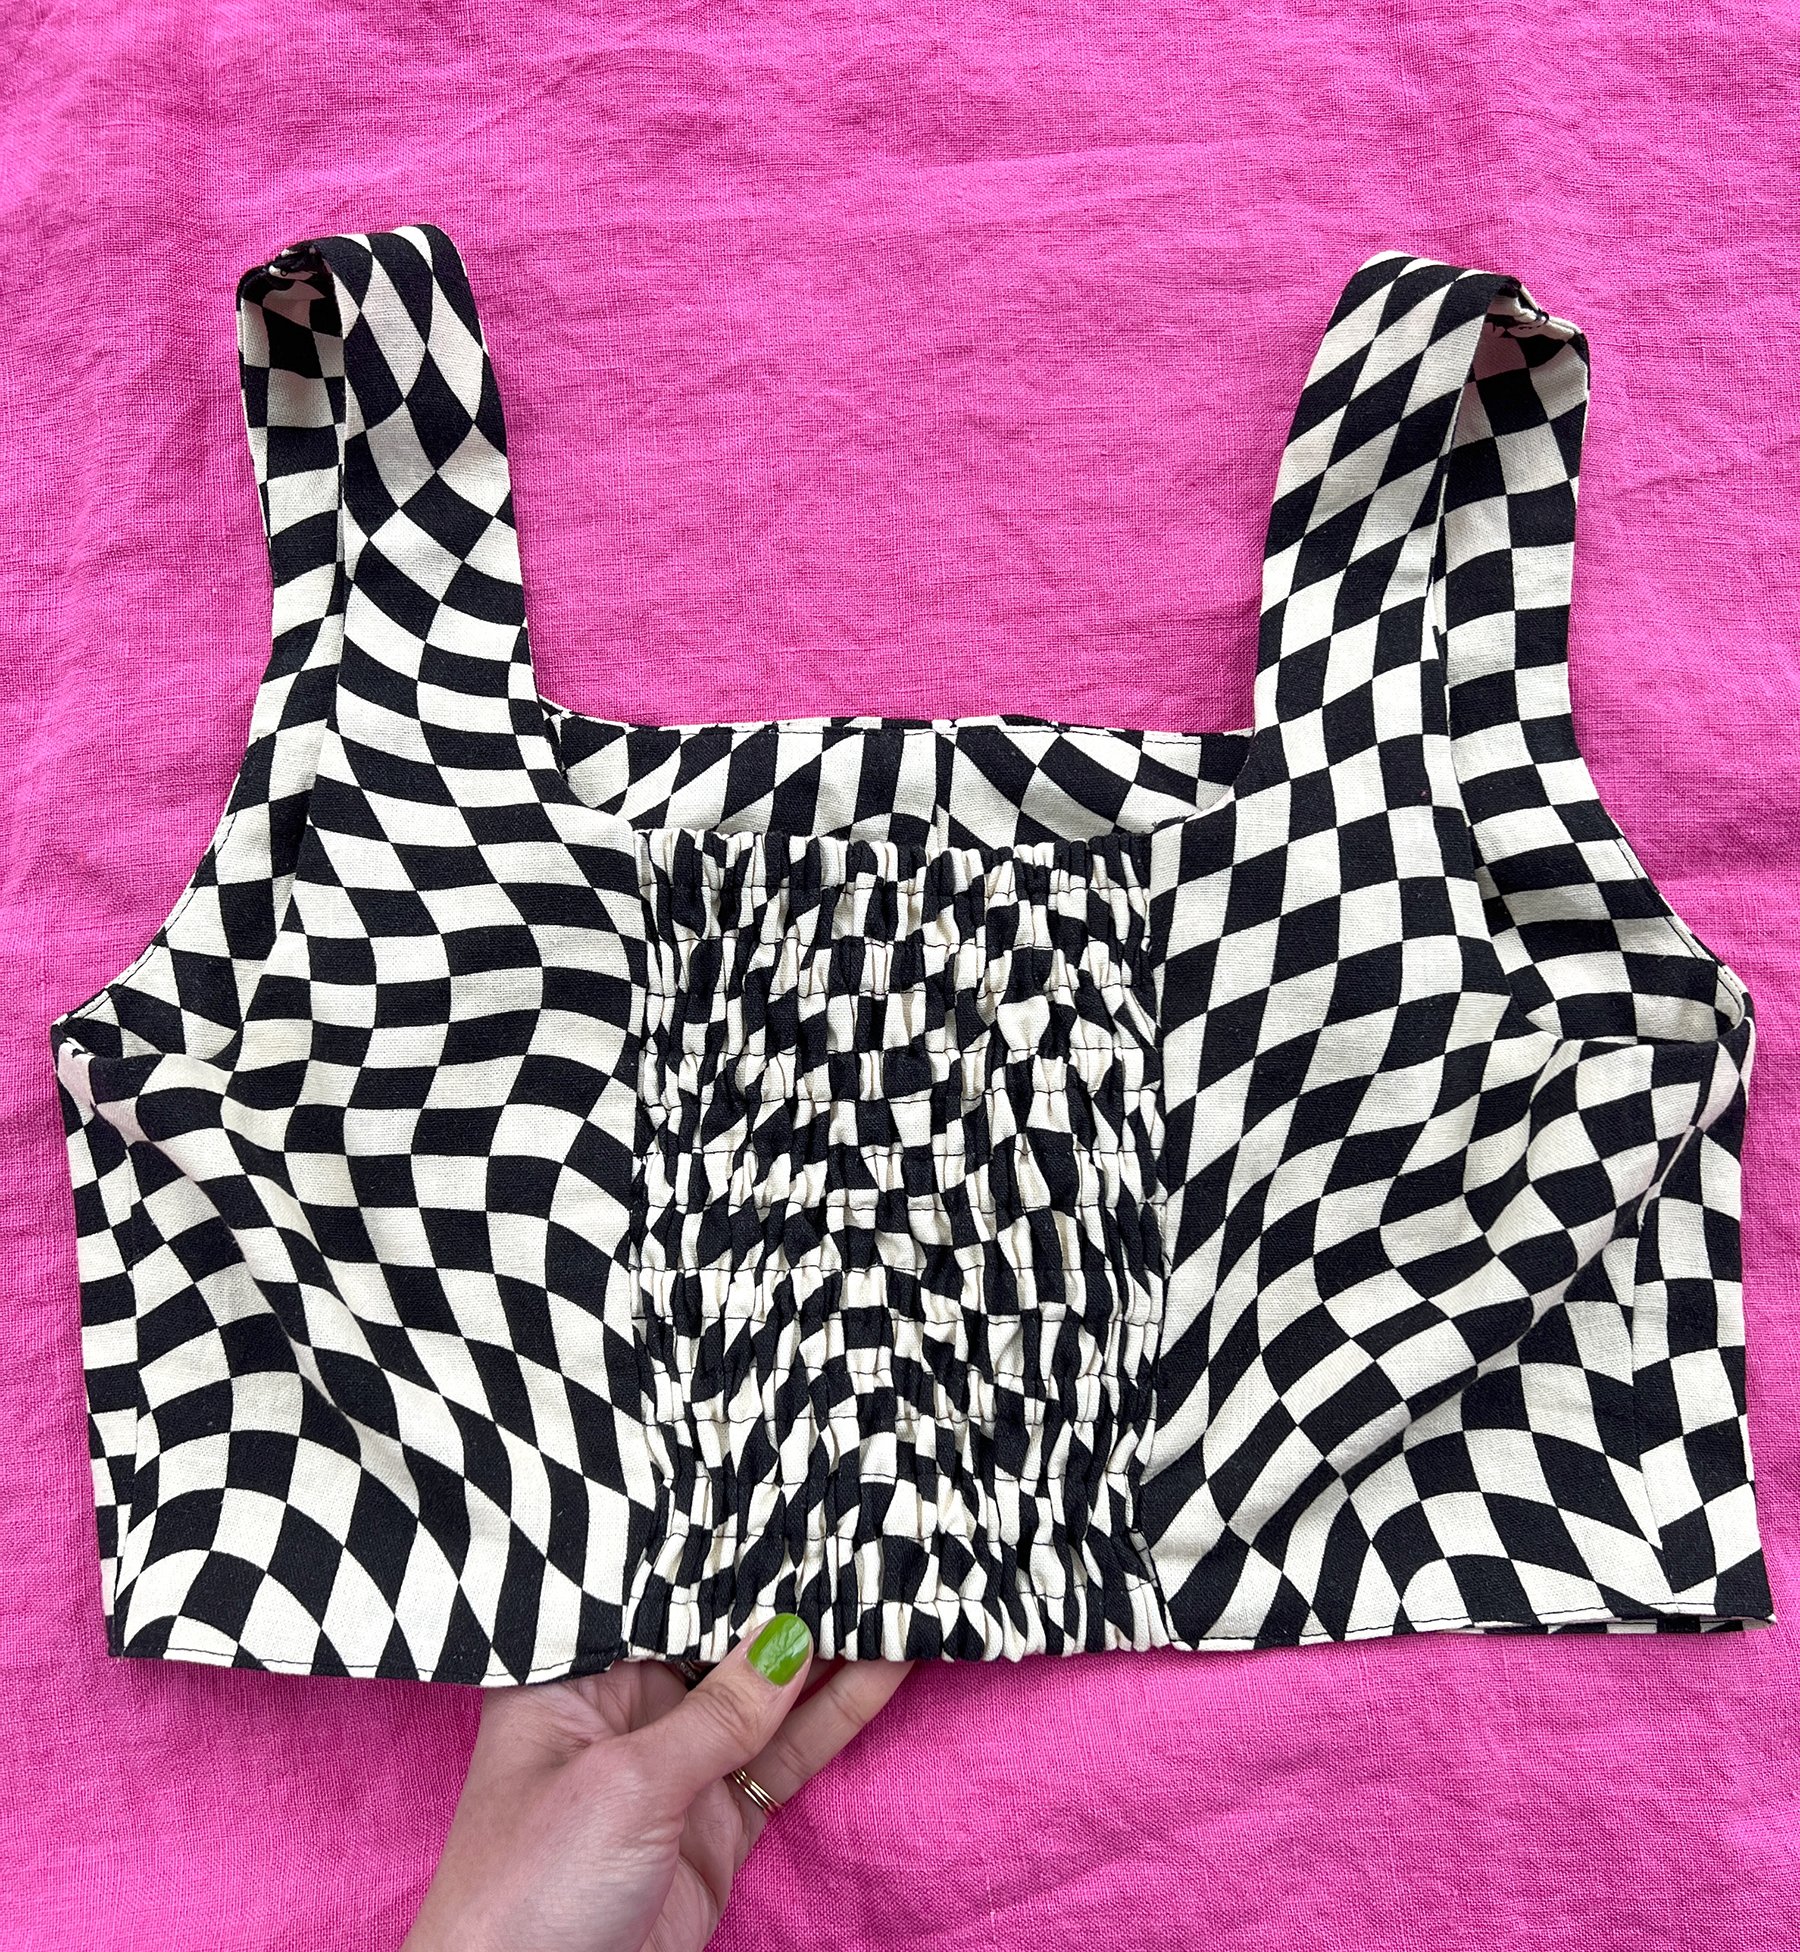
The back of this top, featuring an elasticated panel for a snug fit, and easy on/off.
FIRST IMPRESSIONS:
Overall I love this pattern, but I have one gripe. It’s not really even a complaint about the pattern, but an overarching issue with the general supply chain situation involving notions brands, pattern companies, and big box craft stores (I’m looking at you, Joann).
I picked up this pattern off the rack at Joann, and of course flipped it over to look at the back. The top calls for a 7" separating zipper. Great, let's walk across the store to the zipper display. The shortest separating zippers available are 12" and either chunky plastic or metal with size 5+ teeth. Ok, can't get all your supplies in one place. But then, a 7" separating zipper isn't even something you can purchase from Wawak. It's a custom length from all zipper websites. I don't mind special ordering notions, in fact it's often a thrill, but for a casual top, you'd think they would design with more easily accessible notions in mind, or perhaps Joann could offer a more thoughtful array for purchase.

The full look! Y2K surfer meets 60s hostess meets 2023 sewing blogger.
MATERIALS:
My fabric is a viscose/linen blend purchased at Mood in Manhattan. I bought it in a rush: it caught my eye, I didn’t consider my yardage carefully, tossed it in my tote bag and left the store. I thought it was linen until I got home and looked at the selvedge. I pre-washed & dried on the hottest settings to shrink and soften the fabric. It has a wonderful drape and is the perfect weight for this kind of pants. It’s just slightly heavier than what I’d consider ideal for this top pattern, but it works.
This pattern calls for 1/4” elastic for the back panel. Be sure to purchase non-roll elastic! It only costs a little bit more, but makes a huge difference. It won’t twist or curl when stretched inside the elastic channels.

A zipper would be nice, but as long as your elastic has enough stretch and recovery, eliminating the zip works great.
PATTERN TISSUE ALTERATIONS:
These are typical modifications for me. I am 5'8":
• Lowered apex 1" - to do this, I draw a box around the section of the princess seam between the notches, and slide the whole thing down. Then re-draw the seam lines.
• Lengthened bodice 1" - Note: there are no lengthen/shorten lines on this pattern.
• Eliminated the zipper. I cut pattern piece 3 on the fold and proceeded without the zipper. Note: Pattern piece 3 is marked "casing" to indicate which sets of lines have elastic between them, and which don't. The bottom most casing is double labelled, which is confusing, disregard the very bottom "casing".


Click on any of the above photos to enlarge.
ON THE FLY DECISIONS:
• I considered making a hollow chest adjustment to my tissue, but didn't. In the end, I needed it. But I was feeling lazy and just wanted to finish this garment. So I put a dart at the center front neckline edge. It takes up 1" at the seamline and is 2.5" long. This is goofy and weird, but it works and the print hides it well. (The dart is shown in the top left photo.)
• The strap construction requires a small amount of hand sewing, but I knew if I left it that I would not finish, so I pressed everything into place and machine stitched. (Bottom right photo.)
• You can also see how I pressed up the seam allowances and top stitched the hem. I kind of wanted a cleaner finish here, but done is better than perfect and I don’t even notice it now that it’s finished.

CONCLUSION:
I cut out the tissue, altered it, cut my fabric, and completed sewing this little top in an afternoon. Yes, I took some shortcuts, but next time I’ll have the fit more dialed in. I enjoyed sewing this top and I love the result, so I will be making it again. One thing I especially like about this pattern is that the neckline is scooped, but no bra straps peek out, even at the front corners.
I will likely sew the skirt as well. The pattern for it looks good, but head's up, it takes 2-5/8yards of 60" wide fabric at size 6 and goes up from there. The front overlap is on both sides and includes gathering. Probably best in a light, flowy fabric.
Let me know if you give this one a try! XO, Martha