THE FLOATIEST SILK DRESS EVER, A STRUGGLE: ANNA SUI VOGUE V1178
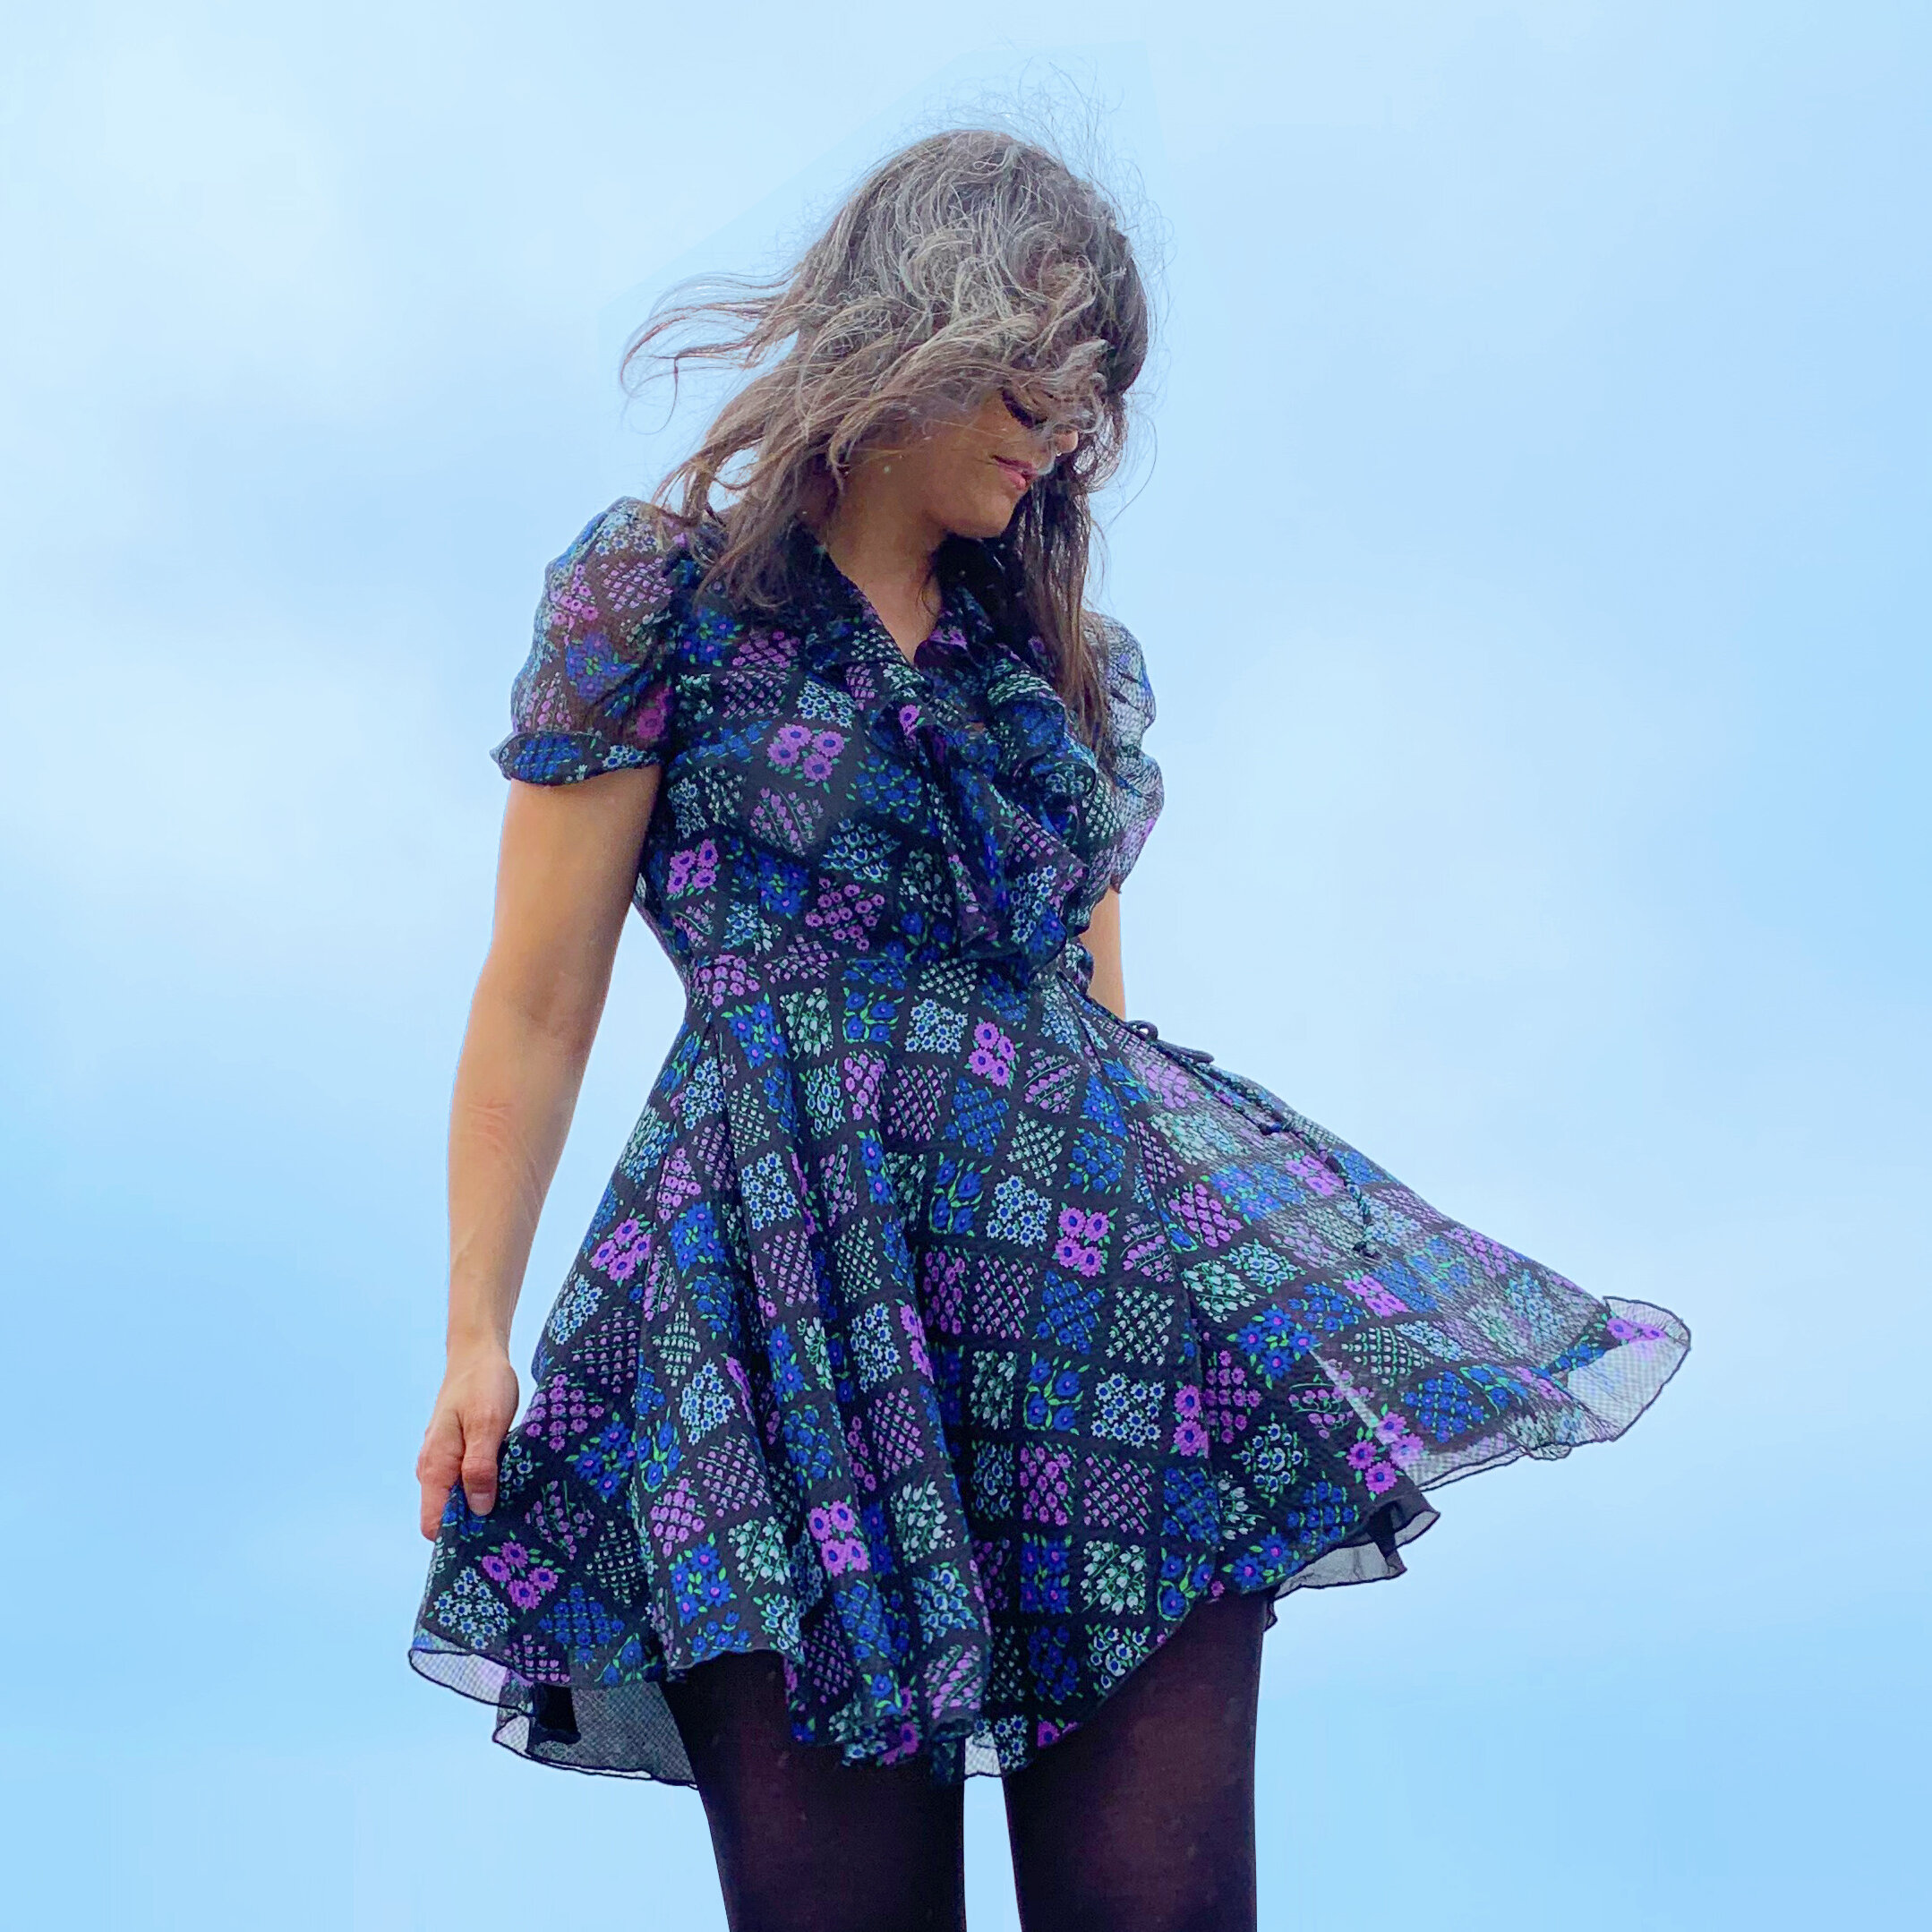
Embracing a windy bad hair day on our roof.
I have a joke with one of my friends: if I see a bolt of printed silk that I like, theres a 99% chance it’s Anna Sui. Seriously, I can sniff her out in any jobber in the Garment District. Her name is always printed in the selvedge, and sometimes the year it was printed is there, too. When I was younger, I always used to scan the back page of Women’s Wear Daily (like, the physical daily newspaper), looking for print or textile job openings with her. I’m actually glad I’ve never worked there, because the prints still maintain their emotional magic for me. Which is how I got myself here, sewing a replica of an Anna Sui dress.
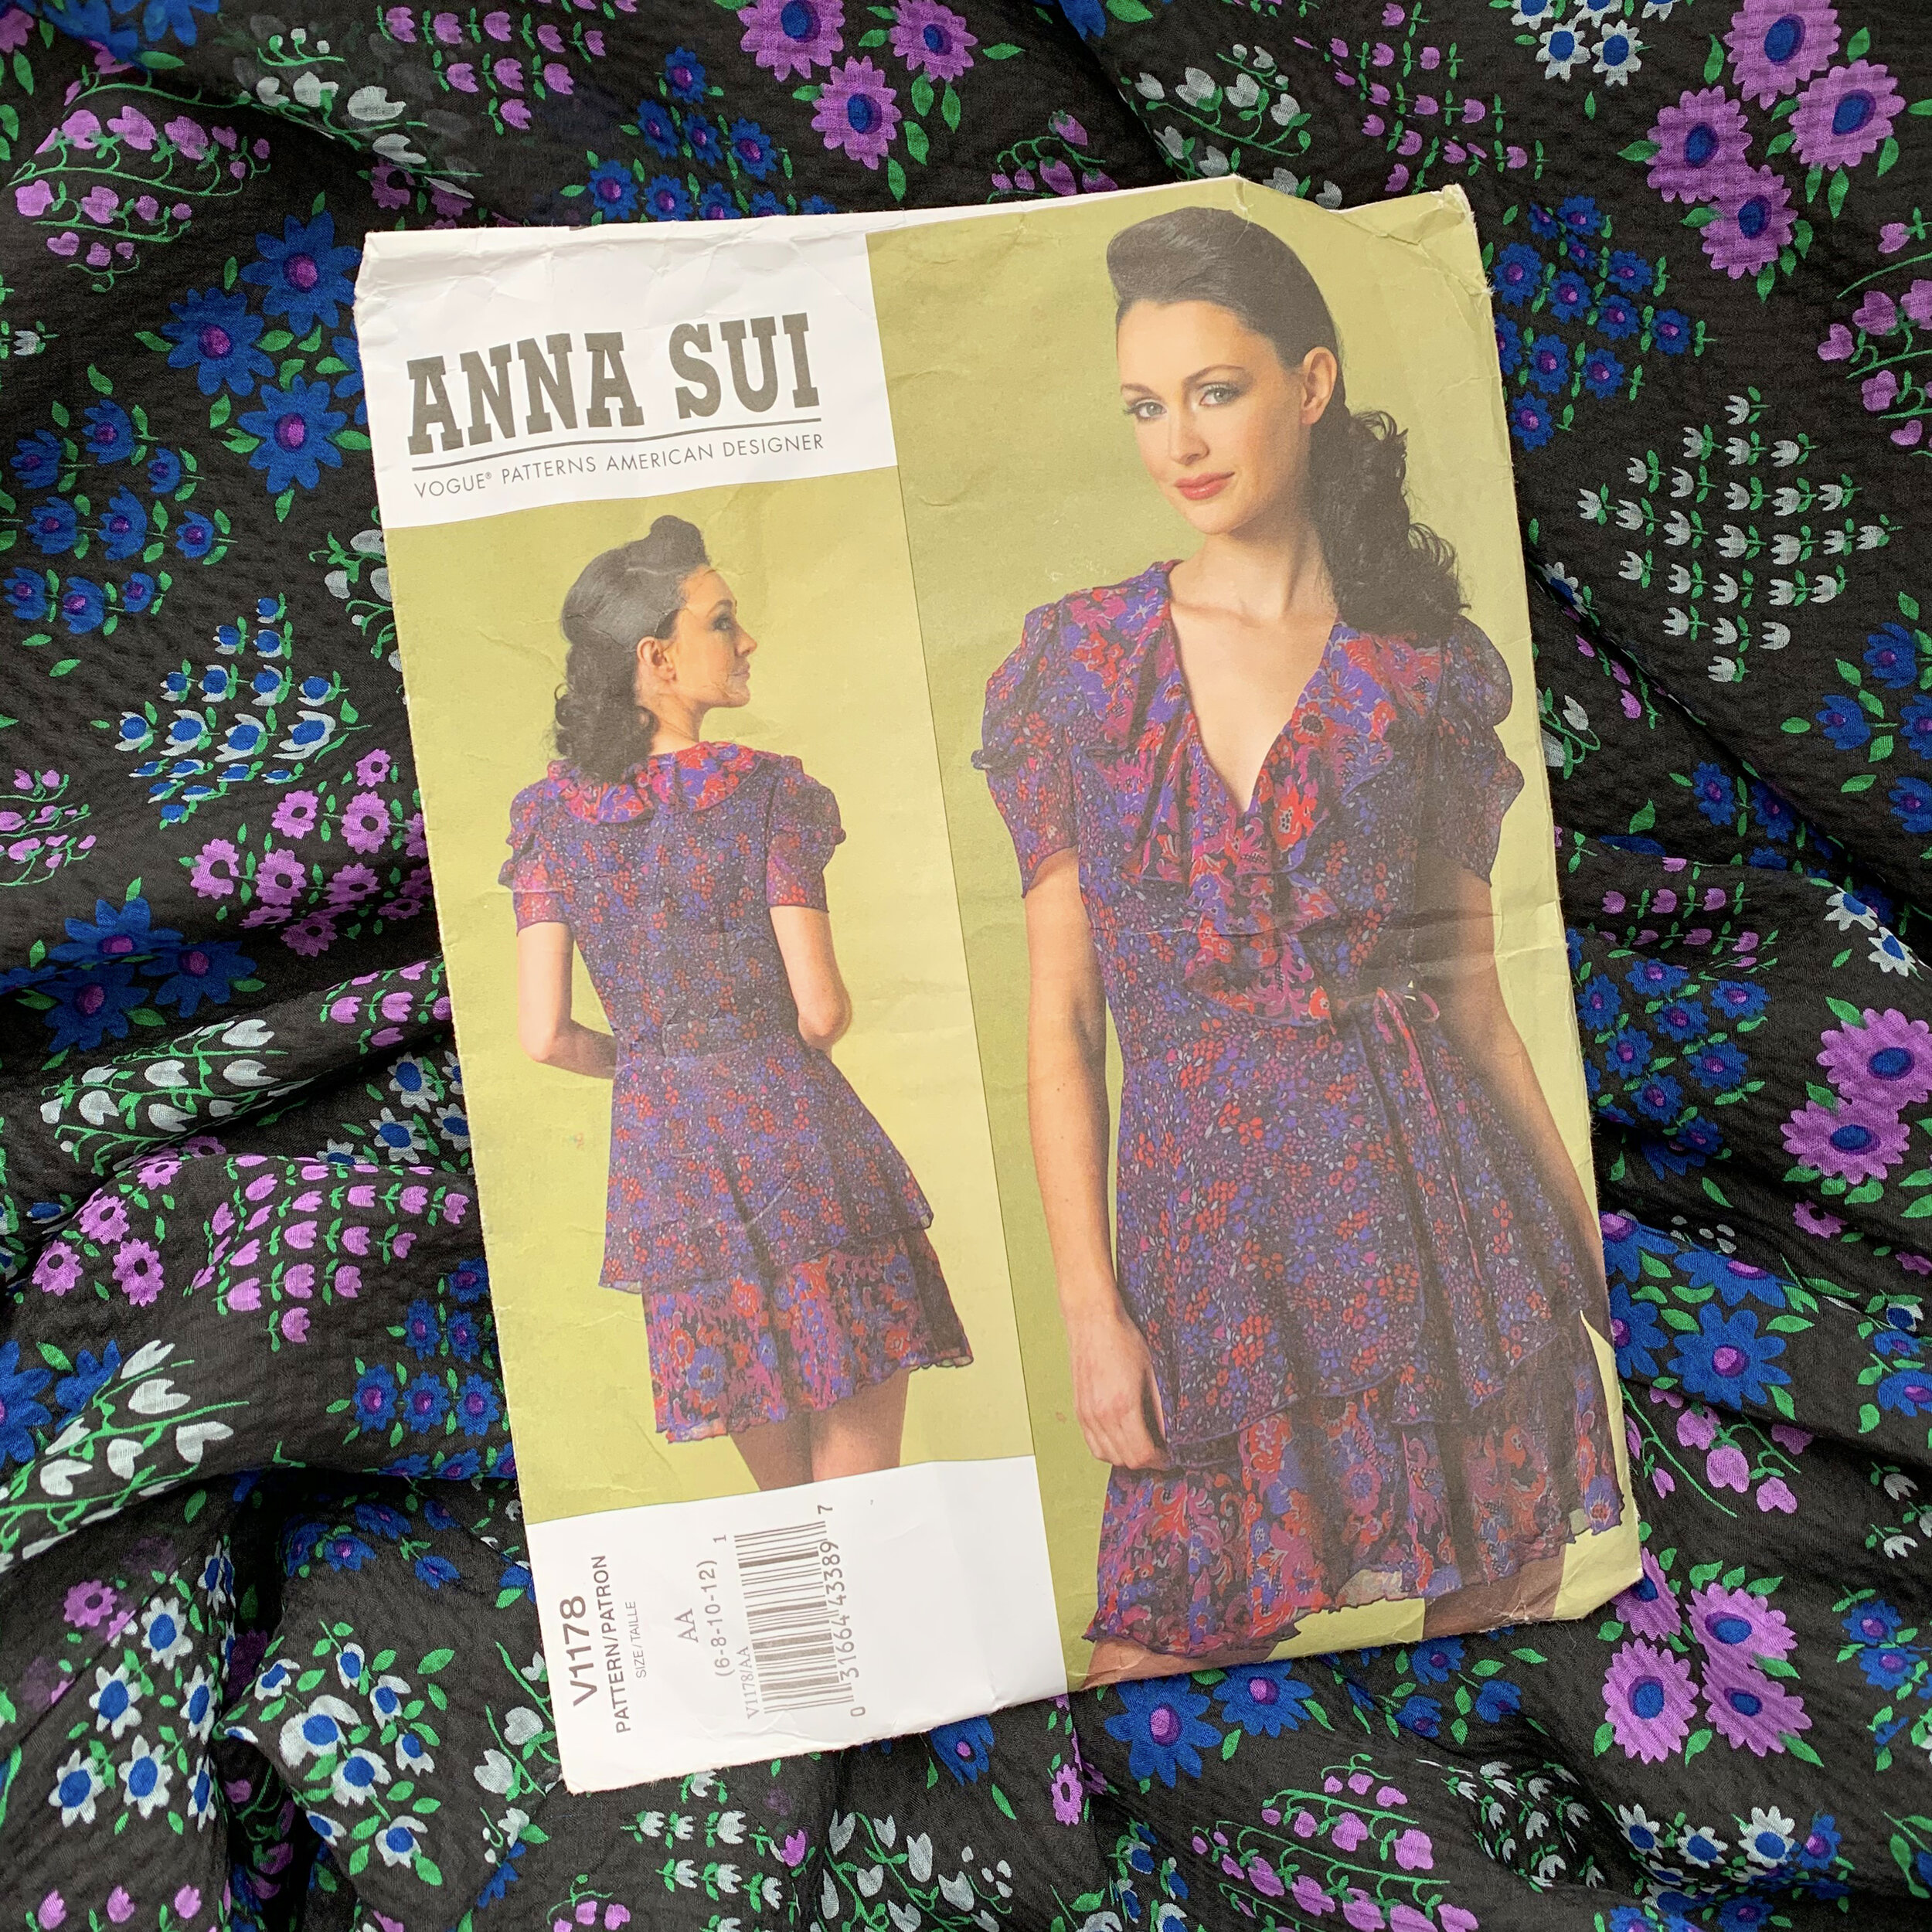
Vogue Patterns American Designer patterns come in an extra large envelope and are usually in print for only a short time.
I bought this pattern when it was released, I have no idea what year, mid 2000s? I wasn’t sewing very much then, but I would buy patterns occasionally in hopes of motivating myself. When I bought this, I definitely didn’t have the skills to sew it. I sewed this one year ago, but it was so frustrating that I stuffed it to the back of my closet until recently. Guess what? It’s a treat to wear!
I love that it's playful & feminine. The pattern recommends doing rolled hems on your serger, which is how "real" Anna Sui dresses are finished; I liked that RTW detail. You can narrow hem if you prefer. I chose my usual Big 4 size 12, and omitted the overskirt because I couldn’t find two coordinating prints on similar fabrics. The instructions are quite good, and the construction of this dress is simple. The difficulty comes from the fabric. And I chose the lightest, most diaphanous silk available.

This is the front bodice pattern piece, after my alterations.
I tissue fit and made my standard alterations: lowered front bust dart 1” and lengthened bodice 1” (I am 5’8”). There are no provisions for lengthening the bodice. I didn’t realize at that time how much this added to the waist. You can see in photos that when I tie the internal waist tie, there is excess fabric at the waist. I may eventually move the interior ties to eliminate that bunching.

The fabric is a 100% silk woven plaid - something between chiffon and organza. It has a softly puckered texture. My lining is 8mm silk habutai - just as light, but more tightly woven and stable.
I’ve read other reviews of this pattern that mention how easy it is to serge a rolled hem on the flounces/hems. I am here to represent those of us for whom this is Not Easy At All. In fact, I think it is a form of sewing torture to make rolled hems on the bias of silk chiffon! It was significantly easier on the habutai lining, so choose your fabric carefully. I kept meticulous notes as I went! My serger kept chaining *next to* the cut fabric edge. Tear away stabilizer is a MUST for light weight fabrics, especially on bias. There were still a few problem spots, about 1/2” every time I hit true bias 45°, the chain wouldn’t attach, that I repaired by hand. This was on the chiffon only, habutai was better (use stabilizer!). My serger has auto settings, but I manually changed stitch length from 1 to 2, because the chiffon gets perforated, and the stitching will just slip off if it is too tight.

Some of my notes and samples from this project.
I kept pages of notes. I was SO frustrated, I thought I might smash my serger. I just couldn’t get things to click! But I learned a lot about the machine, changing needle positions, and adjusting the manual settings, so in a way, it was worth the journey. If I made it again, I'd be very thoughtful in my fabric choice. Silk/cotton voile might be ideal, and any fabric would be serged with lightweight tearaway stabiliser under the fabric. All that being said, I recommend this pattern (intermediate to advanced).

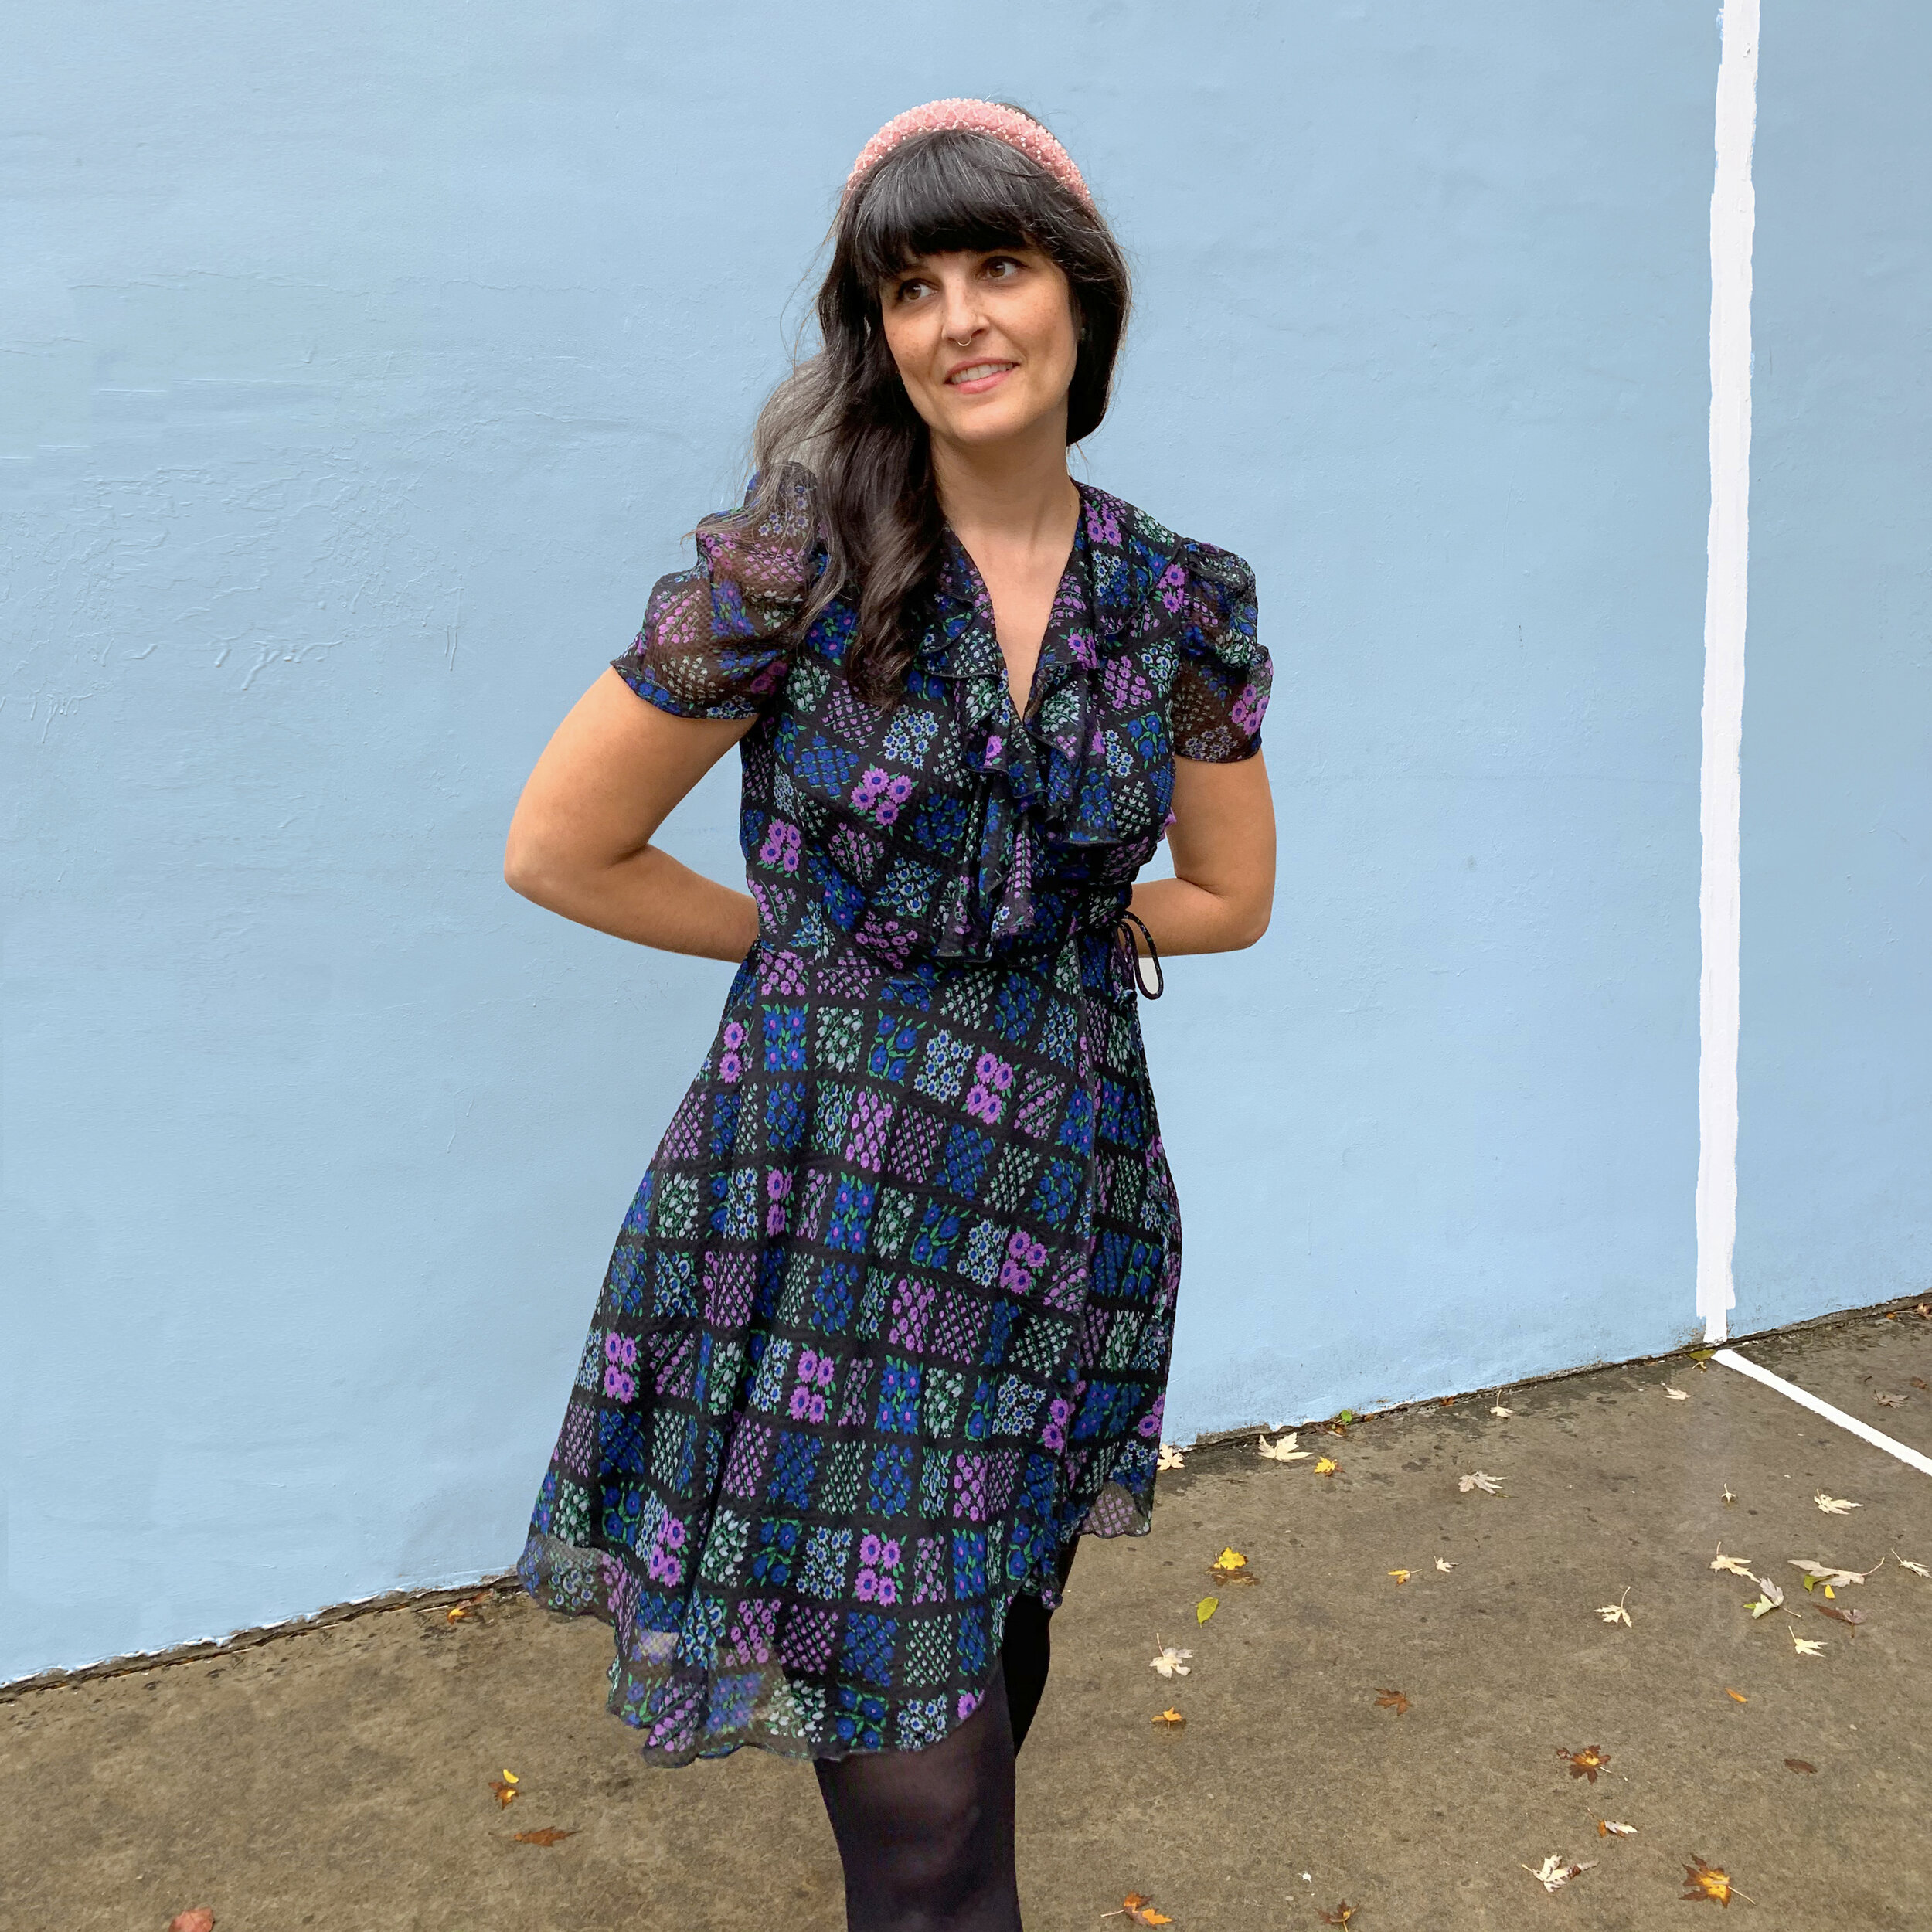
In the end, I am so pleased with this dress!
My only other notes on this project are: The sleeve is outrageous right off the machine. It looked like a chef’s hat. I hung my dress, heavily misted the sleeves with water, called it a night, and came back in the morning to them perfectly flopped. And, the instructions have you leave an exposed serged seam at the interior waist. This is easily avoided. When sewing that seam, sandwich: fashion fabric skirt and bodice right sides together, bodice lining and skirt lining right sides together, then sew the one seam, flip it open, all seams are hidden.
It took me a year to be able to look at this dress without getting annoyed, but I’m so glad I kept it. It’s really well made! In spite of my frustration, I did a good job. The fabric just floats around you when you wear it, it’s lovely. Thank god it’s over! XO Martha

bye!