WORLD'S PUFFIEST NIGHTGOWN! - VINTAGE NEW LOOK 6163

By now you may have noticed some of my weaknesses: vintage nightgowns, puffy sleeves, and dramatic pattern envelope illustrations. This 1980s gem from New Look ticks all the boxes - on paper at least! - and had been on my eBay search list for many months before I finally found a reasonably priced copy. This pattern must be rare, as I don’t see it come up for sale often, and sometimes it is expensive. $25 for a vintage pattern is unreasonable, in my opinion, unless it is a vintage Vogue Paris Original designer pattern, in which case, all bets are off!

Ok. Let’s take a moment for this envelope illustration. The hair! The hand on hip with the coffee cup! These ladies are ready for some kind of Sunday morning magic that I don’t really understand, but I want to know more. This envelope does not have illustrations for the front of the garments, or a pattern description. In cases like this, you must pay critical attention to the illustrations. In this case, they are accurate: the shoulders are actually set as wide as they look on the center woman, and that sleeve puff is accurate. The fabric will pool and swirl around you like that. The collar is yes, that freaking huge. I’ll speak for myself: love at first sight.
This pattern arrived in my mailbox factory folded and uncut, likely never removed from it’s still-crisp envelope. And yet, it was bursting. The glue holding the envelope together had given up the ghost. This envelope contains sizes XS-XL, which, in pattern sizes, means sizes 10-24 (based on pattern ease, an even wider range of sizes could use this pattern successfully). My measurements placed me at size XS. I’m about a size 8 in ready to wear, so if you are petite, let go of this dream now. The tissue is enormous - and not because of the size range, but because the garment is so voluminous. You will need a bare minimum of 3 yards of 54” (or wider) fabric to use this pattern. If you want to make the nightgown, you will need closer to 5 yards of fabric and up to 7 yards of trim. I am not trying to discourage you, just let you know what’s going on here: 80s excess.

Opening the tissue was a treat! Because there were no illustrations, I didn’t even see some of these details: crisp little pin tucks, a plunging neckline (seriously, below the bra bridge), skinny little ties, and the trims! I didn’t have 7 yards of lace on hand to insert into these pintucks, but I’ve filed away that detail to use sometime in the future.
Based on the yardage requirements, and the usual risk of diving into a vintage pattern without first making a muslin, I decided to shorten my version into a blouse. A wacky blouse always has a place in my wardrobe, whereas, a too-billowing nightgown is a bit tricky to work into most situations.
My fabric is a tissue weight linen, which I dyed pink after completing the garment.
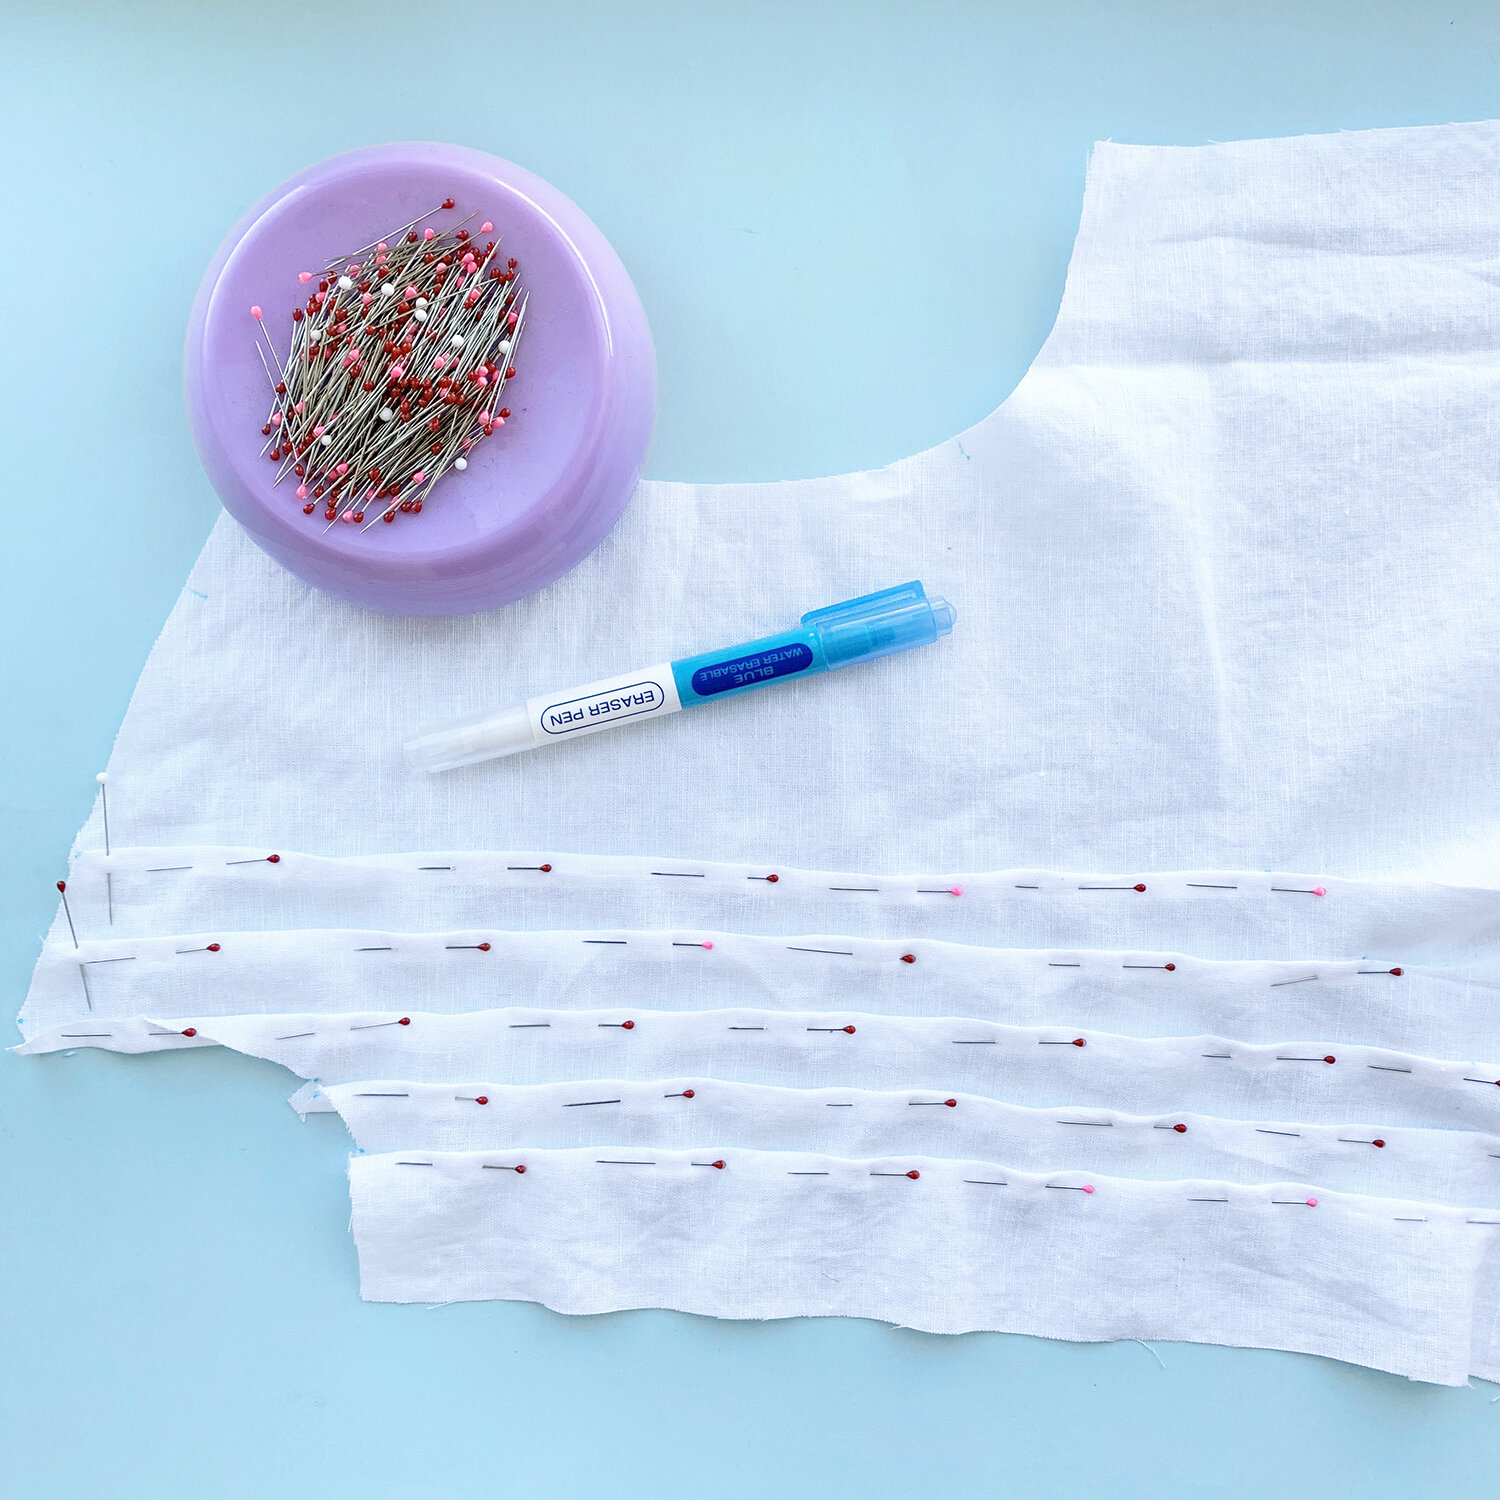
The instructions accompanying the pattern are very good. As usual with vintage patterns, they assume a base level of knowlege. This is the case for the pintucks. They have a little illustration, but you should just do them the way you like to do them. For me, this means marking the dots provided on the pattern tissue with my Clover Eraser Pen (test on your fabric first! It makes a blue dot, and then you use a clear ink to “erase” the marking when you don’t need it anymore. You can iron it and it won’t disappear). Next, I finger pressed my tucks, and pinned them with pins running parallel to the tucks. This way, I can use my edgestitch foot to quickly stitch them down.

The pattern also features a back vent, to add more volume. I reduced the vent by 2”, but I probably should have just eliminated it - the garment is so billowy as drafted! I finished my interior seams using my serger’s 3-thread narrow overlock stitch. This was very tidy, but I wasn’t sure how to handle the 90º turn of the vent. I serged the vertical seams, and then clipped the horizontal part that remained. From there, it was easy to fold under the excess seam allowance and top stitch. You can see here this created 2 sets of parallel stitches. I think it looks nice, and it’s clean inside and out.

Trust me, I know it is a tragedy that I removed the ruffle at the cuff. I know! But: this sleeve takes up a full yard of 60” wide fabric, and is puffy in a way that prompted Jason to say, “I don’t know how you’re going to make this one work.” - and he usually tells me to go for it with volume!! Since I work with my hands, I find a ruffley cuff to be sort of annoying in everyday wear, and since this linen has a lot of body, it’s for the best that I left it off. I just turned the cuff into an elastic casing.
On the topic of sleeves. I typically make a 5/8” - 3/4” narrow shoulder adjustment. For this pattern, I made a sloppy, on the fly adjustment, bringing in the shoulders 2.25”!!! That is a lot! But I looked like a football player otherwise. I’m glad I did this, but the consequence of doing it after cutting my fabric, is that it made the sleeves shorter (I can live with it, but not my preference).

It is really difficult to capture this color in photos! I blended my own mix of Rit dyes, using their flourescent yellow, and it provided a glow that doesn’t translate to pictures.
My final adjustment was to take in the bodice. I tapered from 0” at the armpit, to 2” on the flat at each side seam. This means I removed a total of 8” ease from the hem circumference. It is still quite full, but totally within the wearable spectrum.

The high neckline is the perfect balance to the plunging neckline! I love how low it dips for such covered up style.
This pattern is borderline (no, all the way) ridiculous. I love the drama of it, but I’m also glad I made a blouse as my “test garment” instead of diving in. I think the ideal fabric for this would be super light weight, sheer, and drapey. This tissue weight linen has too much body.
I probably won't sew this again because I have so many vintage nightgown patterns, and most of them are a little more realistically wearable. But maybe, because I really enjoyed the process of sewing this, and I remain fascinated with the View 1 collar. Obviously, I deviated from the pattern considerably, but I can say with confidence that the pattern matches the illustration, and it was well drafted. The collar pattern pieces are very interesting shapes, and everything fit together precisely, pintucks and all. I don’t think anyone needs to seek out this pattern, as there are plenty of other places to find pin tucks and nightgowns, that don’t require major sewing surgery. But if you have this tucked away at the back of your stash, I don’t know, maybe it’s time to make that billowing nightgown of your wildest dreams! Be sure to let me know if you do. XO, Martha