MY QUILTED DREAM COAT: Part 3, Adding Collar, Pockets, & Closures
This is the third installment of my series about making this quilted coat, completely from scratch. To get the full story, you can start with my first post, which focuses on the materials used and piecing. After that, you might want to read my second post, which covers the patterns I used, and much of the construction of the quilt and the coat.
Sometimes, once you are at the point of being able to try a garment on, and you can finally imagine it finished, you still have more work than ever ahead of you. These final steps are the most visible, and in some ways most important steps. This coat certainly required a lot of work, but the steps towards the end were the most fun because I got to make decisions on details that are both functional and aesthetic. In this post, I’m going to talk about:
Adding the collar
Adding pockets & related troubleshooting!
Closures: my favorite journey every time.

Work in progress: adding the collar. I left my thread tails long and sewed them in, so there would be no visible back stitching.
ADDING THE COLLAR:
Adding a collar is often an intimidating experience, and there are times when that is justified (a crisp white shirt, a coat made from expensive wool), but this is not one of those times. If you mess up, you can make another one - it’s just scraps anyway! I am sorry I don’t have photos of this part, but I’m going to do my best to explain how I constructed the collar. It was a simple process as far as collars are concerned.
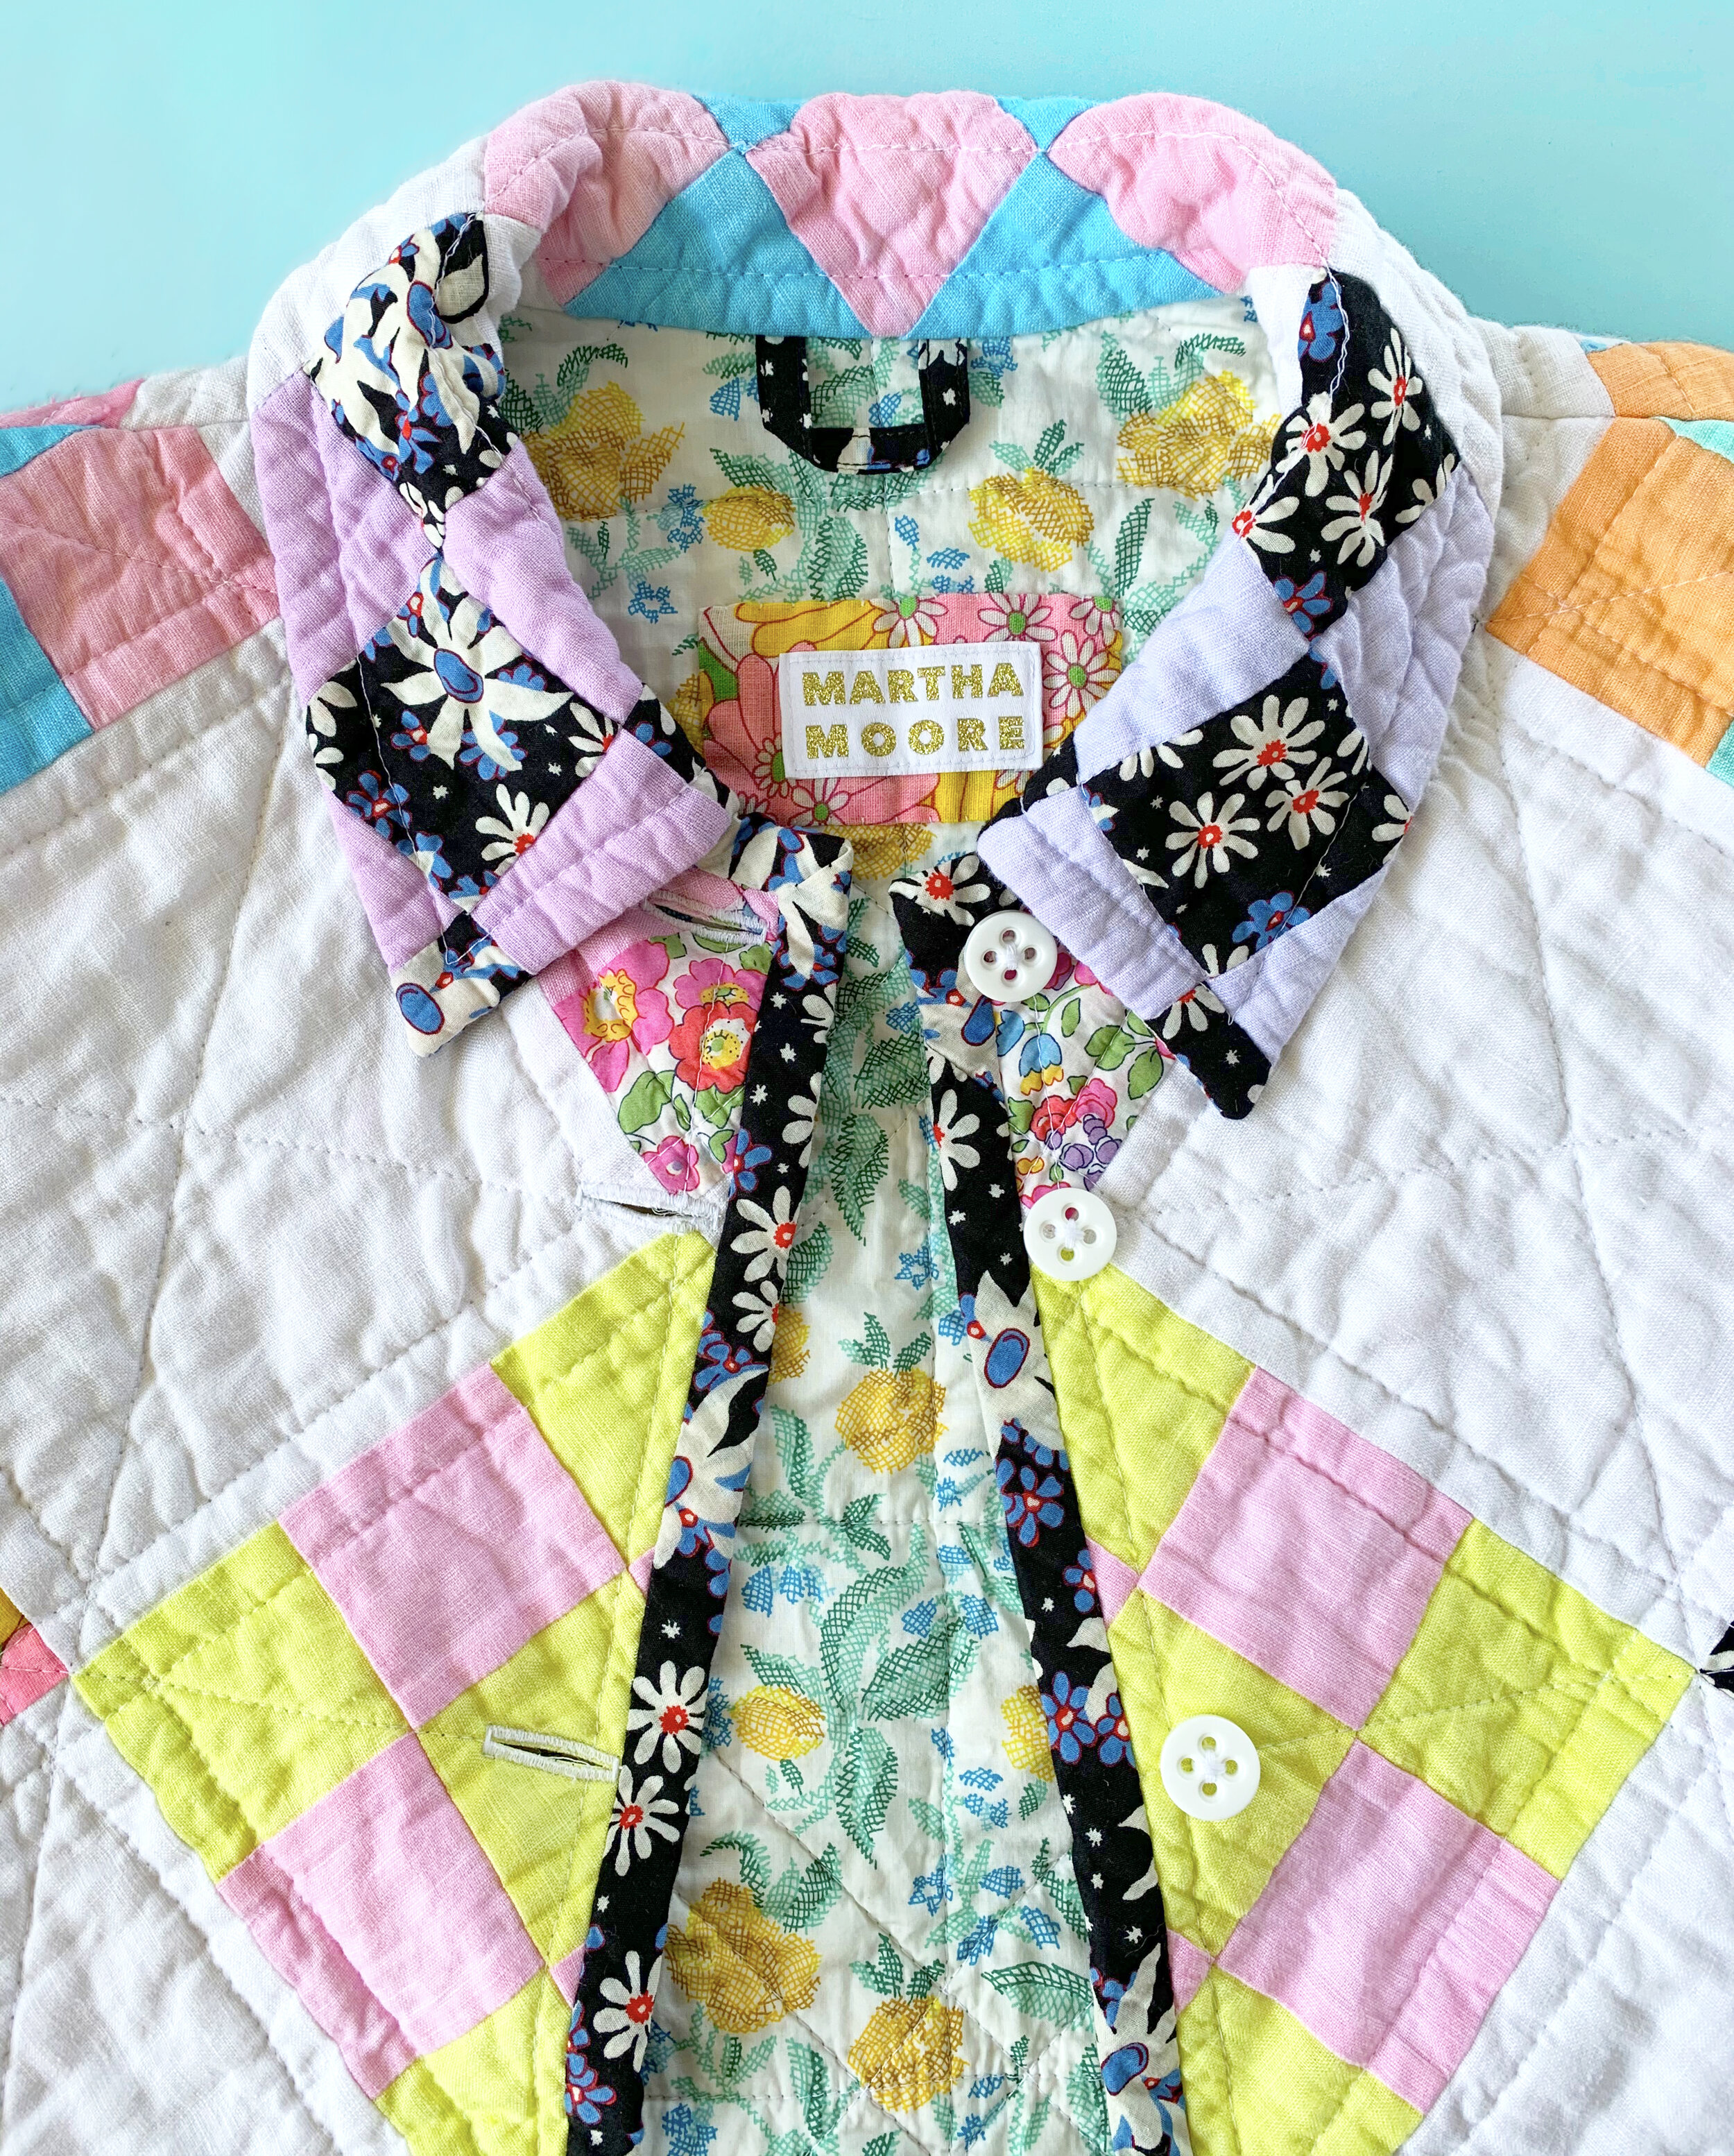
I cut my collar and undercollar as per the pattern. I cut my batting as if it was the interfacing. I constructed the collar as I would for any shirt or coat: sew right sides together except for the long seam that attaches to the neckline, trim and clip seam allowances (removing as much batting as possible), and flip right-side-out. This makes it nice and clean. Then, with the top collar touching the inside of the coat lining, and the under collar layer hanging free (not pinned), I pinned the collar on. I sandwiched my hanging loop inside this seam, and sewed it by machine (that is what you can see in this photo). The under collar remains unattached, and nothing is quilted yet.
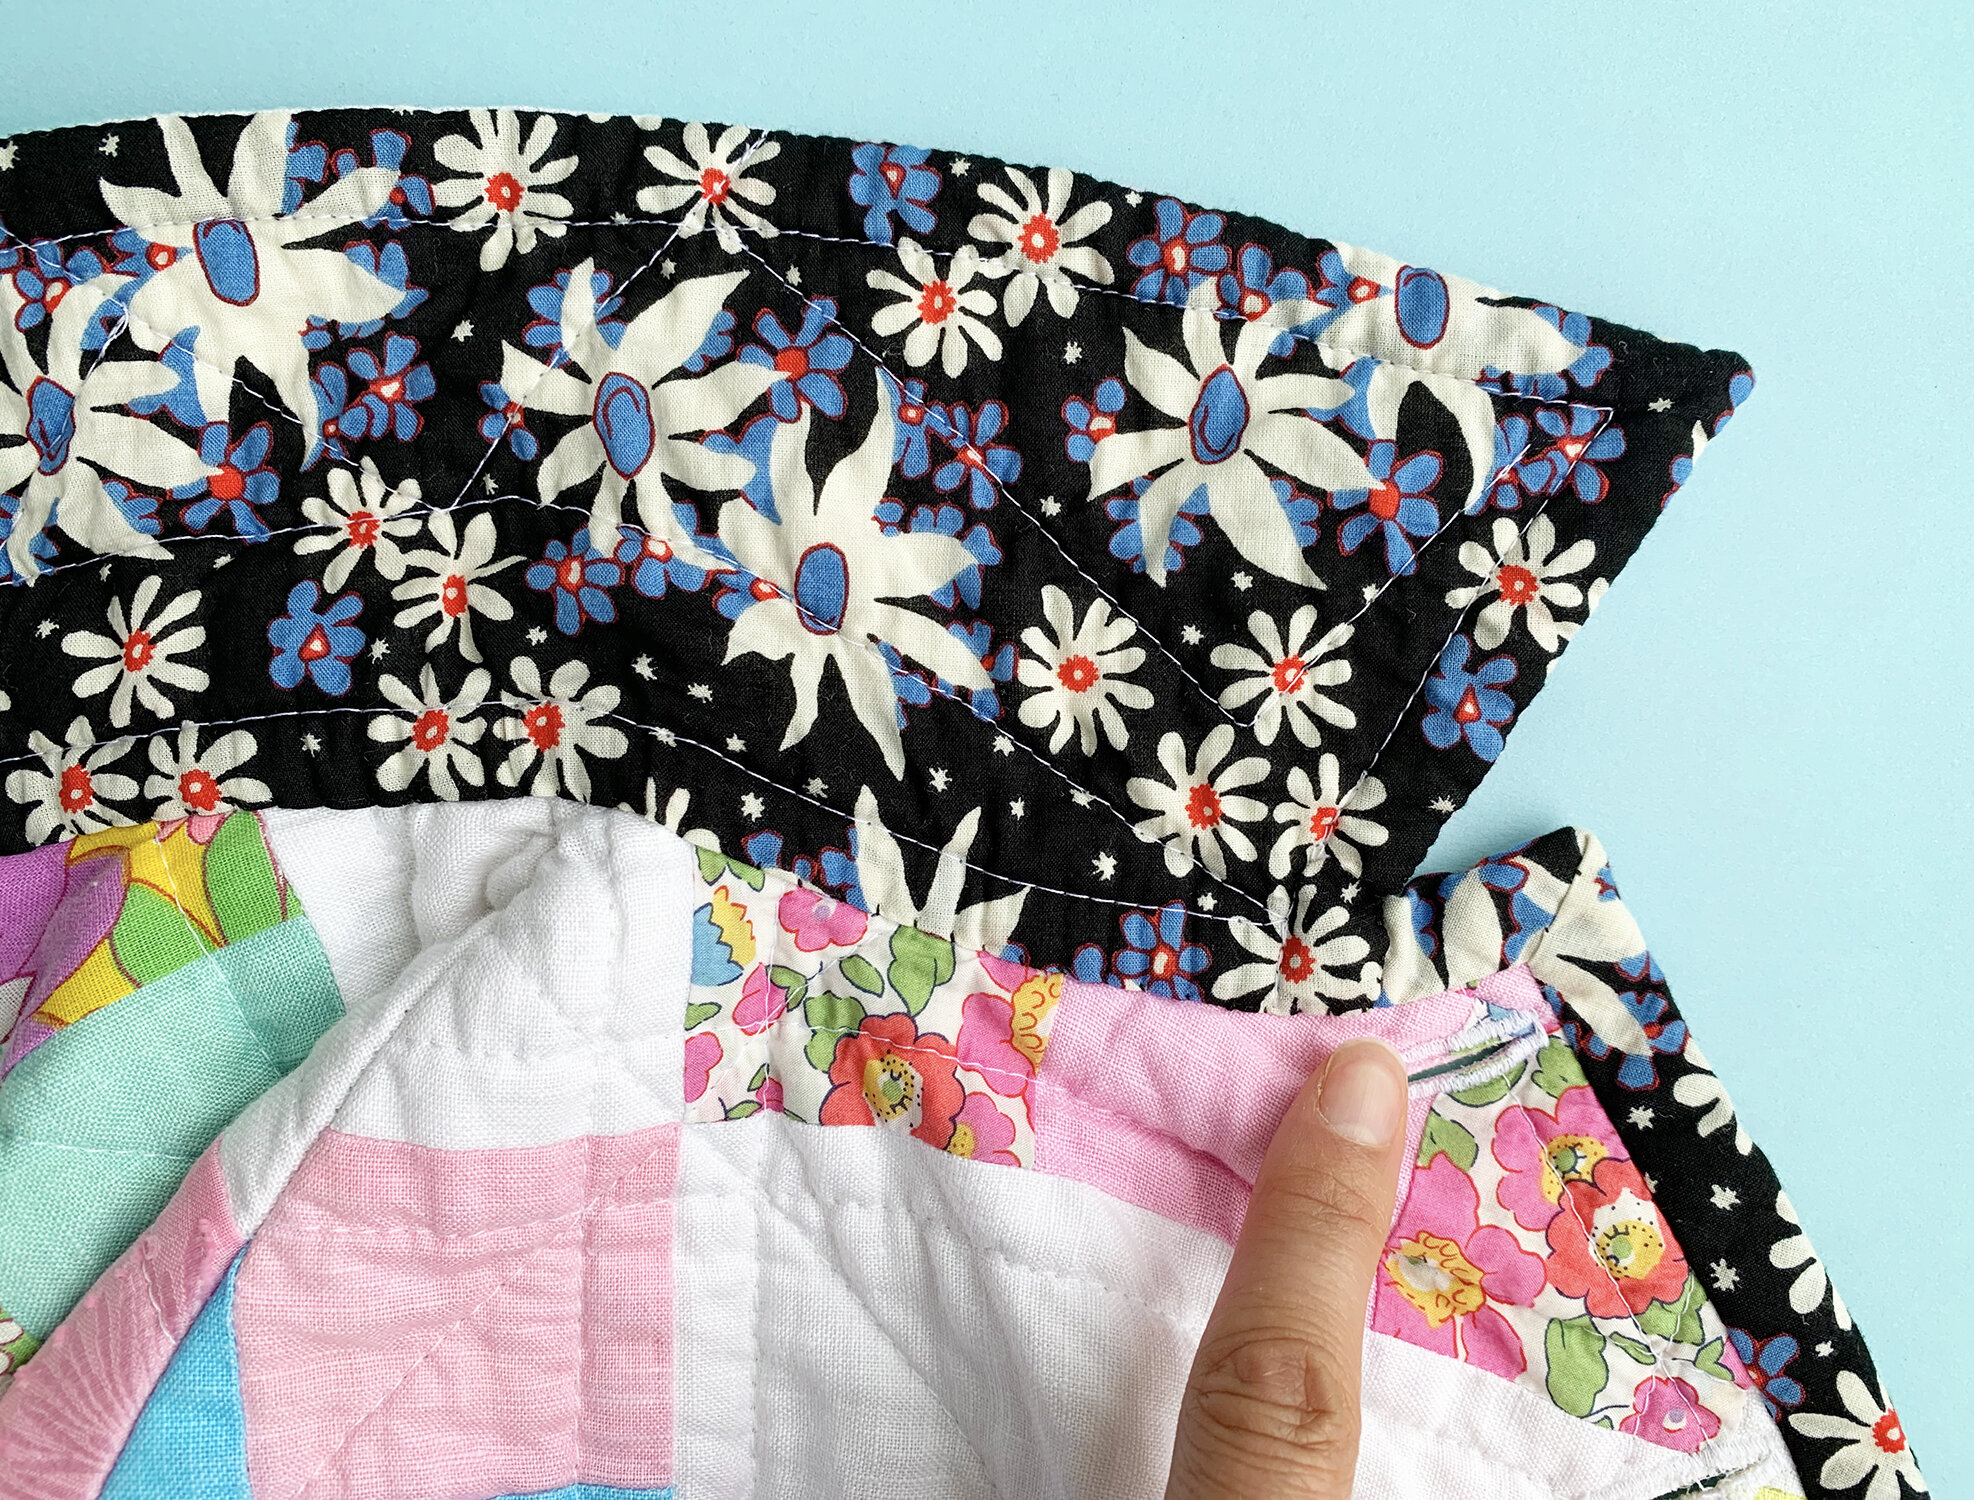
My finger is pointing to the spot where the bias binding at the edge of the coat goes inside of the collar. This creates a super clean and strong finish all around.
Here you can see the undercollar. I folded the seam allowance inside the collar, pinned it in place, and hand sewed it down. When you look at the coat, you are usually looking at the inside of the neckline, and it is very cleanly machine finished.
Once the collar was fully attached, I quilted it. This felt sort of clumsy, because it is a small area of a big heavy coat! One of the lines I quilted is the roll line as indicated on the collar pattern - it might just be in my head, but I think it helps the collar roll at the right spot. I did not back stitch any of the collar quilting - instead, I left my threads long (see the previous picture), pulled them through to the back side, knotted them, and then buried the knots inside the quilting using a long needle. Tidy!

ADDING POCKETS:
Oh man. Pockets. I had to step away from this project for a couple of days just to think about pockets. I was so in love with the overall appearance of the patchwork, that I didn’t want to disrupt it in any way. Usually, I would think welt pockets would be the most discrete, so I considered the pattern pieces that come with the Tamarack Jacket. But to be placed at a comfortable height, They would land at a disruptive spot, and would read as horizontal in a diagonal world. The slanted welt pockets from Step Up Sewing are my favorite coat pockets, so I thought about modifying them to have the same diagonal slant as my patchwork, but again, to be at a comforble placement for my arms, they would be super fussy to get right.
You know what is a reliable pocket for a reason: the patch pocket. You can test it out before you commit, make it as big as you want, heck, you can take it off later if you change your mind! Sorted.
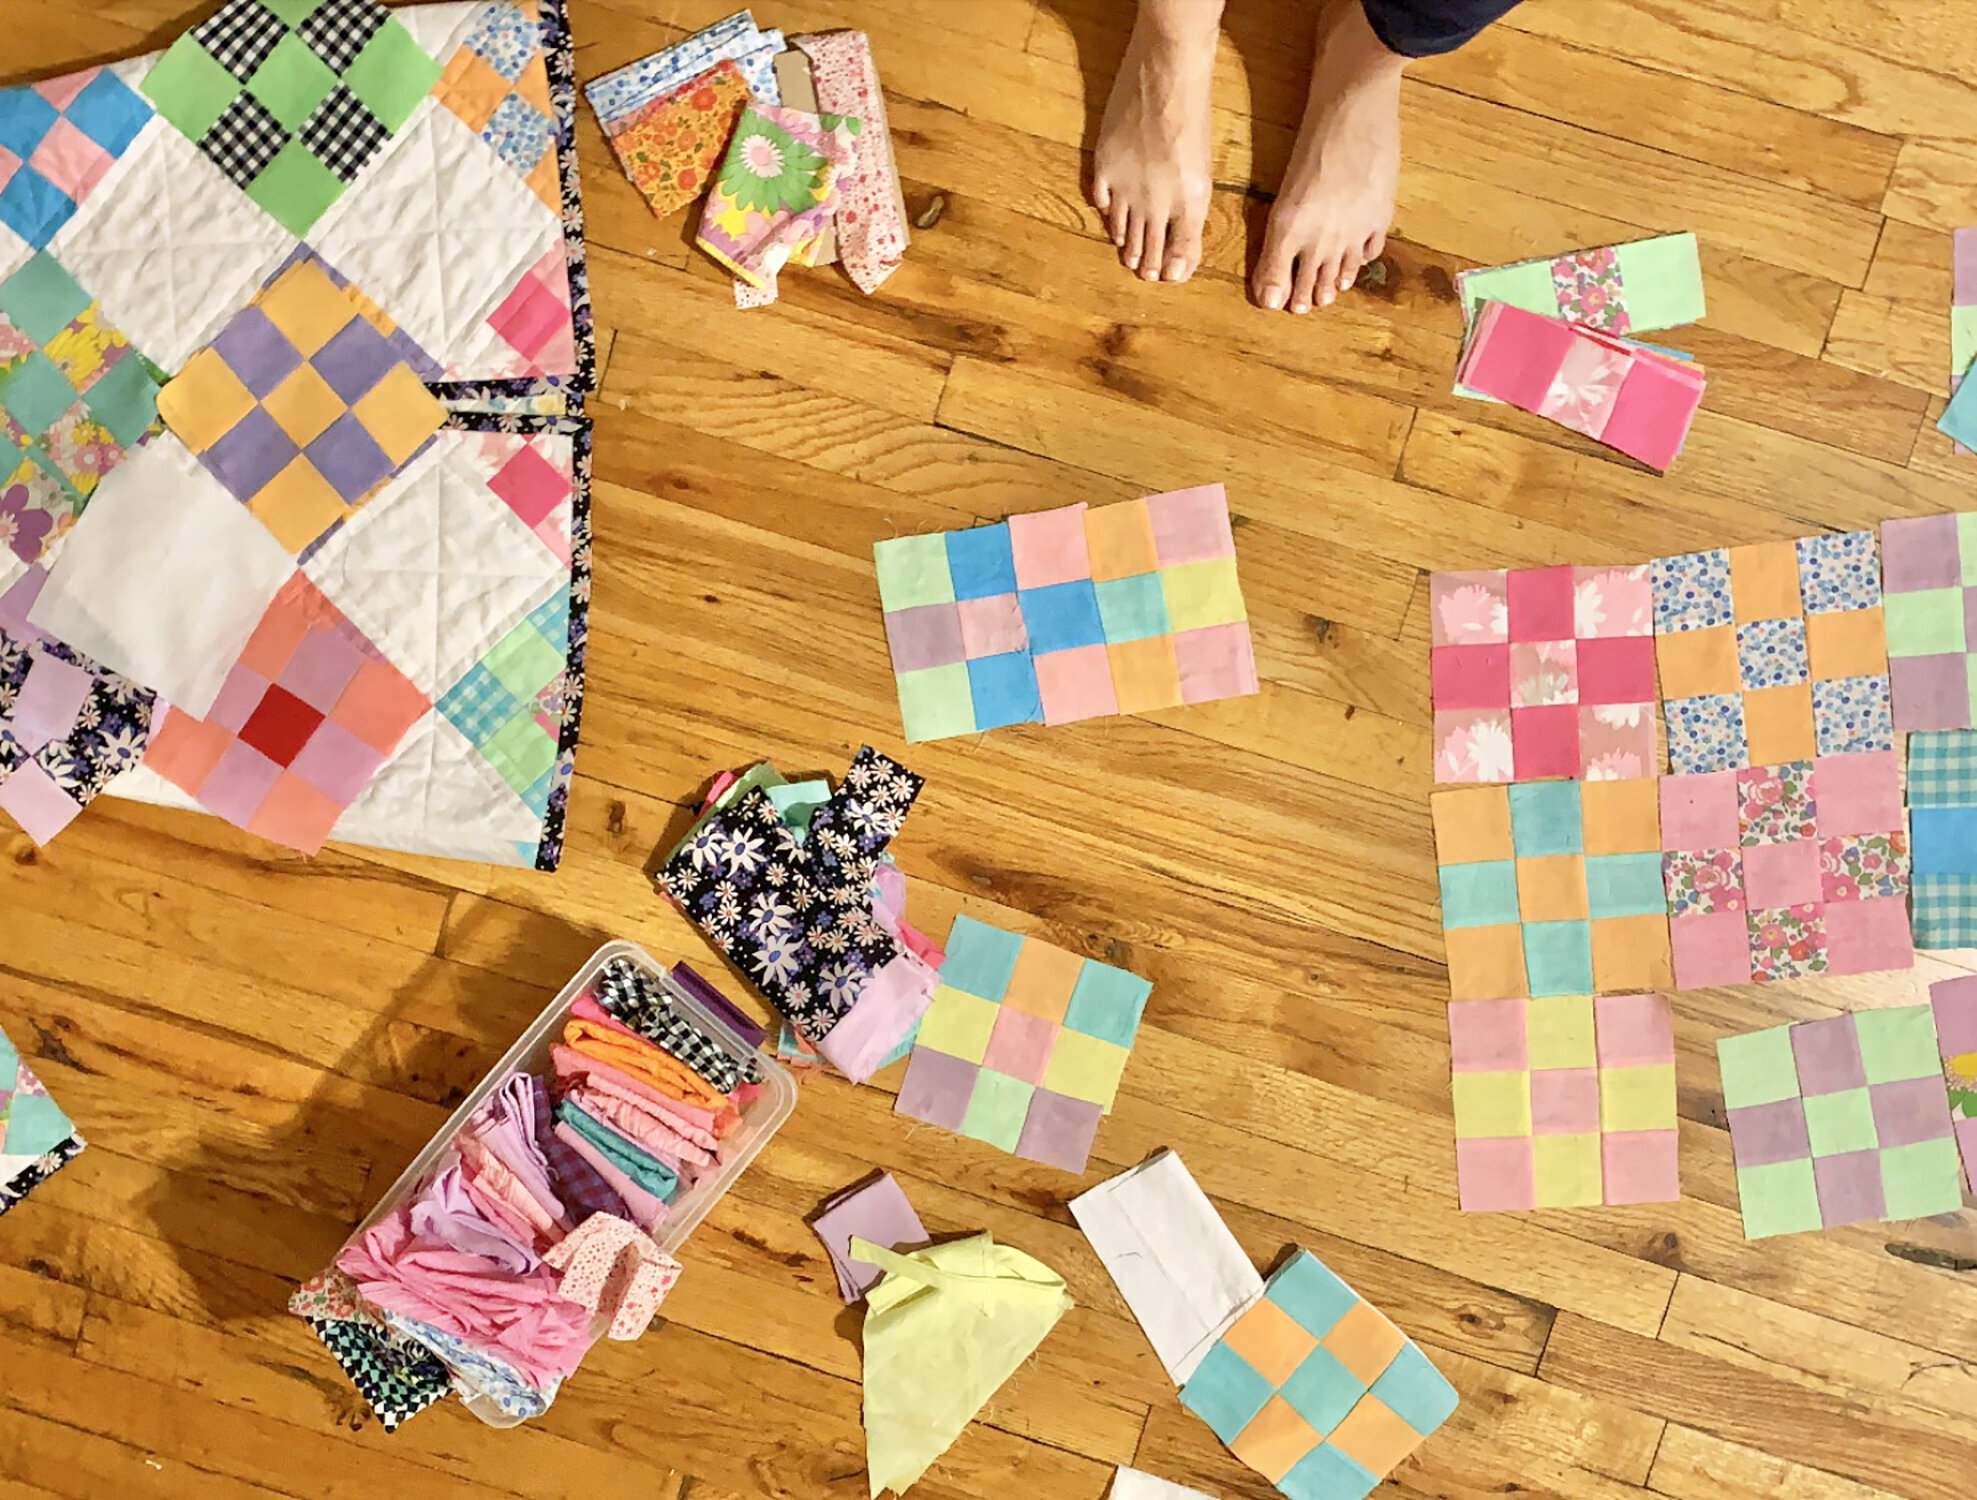
I can tell by the lighting that I did this late at night. Here I am pulling out all my leftover quilt blocks and scraps to find matching pieces to use as patch pockets.
I wanted to pattern match the pockets so they would be as hidden as possible. This of course meant dumping all my available quilt squares on the floor, making new ones as needed, and digging through my smallest scraps to get the last bits of the necessary colors and prints. Worth it! The pockets have batting and lining, and were constructed in the same manner as the collar.
Once the pockets were constructed, they looked like cute little oven mitts. I pinned them in place and hand sewed them down - I wanted complete control for pattern matching purposes! then, I topstitched them into place by machine, so they are nice and secure.

I also added 2 interior patch pockets. This vintage fabric was originally a little half apron from the 60s, that I have owned since college. I used to wear it layered over dresses. Isn’t the print fantastic? The apron had 2 little lace trimmed pockets on it. I picked them off and added them as interior pockets. They are slip stitched down around the edge, and then hand top stitched with back stitching (stronger than a running stitch). I now think these could use a bit of reinforcement, so I may machine stitch them at some point. These pockets fit an iphone or some tickets, etc.

A comparison test between 2 brands of snaps on scraps of my quilt sandwich.
CLOSURES:
Guys. You know. I love. BUTTONS. I love buttons!! Selecting buttons is always my favorite part of sewing a garment, and usually I don’t pick the buttons until the very end of sewing something. I went into sewing this coat wanting to use snaps. So I pulled out some scraps of my quilt sandwich (remember trimming the pieces down to size after quilting them?) and all of my various snaps and snap setting tools.
I tested 2 kinds of snaps: Dritz Heavy Duty, and very similar ones that I purchased at Tokyu Hands (the most fantastic craft store I’ve ever visited. It’s a chain store in Japan - and btw that’s not a typo, it’s Tokyu, with a “u” at the end). The snaps are very similar, but are set with different tools that crimp a little differently. Unfortunately, the results were the same with both.
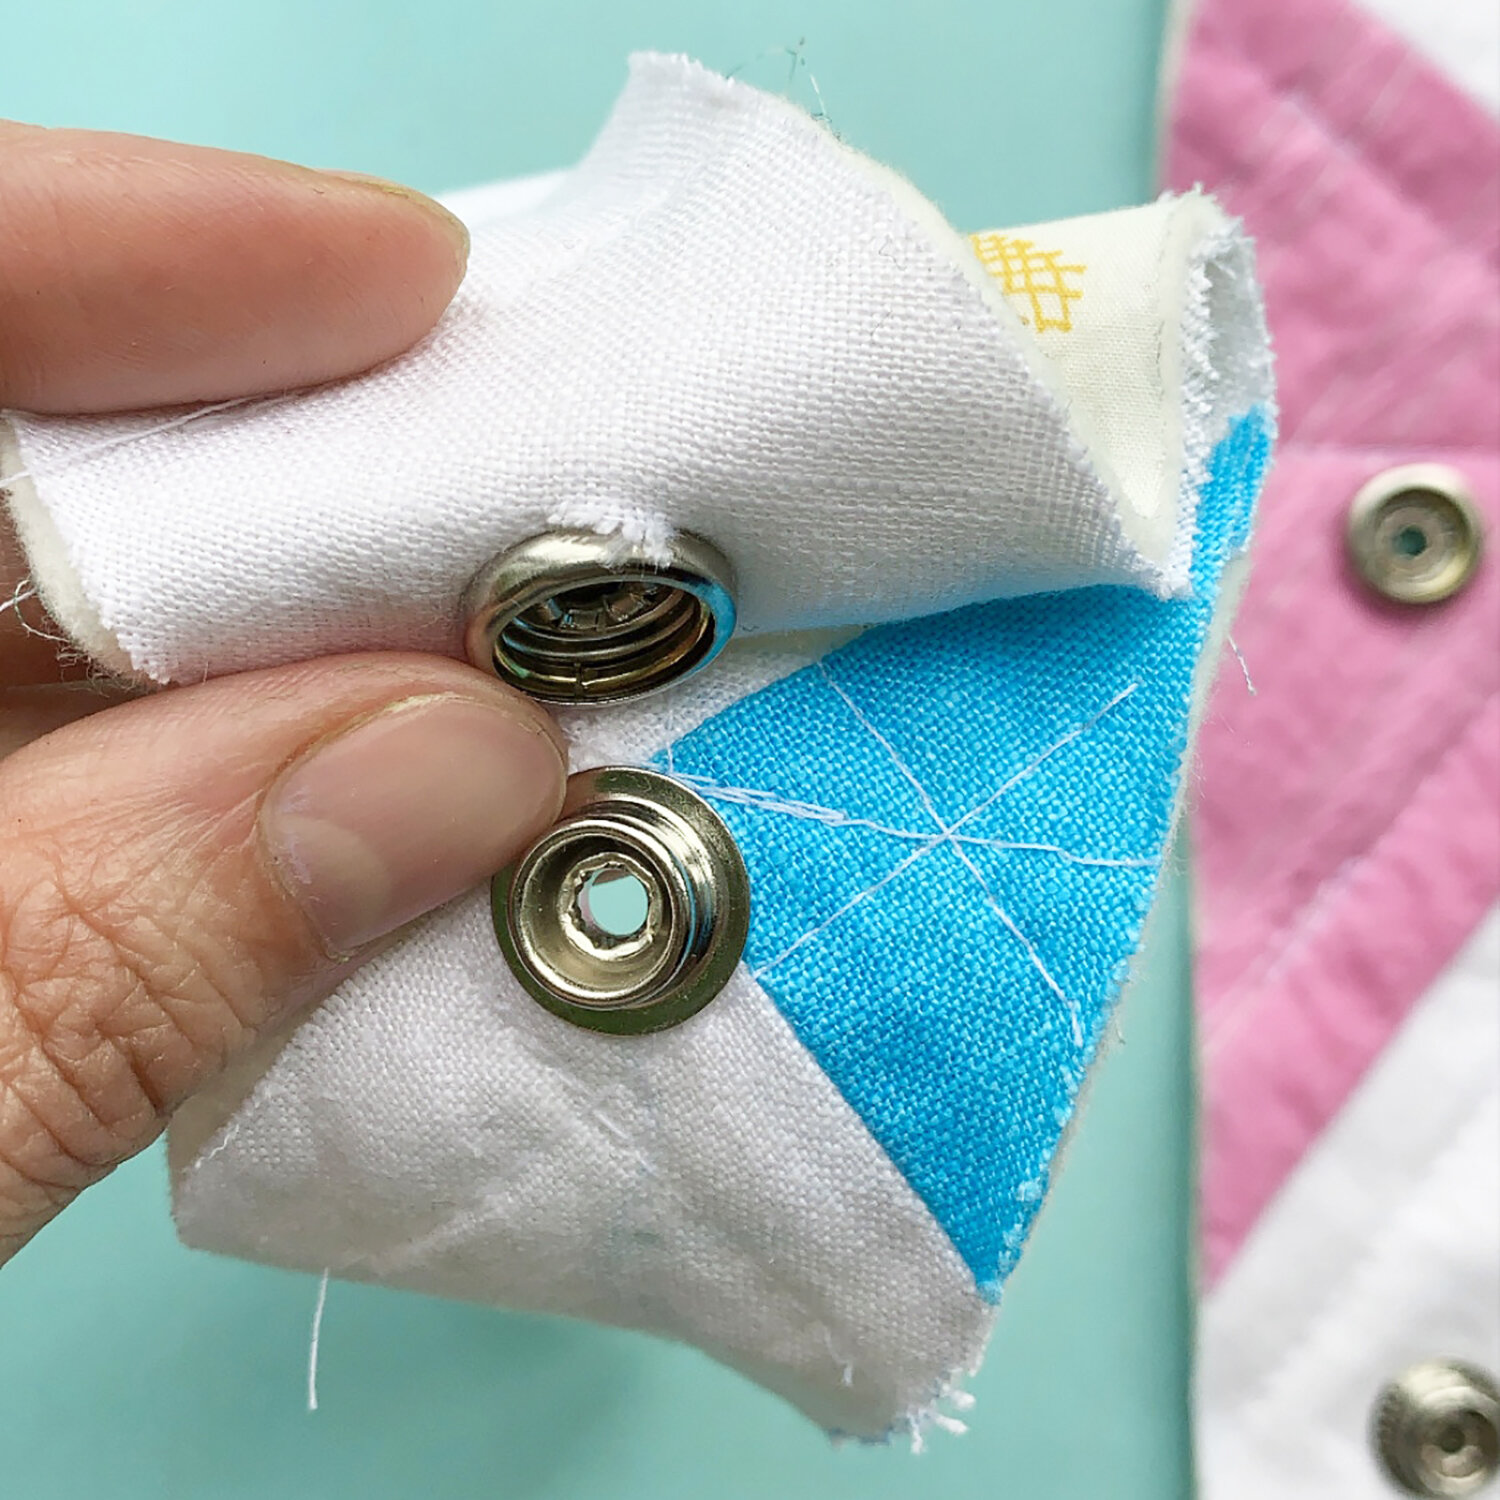
Earlier in this long tale of a quilted jacket, I mentioned that I used linen from my stash for the solid white blocks, and that I wish I’d had quilting cotton or even cotton lawn on hand instead. Here is why! Linen has many wonderful qualities, but those types of cotton would have been better for this application because they have a denser, tighter weave, and fray much, much less.
I cut the holes in my fabric using a small circular die, to minimize any ripping, but as you can see above, this fabric started to fray after about 25 test snaps. That wouldn’t work in the long run, so I just moved on. (I have used these snaps elsewhere with great success! You just need to use an appropriate fabric.)

So we are back to buttons! As soon as I realized snaps wouldn’t work, I thought of these buttons. I don’t remember why I bought these buttons, but it was pre-pandemic. The were the perfect size, simple but interesting, thick and substantial, perfect! They are a dense plastic, which gives me confidence about how they will hold up in the washer & dryer.
Speaking of! Quilts shrink when you wash them, especially the batting. It’s what gives them that beautiful crinkle. I decided to wash my jacket before adding buttonholes. That way, everything would be “pre-shrunk” before I added buttonholes, and the buttonholes wouldn’t warp or buckle.

Even though I prewashed all fabrics, and even though I’ve never had issues with dye transfer or running when using Rit dye, I was nervous to wash this for the first time. I wanted the white to stay bright, and the colors to remain vibrant. I used Shout Color Catchers. Nothing in these posts is sponsored! That’s just what I used. And thank goodness I did, because look how dirty the 3 sheets I used ended up. This photo looks a little dingy, but it’s just because I took the pic in the basement.
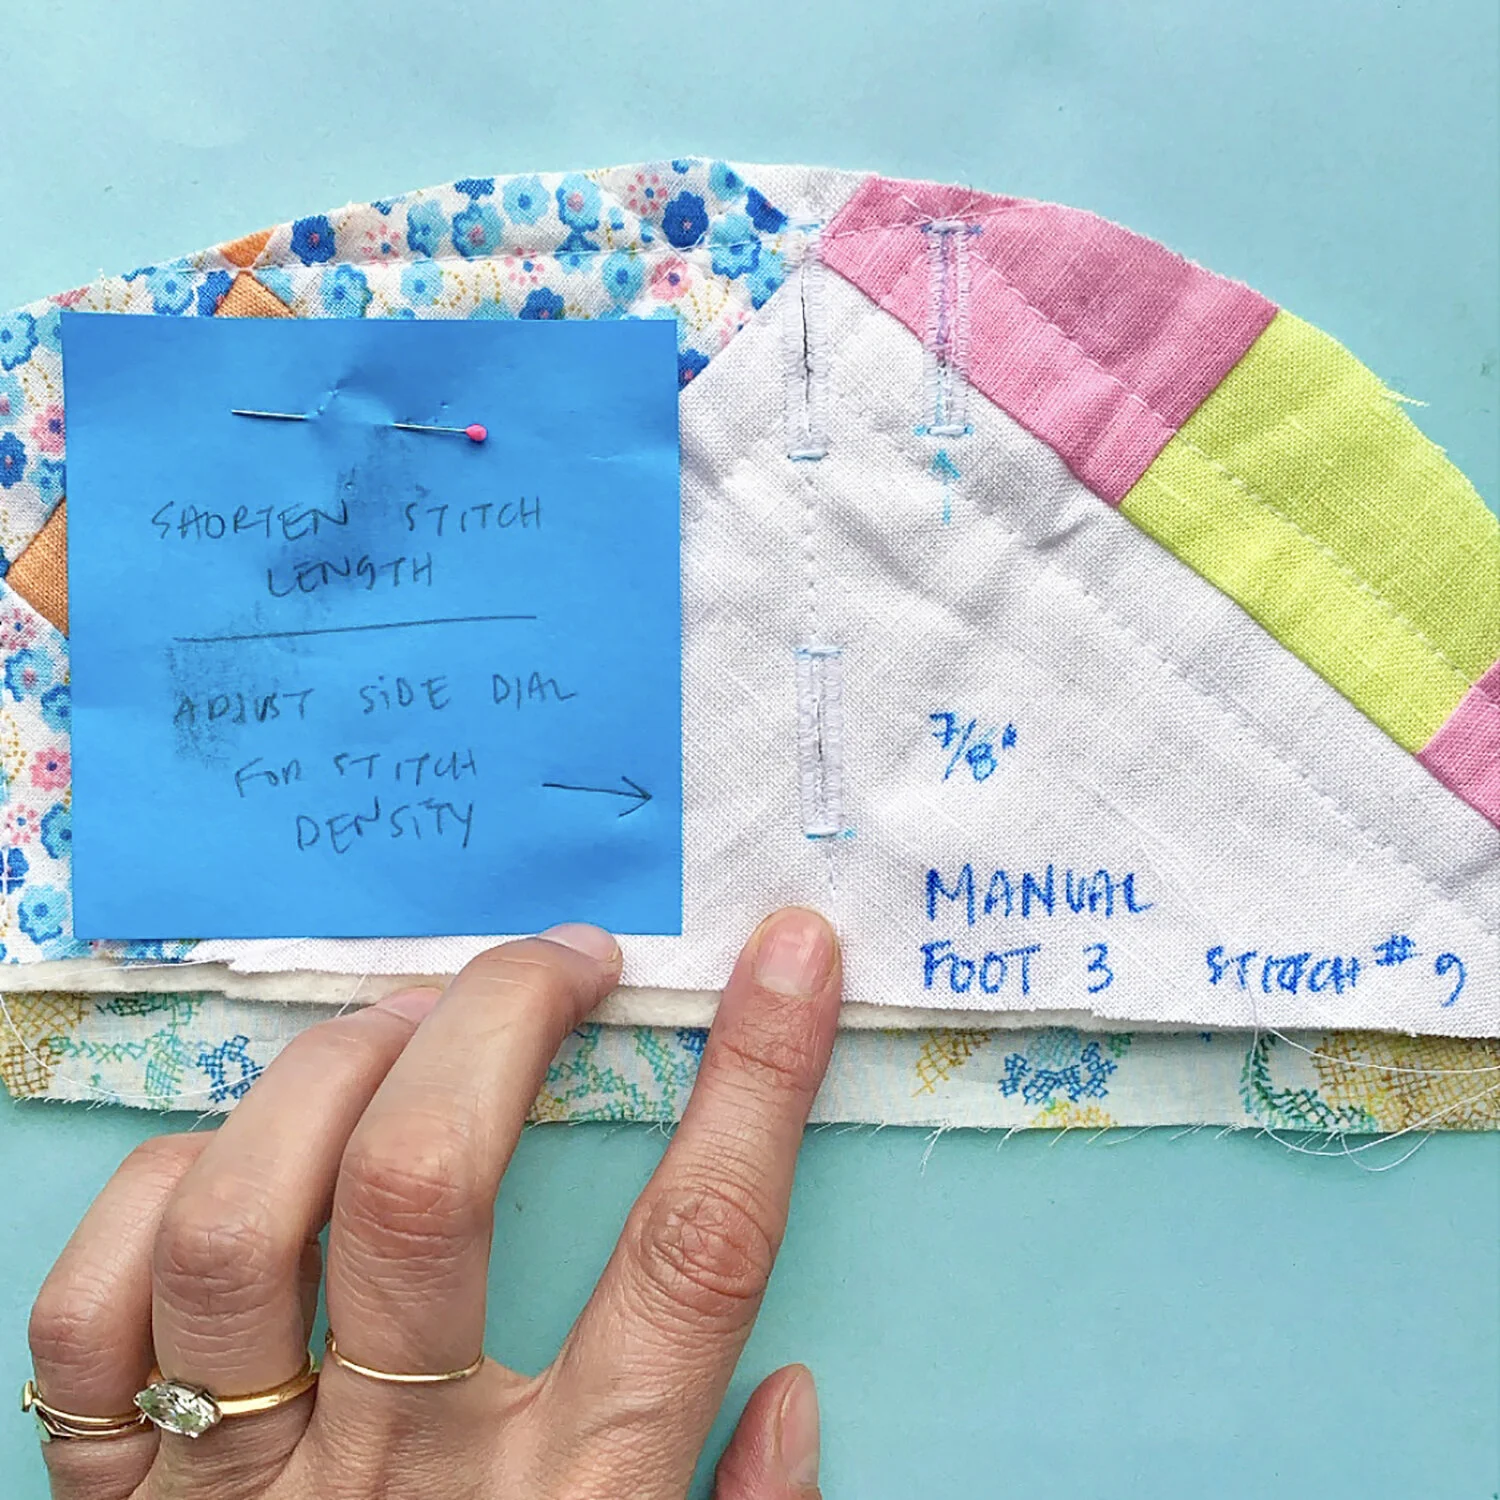
While the coat was in the dryer, I got cracking with practice buttonholes. I used my manual buttonhole foot instead of the automatic one, because I find the manual one can maneuver over lumps and bumps a bit better (it is smaller). I am really pleased with how the buttonholes came out. Placing them was easy peasy, because I was matching them up with the corners of the quilting blocks.

I’m not wild about that stitch tension on the label. Hmmm. Oh well.
The final detail I wanted to add was my label. I knew I’d use the gold & white one! I backed it in a scrap of the vintage floral fabric, and hand sewed it in, so the quilting pattern on the back of the jacket wouldn’t be disrupted. See what I mean about the last steps being some of the most important, most time consuming ones? Whew! I made it!
I’ll show you the full finished jacket in the next and final post in this series. Are there any details you’re dying to see that I haven’t shown yet? Let me know so I can make sure they are covered. Stay tuned! XO, Martha
If you have found this series or this post helpful, and especially if you are going to make your own version of my quilted jacket design, please consider making a “tip” to my Kofi account. Any amount is appreciated, but please consider what you would pay if this had been a pattern offered for sale, or a class you could take online. Thank you so much, I am so thankful for your support.