MY QUILTED DREAM COAT: Part 4, Wearing the Coat!

This is my final post in this series about My Quilted Dream Coat! If you’re looking for lots more info, it can be found in my previous posts:
If you have found this series or this post helpful, and especially if you are going to make your own version of my quilted jacket design, please consider making a “tip” to my Kofi account. Any amount is appreciated, but please consider what you would pay if this had been a pattern offered for sale, or a class you could take online. Thank you so much, I am so thankful for your support.
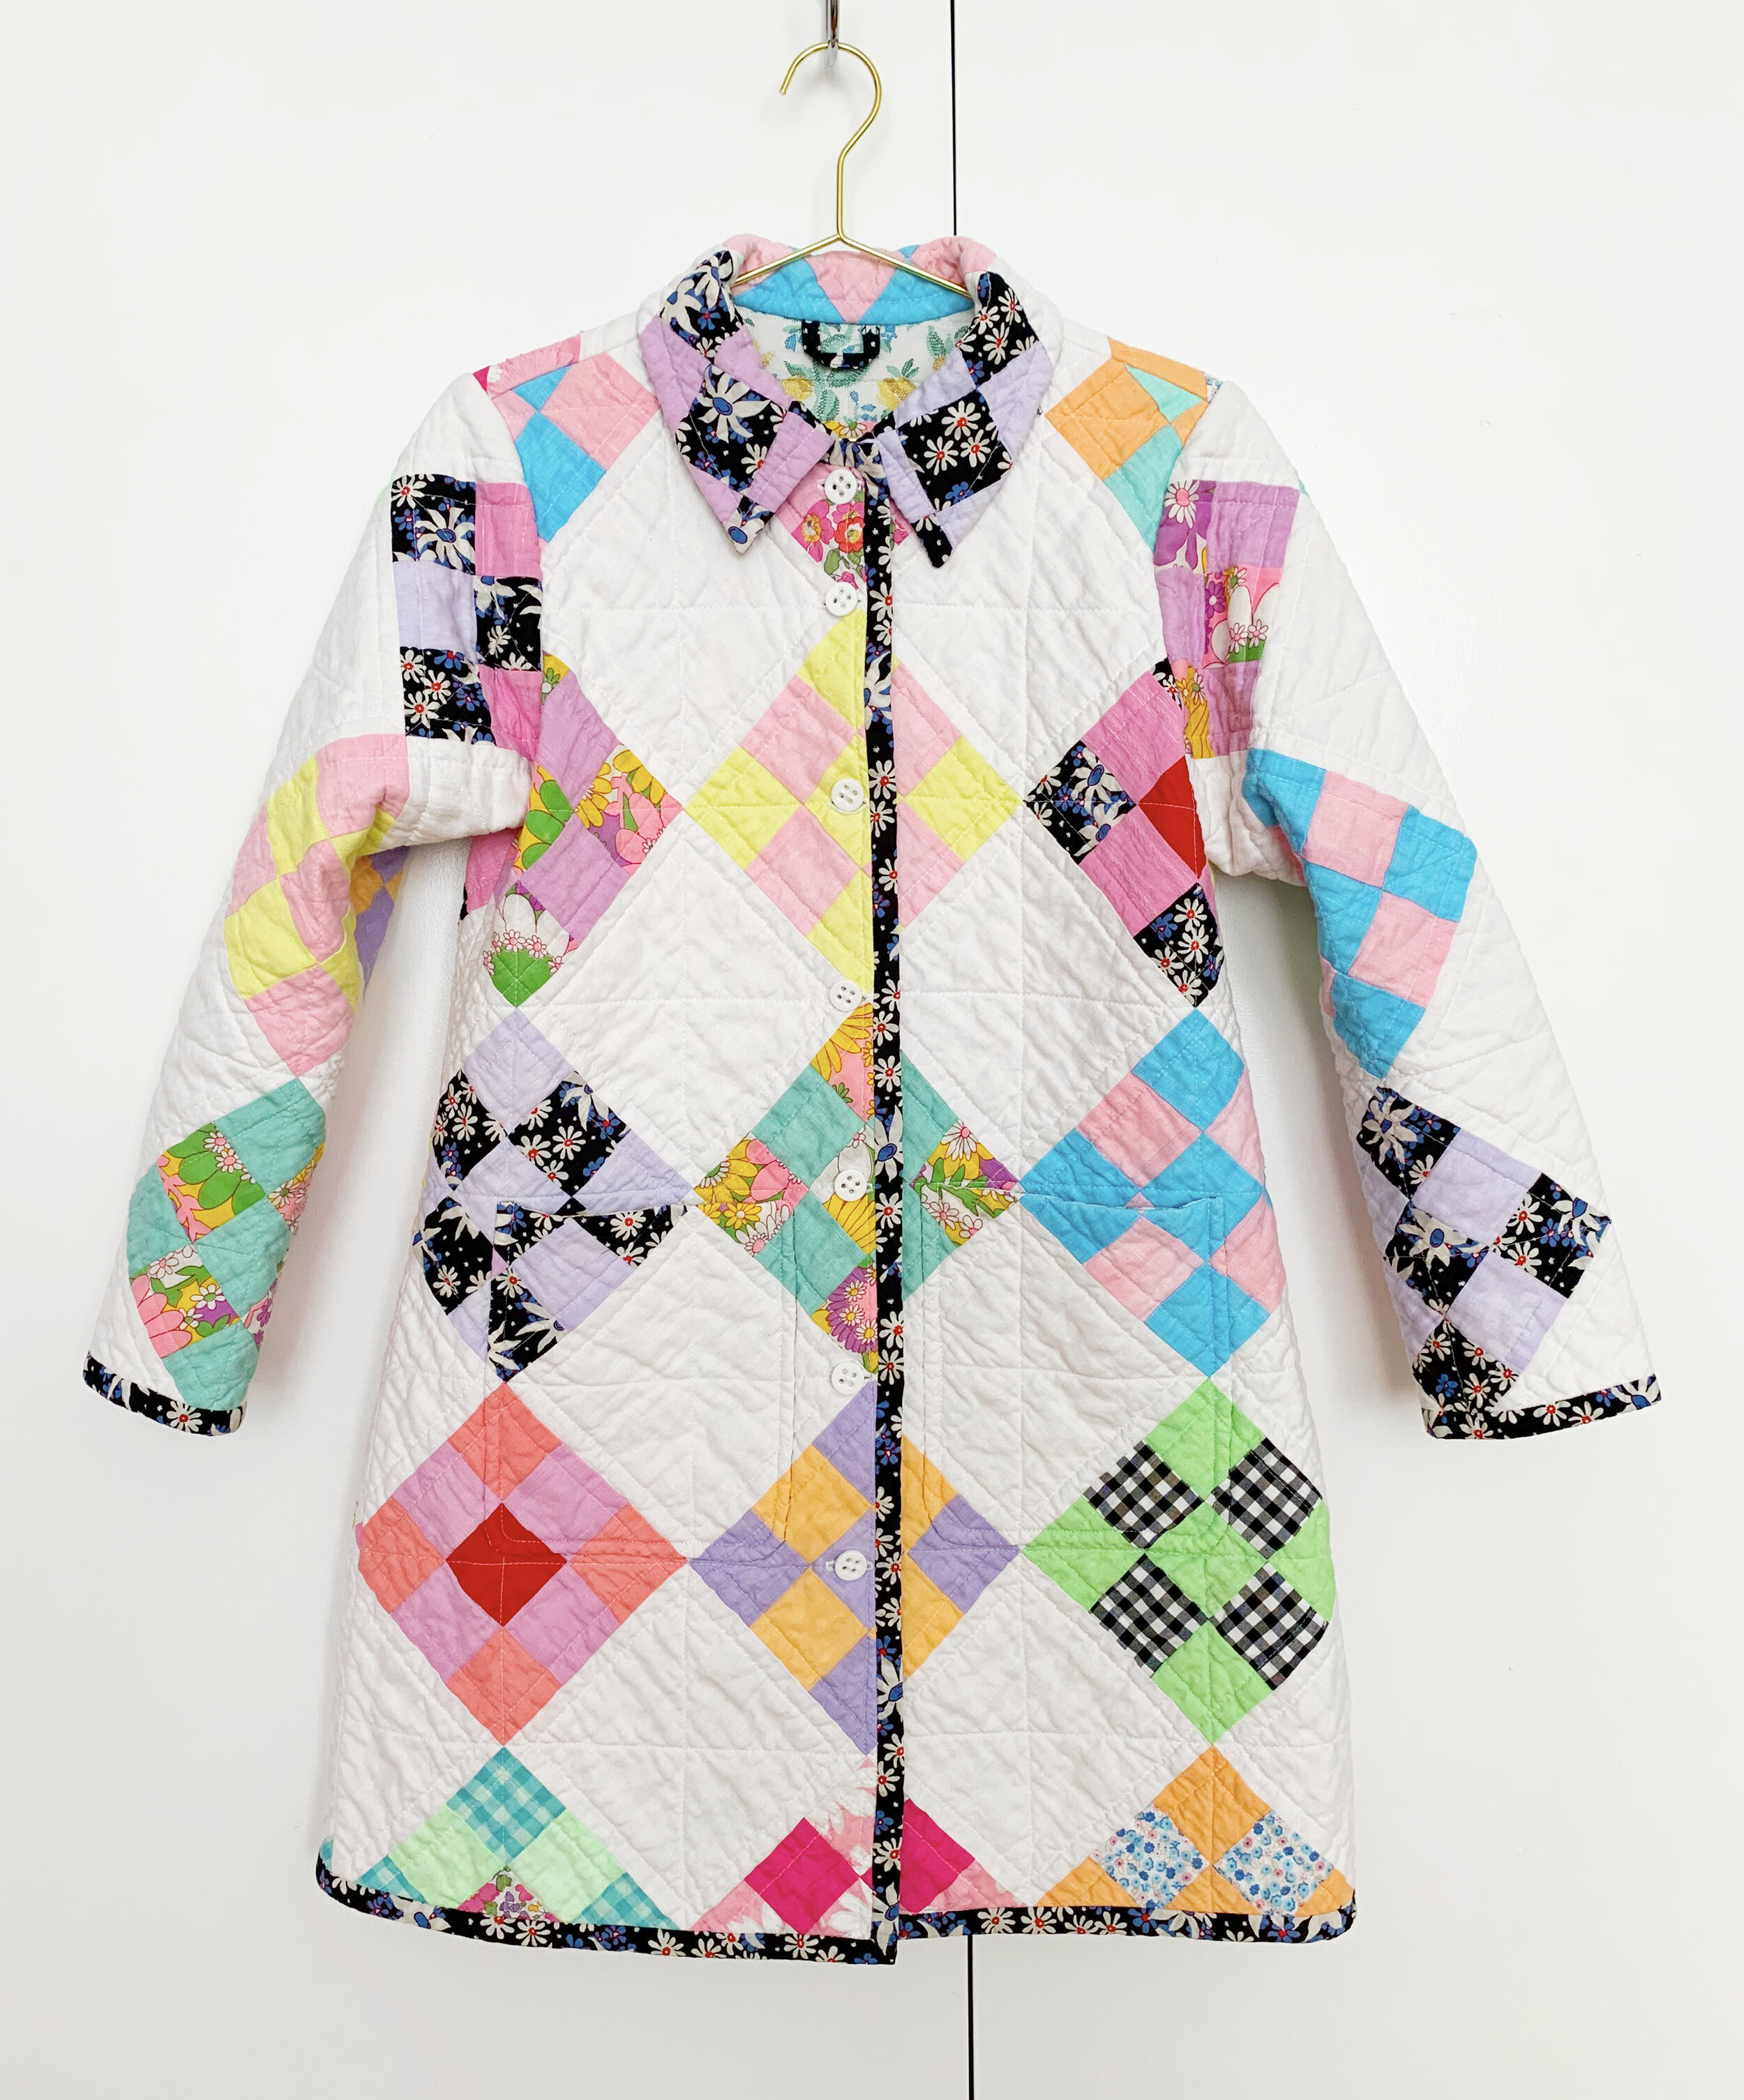
When you sew a quilted coat from scratch - making your own quilt and then making the jacket - you know every seam, every little idiosyncracy of each fabric used and the finished garment. This jacket is permeated with magic, I can feel it! I love wearing it, or even just sitting with it in my lap. The first time I wore it out, a man yelled “Wow, I love your coat!” within a block of leaving the apartment.
Just as with my Quilted Reversable Wiksten Haori, (which has become so soft, btw) I know this will last a long time. It can be thrown in the washer & dryer when it needs to be freshened up, and making repairs will only add to the quilted spirit and character. The more I wear it, the softer and more broken in it will get. A truly bespoke experience at every stage of the jacket’s life. I hope you can experience this joy, too. Let me know if you make a quilted jacket. I know you will love it. XO, Martha
PS: Save your scraps! You’ll want a matching mask. ;-)


This pic is so goofy but it captures how I felt when I finally got to wear the finished coat!