GALAXY JACKET - Part 1: Planning, Pattern Selection, Troubleshooting
If you read my most recent Sewing Plans post, you know that this Jacket was not on my list. But then, I’ve never made much effort to adhere to my plans, and I do usually make those things eventually! This fabric was an impulse purchase, and then, for reasons I will never understand, I had to sew with it immediately, in spite of being in the middle of a planned project.
(If you click any of the smaller photos in this post, they will pop out & enlarge.)
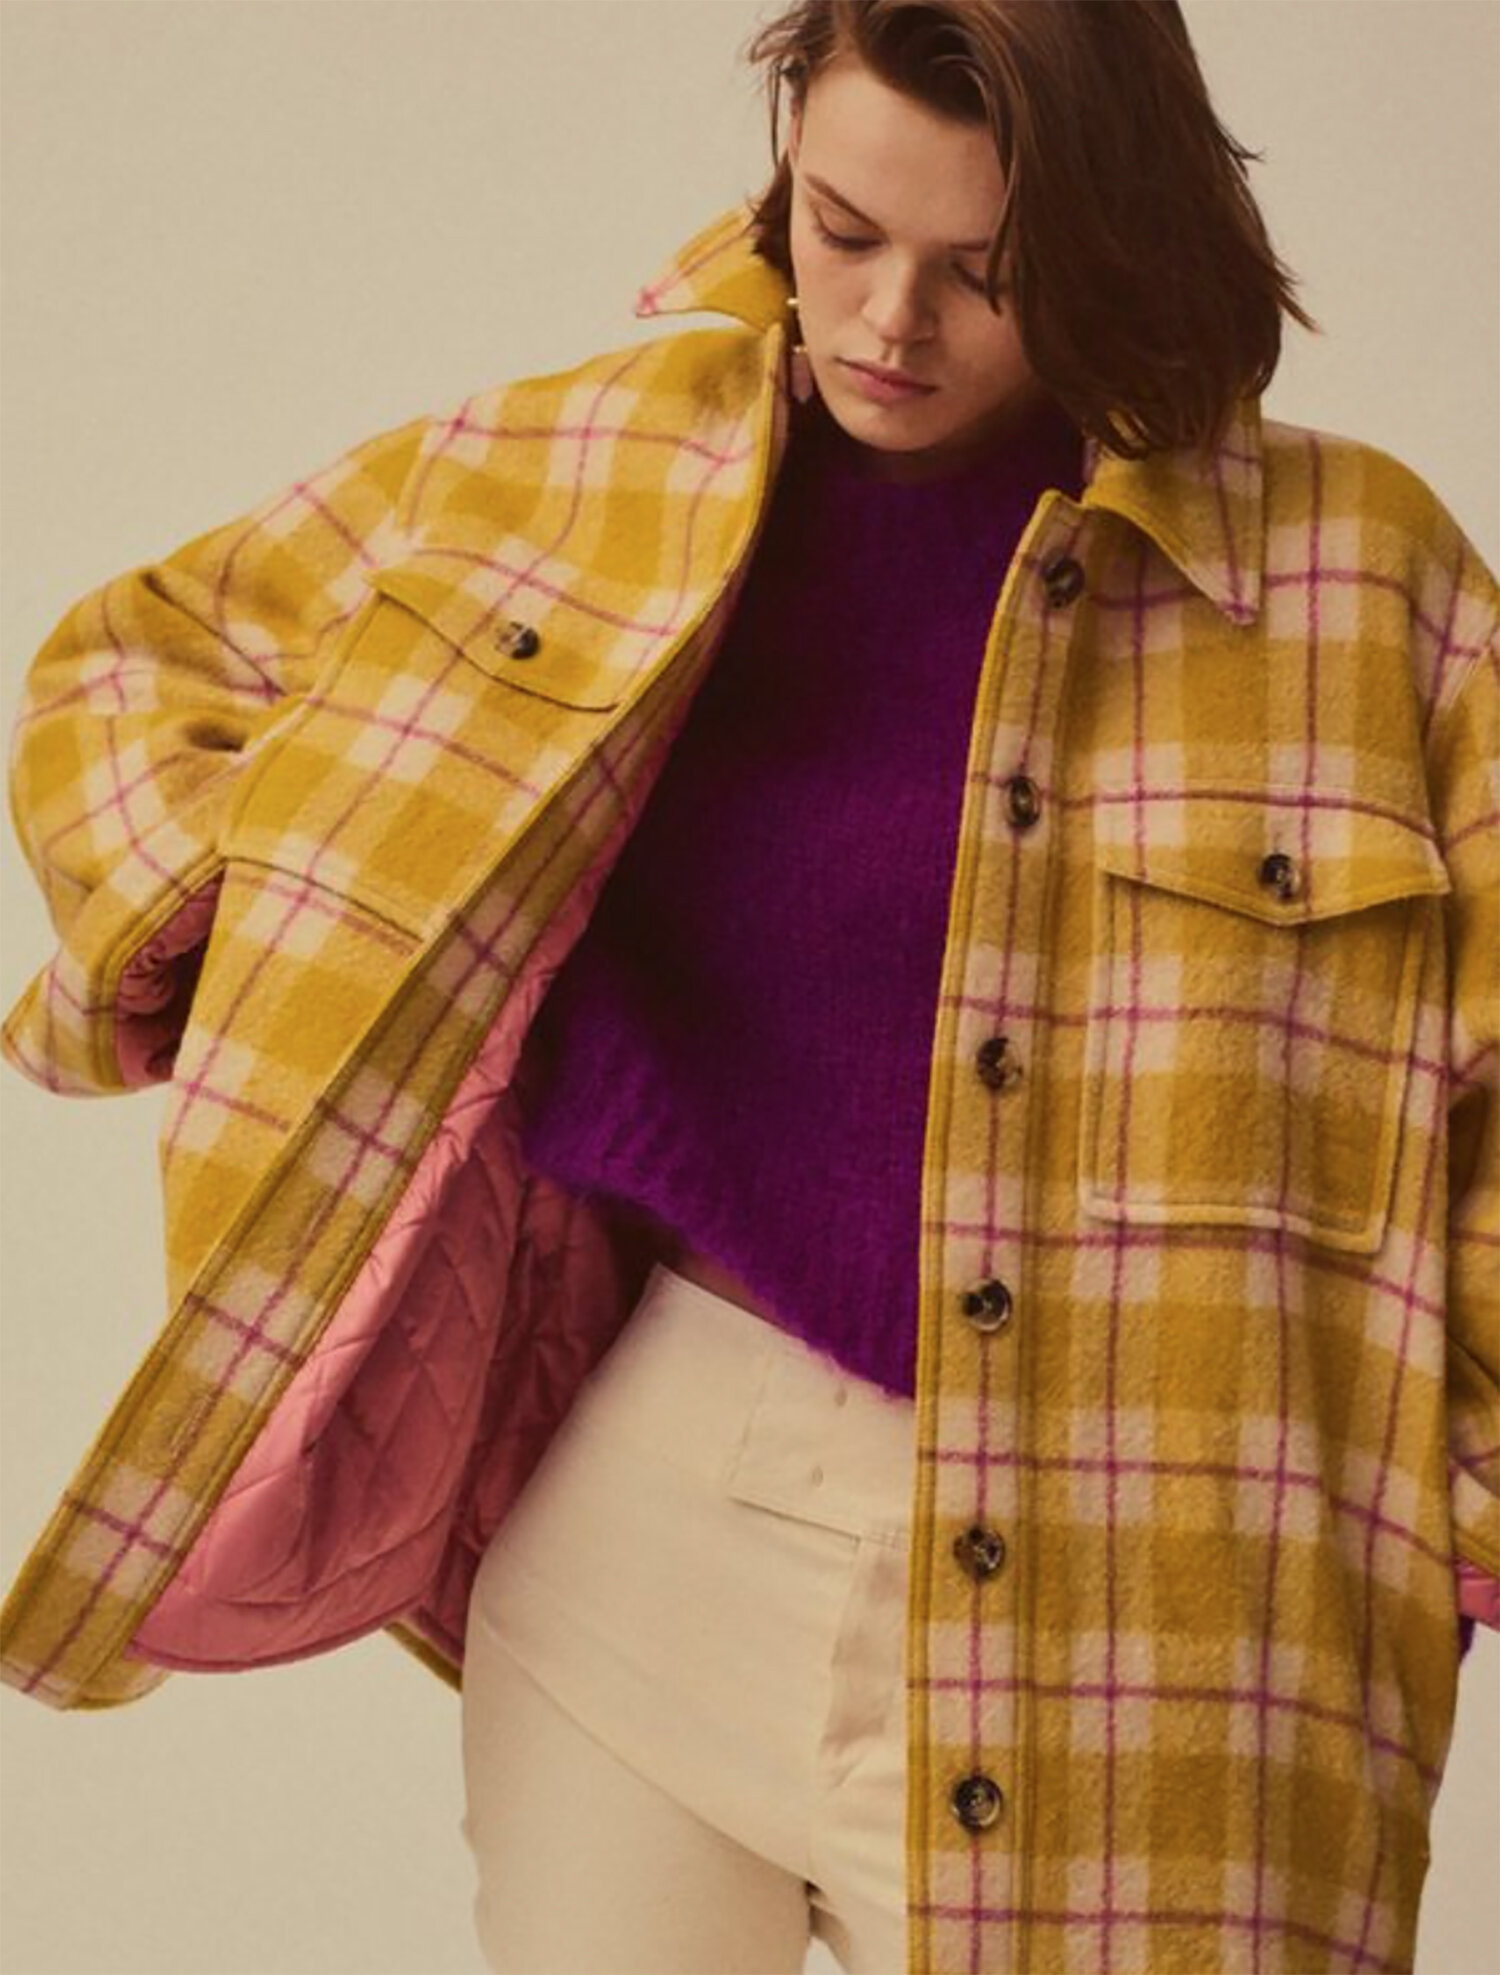

This year I’ve seen tons of “shackets”. That word grosses me out, so I won’t be using it again, but I do like the idea of a shirt-jacket - it’s a classic workwear look, with a casual vibe that matches our current state of permanent dressing down. I own an excellent vintage jacket like this from Filson, but it’s more fitted, so it’s too snug on my hips for me to style the ways I’d like to. The one I own is also unlined. I prefer having a lining in my outerwear pieces, both for additional warmth, and so my jacket always slides easily over my sweaters. Of all the Jackets I’ve pinned on Pinterest, this Isabel Marant version is my favorite. I love the boxy fit, the shaped hemline, and the quilted lining!
After looking at many such jackets, and fixating a bit too much on that Isabel Marant one, I pulled these two vintage Vogue patterns from my stash. They are lovely, and the patterns are different enough that I think both are worth hanging on to. These patterns are most appropirate for an unlined shirt or very light unlined jacket, but they got the wheels turning.

On the wool floor at Mood in Manhattan.
As for fabric: Jason and I popped into Mood on the day Joe Biden and Kamala Harris officially won enough Electoral College votes to secure the election. It was such an exciting day! Cars were honking, people were out in the street dancing! We took the ferry to Manhattan and walked to Times Square just to be part of it all. But then you know me, I couldn’t resist the siren song of fabric. I was overwhelmed by the events of the day, and purchased 2 yards this tweedy wool (and lucked out - there was a ratty 1/3 yard from where swatches had been cut that got left on my piece). It was impulsive! The fabric is 100% wool, quite soft with a brushed face, and a looser weave, which makes it pretty drapey. Notably, it’s too heavy to be appropriate for either of the patterns I pulled.
As such, time to pivot with my pattern selection. You know what would work a treat? The Merchant & Mills Foreman Jacket. Here is my previous version of it, which, against all odds, has become a well integrated part of my frilly wardrobe. I decided to make some simple, but important changes to the pattern, in order to achieve the desired shirt-jacket style. My To-Do list:
Make quilted lining fabric.
Slash and spread front and back, to add width and swinginess through the hip.
Lengthen jacket and create an exaggerated shirt tail hem.
Make collar pointy (it’s drafted “square”), and make a removable faux shearling collar.
Eliminate facings as per pattern, re-draft facings and draft lining.
Add functional button cuffs.
Add some exciting pockets!

In between drafting pattern pieces, I completed a task that took me forever, annoyed me, and was absolutely worth it. I quilted my lining. I wanted the look (as per the Isabel Marant inspiration), and I knew it was a great opportunity to add warmth. Last winter, I made my favorite wool coat with flannel underlining. If you need to add warmth without much bulk, I highly recommend it. For this project, I took a different approach by quilting the flannel to my lining. You can also purchase pre-quilted lining, but all the ones I saw in midtown had polyester batting, and I wanted to keep my fibers natural.
My purple lining fabric is from It’s A Material World in Midtown (read about it here!), and it is a rayon/silk blend. It’s very light, silky, non-staticky….just right. The rayon/silk and the cotton flannel have very different personalities and sewing at an angle did present some challenges. My walking foot was essential here, and I worked in smaller pieces that were roughly the size of each pattern piece.


Having checked the quilted lining off my list, I moved forward with my flat pattern adjustments. They were all pretty easy changes. It’s worth noting, those changes were all made on top of the modifications I made for my camo version of the Foreman.
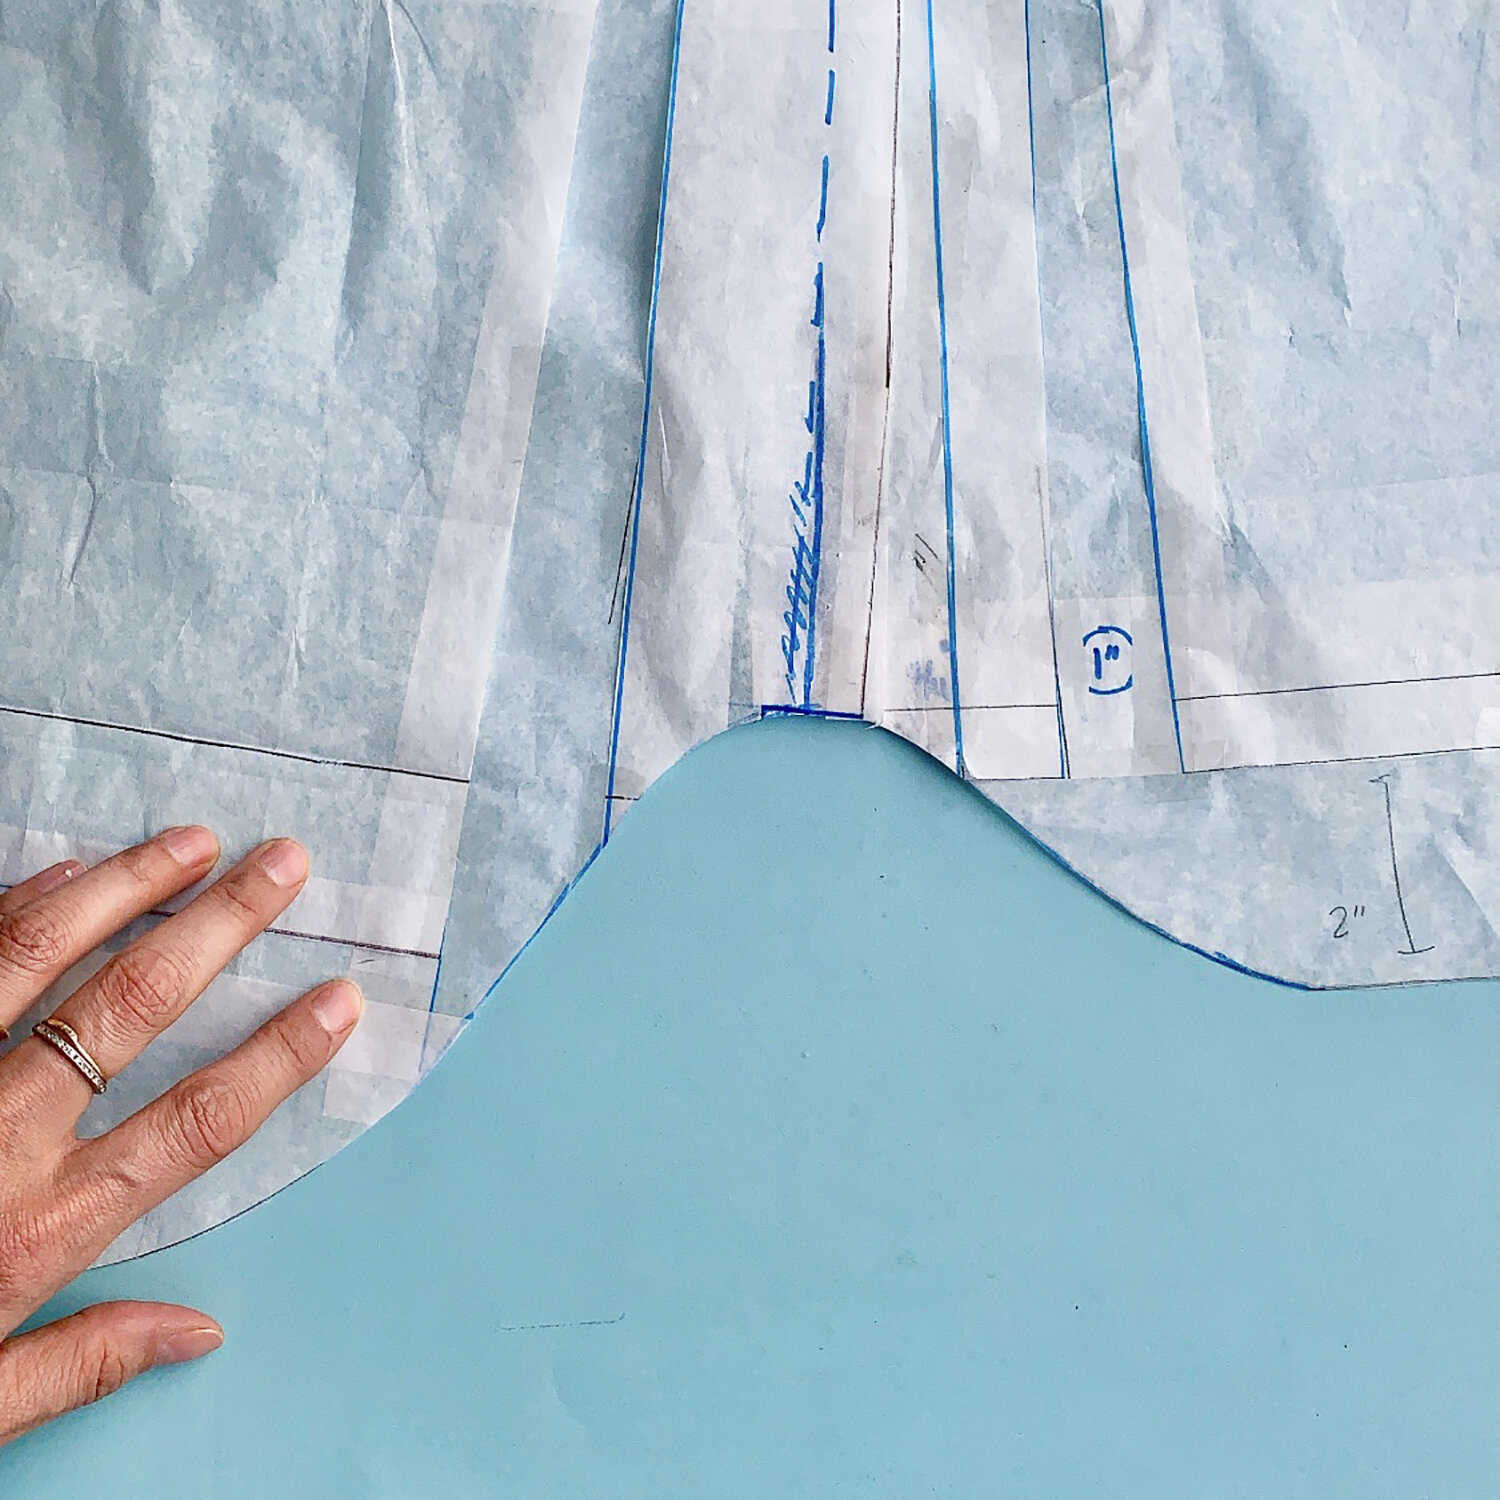
Here you can see where I slashed and spread, added length, changed the hemline, and added fold on facings (instead of the separate facing that come with the pattern). I ended up slash & spreading one more point towards the center of the back piece, which gives the finished jacket an important swing. On the right are my hem facings - I love the fun shapes of these.


The inspiration for the pockets with 2 openings came from that vintage Filson jacket I mentioned earlier. Filson makes the best pockets. Luckily, I knew I had a pattern in my stash with similar pockets. So I pulled out Vogue 1479 to borrow them.
These pockets are easy to make, but are a bit of a puzzle at first. As with bagging a lining, it doesn’t make total sense until you do it yourself, and then it seems obvious. You basically stack a couple of pockets and lining, sew fewer seams than makes sense, and flip it all inside out and, Presto! You’ve got double opening patch pockets. I’d recommend buying V1479 just for the pockets (I like the pattern overall, but haven’t sewn it yet). I also urge you to make several practice pockets, because it’s a little tricky, and you can turn it inside out the wrong way without realizing it immediately. I added thin black cotton lining to my pockets (which is very comfortable), and interfaced the wool of the pockets (to prevent stretching). Unfortunately, both of things add unwanted bulk.

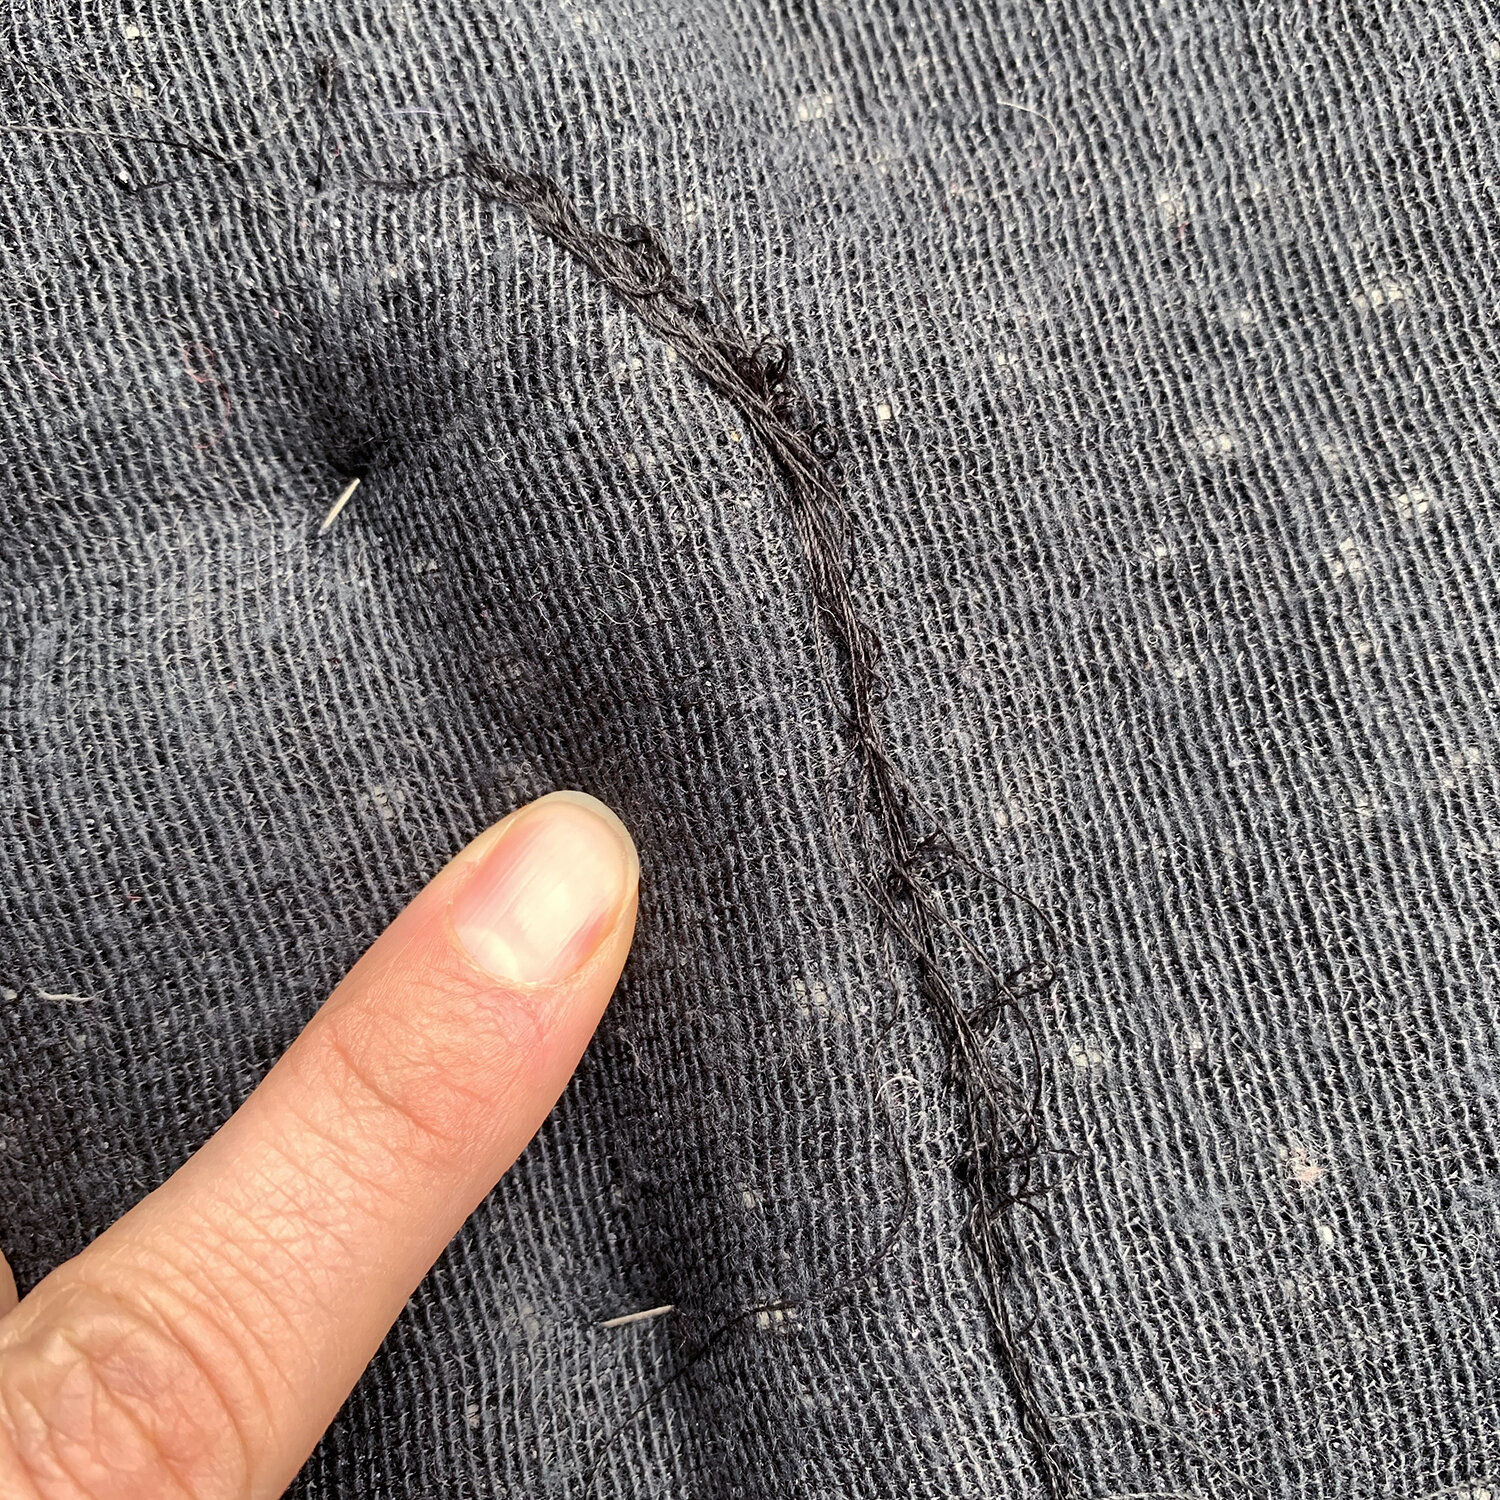
My fabric isn’t that heavy - I’ve sewn heavier wool coats. But when you stack up fabric, interfacing, lining, and seam allowances for two layers of pockets! Ugh. It’s so bulky. I wanted to make bluff patch pockets. This is a cool technique of attaching pockets by machine, with no visible topstitching. You know what? My machine was not going to allow it! On the left, you can see a successfully attached breast pocket (no visible sewing!), and then on the right, you can see my attempt to simply baste my double-open pocket. NOPE!
Since that was a clear no-go, the pockets are attached by hand. I used a double strand of thread, and sewed each seam twice with back stitch. They feel quite secure.
After attaching the pockets, I knew I would need to reduce bulk EVERYWHERE. I decided that any place where I could eliminate folding a seam allowance inside a seam, I would. For those areas, I would instead Hong Kong finish the fabric’s cut edge, and topstitch. I would also need to use a different fabric for my under collar, because attaching coat collars is always a fat stack of fabric.


To be honest, I was not enjoying this project up to this point. But you know I love to dye fabric! My first thought was to use some of the purple corduroy…from my sewing plans….the project I was in the midst of when I started this one! Ha! I cut off about 1/4” and decided to dye it to match my lining. On the right are the Rit colors I used - I am not scientific. It’s just a dash of this and a splash of that until I get what I want. On the right, you can see that I nailed it! This success kept me involved in making this jacket project work.
I’m going to leave it here, on a little high note. My next post will show how the details started coming together, and a proper jacket started to take shape. That’ll be up soon. XO, Martha