PARMA VIOLET WOOL COAT - MY FINISHED PURPLE COAT WITH LEOPARD COLLAR

My finished lilac wool coat!
I’ve already written about the cost of materials for this coat, as well as the tailoring and speed tailoring techniques I used when constructing it, but now I finally finished sewing it! Because I love sewing coats, I have a closet full of them, but you can always find a new style or design feature that is missing. I’ve been craving a lilac coat for a few years, but light purple wool fabric has eluded me. I finally spotted some in Midtown back in October, and knew what had to be done!

I added an oversized, detachable, leopard print collar to add some interest.
THE PATTERN:
You already know about the materials, so let’s dive in to the pattern modifications and alterations I made. I used my trusty favorite Japanese sewing book, Step Up Sewing. I traced off Block D, which has set in sleeves, in size LL. The book has sizes S, M, L, and LL - I find LL fits similarly to a Big 4 size 12 (I’d still recommend a pattern comparison or muslin before diving in with good wool fabric).
The book comes with 5 basic blocks (I've written more about this in my previous reviews, too), and you can mix and match. I love the clean, classic shapes.This is my third coat from this book, and I’ve borrowed pocket and collar details for numerous other projects. I have a review of the book here.
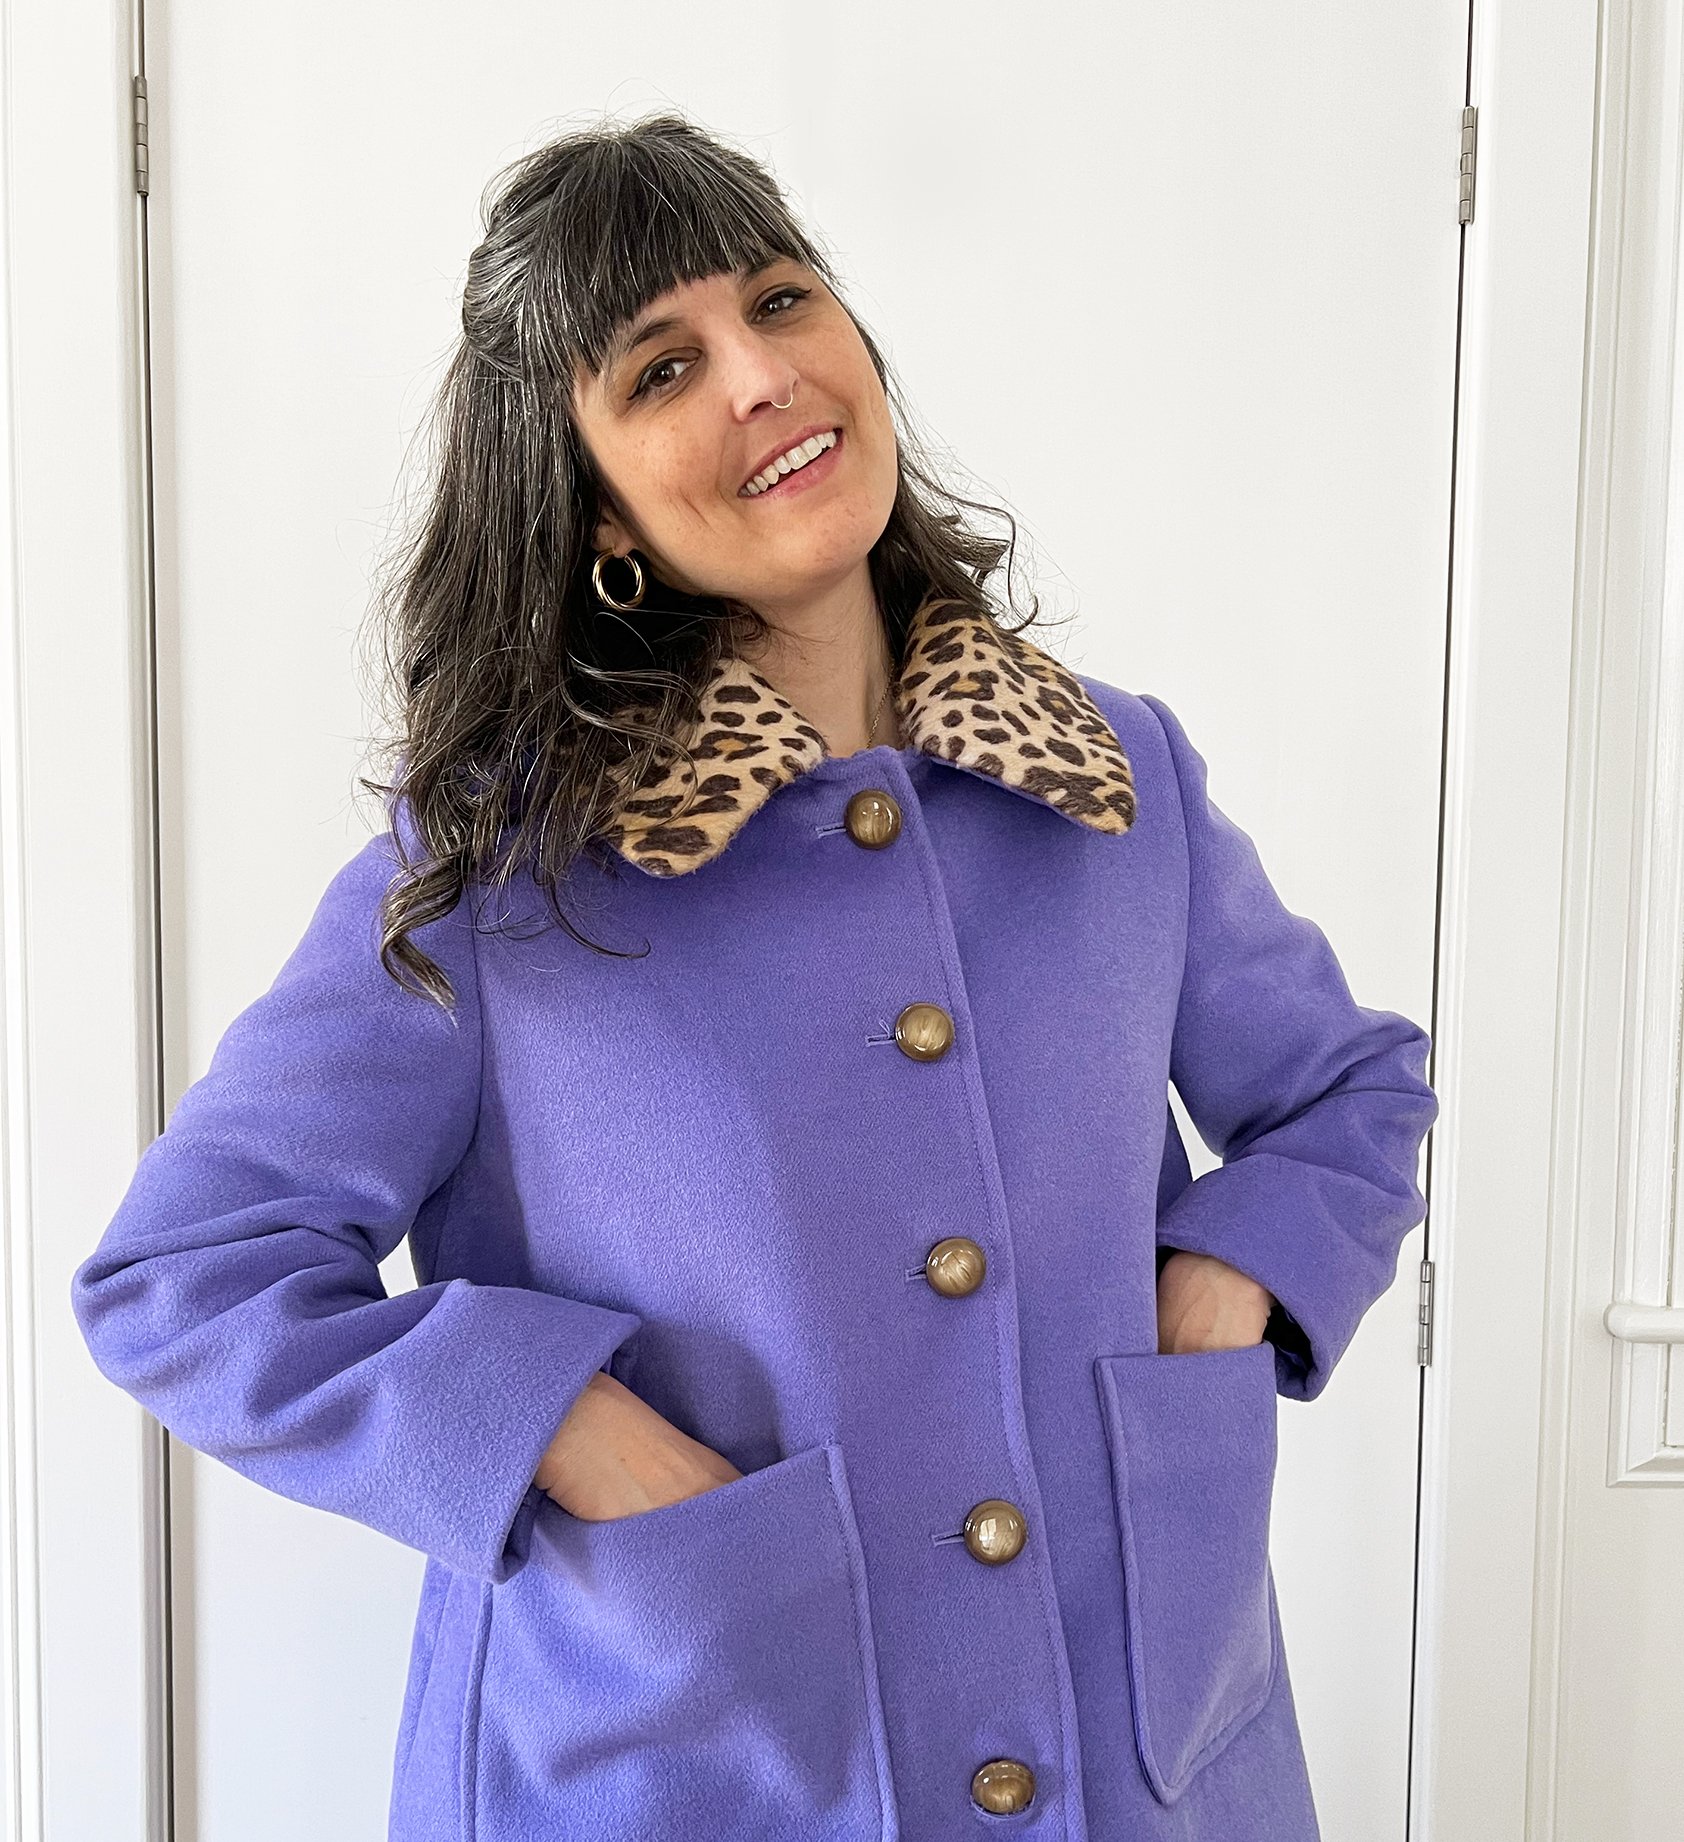
The coat has a classic shape and slightly vintage feel.

For a long time, getting a tidy finish at the front facing corner, without extra bulk, was difficult for me. I’ve had some practice now, and I’m always looking inside of ready-to-wear coats when I have a chance. I’m happy with this technique to keep things neat.
PATTERN TISSUE ALTERATIONS:
• I traced the pattern and added seam allowances as per the diagrams in the book. You also need to add your hem allowances and pay close attention to how the vent & vent lining are drafted - you are expected to trim some places after cutting your fabric. Alternatively you could trace off multiple tissues but I don't think there's really a need as long as you're paying attention when cutting.
• Book recommends 1cm seam allowances, but I went with 1/2". I wish I did 5/8" only because of the bulk of my fabric.
• Slashed & spread back piece to add 1" width at hip. I also added 1/2" at side seam of the back piece, basically grading that piece out to an imaginary LLL. I have wide hips and prefer a more A-line coat shape.
• Added 3/4" width to the sleeve. The sleeve on this block is more narrow than the raglan version in the book. I can't wear a super bulky sweater (which is my preference) but it looks sharp with the slimmer sleeves. Sewing my own outerwear has taught me I strongly prefer a wide sleeve - if I sewed this again, I would add more width.
• Borrowed side seam pockets and patch pockets from a different coat within the same book.
• Enlarged patch pockets and raised their placement for an exaggerated look.
• Used collar D-2 but I think everything else is D-1 (all from the D block except pockets).

The lining is a darker shade of the same periwinkle/violet color.
SEWING DETAILS:
• I love how the book illustrates where to apply interfacing! Full fronts, upper back & back hem, upper sleeves and sleeve hems.
• All seam allowances pressed open with the assistance of a clapper, then hand tacked into place with a single strand of silk thread, to reduce bulk.
• I used horsehair canvas and pad stitching on the collar. Pattern includes roll line. I did this on my camel coat (a previous review) and I will never go back. The collar has such better structure.
• Added 1/2" shoulder pads as well as sleeve heads.
• I used a flat woven twill tape as a stay between the side seam pocket bags and the facing.
• The back vent was constructed in a way I hadn't done before, and after studying the illustrations, I knew my preferred method would be less bulky. I mitered the corners of the wool, and then inserted the lining as per the pattern.
• I bagged the lining and left open the vent area as where I would turn everything. This worked well and I hand sewed the lining around the vent.
• All hems catch stitched into place.

Professionally sewn corded keyhole buttonholes.
Buttonholes were sewn at Jonathan Embroidery Plus in midtown. What a treat to outsource! I went with corded keyhole buttonholes. I also ended up buying new buttons. After I added the leopard collar, I felt the original buttons had a clashing color, so I found some in a warmer brown tone.
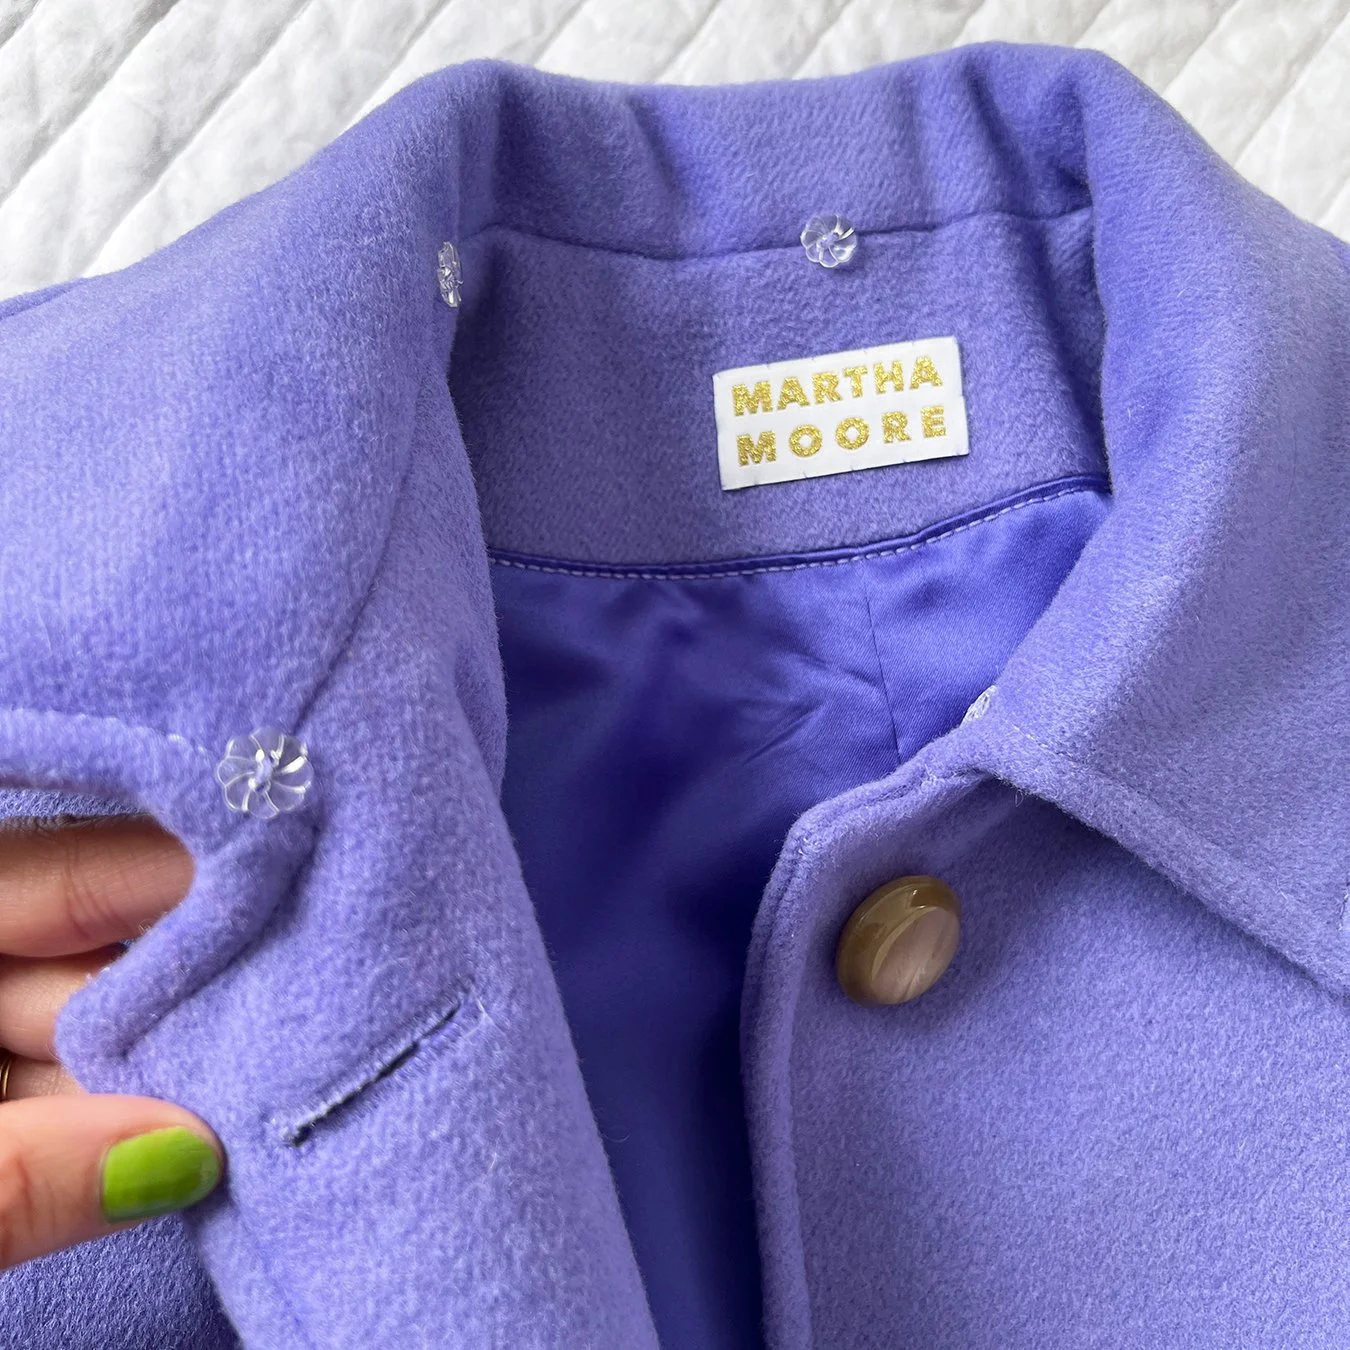
I sewed small clear buttons inside the collar to hold the over collar in place.
The over collar attached.
A LITTLE EXTRA:
Almost every time I sew myself a winter coat, I make a little over collar as well. They are detachable, so I can mix & match. When you’re wearing a coat all the time, it’s nice to have options! This time I went with a fuzzy, leopard printed wool/alpaca blend.
The collar is lined in the lilac wool - my original plan was to use my slippery lining fabric, but the wool provides weight and structure to hold the collar in place, and the matching color means it will always look intentional when worn with this coat. I added small elastic loops, which are caught inside the seam of the collar. These attach to the buttons sewn into the coat collar. This is a secure and attractive way to keep all elements in place.

The back of the coat has a walking vent.

I mitered the corners at the back walking vent. I bagged the lining through this opening, and hand sewed the lining in place.
LAST LOOK:
Friendly reminder: if you purchase a coat an there is a little X of thread holding the vent closed, SNIP IT! Remove it! It was only meant to be there temporarily! You don’t need that anymore. Walk freely.
I disregarded the instructions for constructing the back walking vent found in Step Up Sewing. They had all the fabric folded at 90º angles, which added up and caused bulk. So I mitered the corners here. When lining the coat, I bagged it and pulled it through the opening left at the vent. I then hand stitched the lining in place at the vent. I love how it came out!

Happy in my new coat!
CONCLUSION:
I am happy with this coat! I think I prefer wearing raglan style sleeves on coats, and I definitely prefer oversized shapes. But this is cute and fills a niche in my closet, so it is a welcome addition to my outerwear collections!
I am bummed out that the fronts of the coat got over pressed. This fabric has a deep pile, almost like velvet. This makes it difficult to capture the color in a photo, and also annoying to press. I pressed with a damp press cloth, on top of a fluffy towel, on top of wool pressing mats (on top of my junky rental ironing board). I took a lot of care but at some point was too aggressive when pressing the fronts. I don’t think anyone who doesn’t sew will notice, but it will haunt me!
Anyway, I’m always learning, so next time I’ll try to do better. In the meantime I am returning to my Resort sewing! XO, Martha