POLKA DOT PERFECTION! - GRAINLINE YATES COAT

Wow. First of all, I can’t believe I still haven’t made a final post about my green wool coat. That’s a great piece, but it’s honestly too warm to be worn yet! I learned a tremendous amount while sewing that coat, and after whipping up a couple of quick blouses to cleanse my palette, I was ready to return to winter sewing. Enter the Grainline Studio Yates Coat. I have a bunch of outerwear patterns (maybe 12 or so?) and what sold me on the Yates Coat is the oversized lapels and approachable, modern tailoring methods.

As always, let’s start with the fabric. I have lurked this fabric online for close to a year. The content is Poly/Acrylic, which is a bit of a turn off to me (fabric snob, not sorry), but I absolutely love the fuzzy, napped appearance of the dots. The fabric is manufactured by Telio, so I knew that I was always seeing the exact same fabric at different shops. I have seen it sold at multiple stores in midtown and online, priced from about $27 to $53. Yes, for the exact same fabric. I waited for fabric.com to have a 40% off sale, and bought 4 yards (the minimum amount to get the discount) for about $62 total, and stashed it away. I didn’t have any coat making plans yet, but I earmarked it for a pattern without too many seams, and a boxy shape, both qualities that I thought would help this fabric shine.

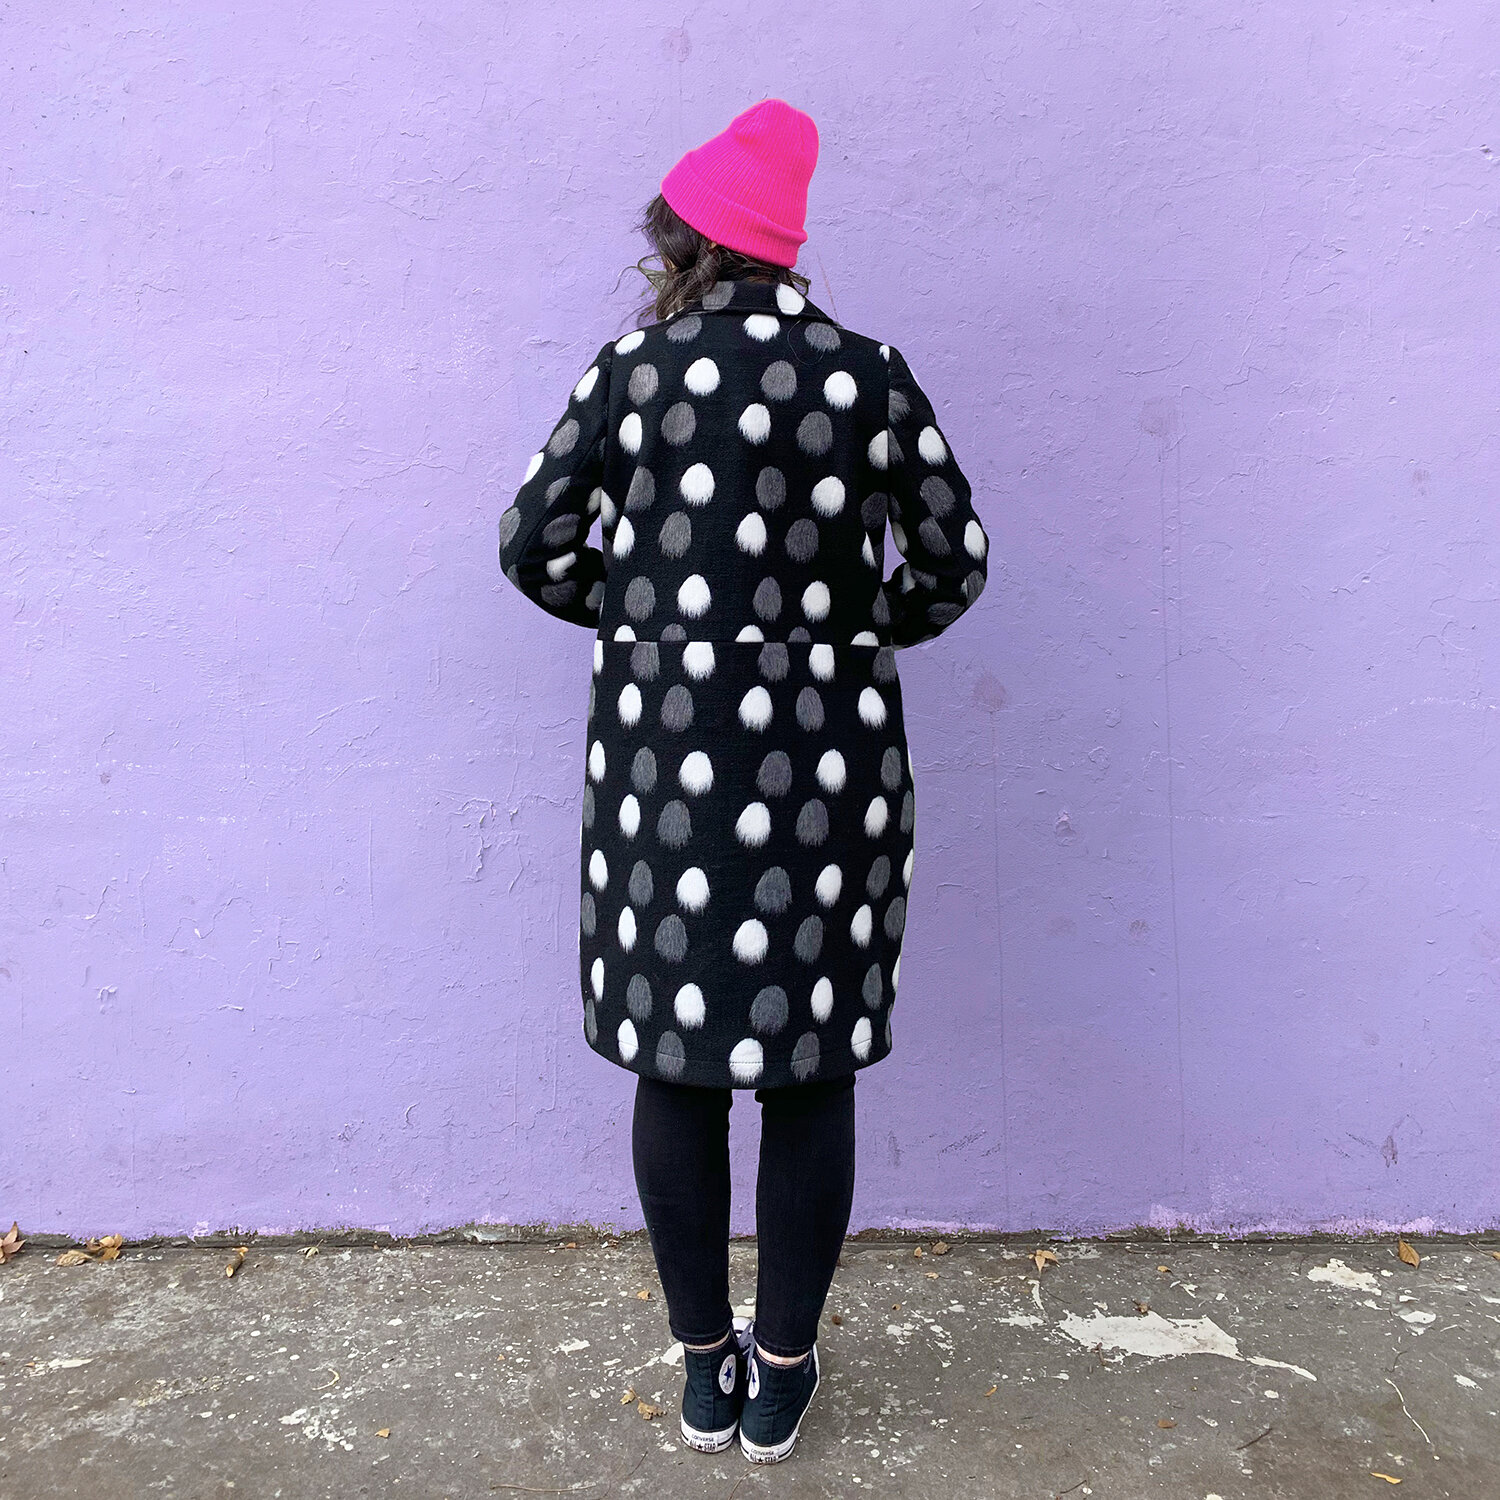
Once I decided on the Yates Coat, my first order of business was to modify the pattern to fit my body. I have recently sewn their Tamarack jacket twice, and found that the pattern ran large compared to their size chart (I sized down from my measurements), so I made a quick muslin. I cut size 10 through the shoulders, grading to size 16 at the hem. This came out boxy, but I like my coats to have plenty of room for layers and movement. I found that the pockets sat too low for my liking. So I raised the horizontal waist seam 2” at the bodice lengthen/shorten line. I then lengthened the lower (skirt?) portion by 6”. This way, I gained back the 2” I had shortened, and added 4” because I wanted a longer coat.

My only other fitting modification was to make a 5/8” narrow shoulder adjustment (pretty normal for me). This made the shoulders more narrow than a size 0.
As for construction, I also added a sleeve head once I had inserted my sleeves to the body. This helps hold the nice, rounded shape of the sleeves at the shoulder. I also added a length of totally non-stretch cotton twill tape to the fashion fabric pocket opening. There is a seam there, and it could easily get stretched out just from using the pockets. I’m hoping this will help the jacket hold its shape in the long run.
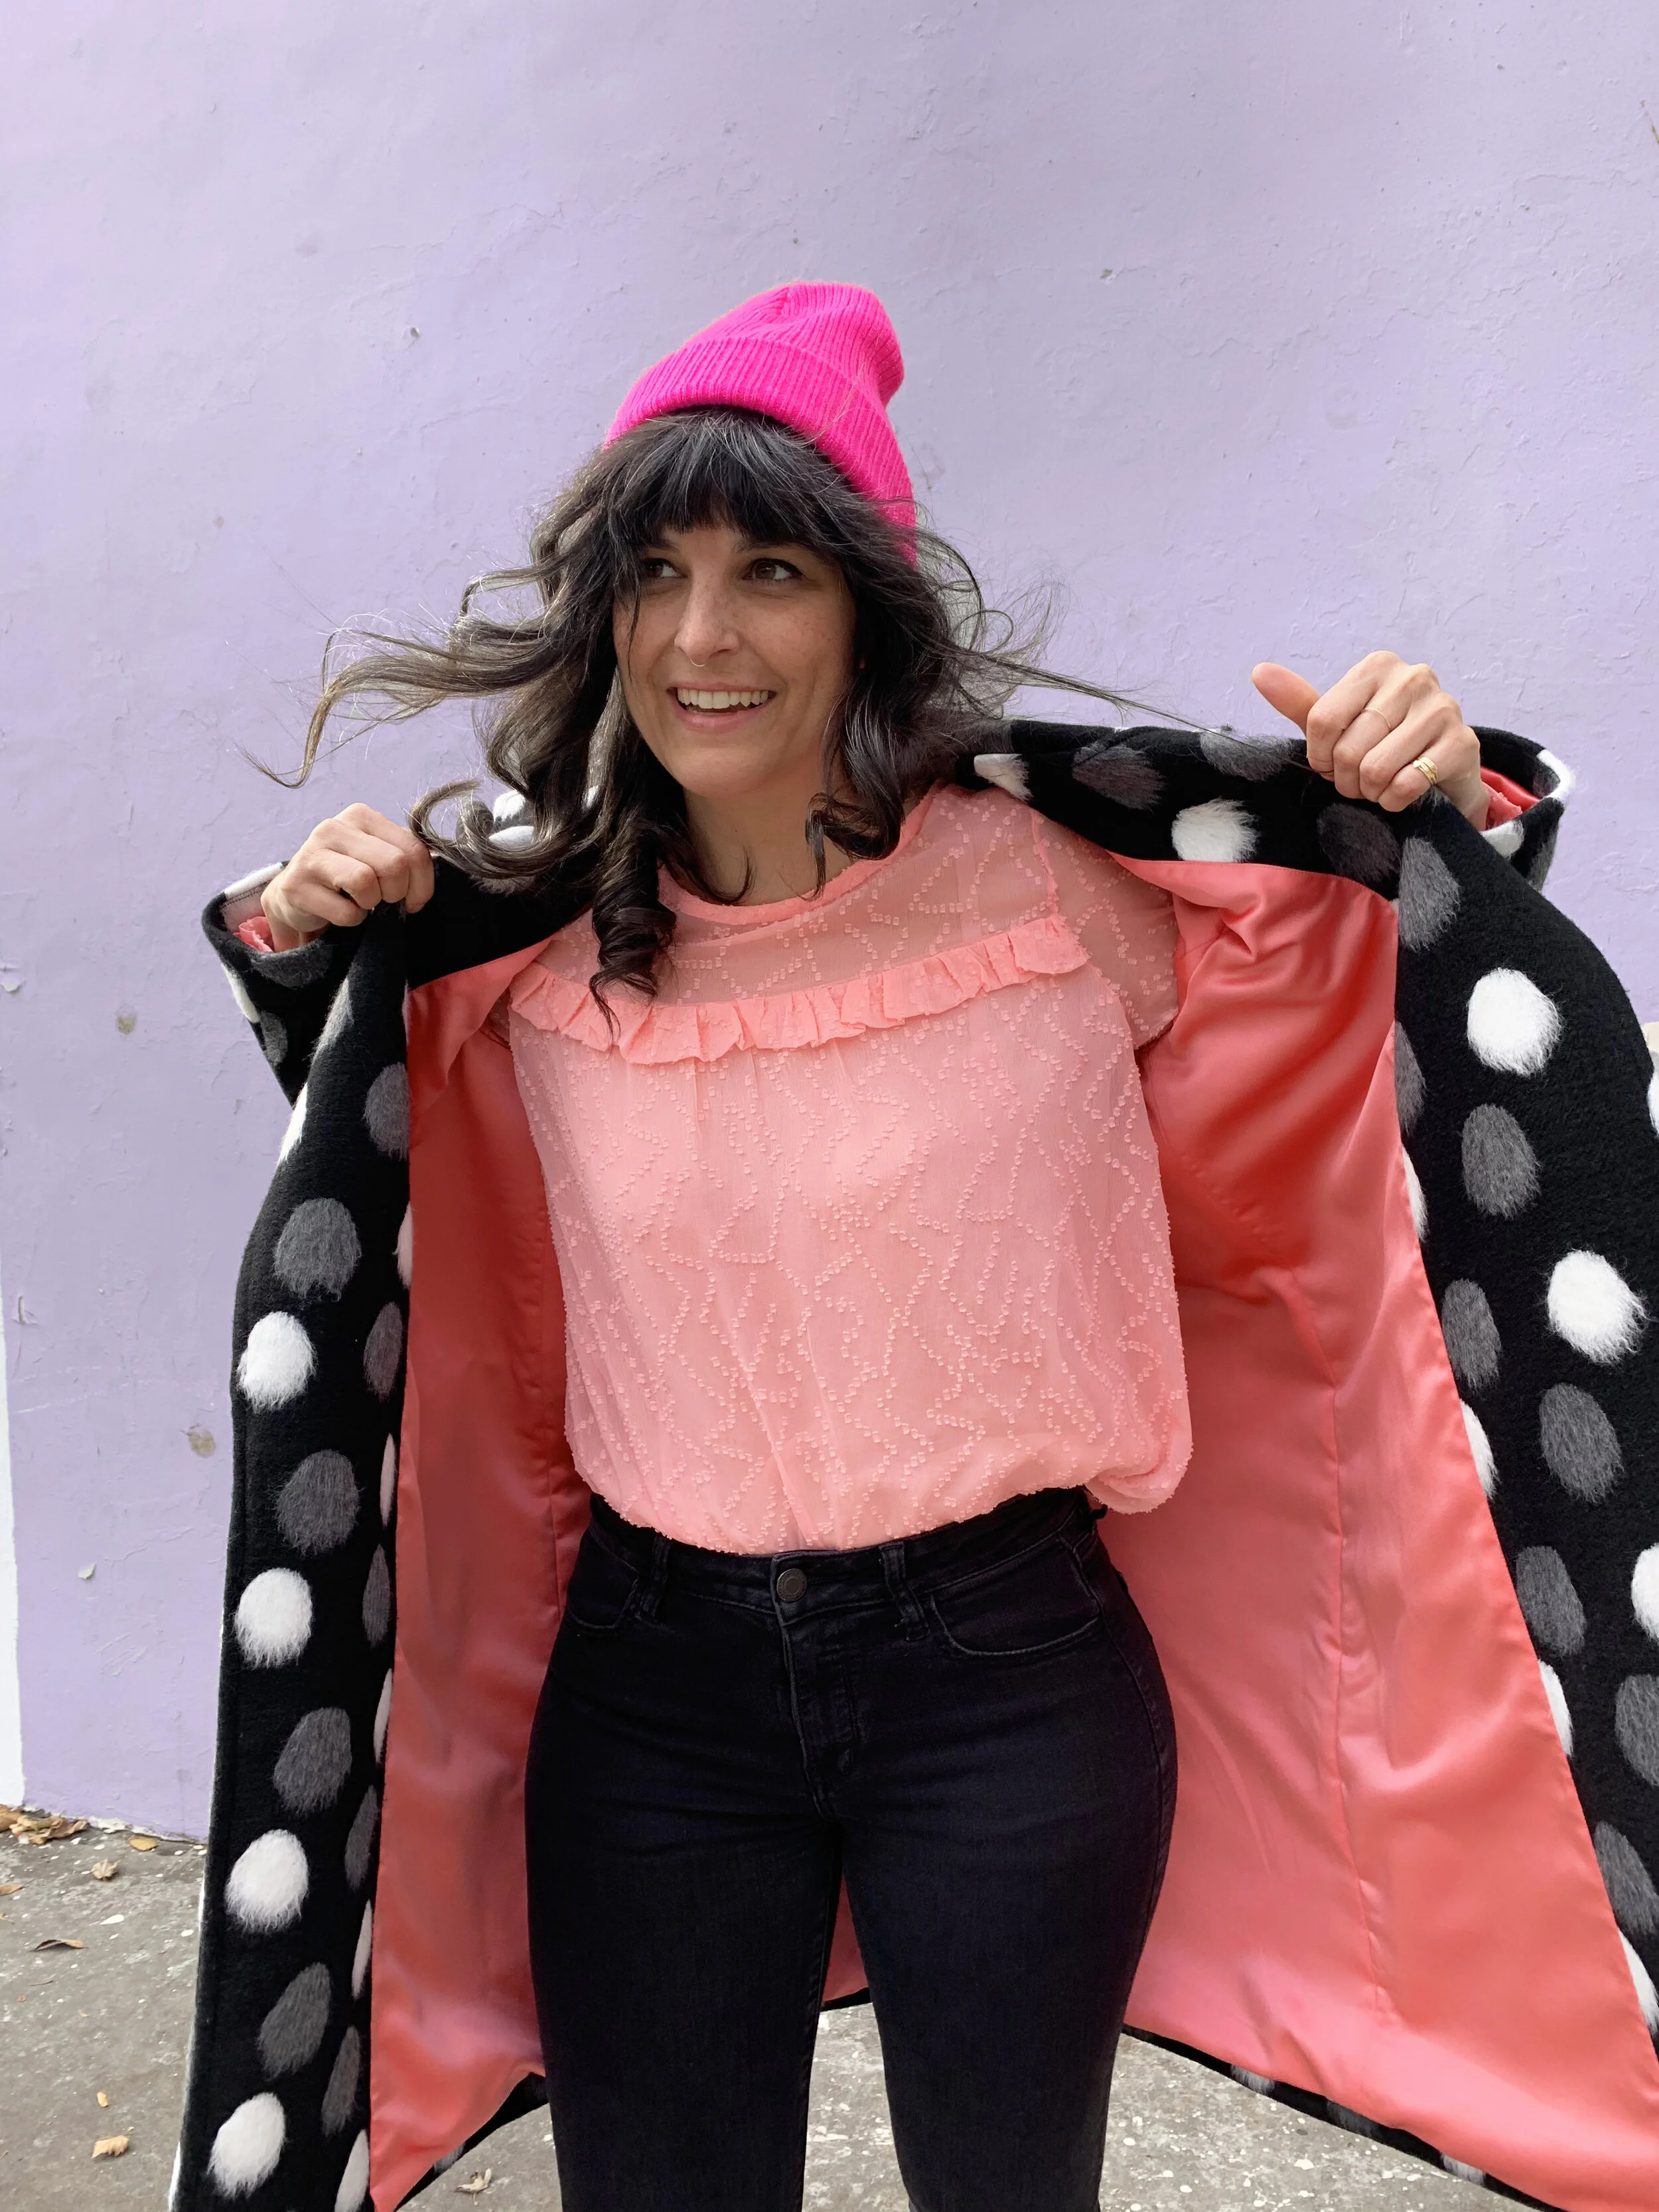
I was planning on lining this in black, because I knew I had both poly satin and kasha on hand….but then I found this pink poly satin in my stash. It’s heavier and densely woven (why did I buy this?) and seemed perfect. When I realized I had enough, I was still unsure. When I asked Jason he said, “I don’t know why it wouldn’t be pink.” Voice of reason!
I really love Grainline’s technique for bagging the lining. You sew the shell and lining separately, and then you sew facings onto the shell - I’ve never seen that before. This creates a clean turn of the cloth at the hem and sleeve hems, and makes bagging the lining quite simple. I have never bagged through a hole in the sleeve, but it is so discreet! I’ll definitely use this technique again.

Of course I added one of my custom labels, and a chain. I try to hang up my coat, but let’s be realistic, sometimes you have to hang it on a hook real fast. So I use my Buried Diamond charm chain and petersham ribbon inserted into the collar seam. Speaking of that seam, I have to mention it was almost impossible to top stitch there - I broke two needles! My machine was making the terrible chonk-chonk sound. So my top stitching is a very long stitch, which I sewed very slowly. Tip: when selecting a coat fabric, fold your fabric so you can feel four layers. Would you want to sew that? If the answer is No, proceed with caution! (This was max thickness my machine could handle.)
Ultimately, I think I sized up too big, but also, I don't know what the intended fit is based on the size chart. I am happy with it because I can layer and it's a statement piece anyway. Next time I will keep the shoulders and sleeve as they are, and maybe size down to an 8 or 10 through the entire body. I would happily sew this again in a solid color. I feel like this was my real muslin, I learned a lot and could do better next time.
This is a super friendly pattern. It goes together easily in all the crucial places: collar, lapels, lining fits into the shell without fuss. Even after my alterations, the sleeves set easily. I recommend this pattern to first time coat makers or more experienced ones. I think you will enjoy making this! XO, Martha