A VICTORIAN DELIGHT! TUCKS, LACE INSERTION, AND LIBERTY: VOGUE 8293
Over the past 6+ months of Covid quarantine life, my sewing preferences and needs have become distilled, concentrated down. I sew (or engage in sewing adjacent activities) almost every day, as my meditation and mental workout. I no longer buy clothing, so I have to fill needs (hello pajamas), and of course there is a distinct pleasure in whipping up an easy breezy project. But I also have to challenge myself to keep things interesting, and to continue to learn. And, I must scratch the itch of fashion! Ruffles, pleats, fancy trim, buttons, skinny little ties! These are the things I crave.
I own hundreds of patterns (yikes!), and my favorite ones are vintage - they contain drafting and design details that don’t show up much anymore, and I see so much potential in every sketch. But I don’t descriminate - any pattern I come across in my hunt for new-to-me patterns is fair game. I was straight up delighted to find Vogue 8293, crisply factory folded, on eBay. This pattern was released in 2006, a questionable year for fashion (I should know, I was a senior in art school), but this Victorian inspired blouse is a winner!

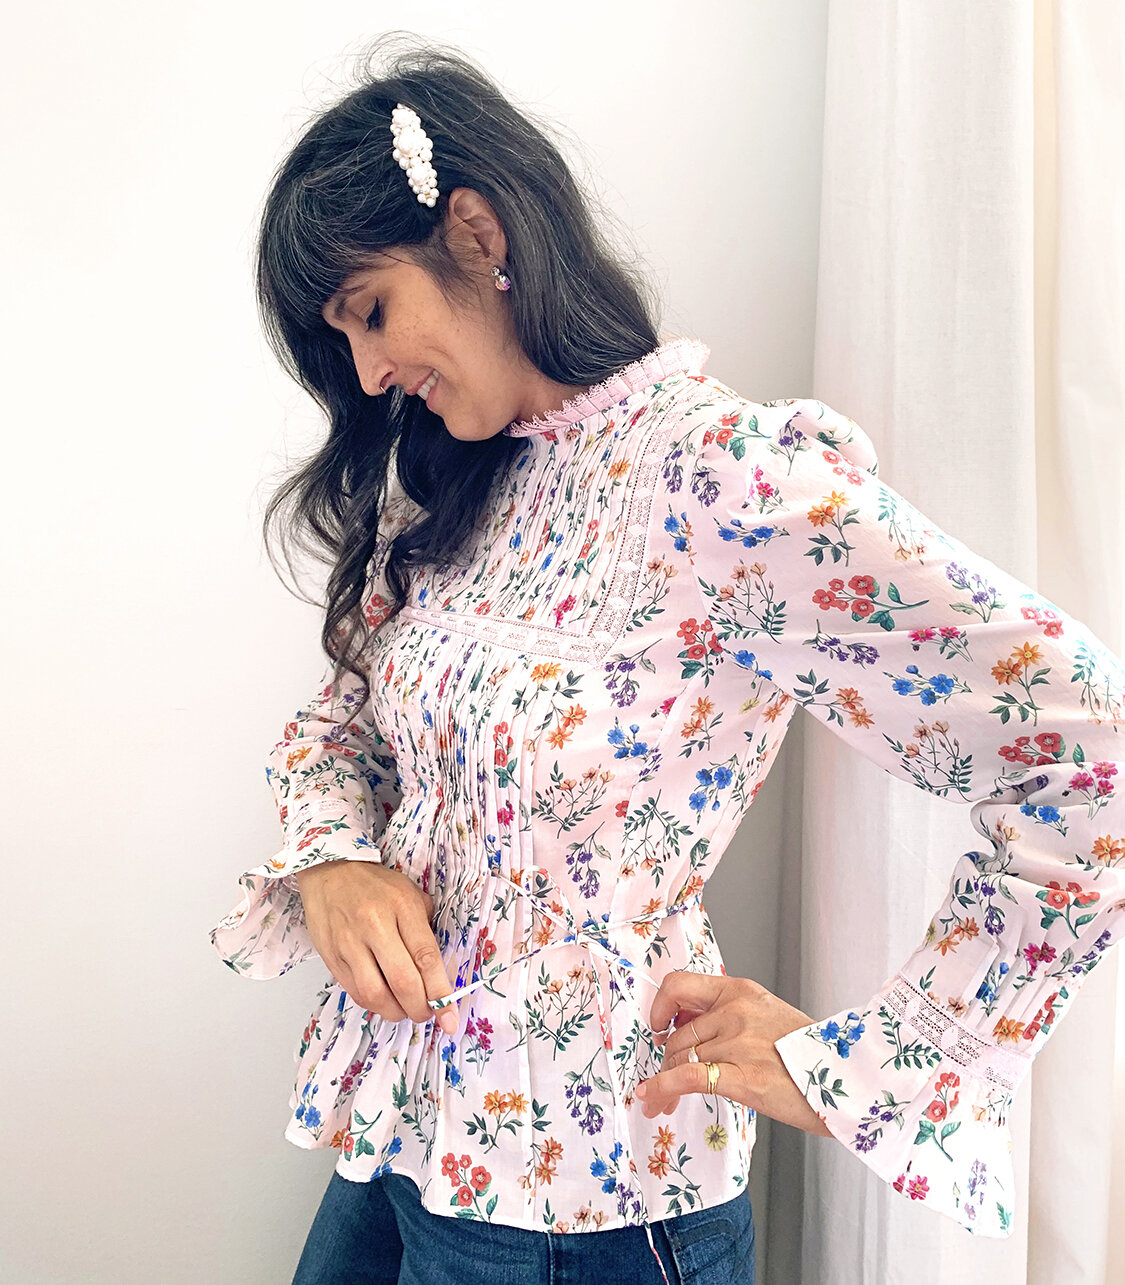
I clicked “Buy It Now” without a single thought. What a beauty! It reminds me of the Horror Vacui blouses and dress bodices I so covet, stitched up in heavily pleated and self trimmed Liberty Tana cotton lawn. I had just the fabric for it! As soon as the envelope arrived in the mail, I got to work.
This pattern is rated “Average/Moins Facile” - I always think Vogue patterns skew more difficult than other brands, so factor that into the rating. Making the tucks and lace insertion are well explained and well illustrated. Some of the more common techniques, like forming the center back self facing, are sort of glazed over - I'm guessing they assume you know what to do.
As always, I start with the fabric. I used 2 yards of this Liberty Tana, there was never a question of using anything else. The ground color is the softest whisper of a pink. It’s the kind of color that shifts throughout the day, depending on the lighting. I initially paired the fabric with a white lace for the insertion, but it clashed. I documented my hunt across the Garment District in my Instagram stories, which are saved as a highlight. I eventually found this perfect color match at Mood. I’ll circle back to the lace in a bit.

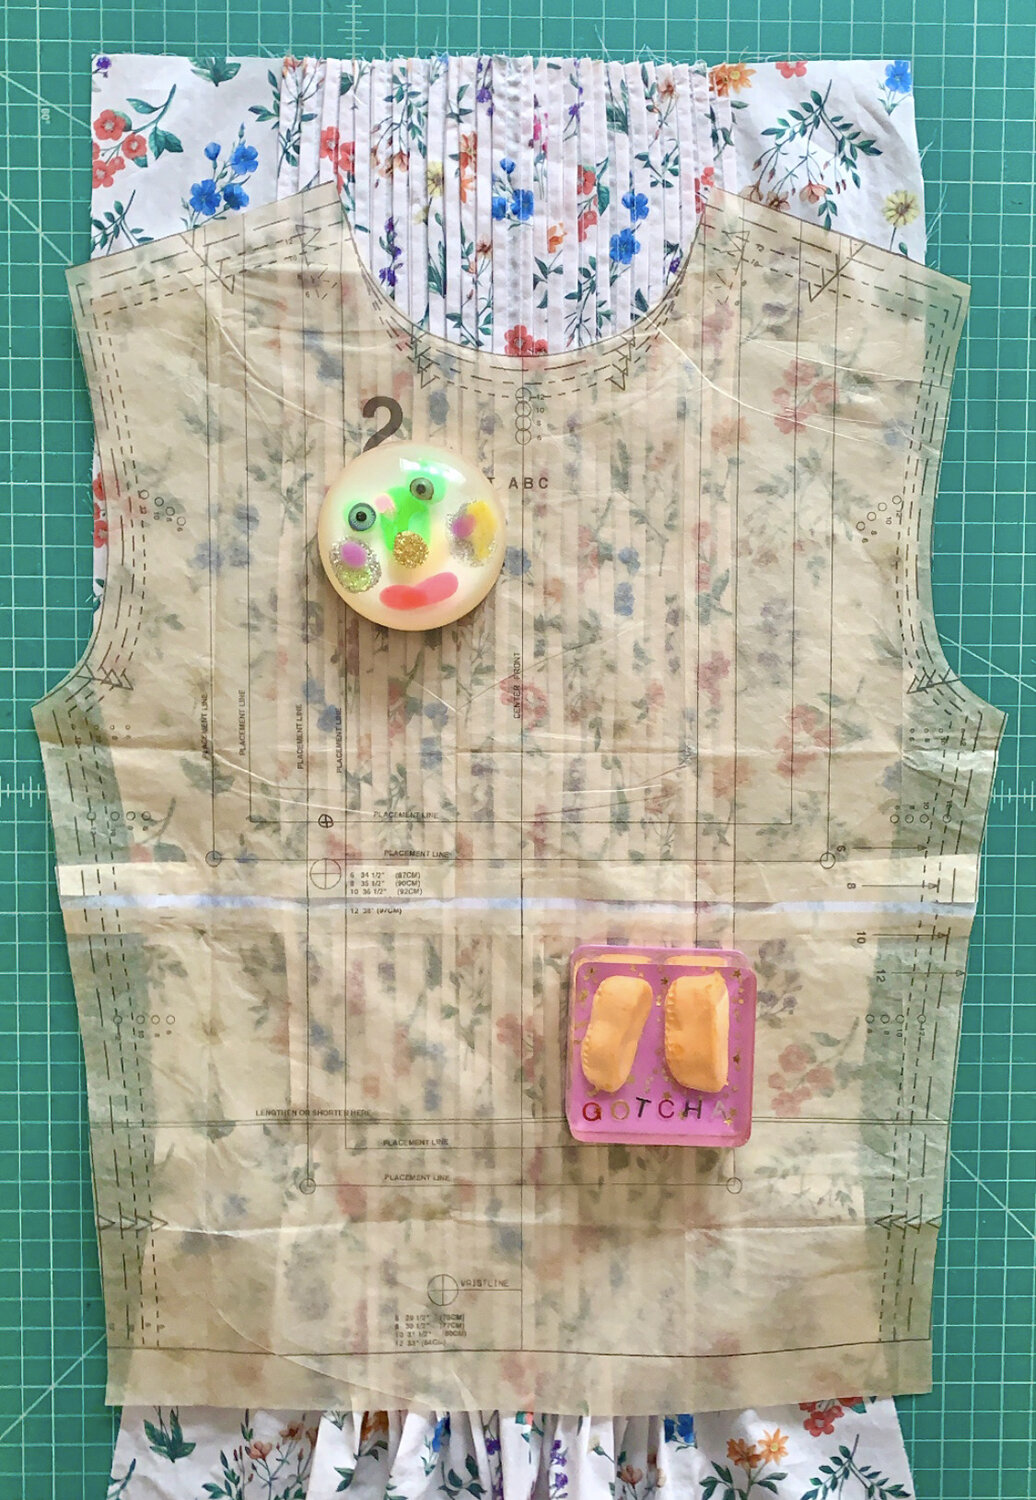
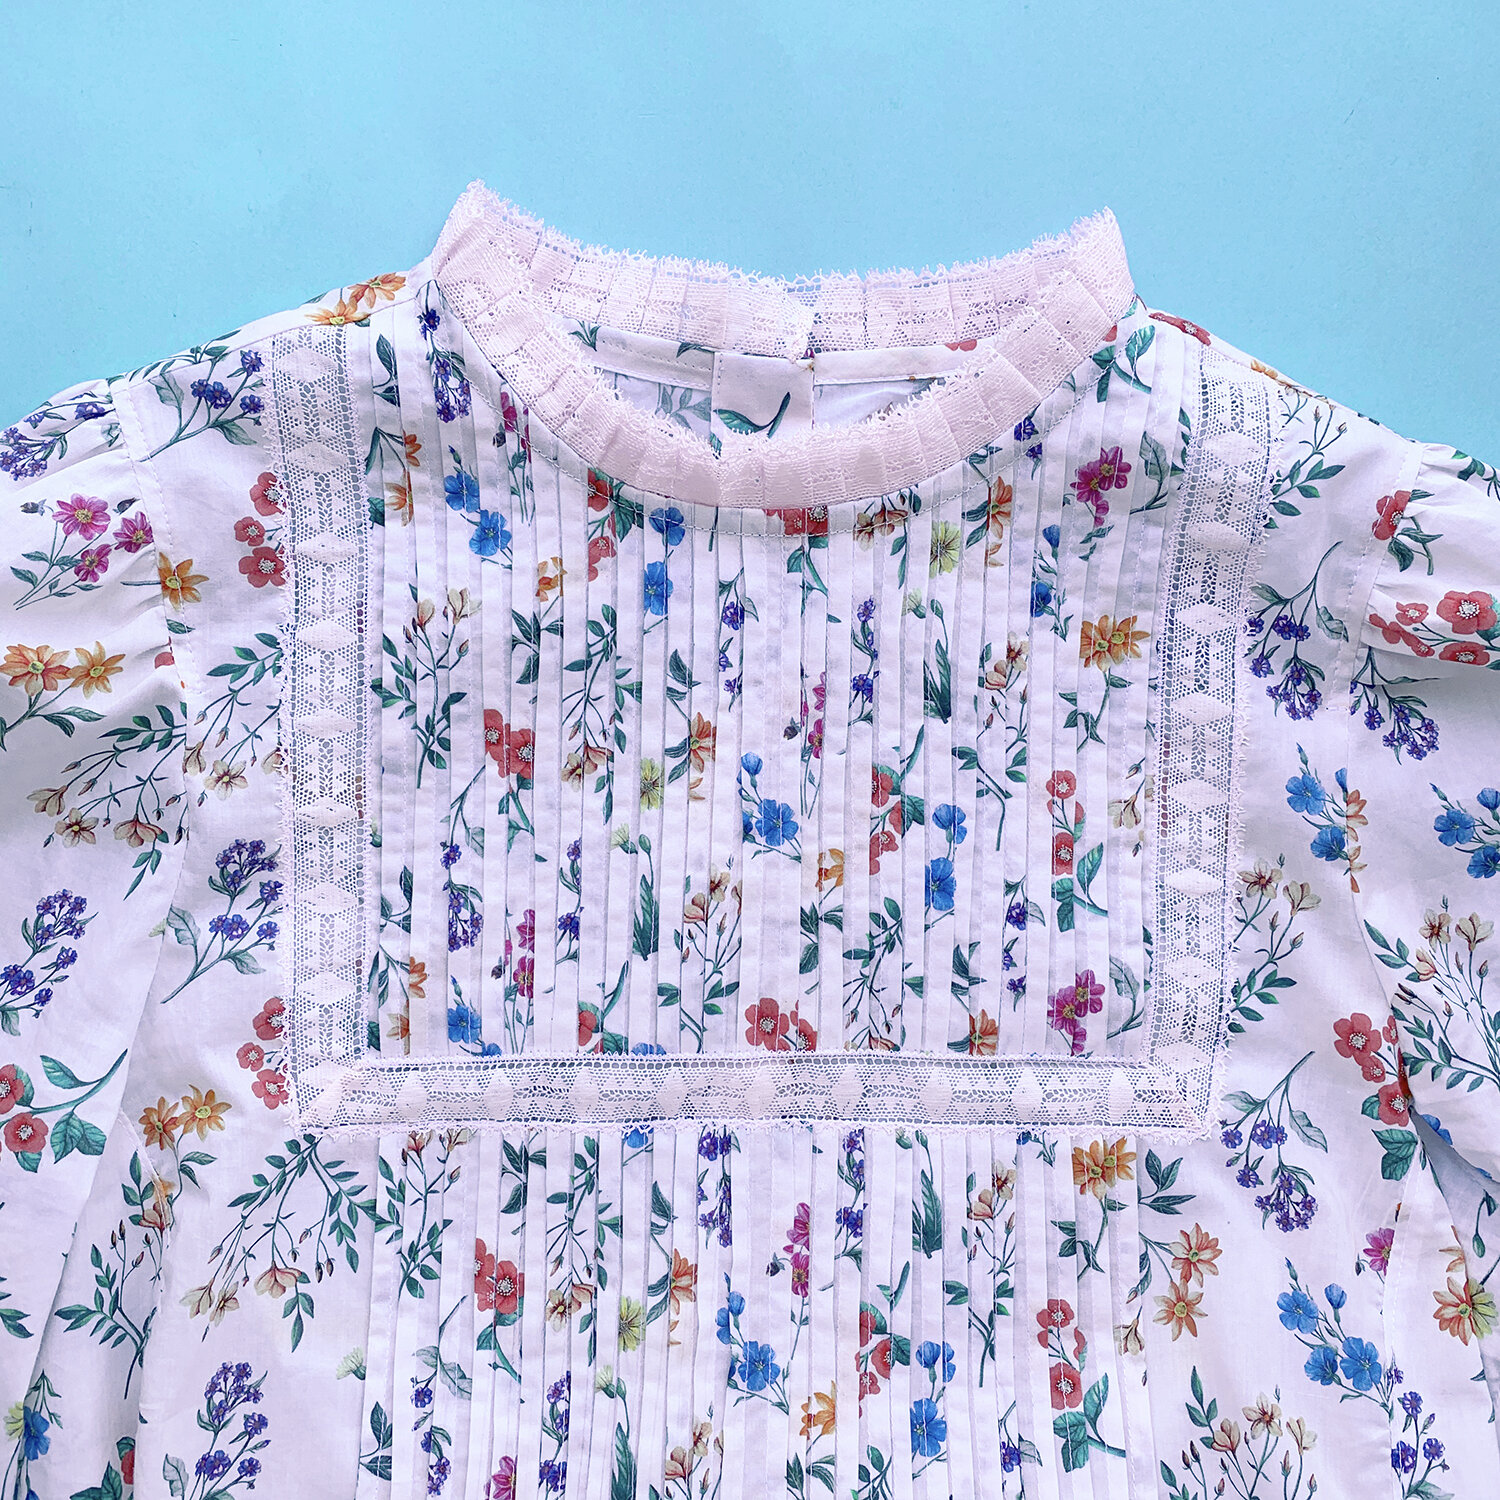
The pattern pieces are pretty cool: you get one with many markings to help you make the tucks (on left), and then once you have completed your tucks, you use a second pattern piece to use to cut your front out of the tucked fabric (on right), and it has the markings for the lace insertion. Regarding the tucks…I don't claim to be the most precise sewer, I did an OK job. But, upon completing the 24 bust tucks, I overlaid the 2nd pattern piece....and as you can see, my tucked panel was now too small!
The front bodice has twenty-four 3/16" tucks. 3/16" is a dumb measurement imho, but I marked my fabric carefully with a mechanical pencil and moved my needle position to hit it. Here is the issue: if you are 1/32" off, on the fold that is 1/16"....let's say you do that on all 24 tucks? Now you are 1.5" off in total. I seemed to be off even more than that, but my tucks measure very close to 3/16”.

I’m not one to let a hiccup slow me down, and I cannot be bothered to rip out and re-do this kind of detail work, especially when it leaves needlemarks (even with the fresh Microtex needle I used). I just added width to the panel: attached with French seams, with the seam to the outside, so it looks like a tuck. You can see it here as the “tuck” on the edge.
Is it perfect? No. Will anyone know unless I tell them? No. Ha! So that is one viable solution if you find yourself in the same predicament. Otherwise, I would ignore the first pattern piece execpt for the markings - start with a larger piece of fabric than called for. This will waste fabric in the end, but save you a headache in case you are not 100% perfectly precise with your tucks. The tucks are purely decorative, so while precision is always appreciated, you can wiggle out of it!
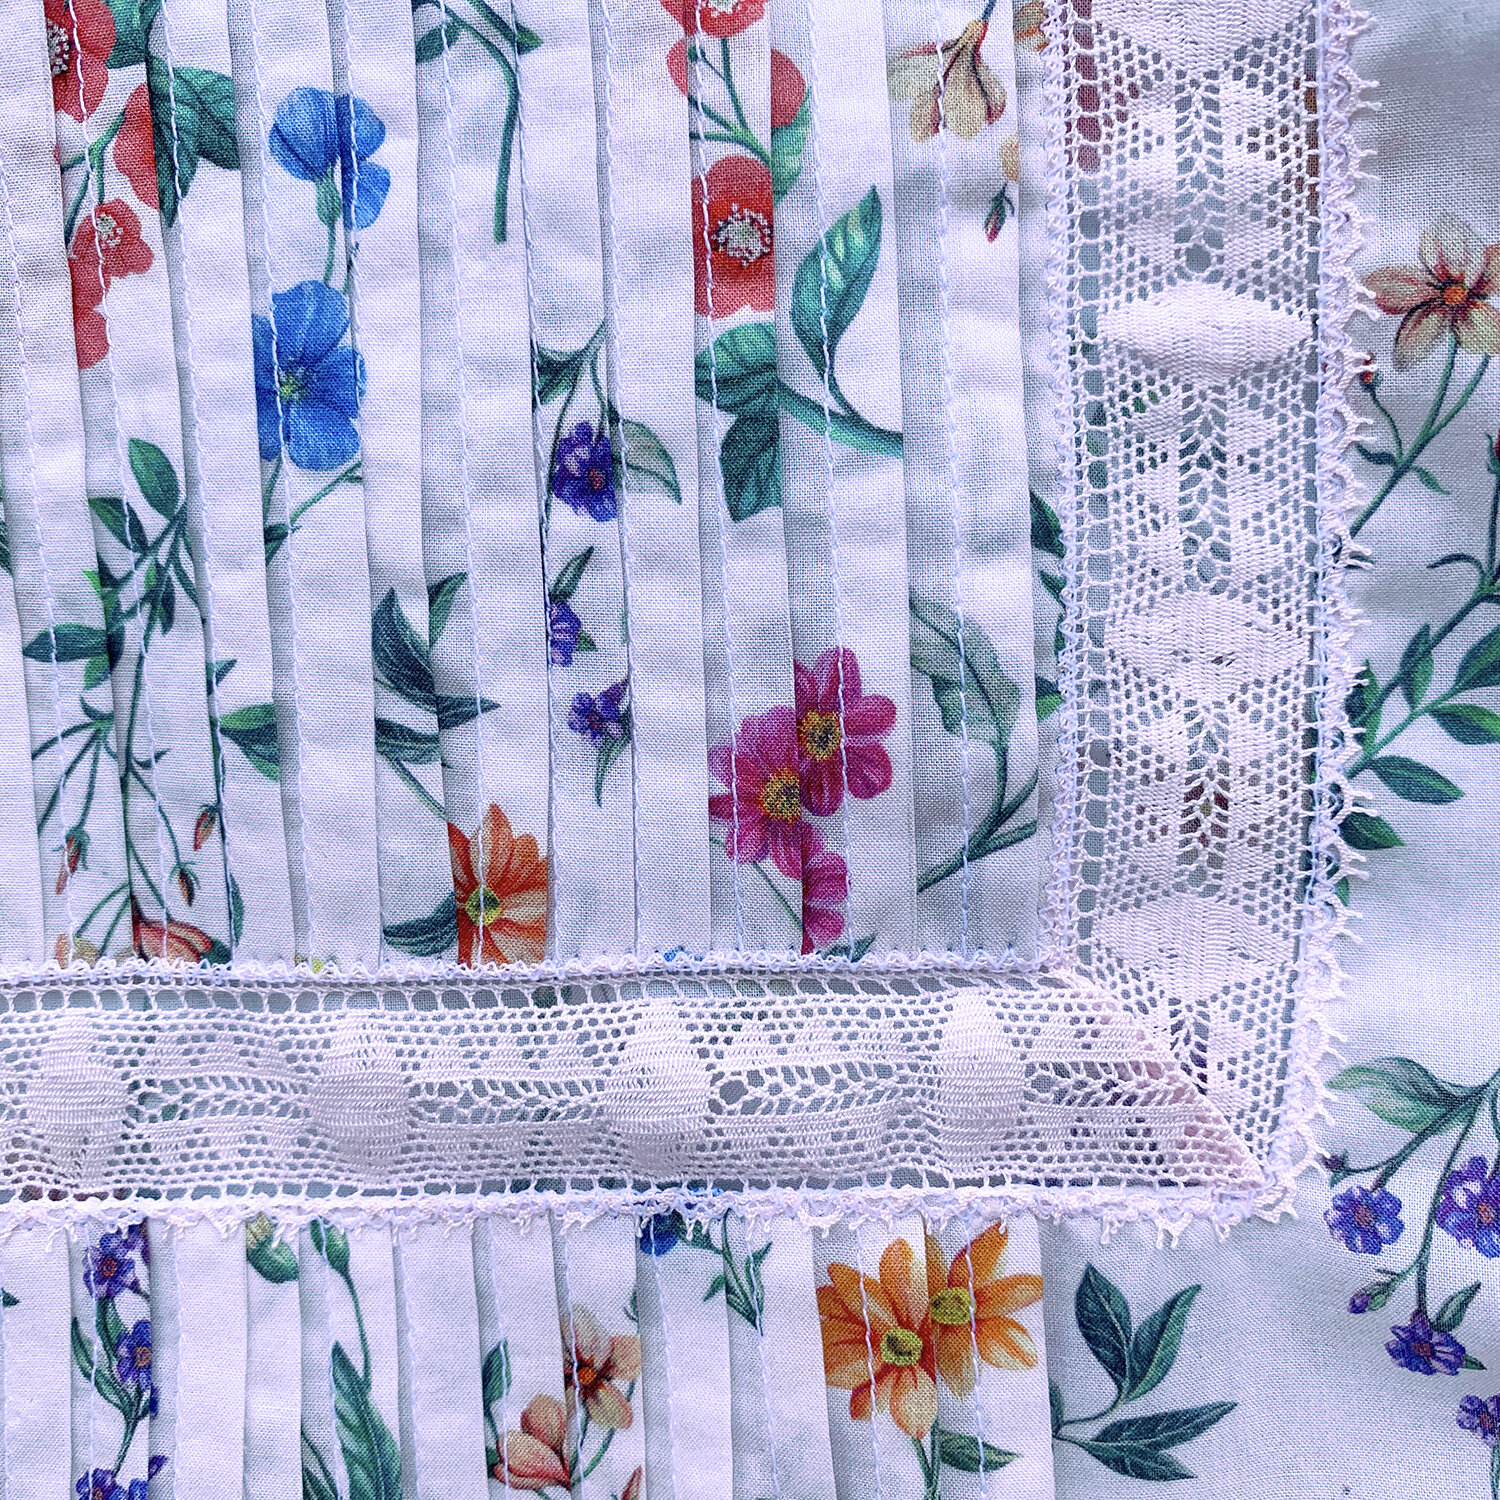

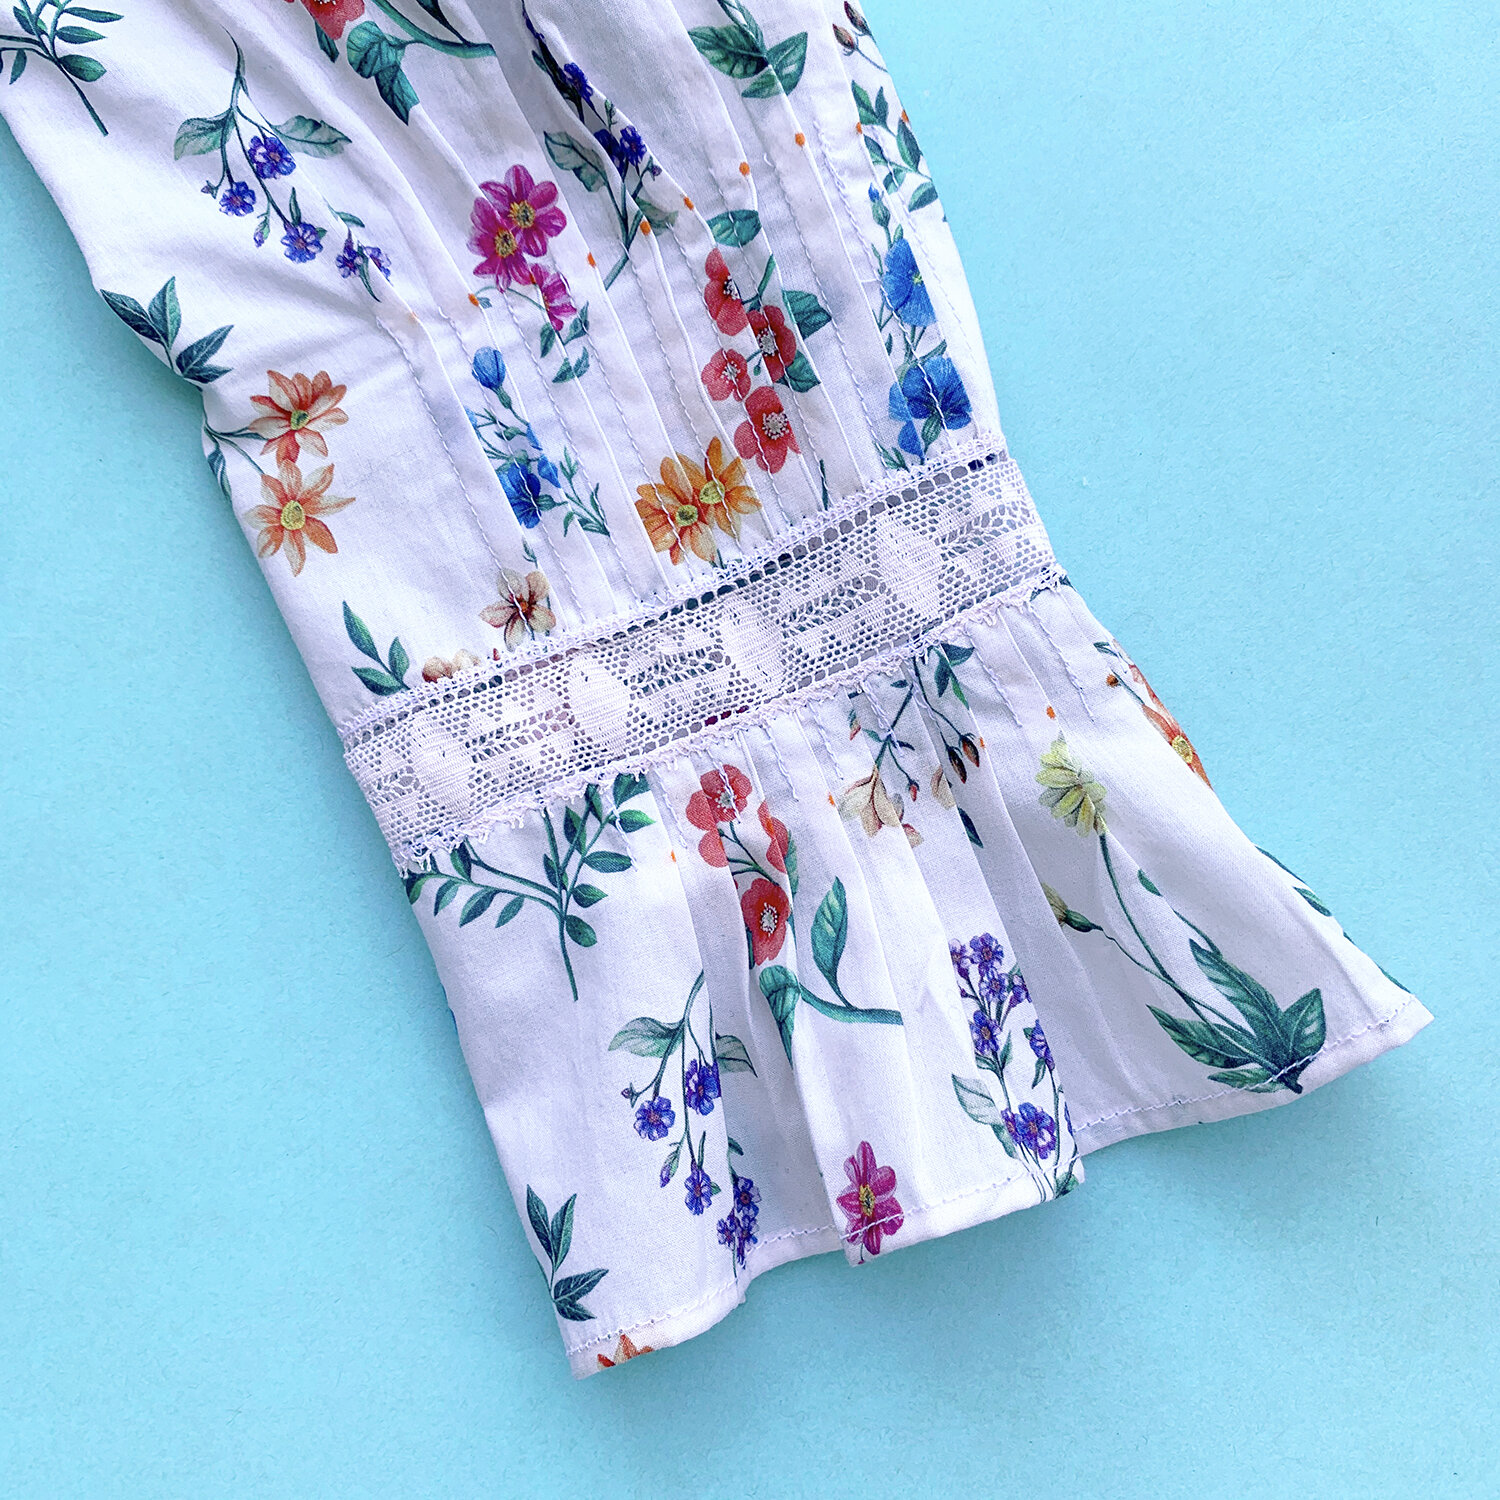
The pattern calls for 1/2” wide flat lace, but I had to make some concessions. I realized I wanted a geometric lace (not floral), and the color proved difficult to match (I was not interested in dyeing it). The lace I found is about 3/4” wide, making it too wide to overlap the tucks in the vertical lines called for in the pattern. I just eliminated one of the rectangles. The one I kept, I raised the horizontal placement by 1”, because otherwise it overlaps the apex. You’ll want to see how it falls on your body, and can adjust from there if needed.
To keep this blog post from getting too long, I will write a separate post about lace insertion. I really enjoyed it! It’s a simple technique that makes anything look fancy.

I have to say, I LOVE the fit of this blouse. I don't usually need an FBA, but after tissue fitting, I wanted to make sure there would be no pulling across the tucks on the bust. I made a 3/8" FBA to the side panel, and then rotated the dart towards center front as you would for a princess seam. This added a little to the princess curve, so I measured that amount, and added the same amount of height to the main bodice panel. Not sure I needed this after all, but it fits well.
Speaking of pattern adjustments, I cut my usual size 12. My typical adjustments are: lengthen bodice 1”, lower apex 1”, narrow shoulder adjustment, lower CF neckline 1/2”. I made NONE of these and love the fit. For that alone, I will likely make a short sleeved version of this top (maybe all black), and I might play around with the pattern tissue to create something a little different, with the same fit. I can’t think of another blouse that fit me so well in the shoulders, right out of the envelope.
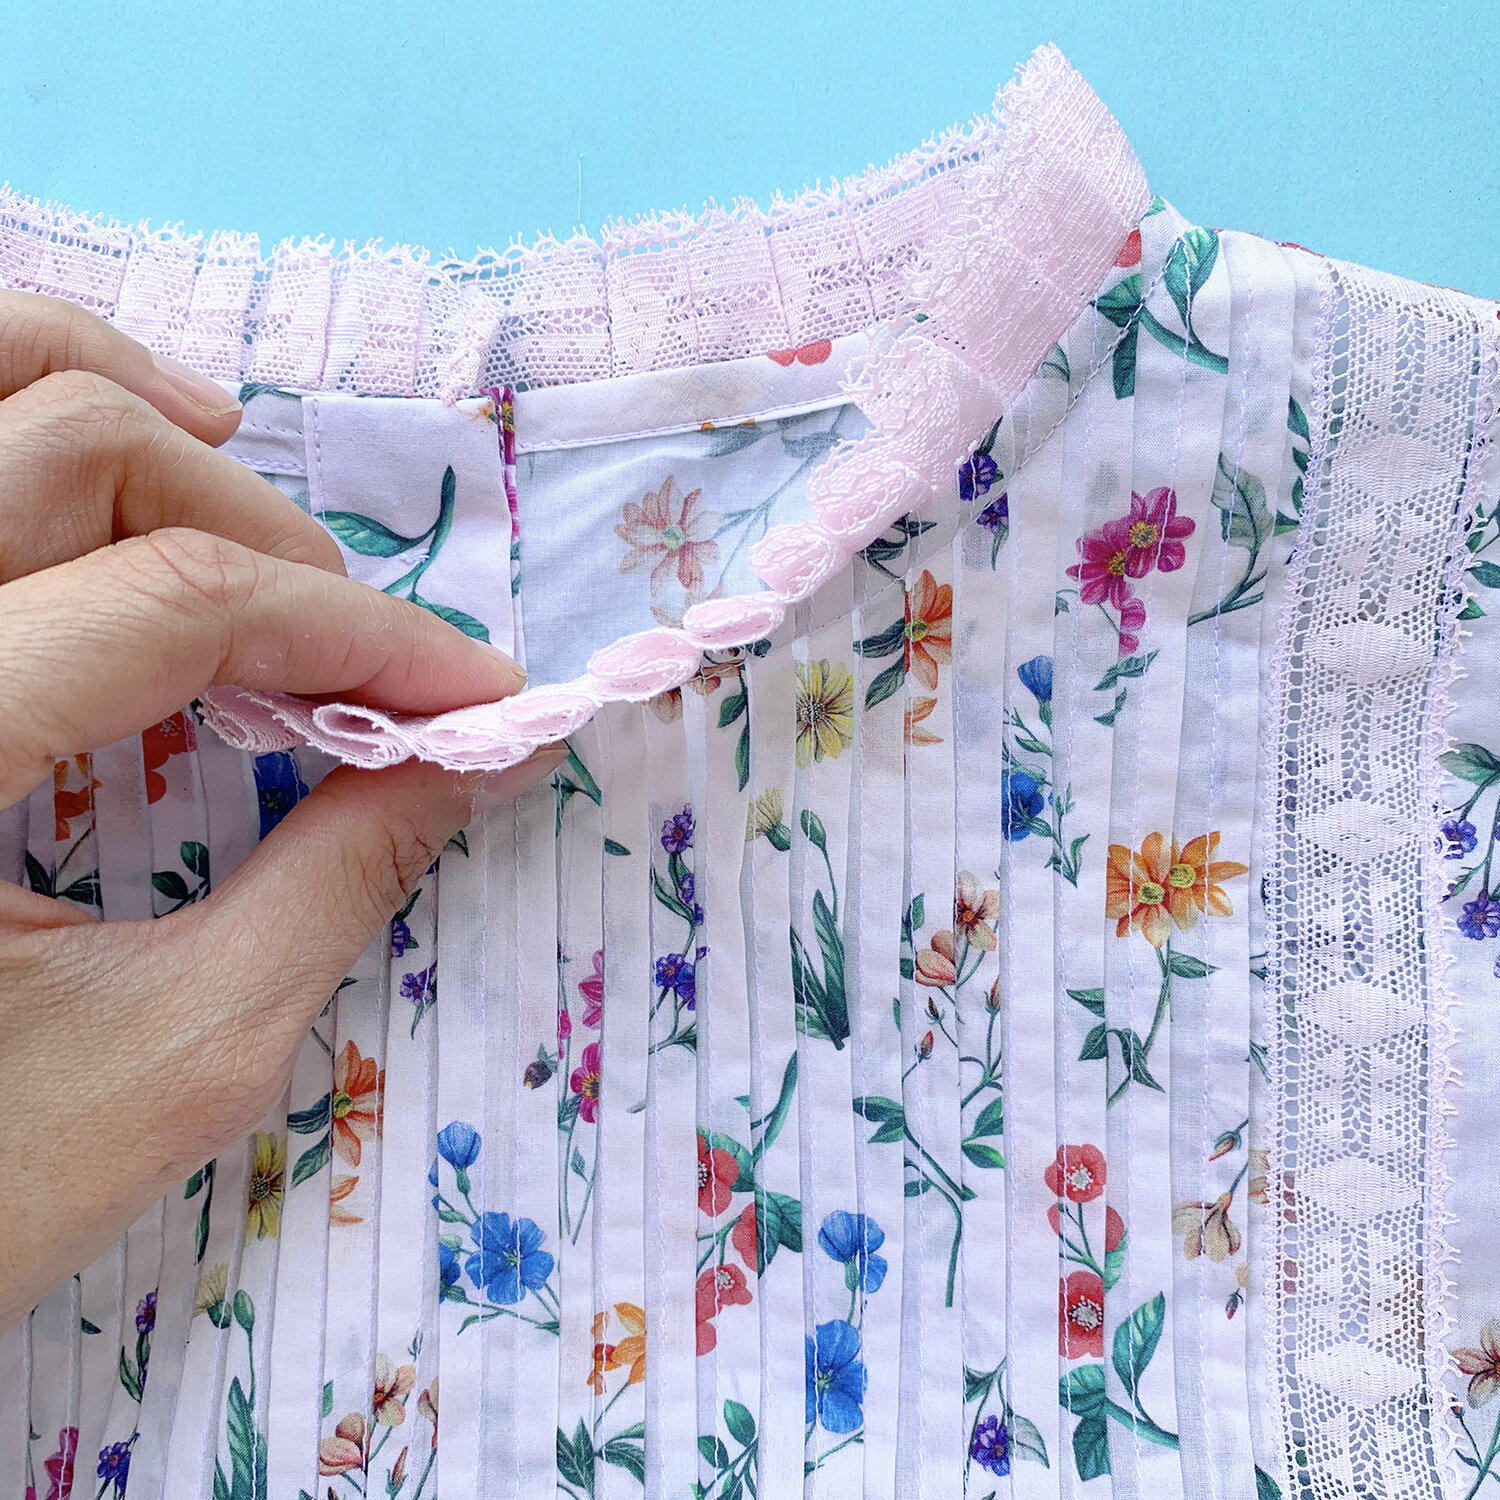
The pattern calls for flat lace for the insertion, and ruffled lace for the neckline. Because I knew I would only have the flat lace (again, I site my hunt across midtown), my plan was to make a self fabric ruffle. But because I eliminated the second rectangle of lace insertion, I unexpectedly had about a yard of lace remaining. I carefully folded out 1/2” pleats, and caught just the very edge of the lace in my seams, so as not to lose it’s width in the seam allowance. This worked perfectly! Now my trims are all matching.
I adore these sleeves! Due to my French seams, I stumbled a little with finishing the sleeve openings. You can see my little zig zag stitches to hold things in place. I’m not happy about that - I should have just hit pause and hand sewed it - but I know myself well enough to tell you I will live with it. Also, all the orange markings you see on the tucks will come out, in my excitement for the finished product, I just haven’t gotten to it yet!
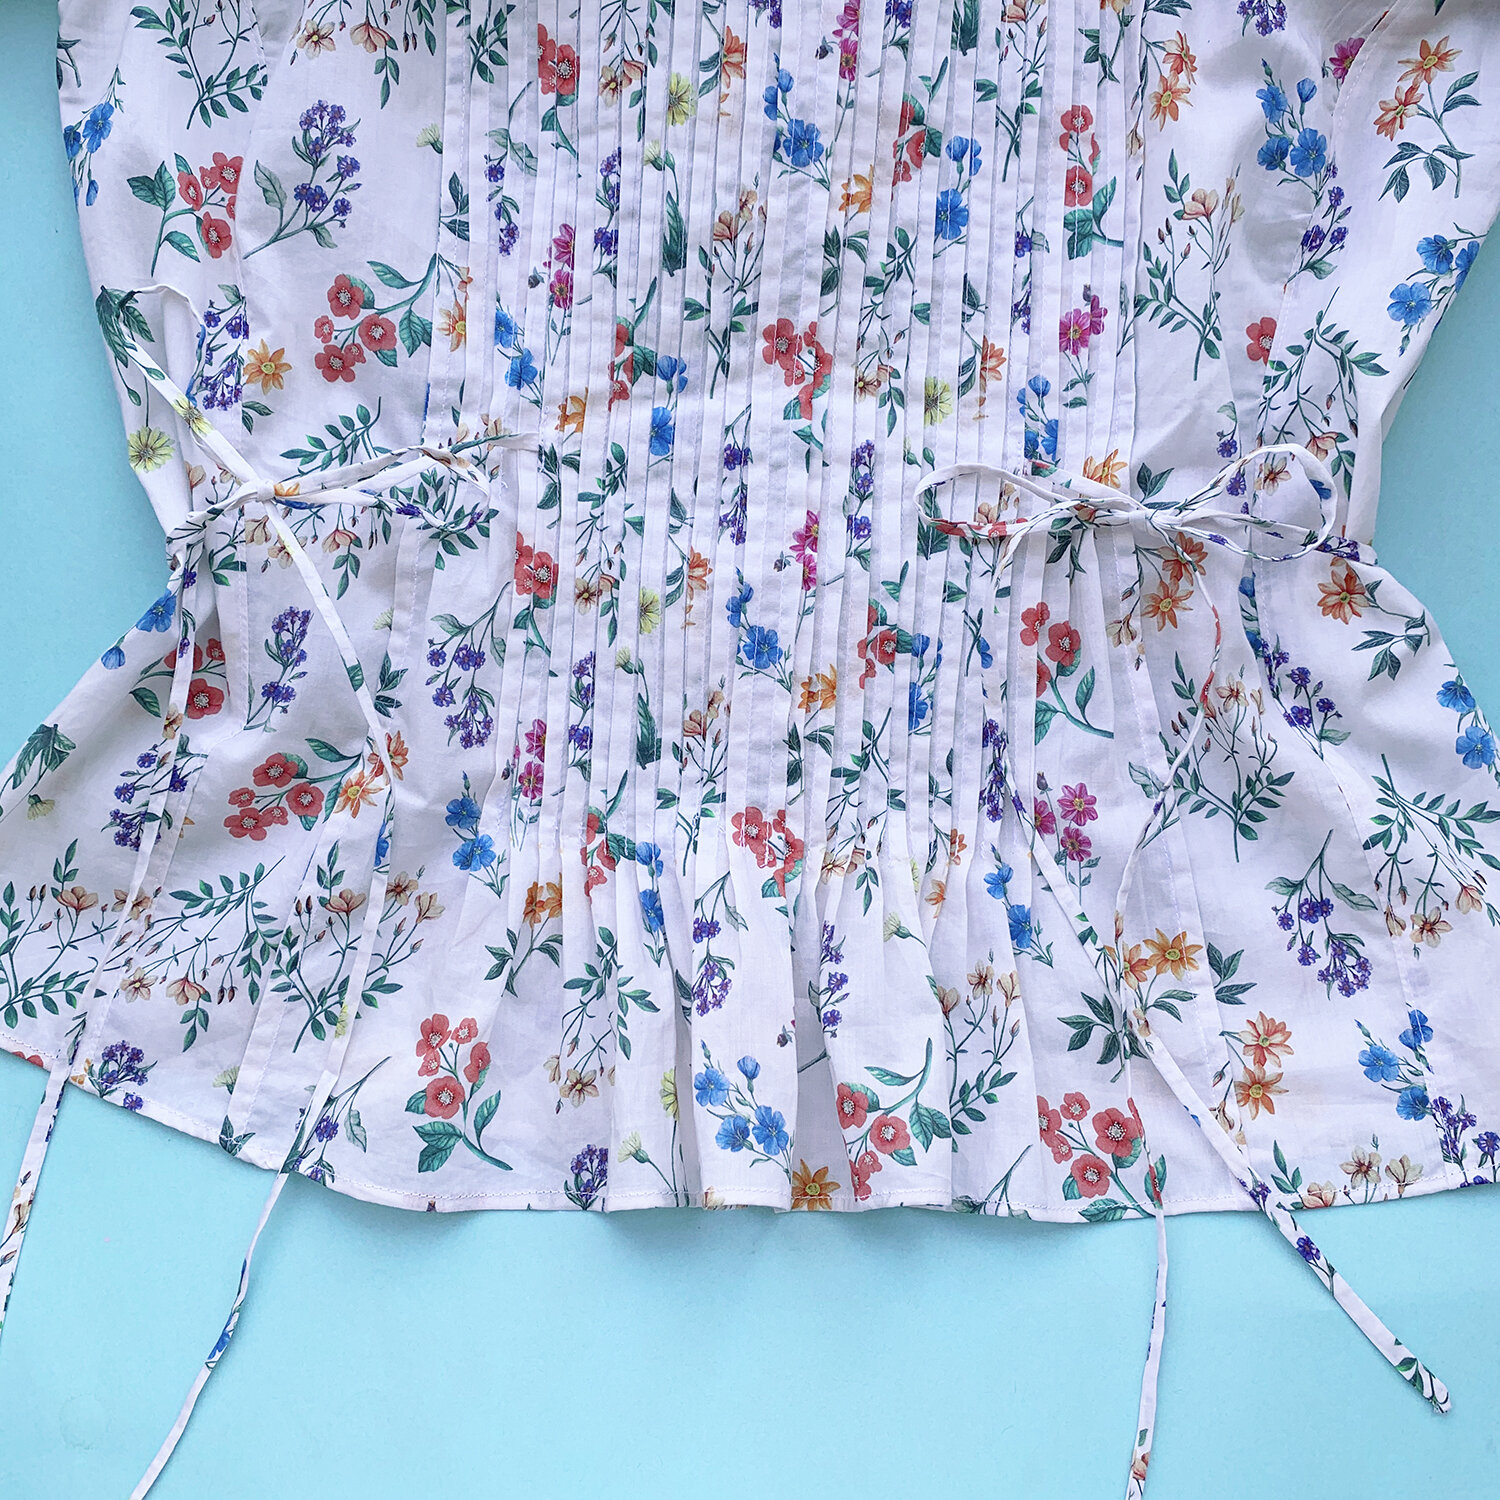
All hems are baby hems; I used my rolled hem foot for everything. I was delighted to see these skinny little straps! You know I love those! These are cut on the straight grain.
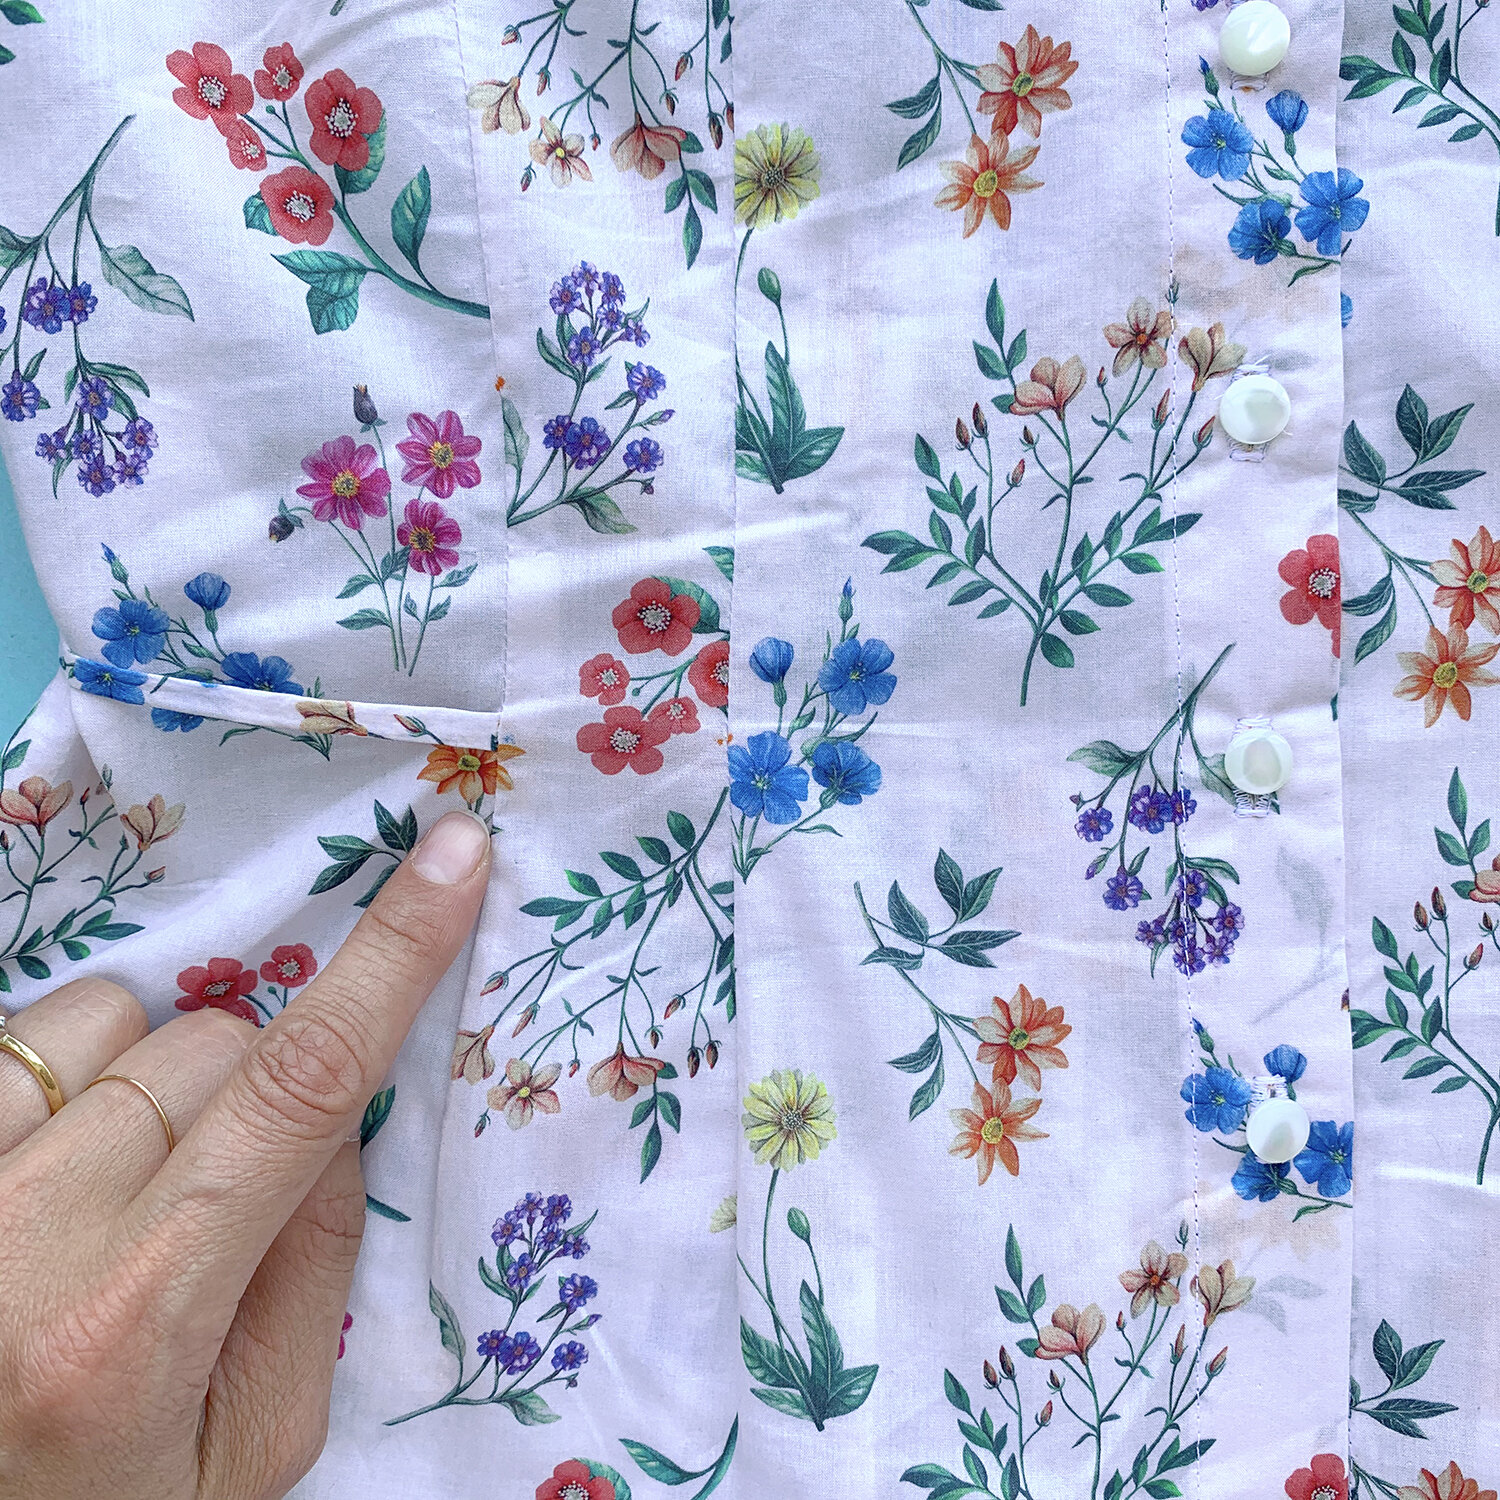
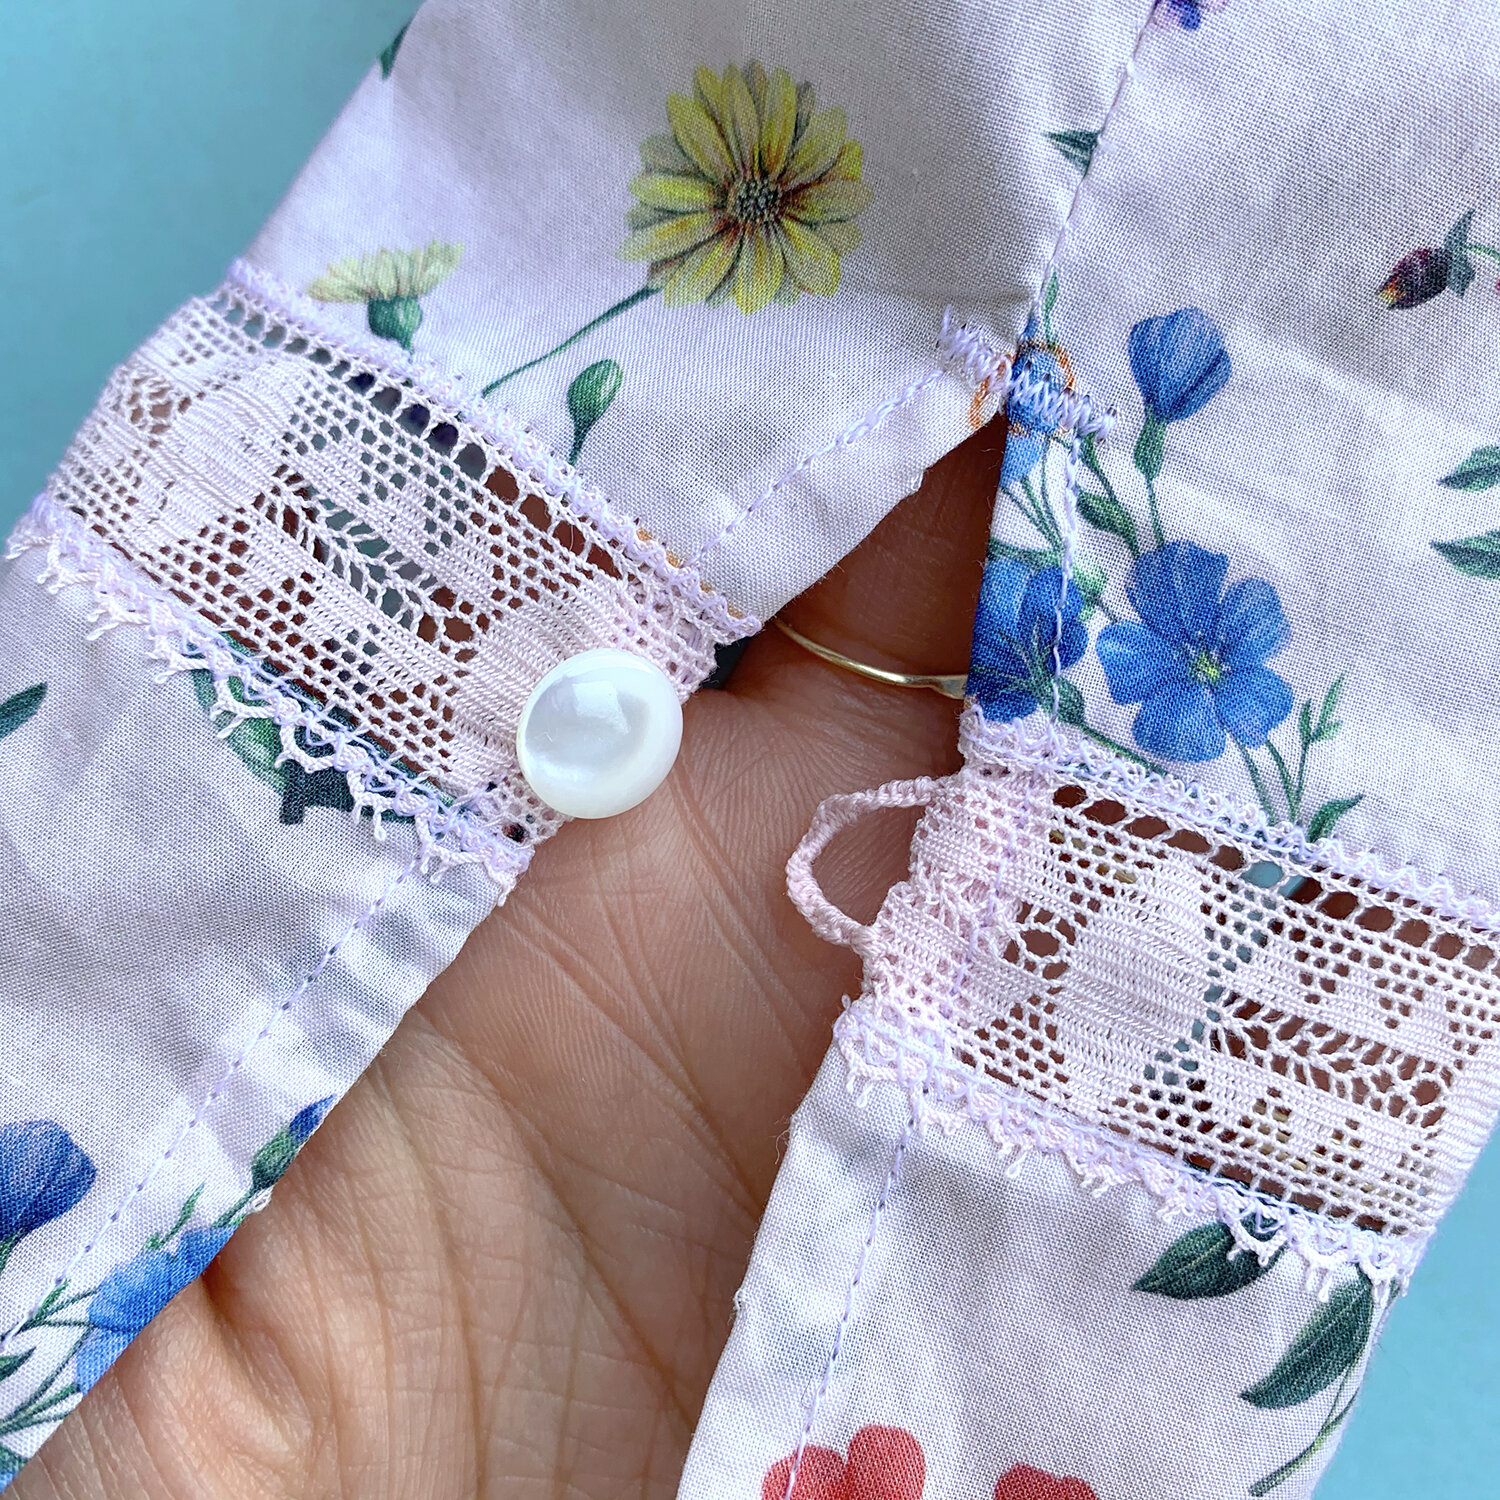
This top buttons up the back with 9 tiny little carved shell shank buttons. My buttons are from my stash but I know they came from Pacific Trimming. I added whisper light interfacing to both sides of the back button placket (not called for in the pattern). At the cuff, you make your own thread loop to hold the cuffs closed. Sometimes it is tricky to dress yourself with buttons up the back, but I can get this on and off without much fuss. I tend to un-button the top and bottom only, and slip it on over my head without issue. Then I can button myself up again without too much contortion.

I thoroughly enjoyed this project. It challenged me, but not too much. It has Ruffles, pleats, fancy trim, buttons, skinny little ties. I feel like myself when wearing it. I know someone will ask where I bought it (oh, the thrill!). I’ve already accepted that I’ll be making it again.
I saw a bunch of this pattern on eBay, but they’ve all been snapped up! Was it you? Will you be sewing it? Tell me more!! I want to see!! XO, Martha