QUILTED CHEATER QUILT JACKET - Vintage Fabric Finally Gets Used! My Newest Quilted Tamarack Jacket
You might remember that when it became clear Covid lockdown would last longer than we all anticipated, I decided to make myself a quilted jacket from scratch. I figured that doing all the patchwork, all the quilting, all the sewing, would take up enough of my time to outlast the pandemic. HA! How naive.
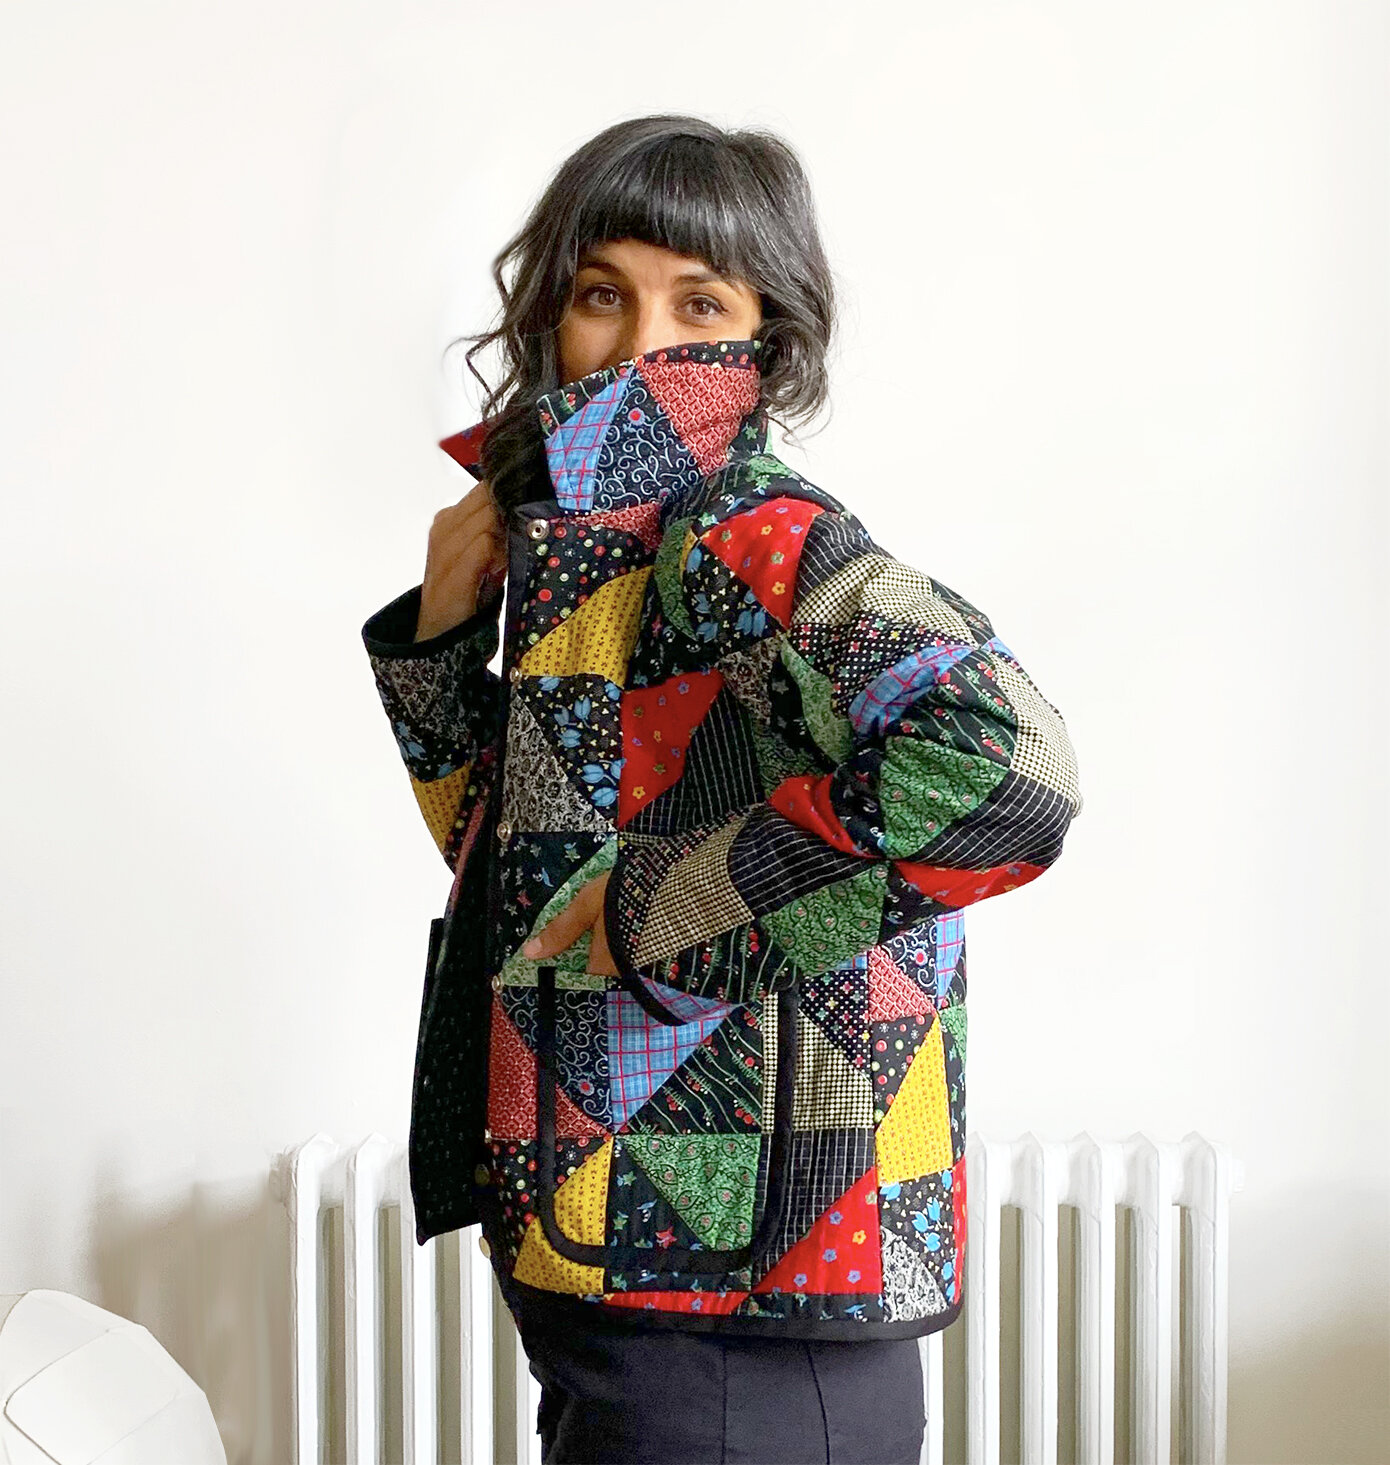
Anyway, I made a really special jacket, pieced together from scraps of other sewing projects, which I documented in a four part blog series that you can start reading here, if you missed it. For that jacket, I used Grainline Studio’s Tamarack Jacket pattern as a jumping off point. I made a bunch of changes, most notably adding the collar.

When I decided it was time to use this vintage cheater quilt fabric from my stash (I bought it at an estate sale), I thought it would be fun to make another quilted jacket. This way, I could skip the patchwork process, and give this 1940s era fabric a chance to finally see the light of day. And, big bonus, the pattern was already adjusted and the work of figuring out how to add a collar was done.
I have been wanting to use this fabric for a while, and a jacket seemed like the most natural use for it. A jacket is about what I had yardage for: 3 yards, at only about 34” wide, I couldn’t have any huge pieces. To push me over the edge, my friend Pauline sent me a photo of this Sea New York quilted jacket. Looking at it now, it’s quite different from my jacket, but it was absolutely an inspiration source.
I love the Tamarack Jacket pattern because it is straightforward and fairly simple, but it is well drafted and goes together easily. There are many ways to make the pattern more or less complicated, and completely your own. You can use pre-quilted fabric and store bought bias binding, or you could make your own patchwork and hand quilt it. With my cheater cloth fabric, I chose somewhere in the middle. It is what you make of it.

Here you can see where the print goes off grain at the hem, and on the pocket piece. The finished jacket is busy enough that I don’t think anyone will ever notice.
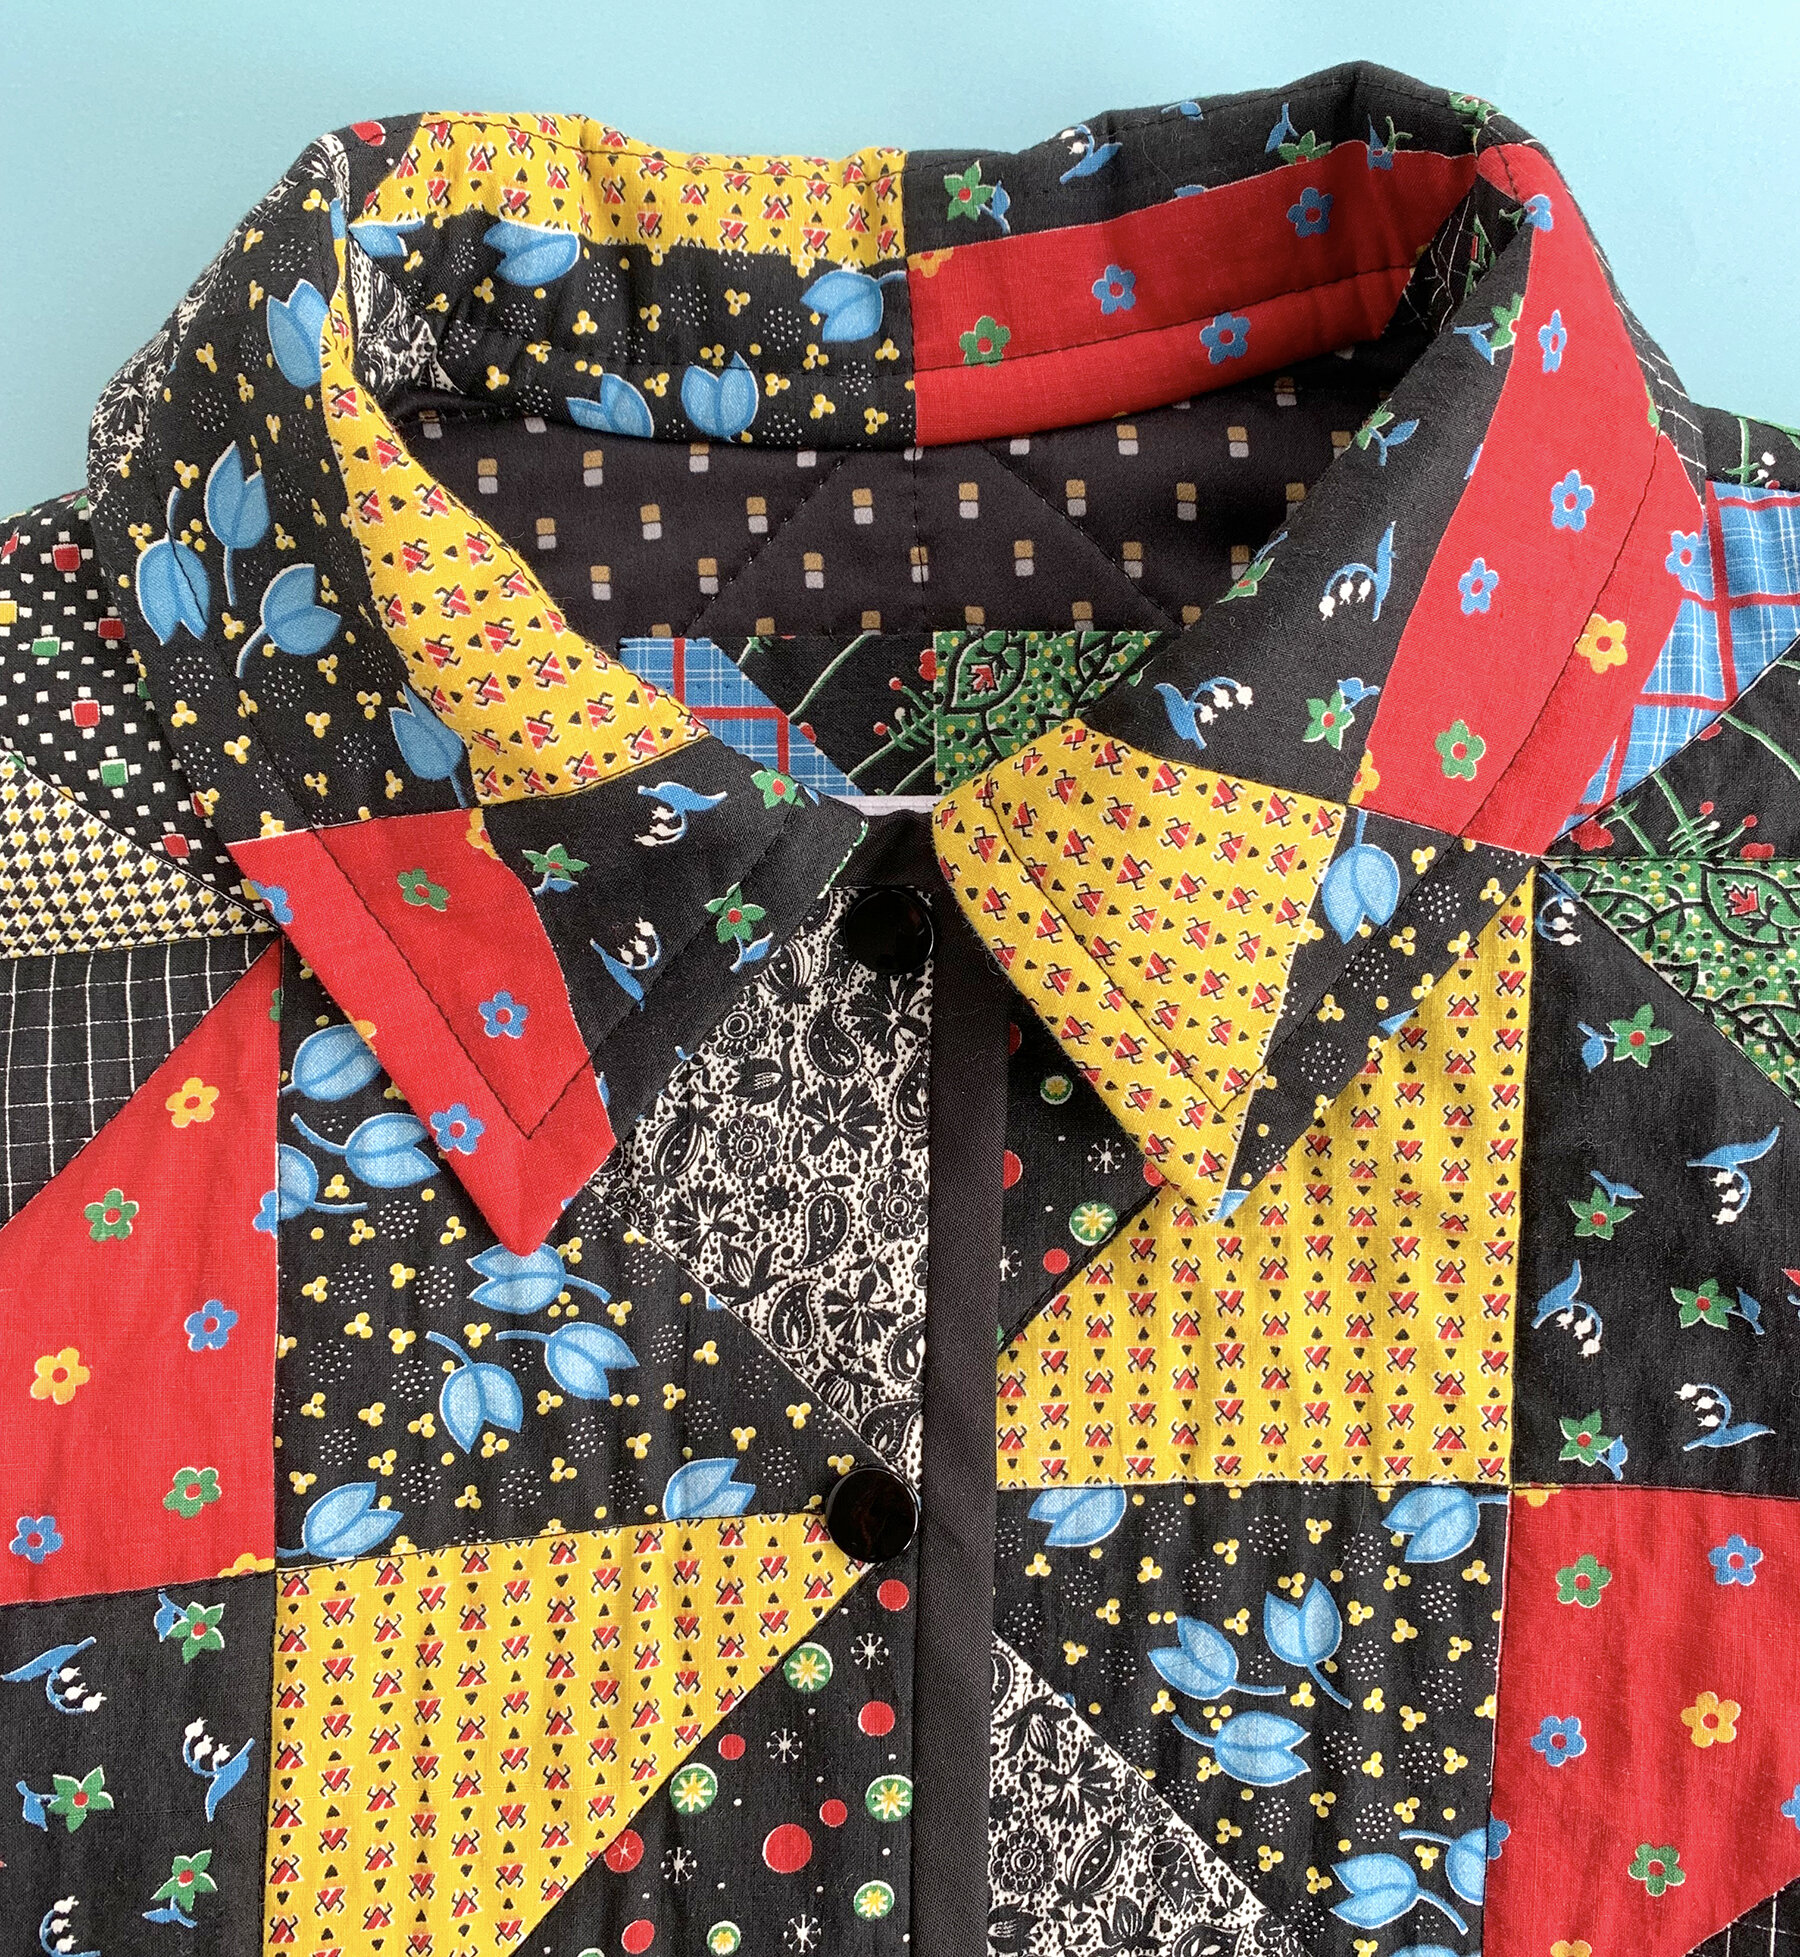
Something I had to address from the beginning, and several times throughout my process, was that this fabric was printed very off grain. Both ends of my cut were torn, not cut, so I could see the woven grain easily, and the print was skewed by about 1”. Sometimes you just have to roll with it! I couldn’t fight this, but I could work around it.
I decided to prioritize the print being square and pattern matched at center front of the garment, and did my best to have it be square across the back. As you can see above, the left side front is the most skewed part of the print. There was no way to force the print to be square without it showing somewhere! So the print is not level at the hem on this piece, or on the pocket! Working on this section of the jacket, I had to keep fighting the optical illusion. I ended up measuring a lot, and then just going with it.

All seams are Hong Kong finished in silk charmeuse binding. The seams are then hand tacked down to keep them in place, reducing bulk. The outer edges of the jacket are finished in Wrights bias binding, which was attached by machine, and then hand slip stitched in place on the inside of the jacket.
I quilted the fabric in 3 large pieces before cutting out the pattern, following the print to “stitch in the ditch” (in quotes because there was no “ditch”). I used Quilter’s Dream “Select” cotton batting, and the lining is silk charmeuse I snagged in a Fabric Mart sale a couple years ago. I pre-washed the cotton fabric and the charmeuse first. I used Wrights bias binding for all the outside edges of the jacket. That binding was attached to the front by machine, and and hand slip stitched down on the inside of the jacket.
Because I knew I would be using Dritz Heavy Duty Snaps as my closures, I added woven fusible interfacing to both the cheater cloth and the charmeuse, at center front of both sides of the jacket, inside my quilted sandwich. This provides stability and strength to the pressure points created by adding snaps.

I won’t get too in the weeds about sizing in this post, because there is info on that in my previous series on this pattern. I sewed a size 6 (the pattern chart puts me squarely at size 8) and I used the pattern just as I had it for my last version, with the following changes:
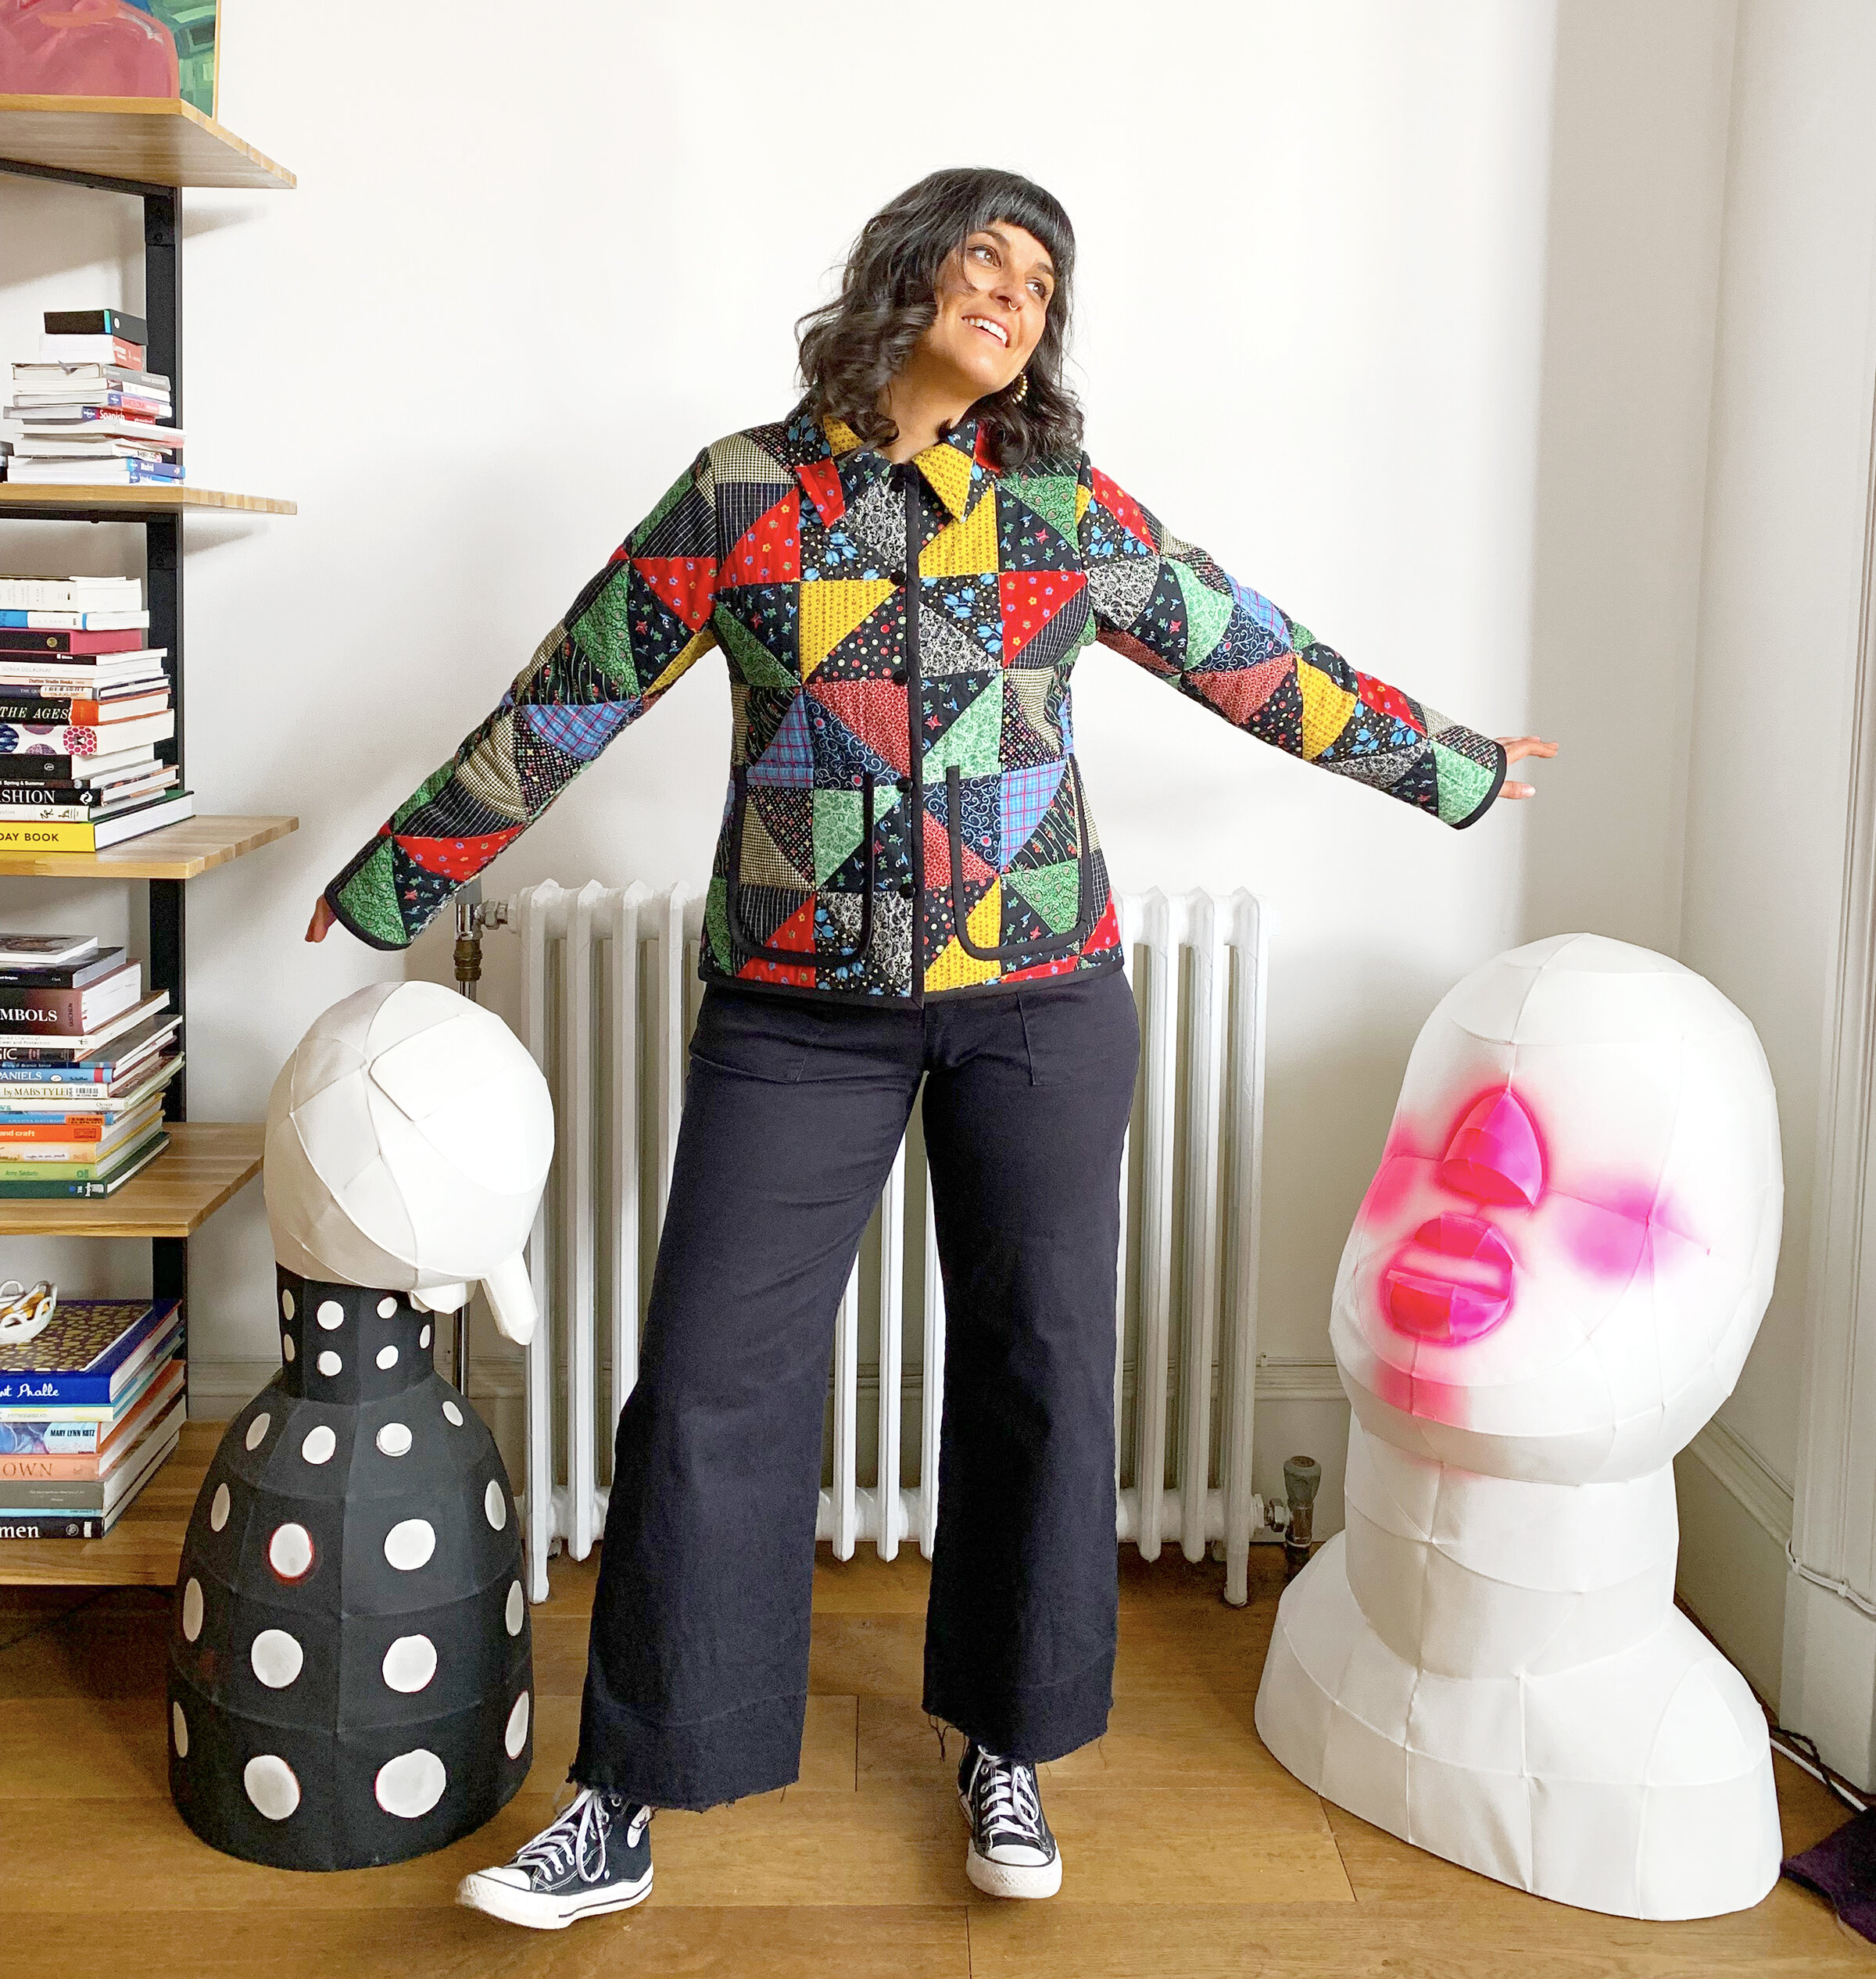
I lengthened the sleeve another 1.5”, meaning my sleeves are 2.5” longer than as the pattern is drafted. I also widened the sleeves, from the elbow down, adding 3/8” one each side, adding a total of 3/4” width to the sleeve hem. I shortened the jacket 3” from the original draft, and made the hem go straight across, with no slits at the side seams.
I made patch pockets instead welts, because I like the inside of the jacket to be clean - I actually really prefer to put my hand inside a welt pocket (patch pockets often feel clumsy for hand warming), but I prefer for welt pocket bags to be concealed by lining.

When sewing a quilted jacket, I am always looking for ways to reduce bulk. I Hong Kong finished all interior seams, binding them with bias cut strips of silk charmeuse. I then hand tacked down the seam allowances, to hold them flat.
Though I follow the Tamarack Jacket’s order of construction, which has you attach the sleeve to the body on the flat (NOT in the round), when finishing my seam allowances, I do it as shown in the photo above. The armscye seam is finished as if that seam was sewn in the round. I do this because it creates significantly less bulk in the armpit, which I think makes the jacket much more comfortable to wear.
If you follow me on Instagram then you know that I had a SNAFU with my snaps. UGH. I kept procrastinating putting in the snaps, because I wasn’t in the mood for it. I have to really focus when installing hardware. I learned my lesson and won’t force it ever again!
Basically, I made two sets of test snaps before beginning. The tests were both perfect. Just perfect. So I marked where my snaps would go, made holes on my jacket with a die and hammer, and got to work setting the snaps. Five snaps, ten settings total. Guess what? I installed all of them wrong. I had mixed up the snap pieces. My heart sank.
Luckily, the snaps were still functional, but they felt clumsy and looked wrong. It really bothered me. I received a lovely direct message on Instagram, from someone who had once made the same mistake. She assured me it could be fixed! I was doubtful, but tried removing the snaps from my two test samples. It worked! So I removed all of the snaps from my jacket, and reinstalled them correctly. I will be posting another blog post dedicated to this topic! I hope you will never need my tutorial, but if you find yourself in this predicament, fret not! It can be saved.

If you’re hoping to hear how I attached the collar to this jacket, that will be my next blog post! It should be up in a day or two. The process is quite simple, not so different from adding a collar to a wool coat or jacket, with a few quilty considerations. I took photos of my process, so I’ll be sharing them all in once place.

A peek at my label!
This jacket went together in fits and starts. I kept having to hit pause because I ran out of bias binding, or I messed up my snaps, or I didn’t feel like hand sewing anymore (I actually love hand sewing, but we all get bored sometimes).
Normally I would toss a finished quilted project in the washer and dryer, but here in Scotland, tumble dryers are pretty unusual (we hang dry on a contraption called a pulley clothes airer). Without the wash & dry, this jacket has a flatter look, not the crinkled texture associated with a cozy quilt. My eye has adjusted, and I think I will keep it this way (until I spill on myself or something). I’ve already worn this jacket two days in a row - yes, it is chilly enough in Glasgow to require a jacket in June, sob!

So I’ll be keeping cozy in this jacket for the foreseeable! I am in love with it. The charmeuse feels luxe, it’s perfectly warm, the pockets hold my keys, phone & wallet with ease. Also, I am so happy it is done! If you’ve sewn a quilted jacket, you know what I mean. Ok, more about the collar soon! XO, Martha